Containment Bay P1T6 (Extreme)
An up-to-date reference would be Nukemaru’s guide:
(English subtitled)
Things to check
- Check the Sin and Punishment spread positions.
- Check which tank takes which add.
(These two points are different from older macros.)
Japanese
■罪と罰
    MT/D3
 H1/D1 ▲ H2/D2
     ST/D4
■雑魚:2→3(MT)→1(ST)
    直線範囲は1人受け
■隕石2回目
  安置対角(or A) → 安置
English
■ Sin and Punishment
    MT/D3
 H1/D1 ▲ H2/D2
     ST/D4
■ Adds:2→3(MT)→1(ST)
    Infusion: Take solo
■ 2nd Meteorite
  Opposite safe corner (or A) → safe corner
Markers
The 1234 markers mark the boundary for the “weak” knockback.
The A marker is used as a gathering point to bait falloff AoEs during second Quasar.
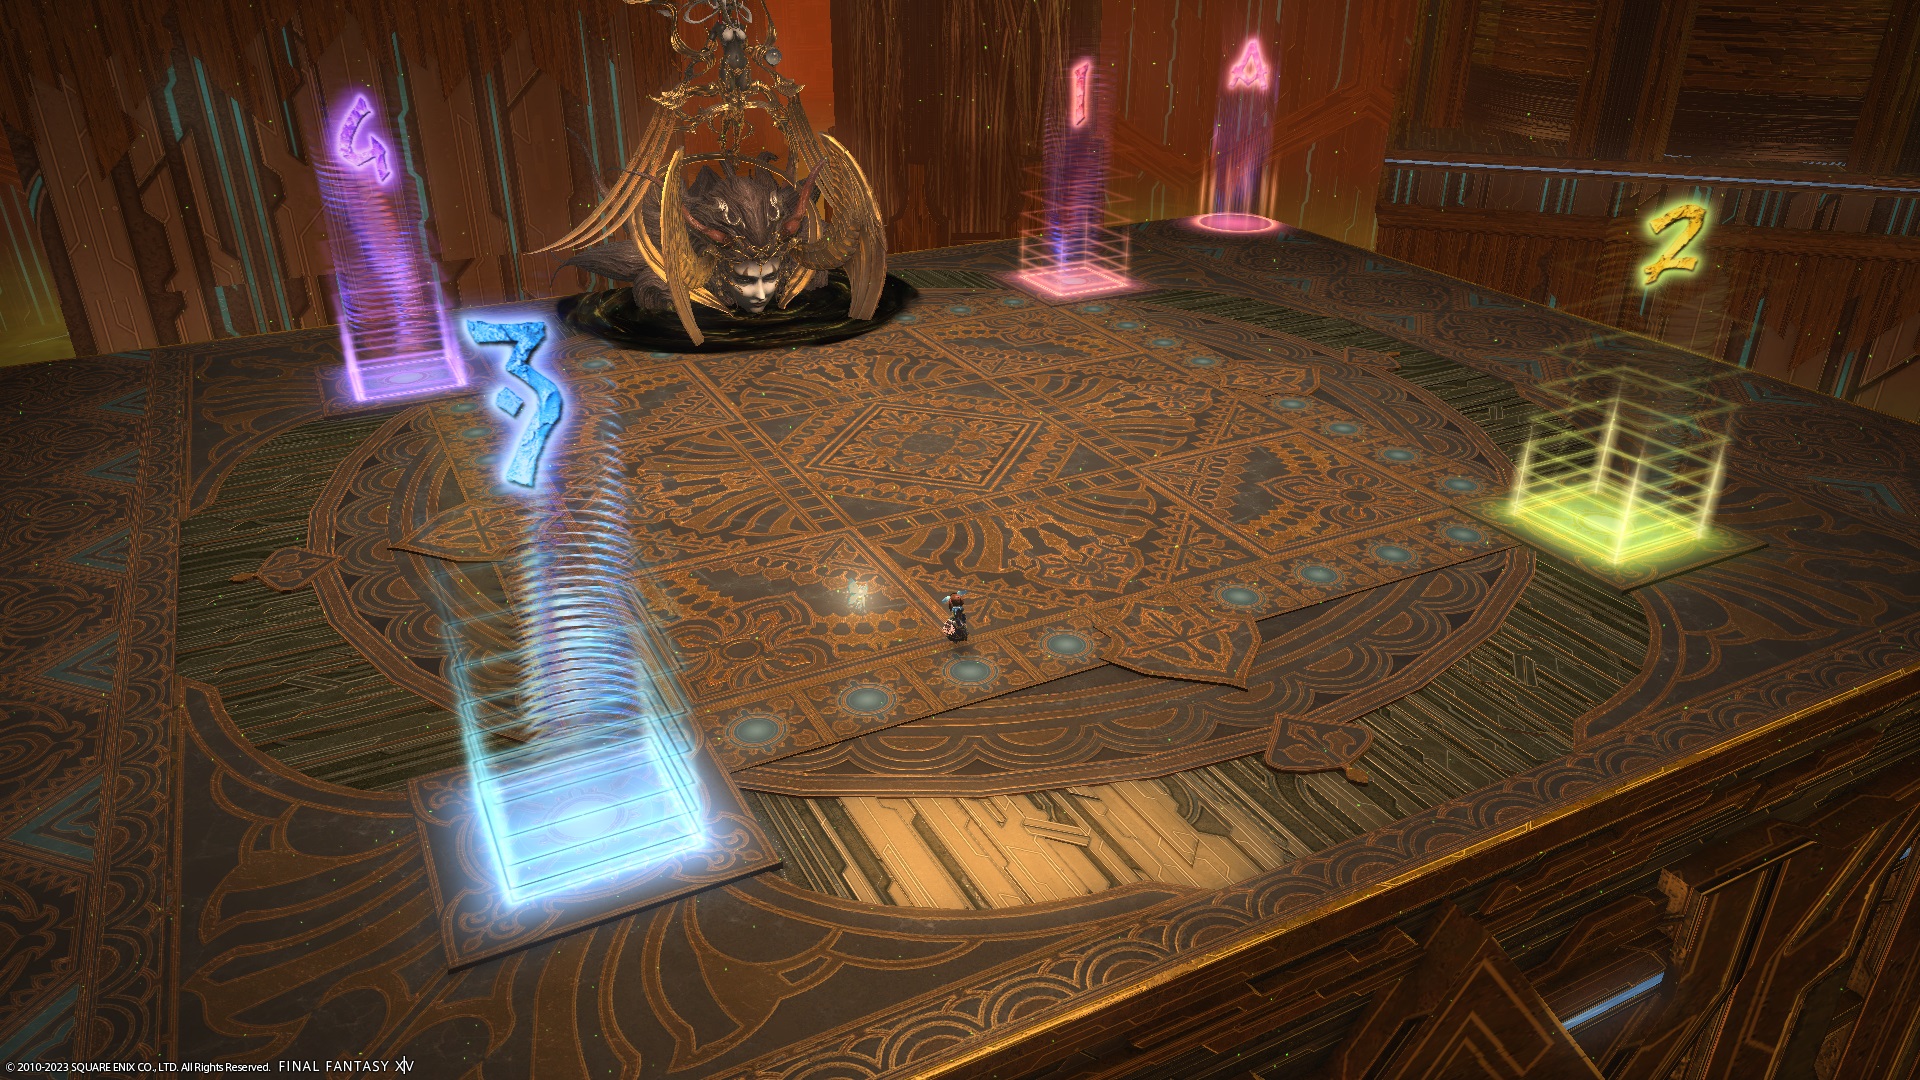
XIVLauncher WaymarkPresetPlugin positions
{
  "Name":"Sophia EX",
  "MapID":184,
  "A":{"X":18.4,"Y":0.0,"Z":-13.3,"ID":0,"Active":true},
  "B":{"X":0.0,"Y":0.0,"Z":0.0,"ID":1,"Active":false},
  "C":{"X":0.0,"Y":0.0,"Z":0.0,"ID":2,"Active":false},
  "D":{"X":0.0,"Y":0.0,"Z":0.0,"ID":3,"Active":false},
  "One":{"X":9.3,"Y":0.0,"Z":-9.3,"ID":4,"Active":true},
  "Two":{"X":9.3,"Y":0.0,"Z":9.3,"ID":5,"Active":true},
  "Three":{"X":-9.3,"Y":0.0,"Z":9.3,"ID":6,"Active":true},
  "Four":{"X":-9.3,"Y":0.0,"Z":-9.3,"ID":7,"Active":true}
}
Equilibrium Tilts
- Always move to the side with more tethers.
- If the number of tethers on both sides are equal, move opposite the blue Meteor.
- If the total number of meteors/tethers is even, go all the way to the edge.
- If the total number of meteors/tethers is odd, stop around 1/4 of the way to the edge.