Nidhogg
Nidhogg’s phase opens with Final Chorus, another very hard-hitting raid-wide attack. Notably, Nidhogg is not yet targetable, so debuffs like Reprisal or Addle cannot be used to mitigate this damage.
Wyrmhole (Easthogg)
The first phase of Nidhogg is often called “Wyrmhole”, due to its strong resemblance to Wormhole Formation in TEA.
This Wyrmhole strat is affectionately dubbed “Easthogg”, which dictates where debuffs go, and which direction players face.
- Players are split into three groups based on their numbered debuffs.
- Each group is then possibly assigned arrow debuffs, which further determine which positions each player takes.
Only one or two pairs of arrow debuffs will appear. The following diagrams illustrate a scenario where all groups have a pair of arrows, but this will not actually happen in-game.
[Click to Expand] Arrow debuffs
| When Nidhogg clones dive onto players (in order, based on the First in Line, Second in Line, and Third in Line debuffs), a tower will spawn shortly for another player to take. Where these towers will spawn is determined by the "arrow" debuffs. | |
 | High Jump Target This is the base case- the tower will spawn where the player was standing. |
 | Spineshatter Dive Target The tower will spawn 15 yalms (a little shorter than Nidhogg's targeting circle's diameter) in front of where the player was standing, based on the direction the player was facing at the time the dive landed. |
 | Elusive Jump Target The tower will spawn 15 yalms (a little shorter than Nidhogg's targeting circle's diameter) behind where the player was standing, based on the direction the player was facing at the time the dive landed. |
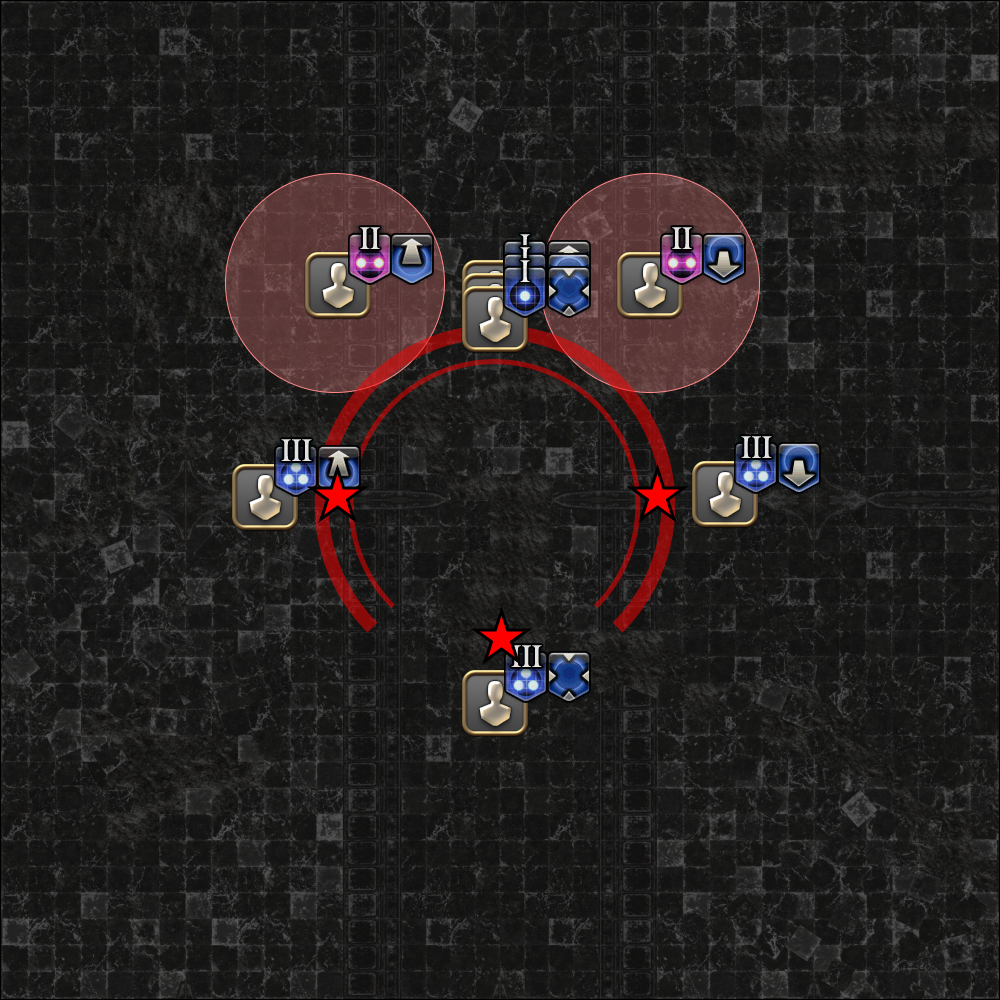
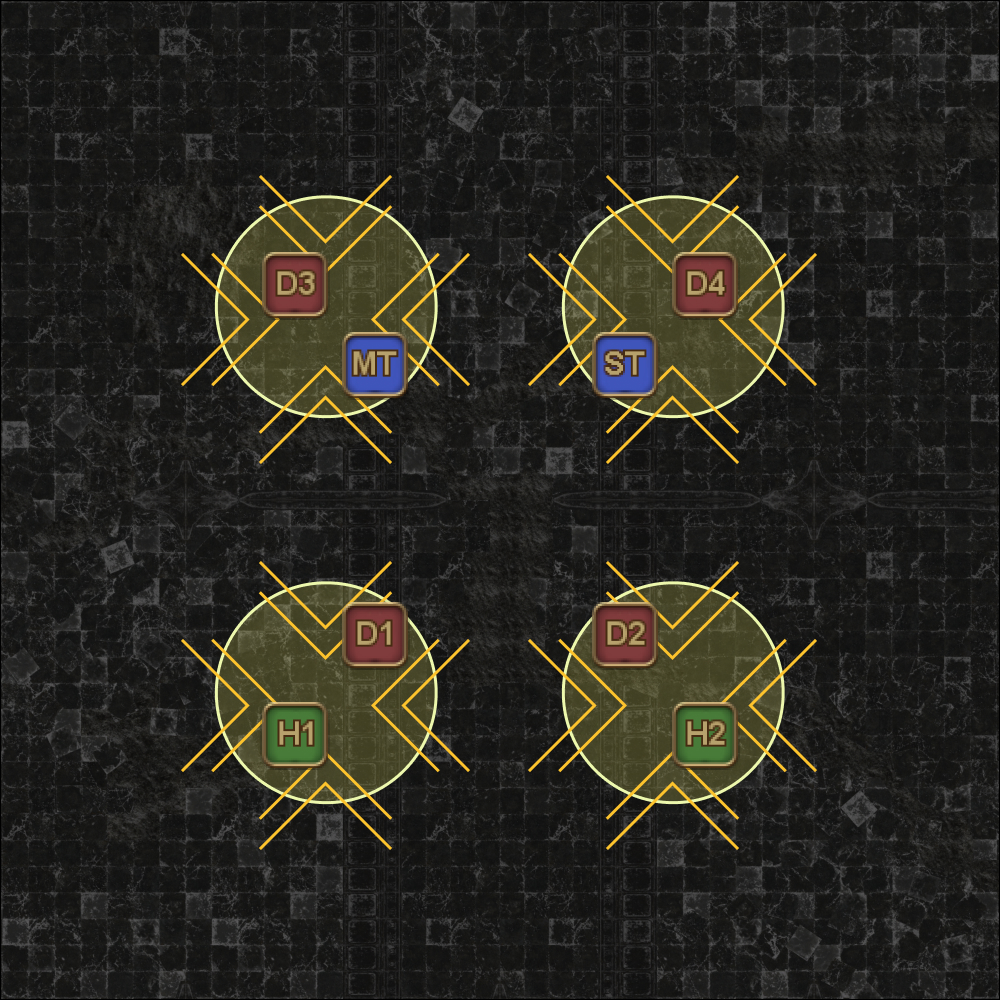
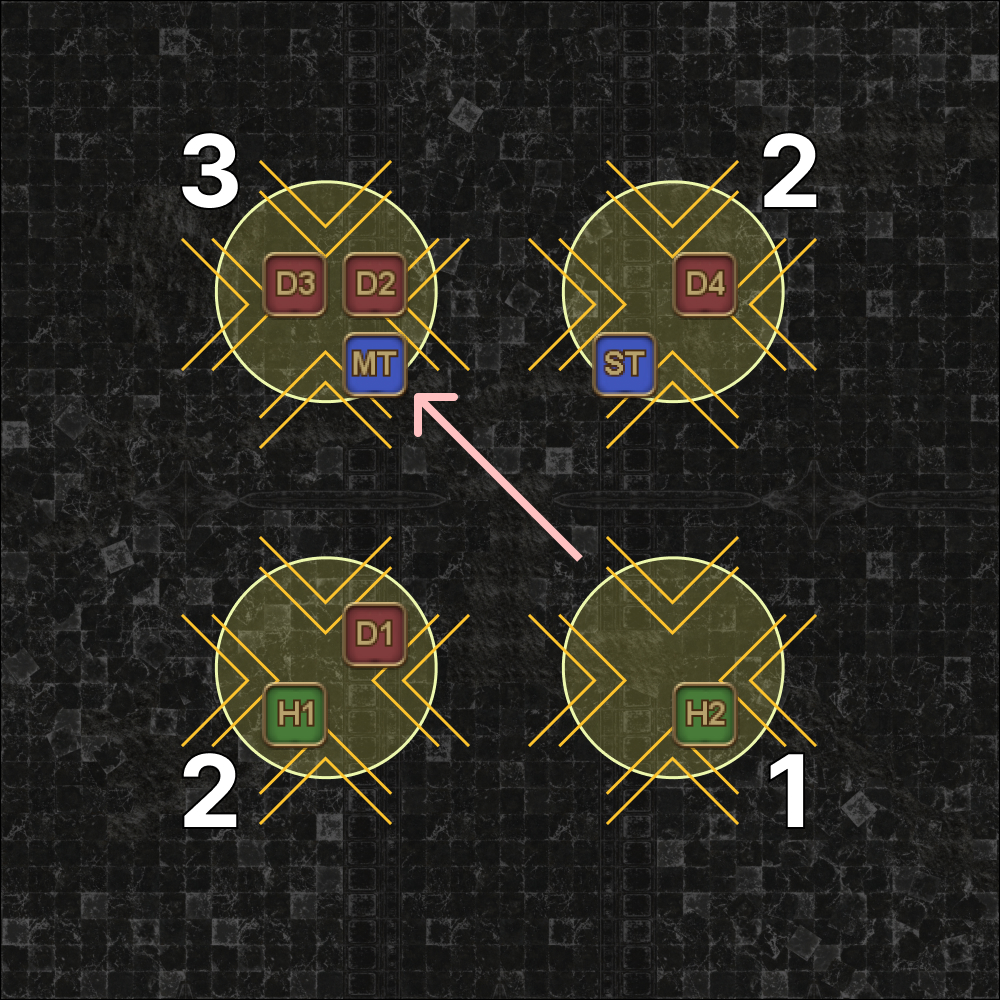
1. Numbers appear. All players claim initial spots:
These will be your positions if your group does not get arrows. | 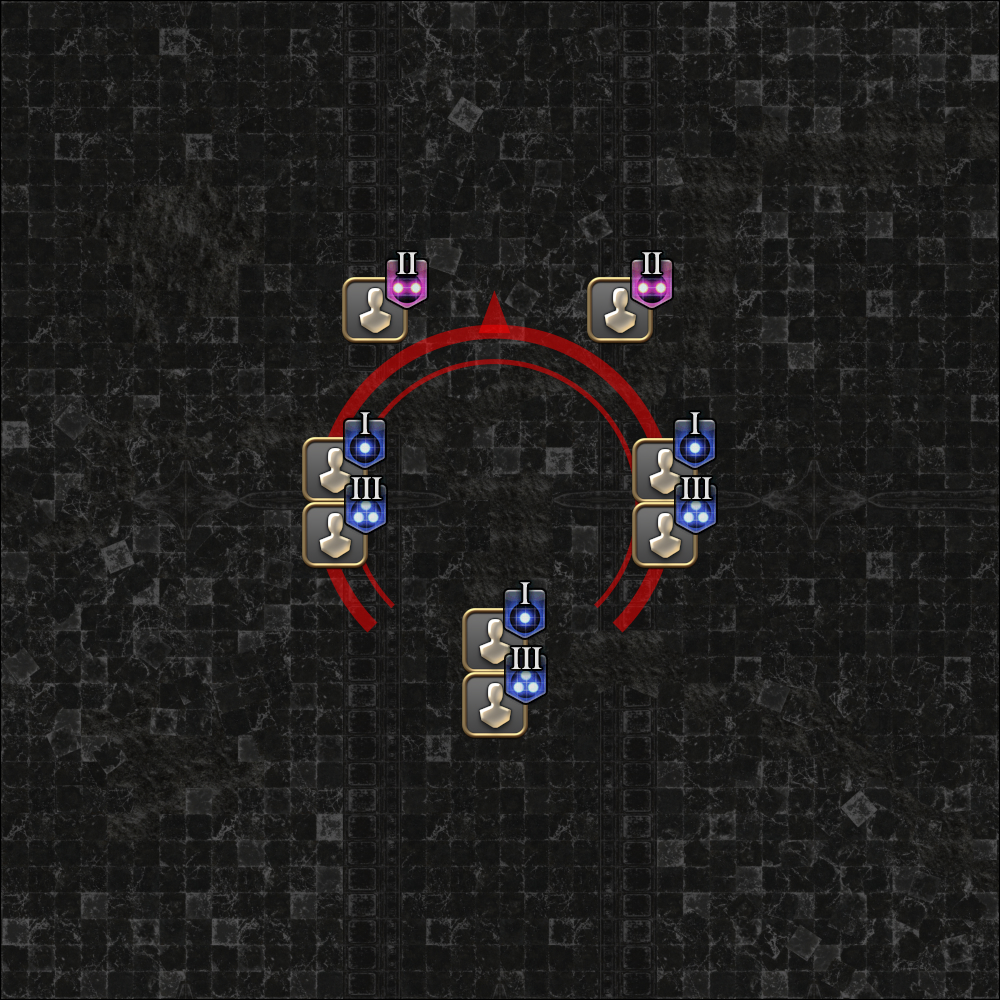 |
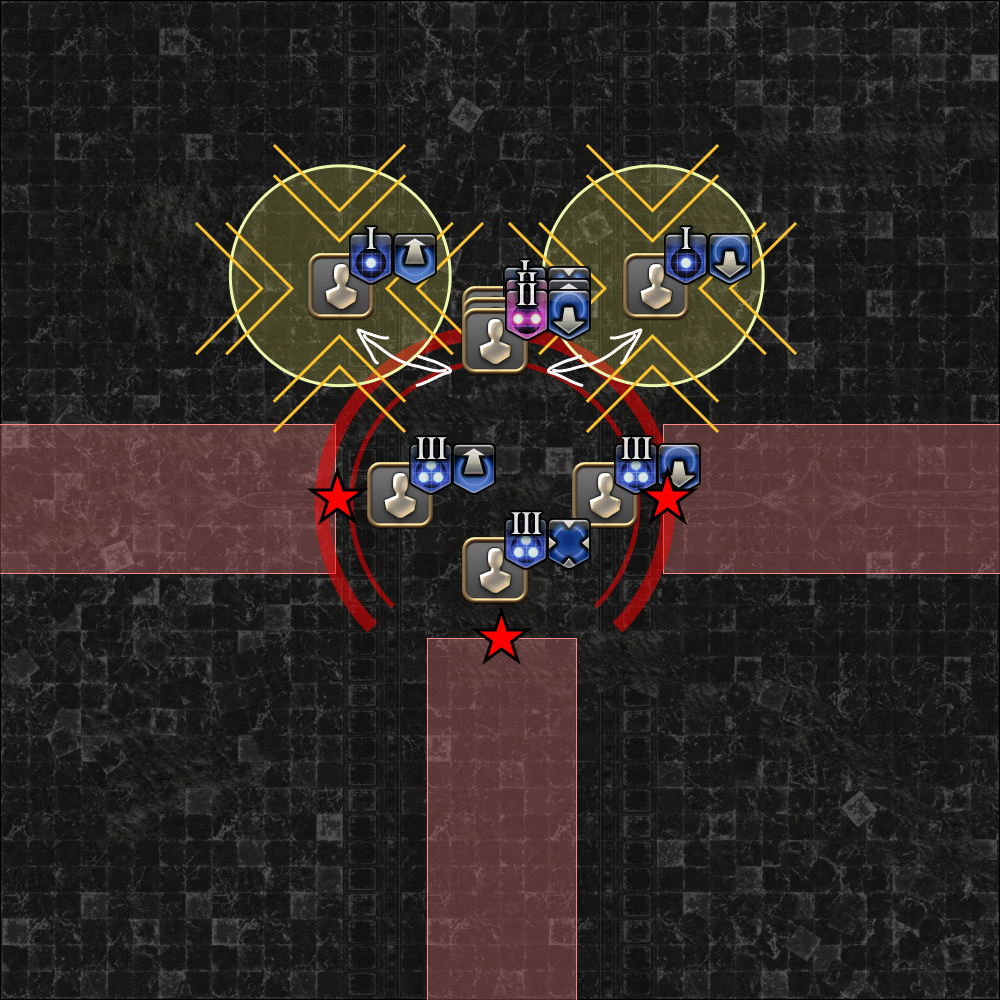
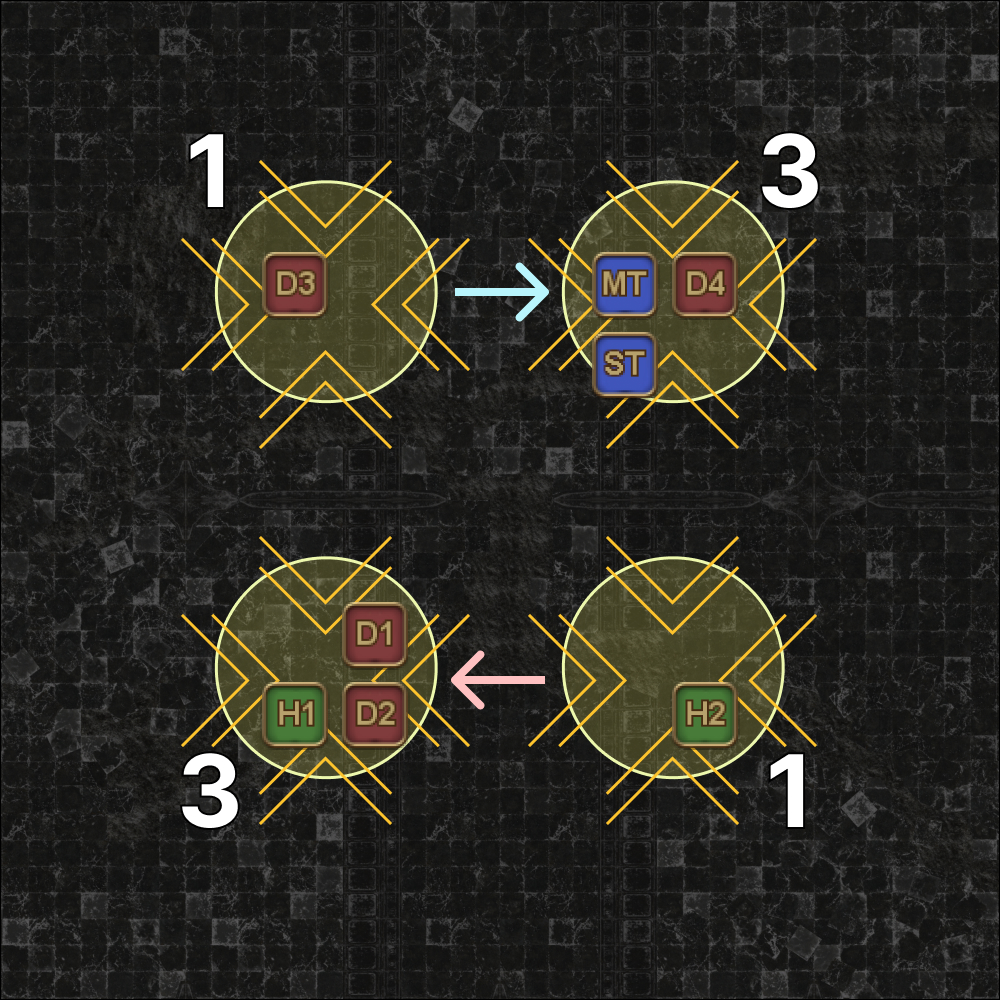
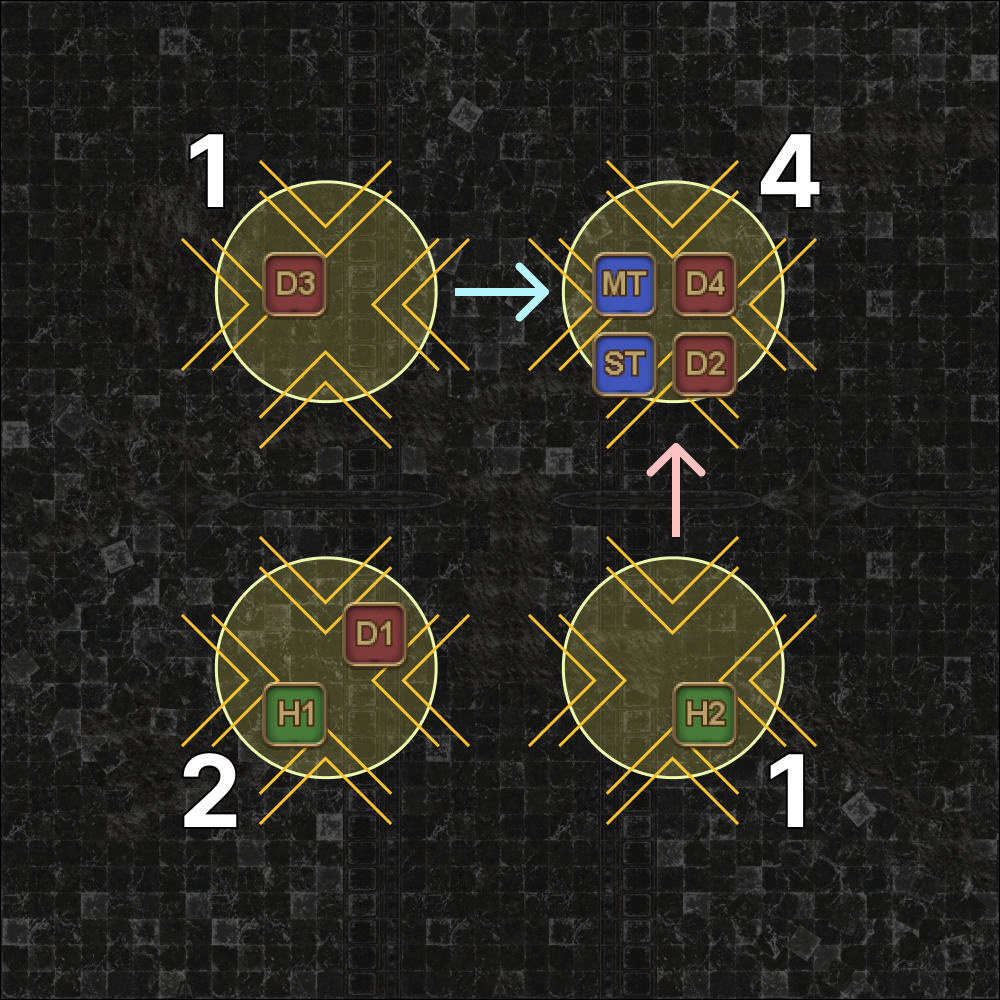
| 2. Arrow debuffs appear. If your group contains arrows (Elusive/Spineshatter Dives), the arrows override the claimed positions from the previous step.
These are now the final player positions for the Wyrmhole phase. | 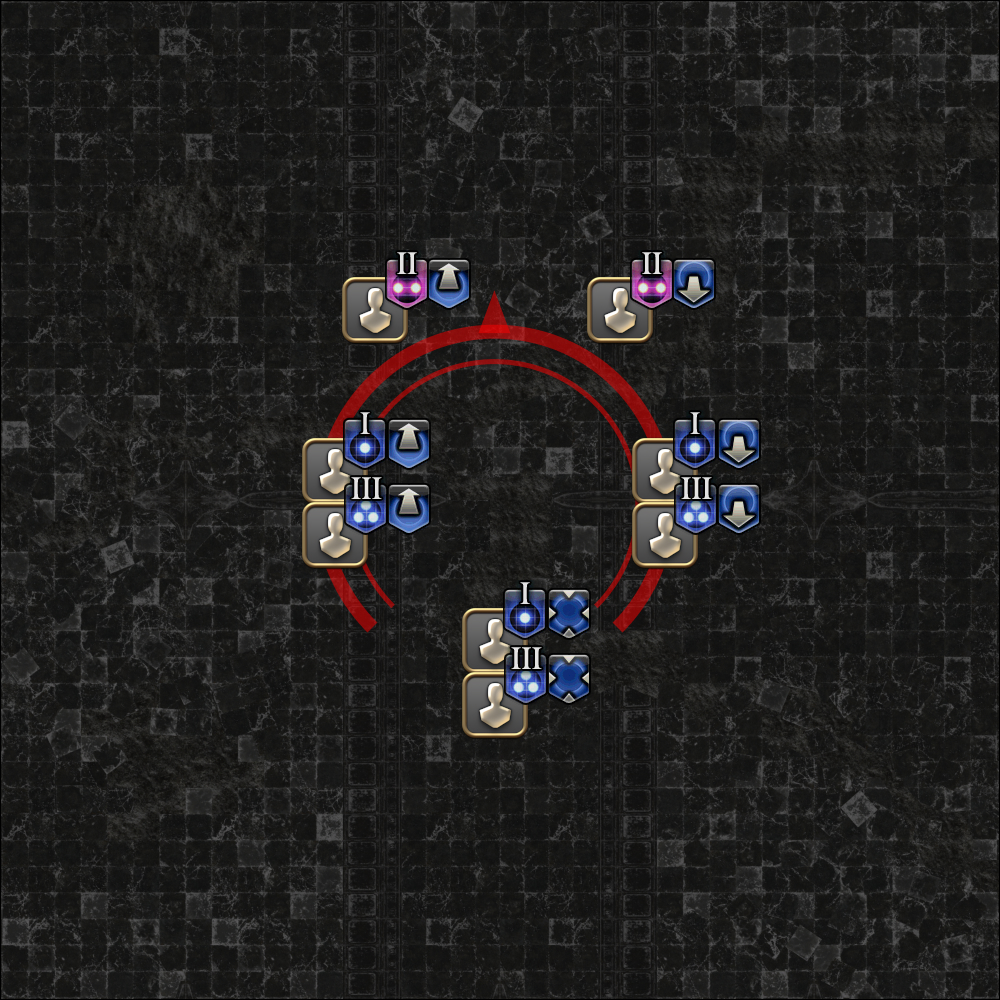 |
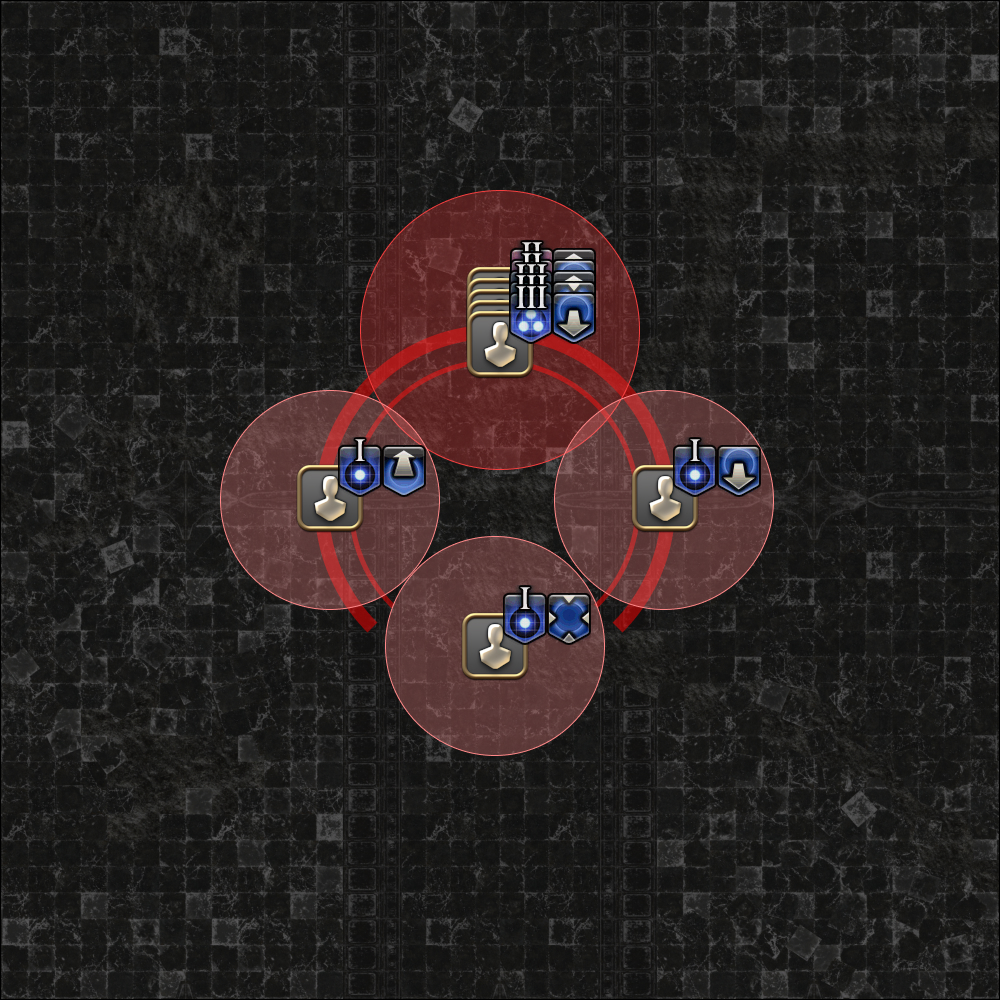
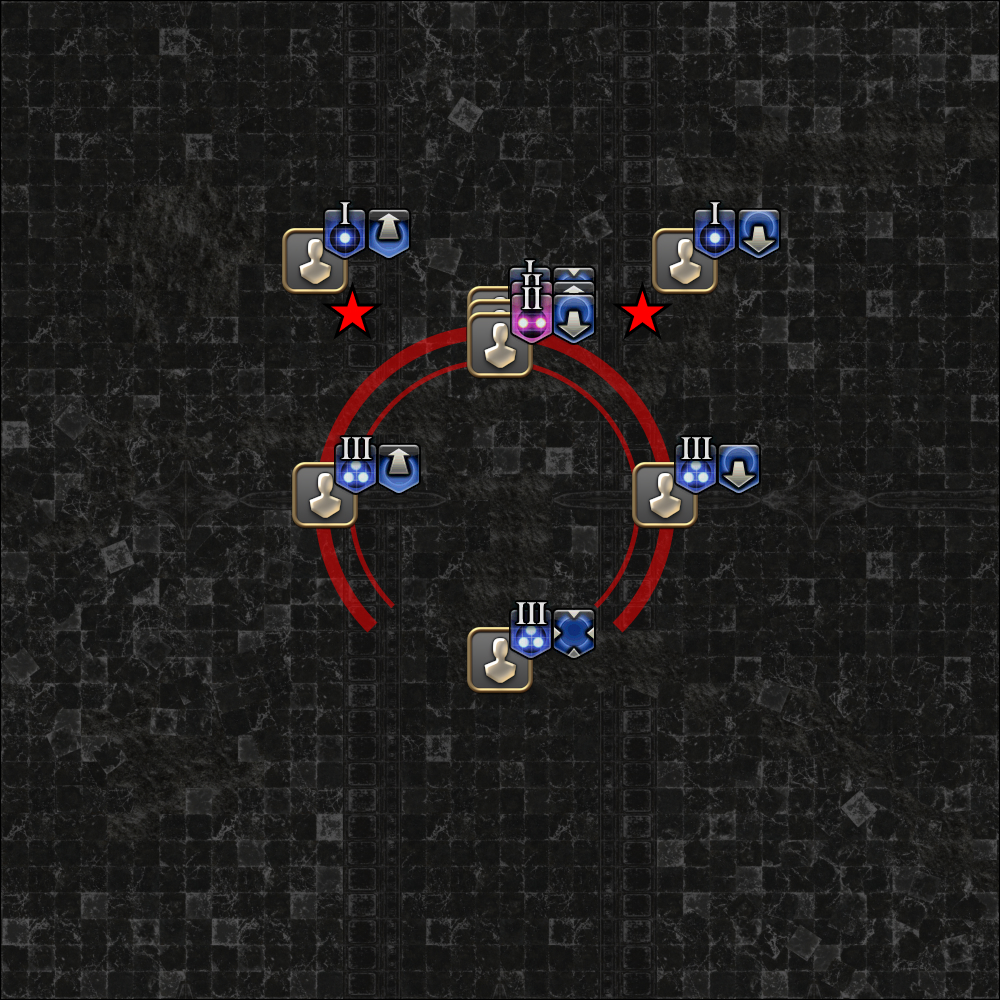
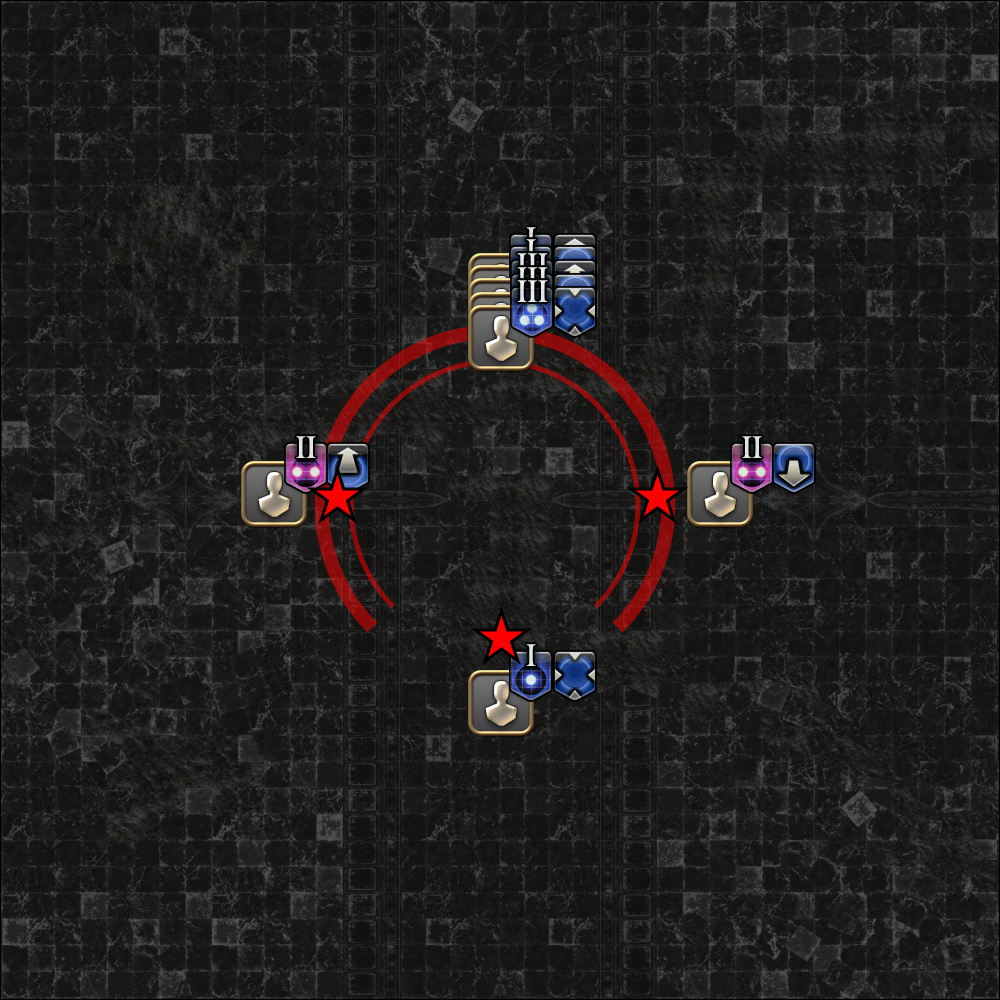
| 3. First loop begins. Nidhogg will cast either Gnash and Lash or Lash and Gnash, which determines the sequence of Nidhogg's upcoming attacks. (Lash = move in, Gnash = move out). When it resolves, Nidhogg clones land on all the "1" players, and a random player in front of Nidhogg is targeted for a stack (Eye of the Tyrant).
|  |
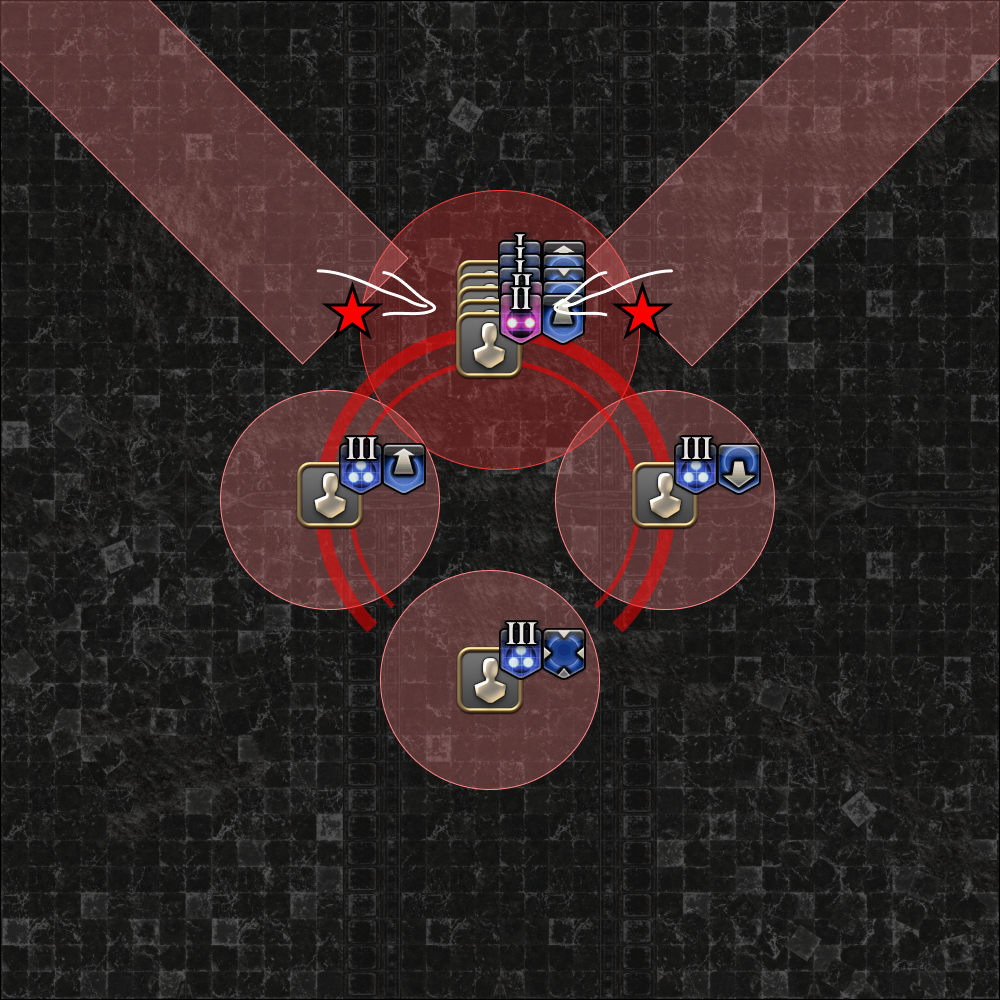
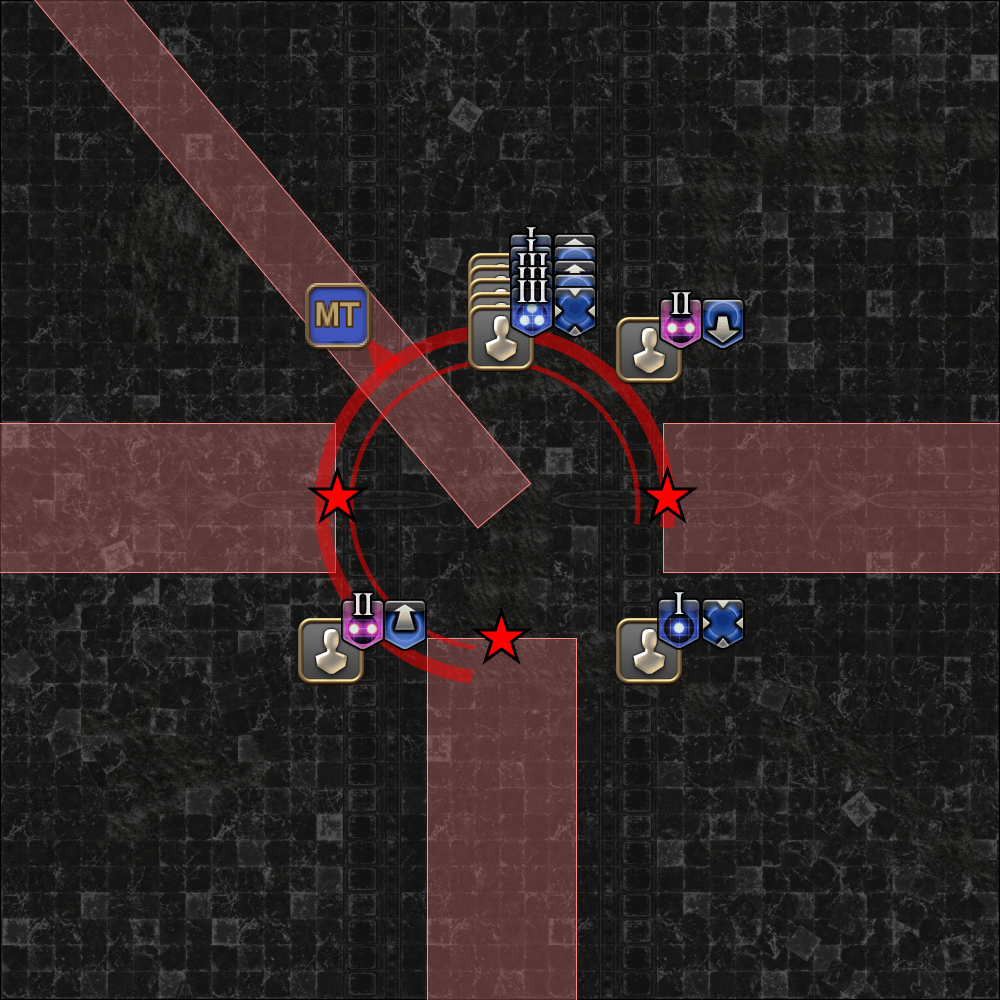
| 4. After the clones land, the first part of Lash and Gnash or Gnash and Lash resolves.
(The diagram illustrates "Gnash and Lash", so players stay out first.) | 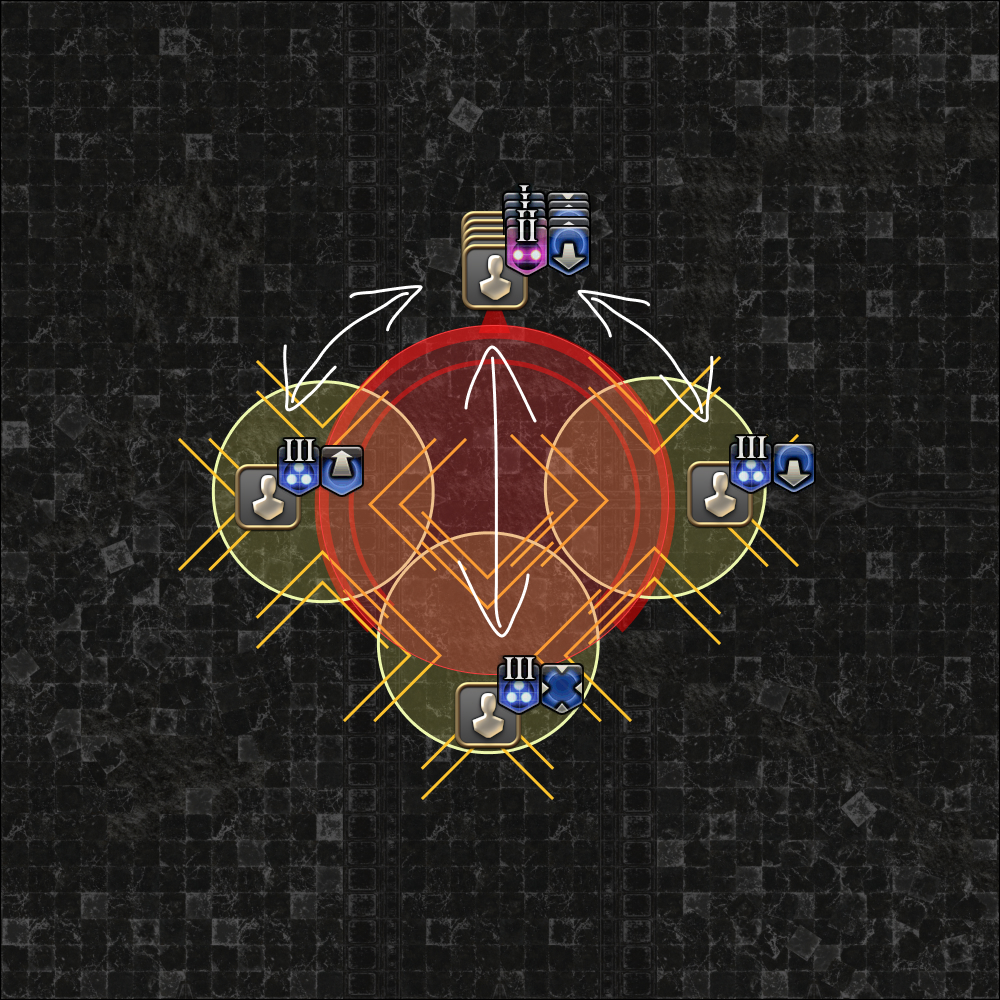 |
| 5. The second part of Lash and Gnash or Gnash and Lash resolves.
(The diagram illustrates "Gnash and Lash", so players move in next.) |  |
| 6. Second set of towers.
|  |
| 7. Second set of towers. Nidhogg will start casting another Lash and Gnash or Gnash and Lash, which will go with the third set of towers.
|  |
| 8. Second set of towers.
|  |
| 9. The second Lash and Gnash or Gnash and Lash finishes its cast, which drops the third set of towers together with another Eye of the Tyrant.
|  |
| 10. After the clones land, the first part of Lash and Gnash or Gnash and Lash resolves.
(The diagram illustrates "Lash and Gnash", so players move in first.) | 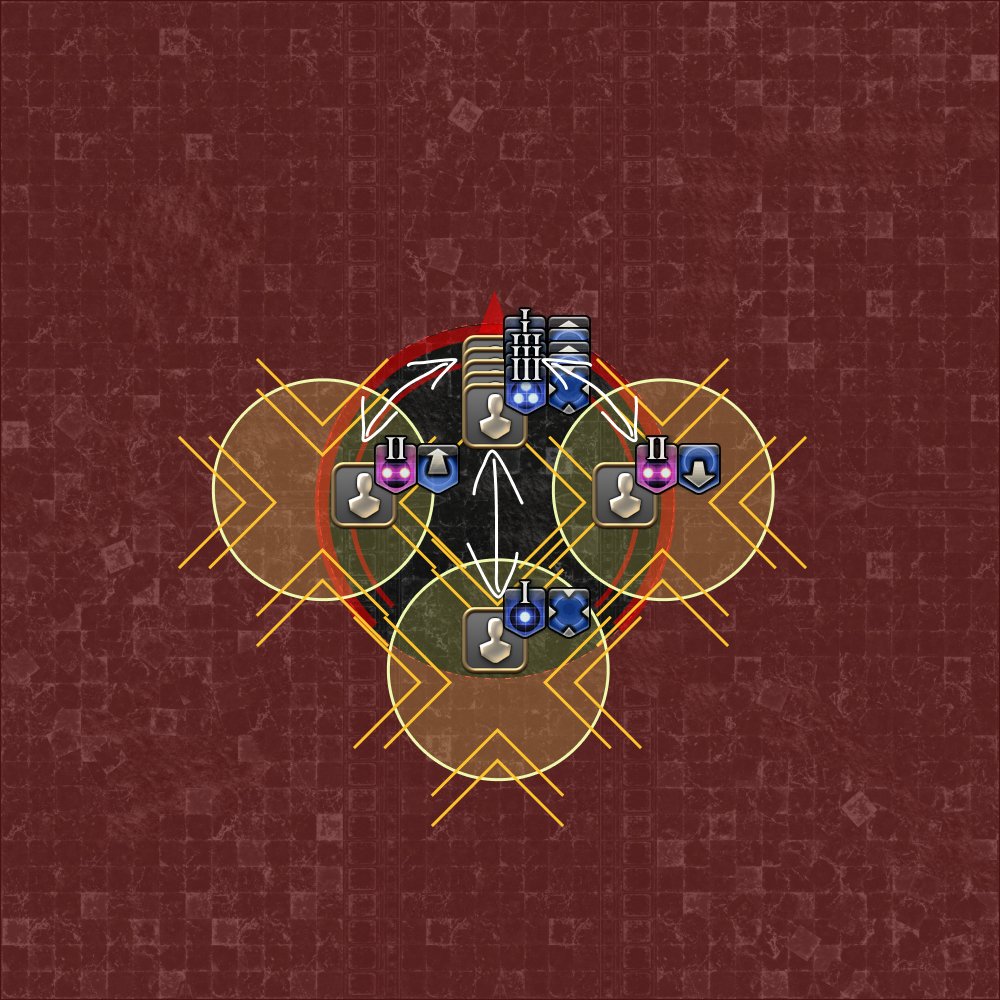 |
| 11. The second part of Lash and Gnash or Gnash and Lash resolves.
(The diagram illustrates "Lash and Gnash", so players move out next.) | 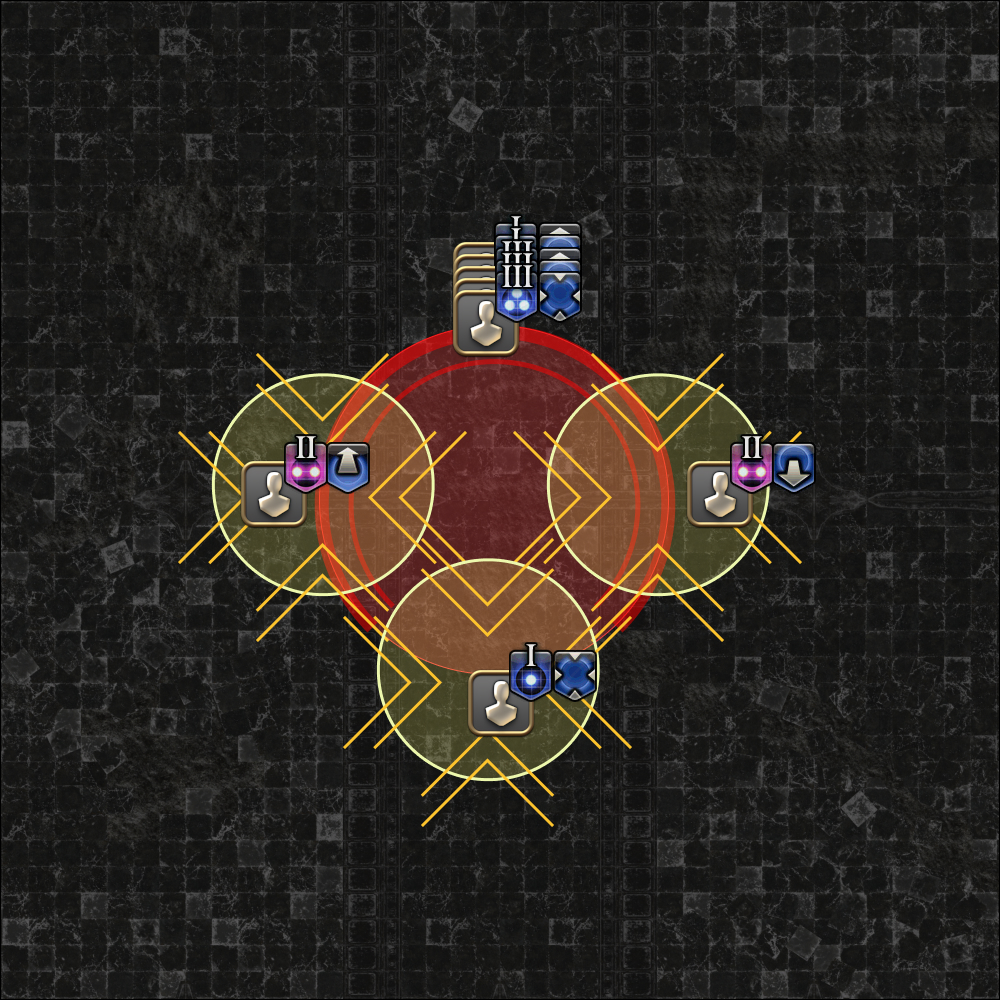 |
| 12. Bait the third set of Geirskoguls.
|  |
| 13. Nidhogg will resume auto-attacking the MT. If the MT was part of the stack, be sure to point Nidhogg away from the party.
|  |
| 14. After two auto-attacks, Nidhogg will turn to face a random party member and cast Drachenlance. Dodge or outrange this, and prepare for 4x towers. | 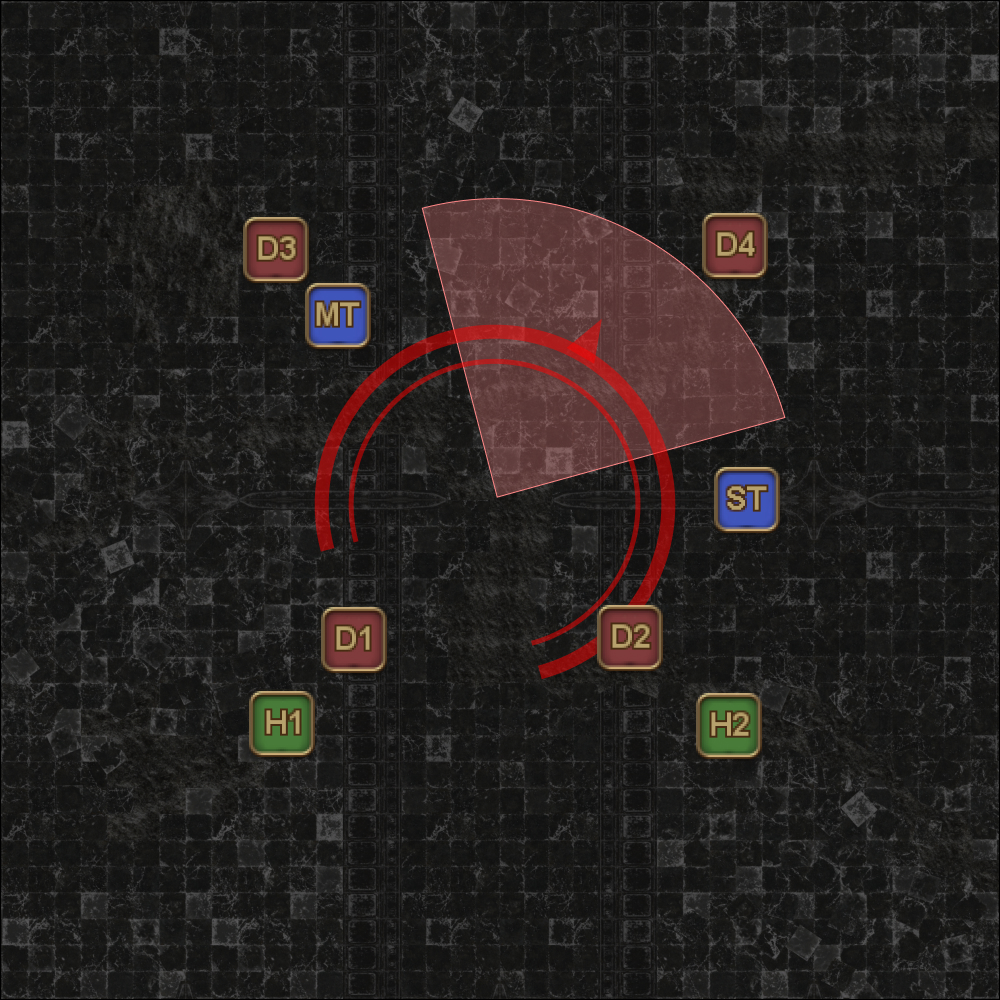 |
4x Towers
Four towers will spawn at the four intercardinal towers. Each tower needs 1-4 players (chosen at random) to be inside, with a total of 8 players.
The easiest way to resolve this is to preposition in pairs at each tower:
Starting positions:
|  |
- Healers and Ranged stay in their towers to bait Gierskogul.
- Tanks and Melee adjust:
- If your tower needs 2 or more players, stay.
-
Otherwise, adjust to the first tower that needs more than 2 with the following priority:
cw > ccw > across
Done correctly, at most two players will need to move.
|  |
Example 2
|  |
Example 3
|  |
Just like before, Nidhogg clones will appear where the towers were when resolved.
| 1. When the clones appear:
Note: Having a tether does not necessarily mean you are not baiting Geirskogul, as the tether could have come from a different clone. | 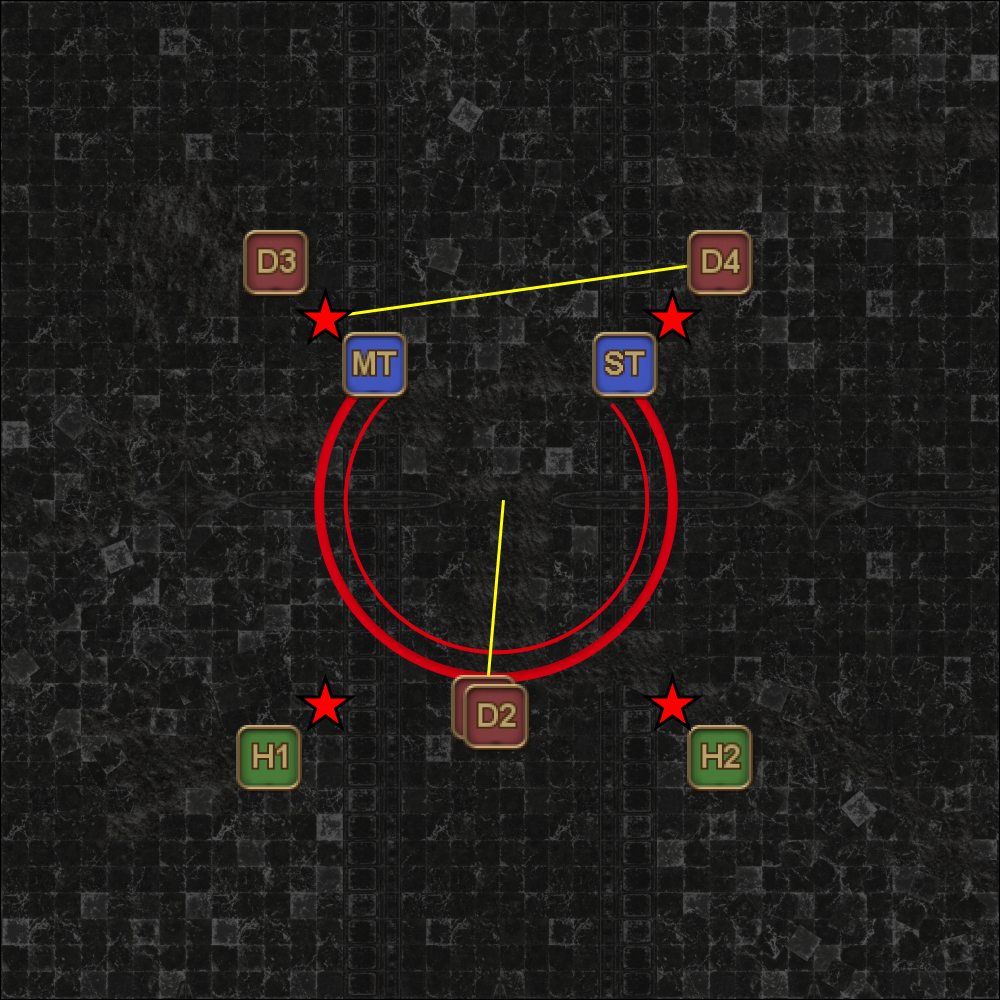 |
| 2. Tanks take the two tethers, stack under Nidhogg, and use their invulnerabilities.
Everyone dodges the Geirskoguls. Note: If you are tethered to your own clone, it will be difficult for the ST to find and take your tether. Since you are not baiting a Gierskogul, move to the side to stretch your tether to make it easier for the ST. |  |
After the Soul tethers resolve, Nidhogg will then auto-attack the MT five times before turning for one final Drachenlance (which will always point South).
Nidhogg then starts casting Revenge of the Horde (enrage).