Omega M/F
| 1. Omega-M and Omega-F will spawn. The party will get two GCDs before Omega M and F cast Firewall, which applies a debuff on the four closest players. Those players will only be able to attack that target. Stay near to your assigned boss, and away from the center of the arena to ensure you get the correct debuff. | 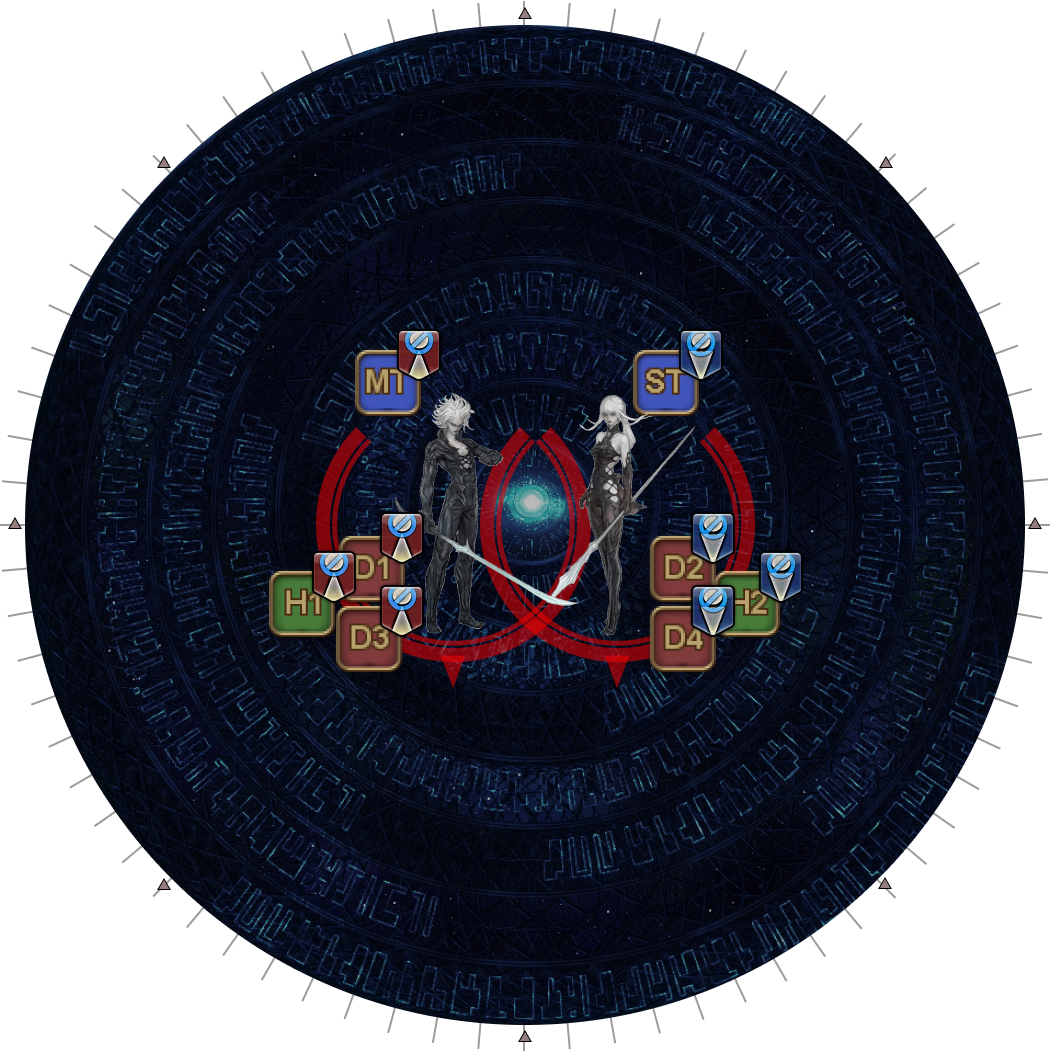 |
| 2. Omega-M and Omega-F will each target their tank with Solar Ray, an AoE tankbuster. | 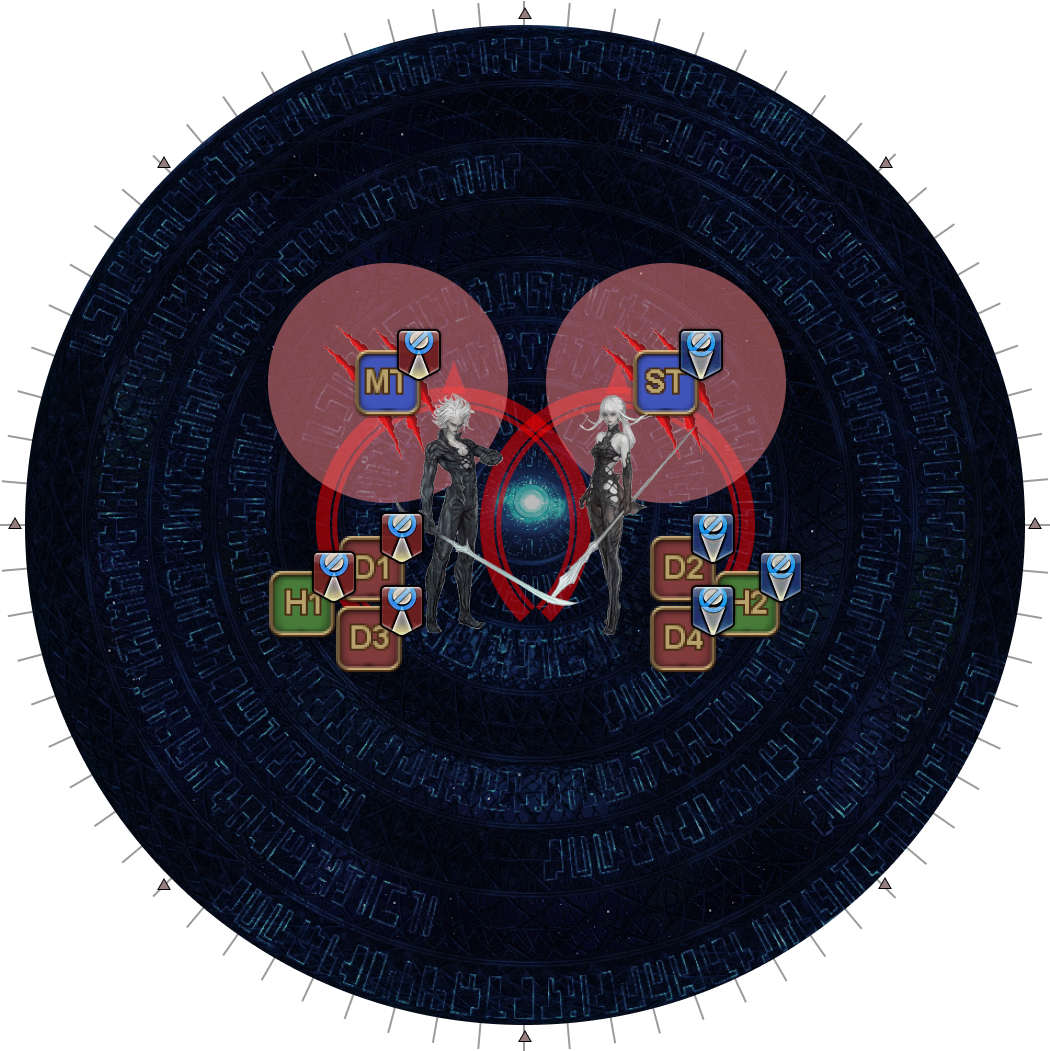 |
After a while, Omega-M and Omega-F will both cast Party Synergy, the first major mechanic of this phase.
Party Synergy
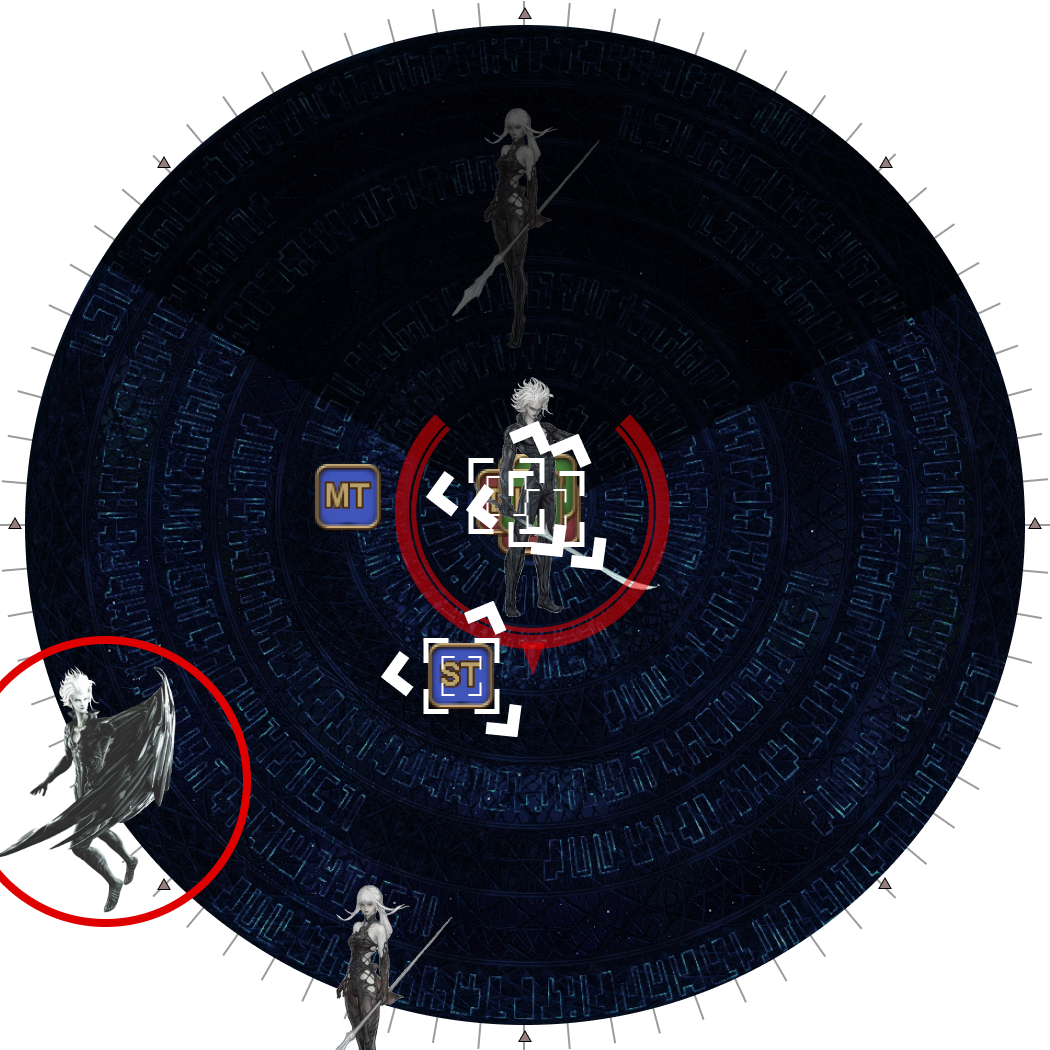
All players in the party will be tethered together and paired, indicated by the Playstation symbols. The party will also get either Mid Glitch, or Remote Glitch.
[Click to Expand] Mid/Remote Glitch debuffs
  | Mid Glitch and Remote Glitch are debuffs that will apply a Vulnerability Up debuff on paired players unless the two players are a specific distance apart:
There are two instances in Party Synergy where this distance requirement needs to be satisfied to avoid dying to damage. Observe that standing on the markers would be too short to satisfy Mid Glitch. |
 | |
A giant eye will also appear outside the arena at a random cardinal or intercardinal position.
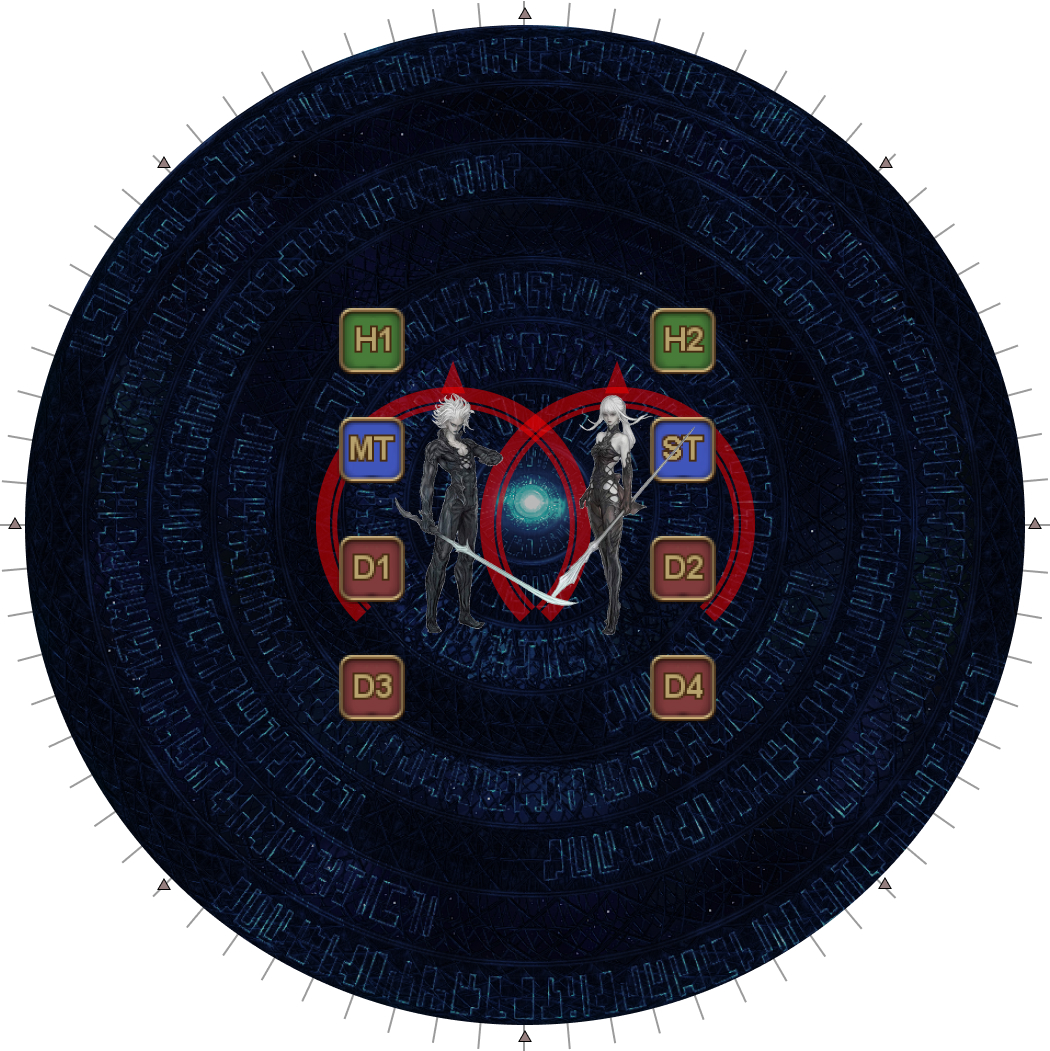
| 1. Line-up in your light parties from north-to-south.
|  |
| 2. Playstation markers appear. If your group has two of the same marker, the lower player swaps groups. (In this example, the MT and D4 will swap groups.) Remember your Playstation symbol and which side you will be on for later. The symbols will disappear. | 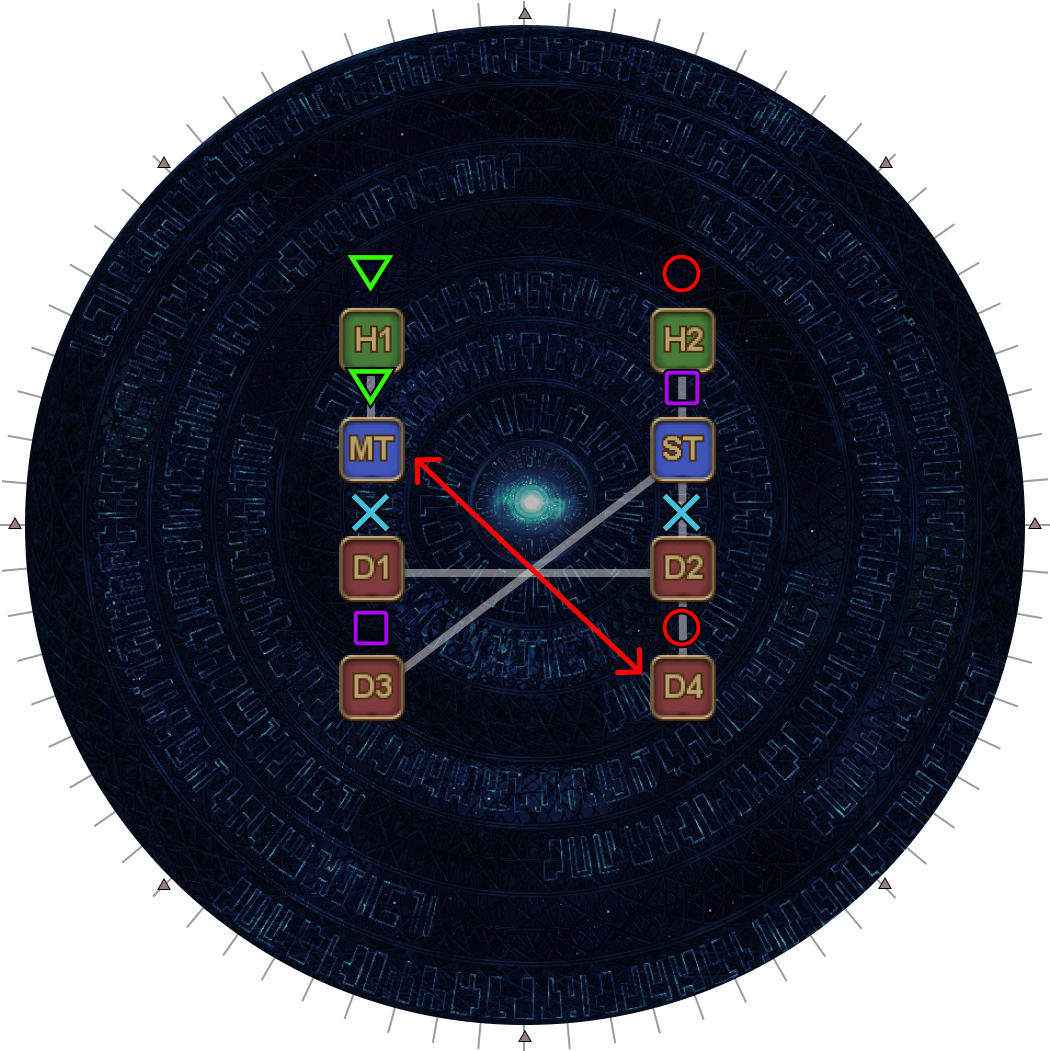 |
| 3. Two Omega-M and two Omega-F clones will spawn. Identify the Omega-M/F pair with:
Dodge their combined AoEs. (You do not need to consider the Mid/Remote Glitch tethers at this point.) | 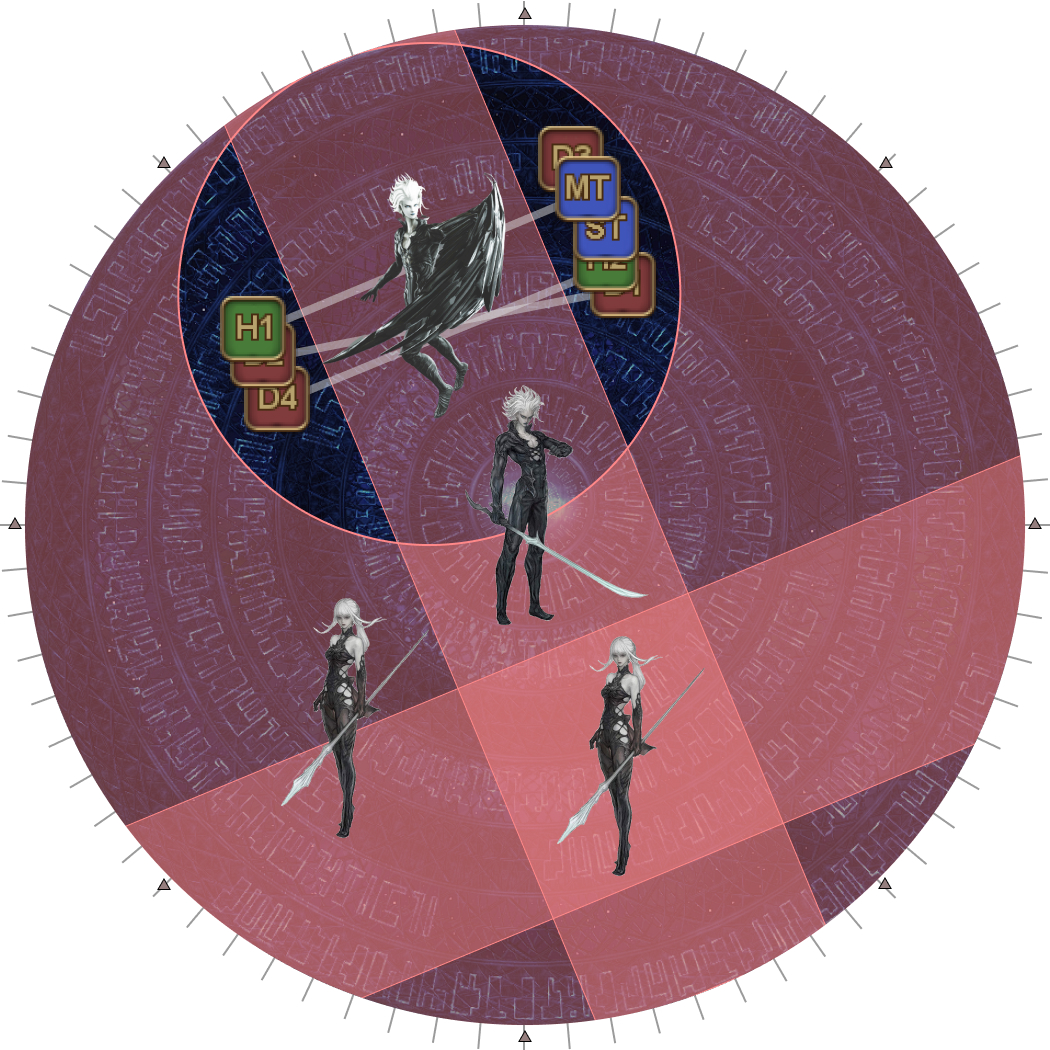 |
Omega-M/F’s AoEs are determined by the weapons held by the genuine Omega-M/F pair. Note how the markers demarcate the boundary of Omega-F’s AoE.
| M Sword, F Blade-legs: 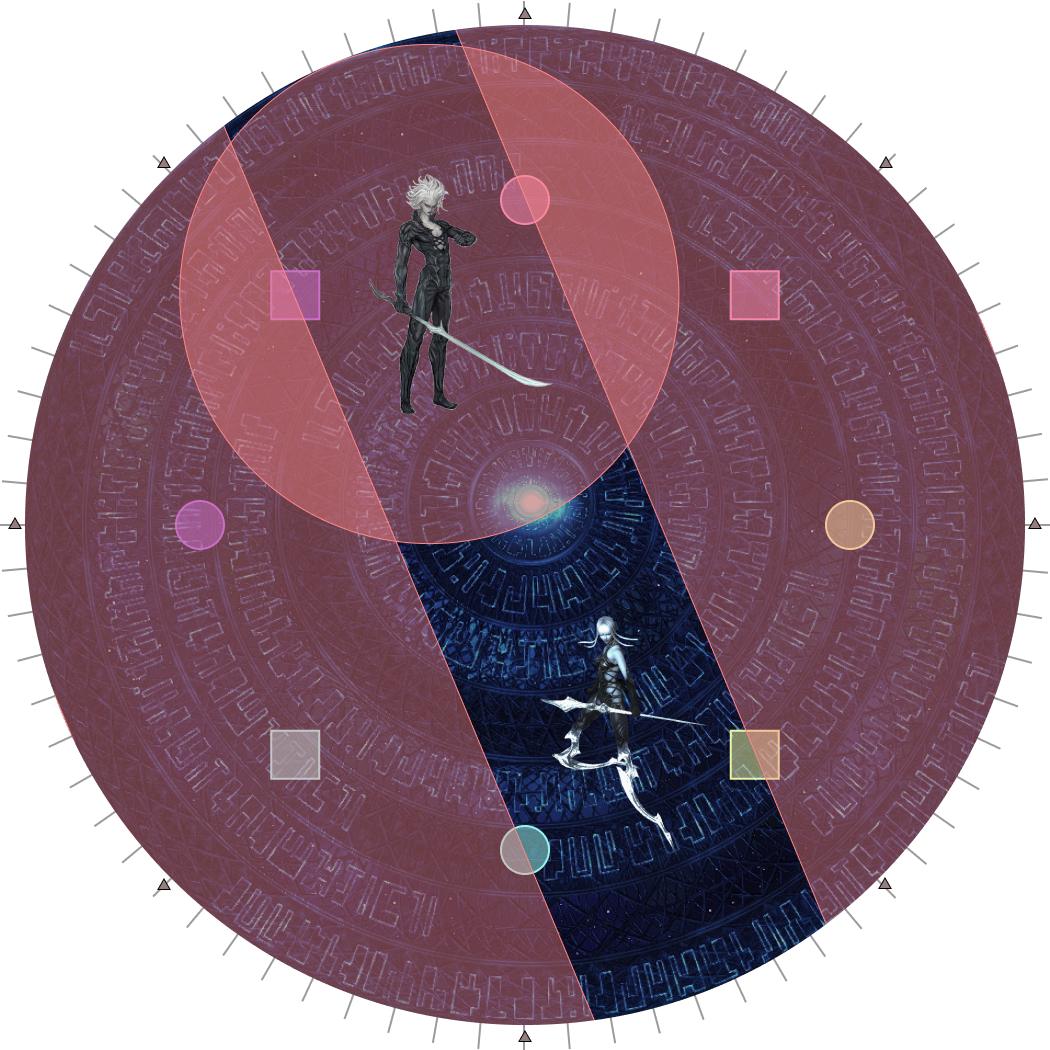 | M Shield, F Blade-legs: 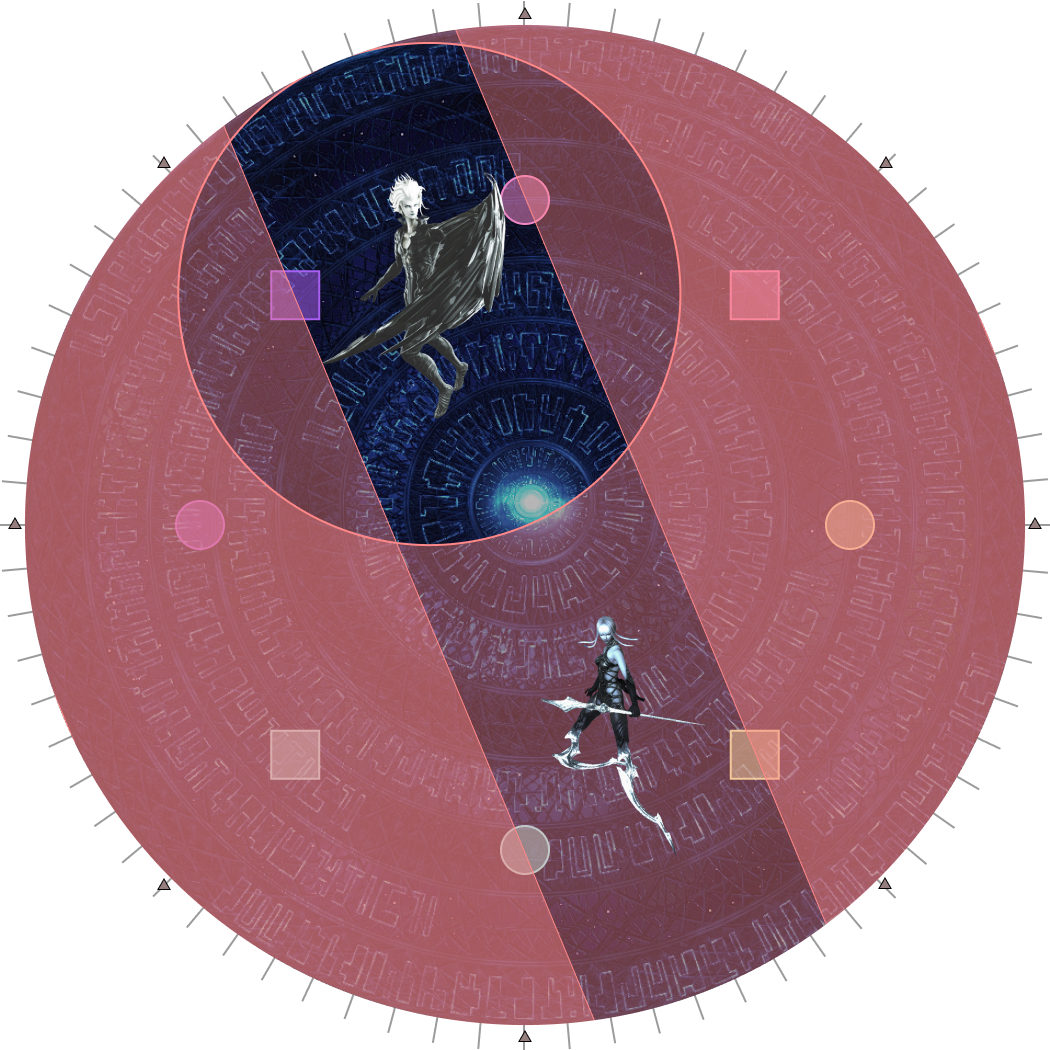 |
| M Sword, F Staff:  | M Shield, F Staff: 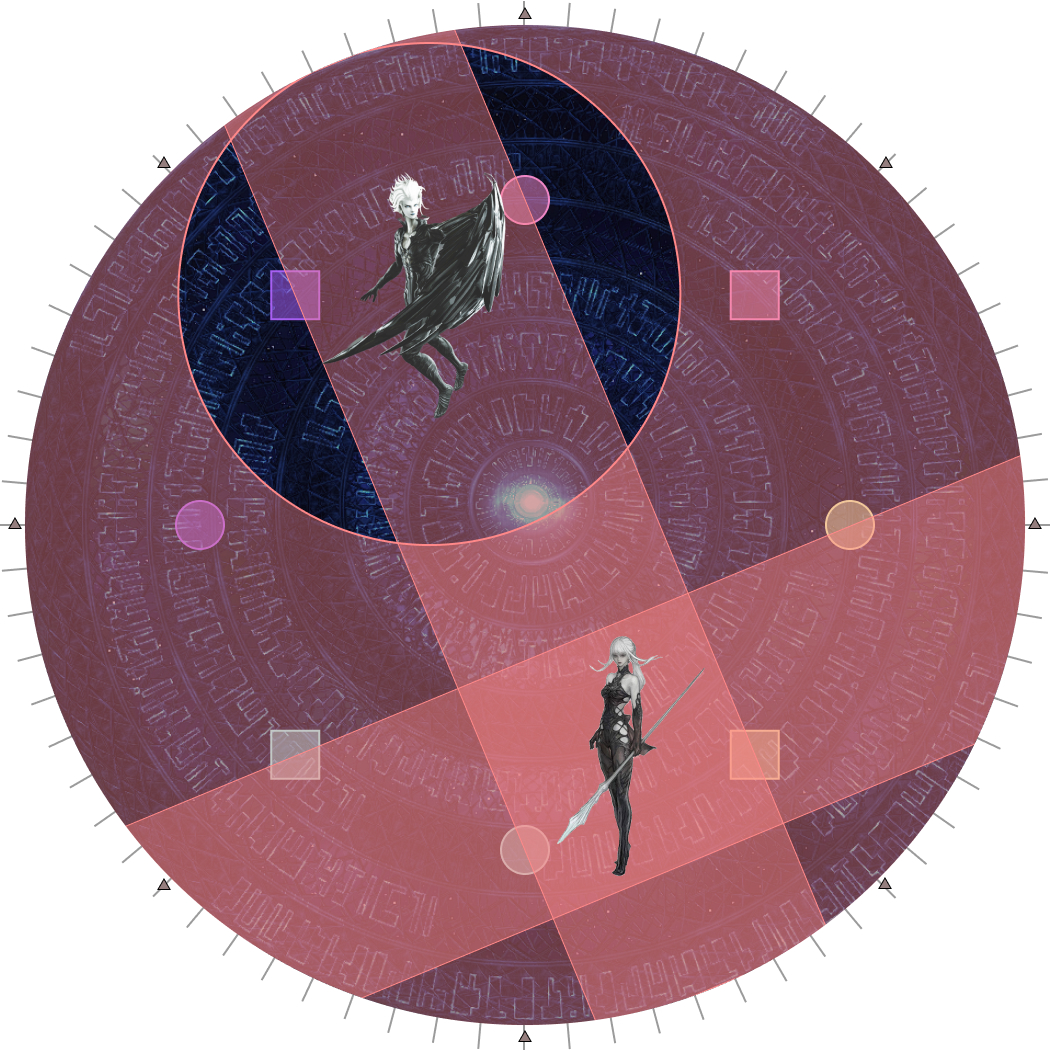 |
This will take considerable practice. Nukemaru has compiled a collection of clips which may help:
After dodging Omega-M/F’s AoEs, the party now resolves Mid/Remote Glitch.
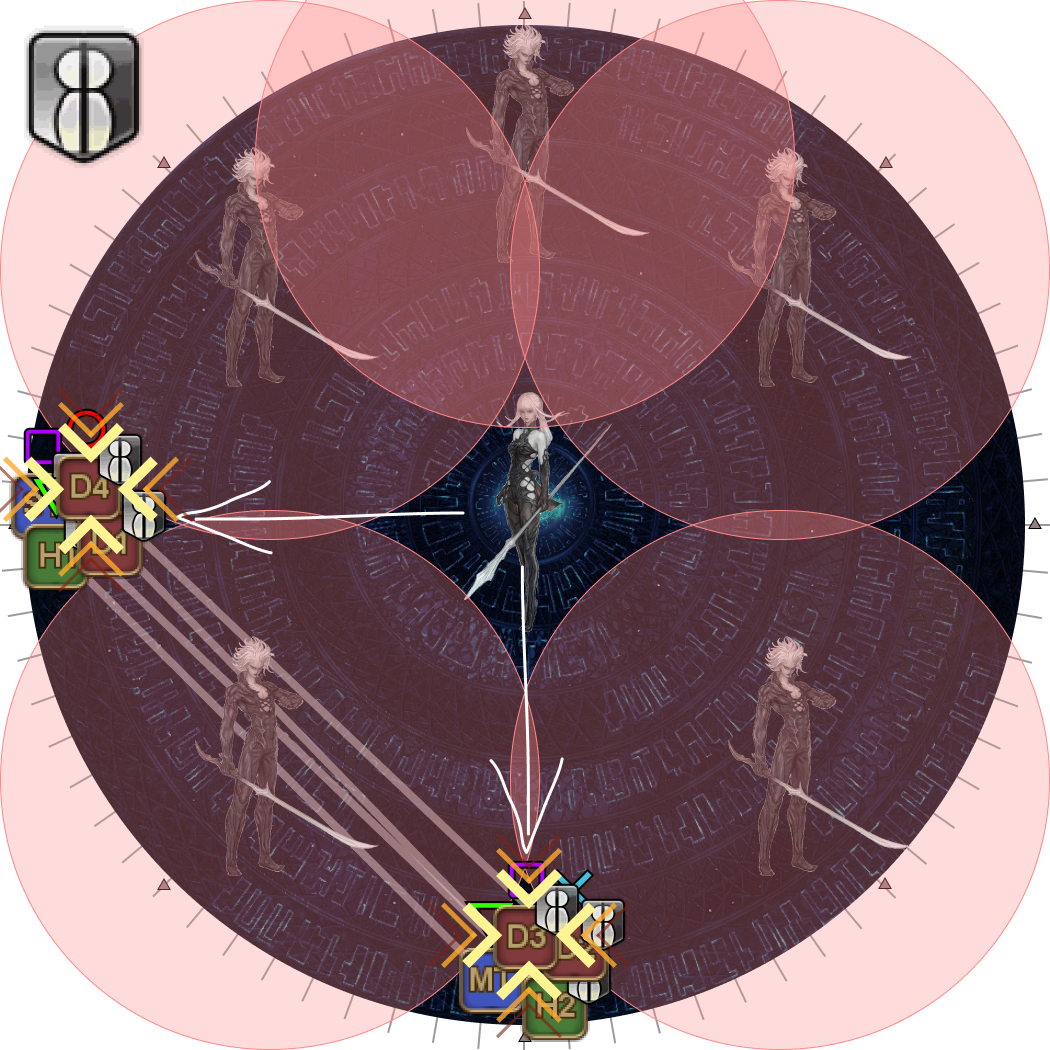
| 4. Using the Eye as North, split up into your 4:4 groups. If the party's debuff is Mid Glitch, spread in the order 〇×▽□ from top-to-bottom. Otherwise, if the party's debuff is Remote Glitch, only the right-side group's 〇 and □ swap positions. Four Omega-M clones will also spawn along either all the cardinals, or all the intercardinal directions. | 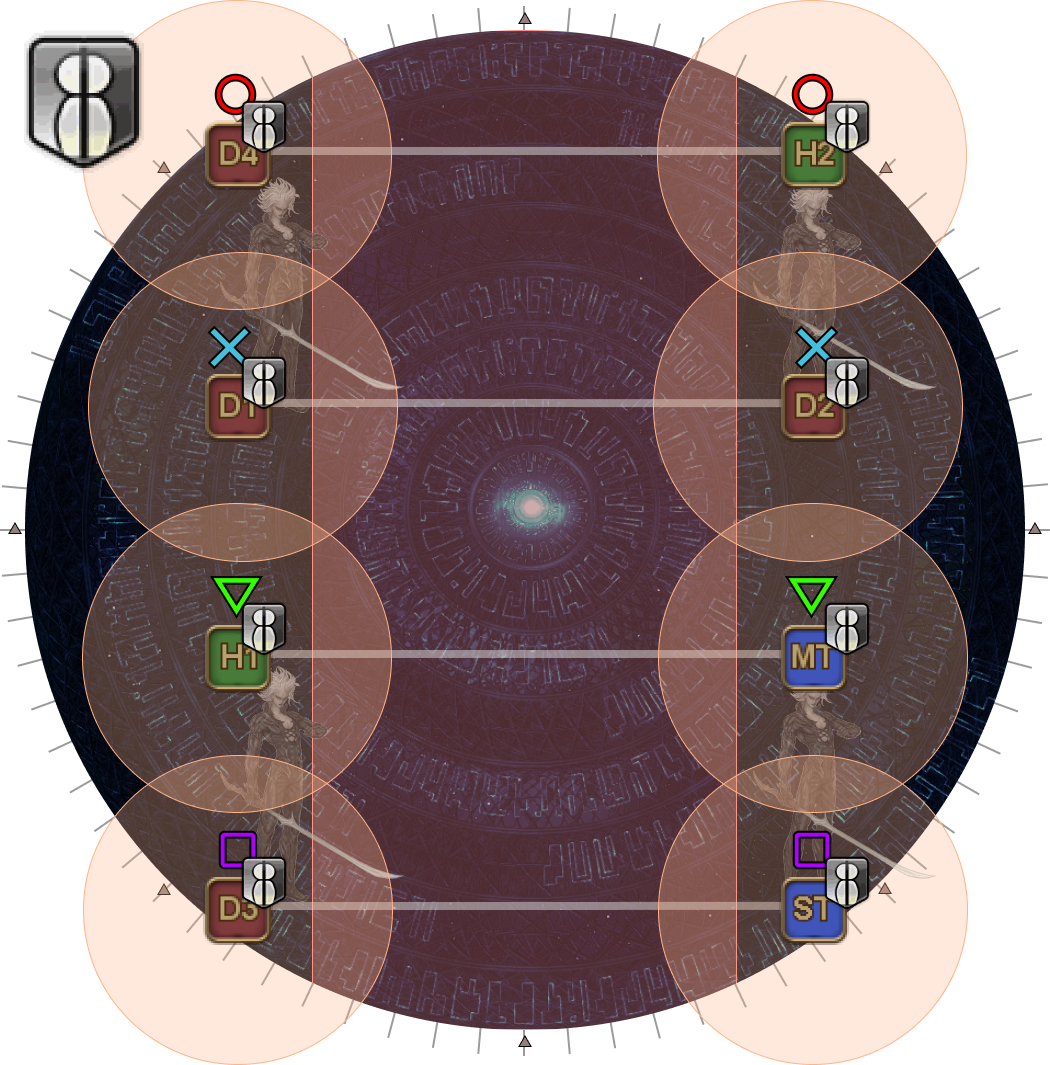 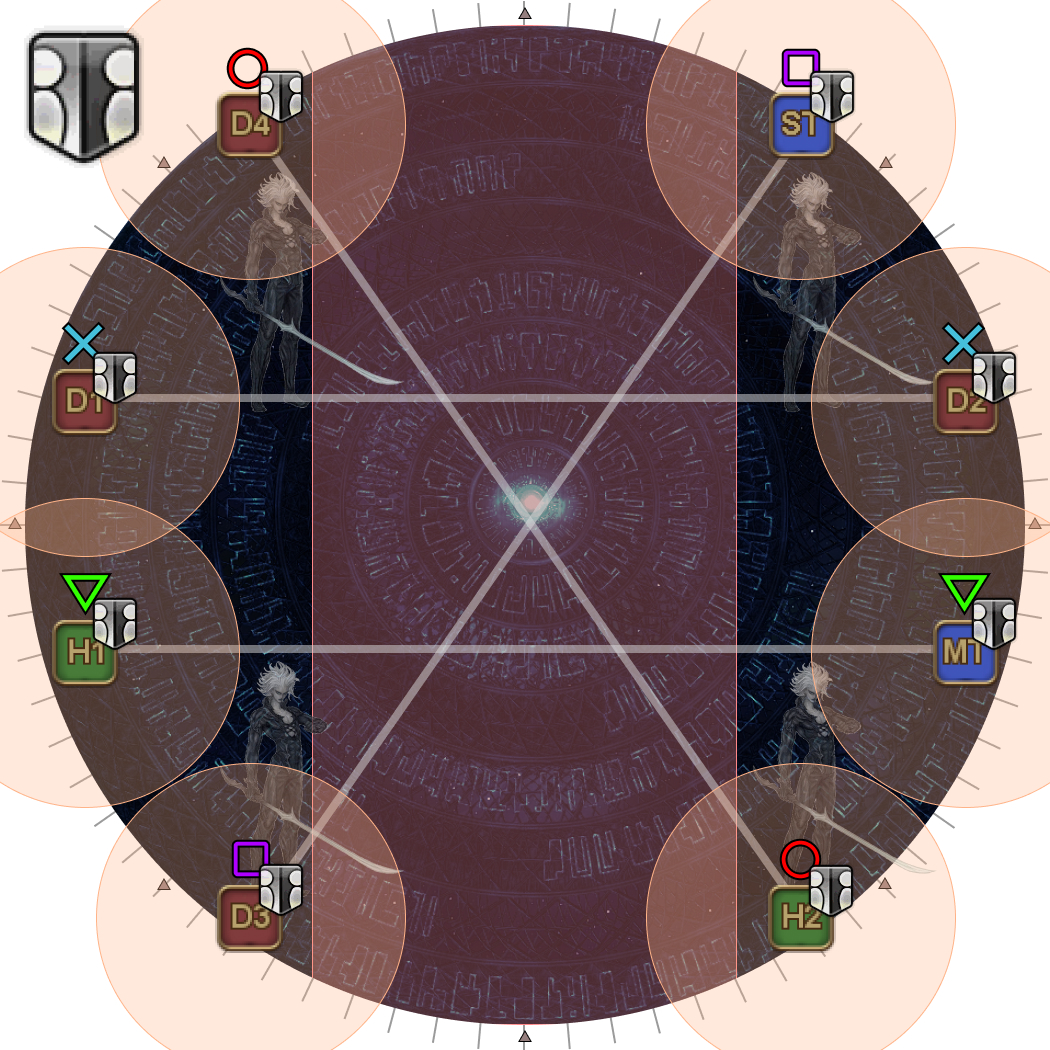 |
| 5. The other Omega-M/F pair will now switch genders. Omega-F will change to Omega-M (briefly flashing white) to make three Omega-Ms standing in a row. Use this new Omega-M as the new North. Come back to the center of the arena. As you do so, two players will be marked with stack markers. If one side has both stack markers, the one further from the eye swaps with their partner in the other group. (In this example, the left side × and □ players both have a stack marker. Since □ is further from the eye, the □ players swap sides.) | 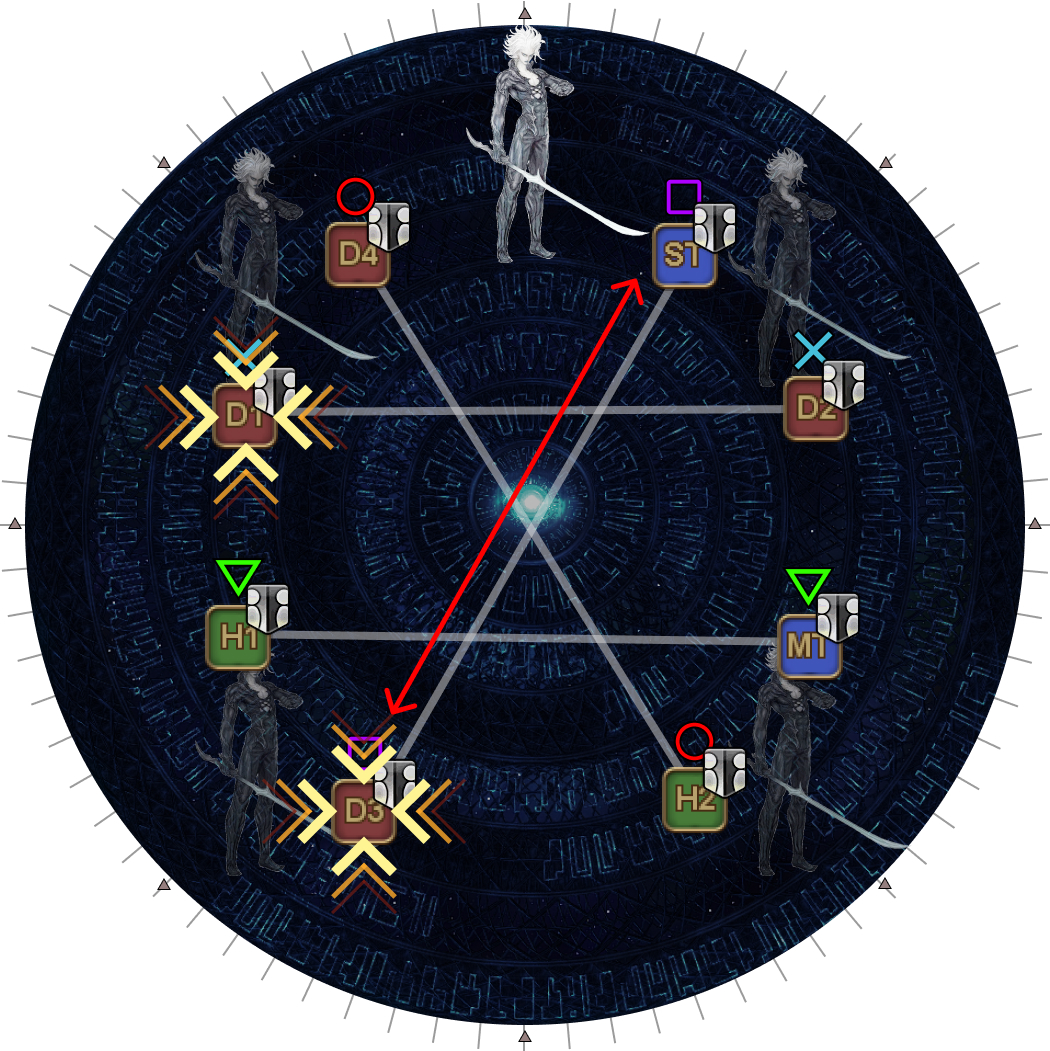 |
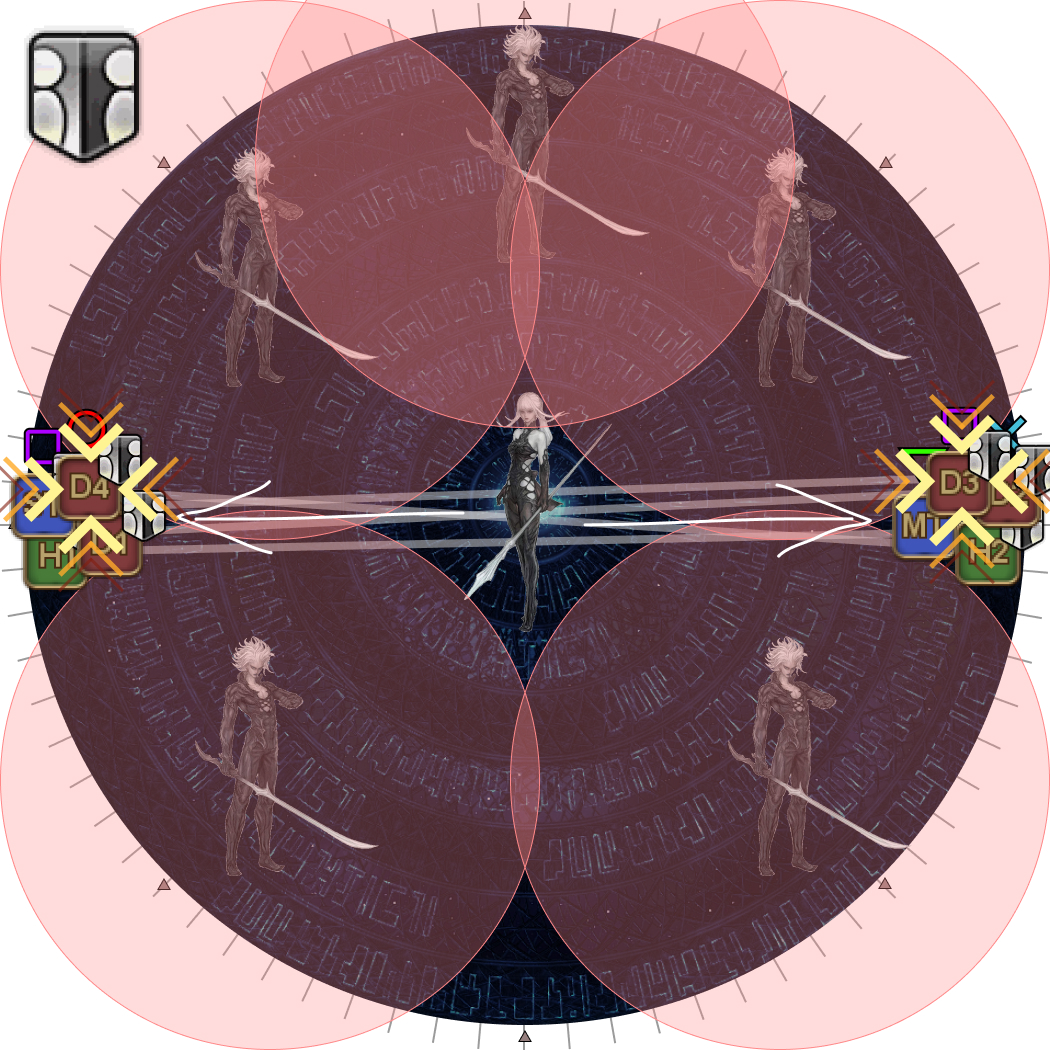
| 6. The (new) Omega-F will then do a knockback from the center. The party needs to get knocked back into two safe spots, based on whether the party has Mid or Remote Glitch.
|   |
Because Omega-M and Omega-F swapped genders during Party Synergy, the tank who previously had hate on Omega-M will now have hate on Omega-F, and vice-versa. Both tanks will need to Provoke their target either before Party Synergy, or immediately after as the Packet Filter debuff is still on.
After a few autoattacks, the two clones will cast Limitless Synergy, dropping the Packet Filter debuffs, and giving the party one GCD to hit both targets before starting Limitless Synergy.
Tip: Omega-M will briefly stop auto-attacking to cast Synthetic Shield to prepare for Limitless Synergy.
As a result, the ST (who is holding Omega-F) will take more damage during this interim from Omega-F's auto-attacks.
This is also a good place to use Addle, as Omega-F's auto-attacks are magical, and targeted debuffs will not be used during Limitless Synergy.
Limitless Synergy
Omega-F will teleport North and begin casting Laser Shower. Omega-M will teleport to the middle of the arena and shield Omega-F, rendering her invulnerable until Omega-M is defeated.
Meanwhile, five more Omega-M/F clones outside the arena will throw various mechanics at the party to resolve.
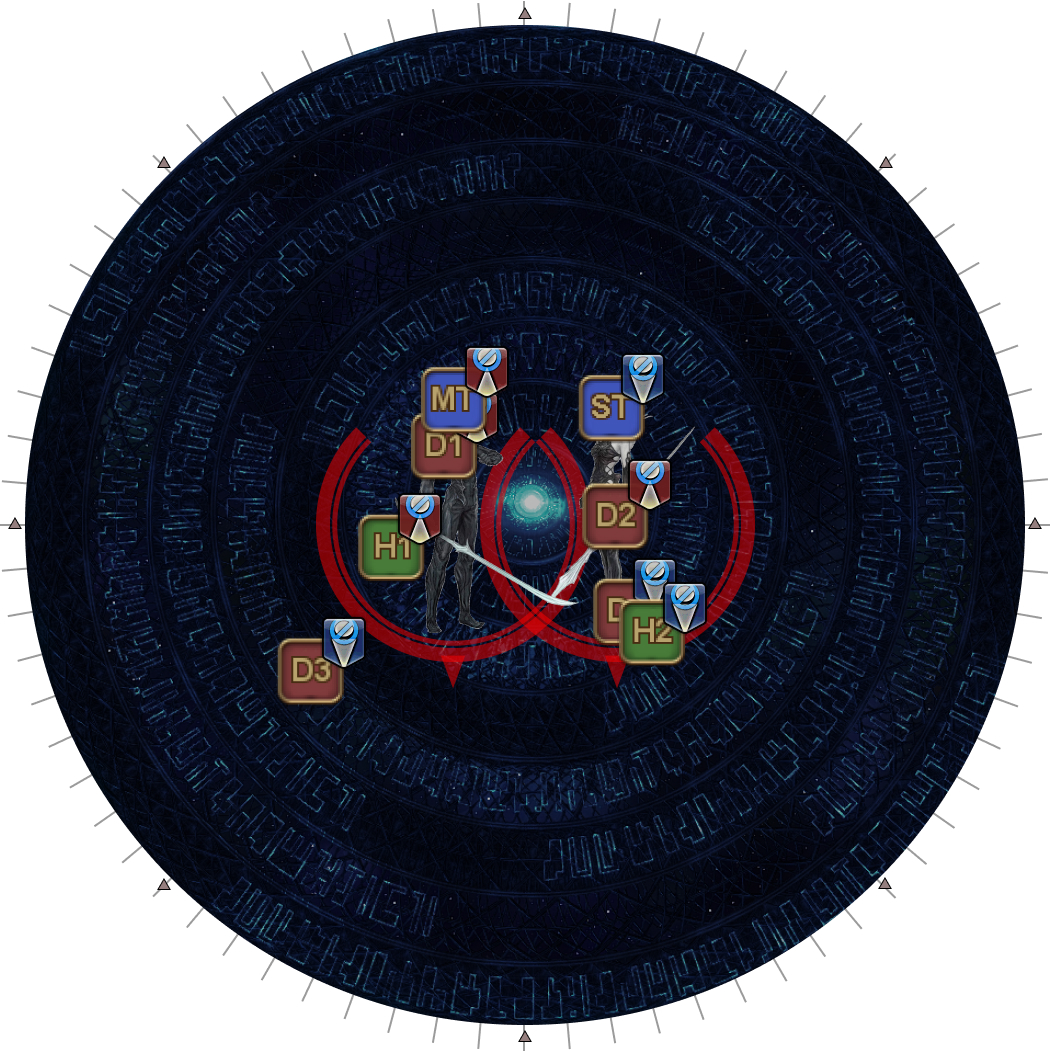
| 7. All players stack together outside the target circle, at true south (indicated by the tip of Omega-M's targeting circle). Two clones at opposite intercardinal positions will each tether a random (non-tank) player. | 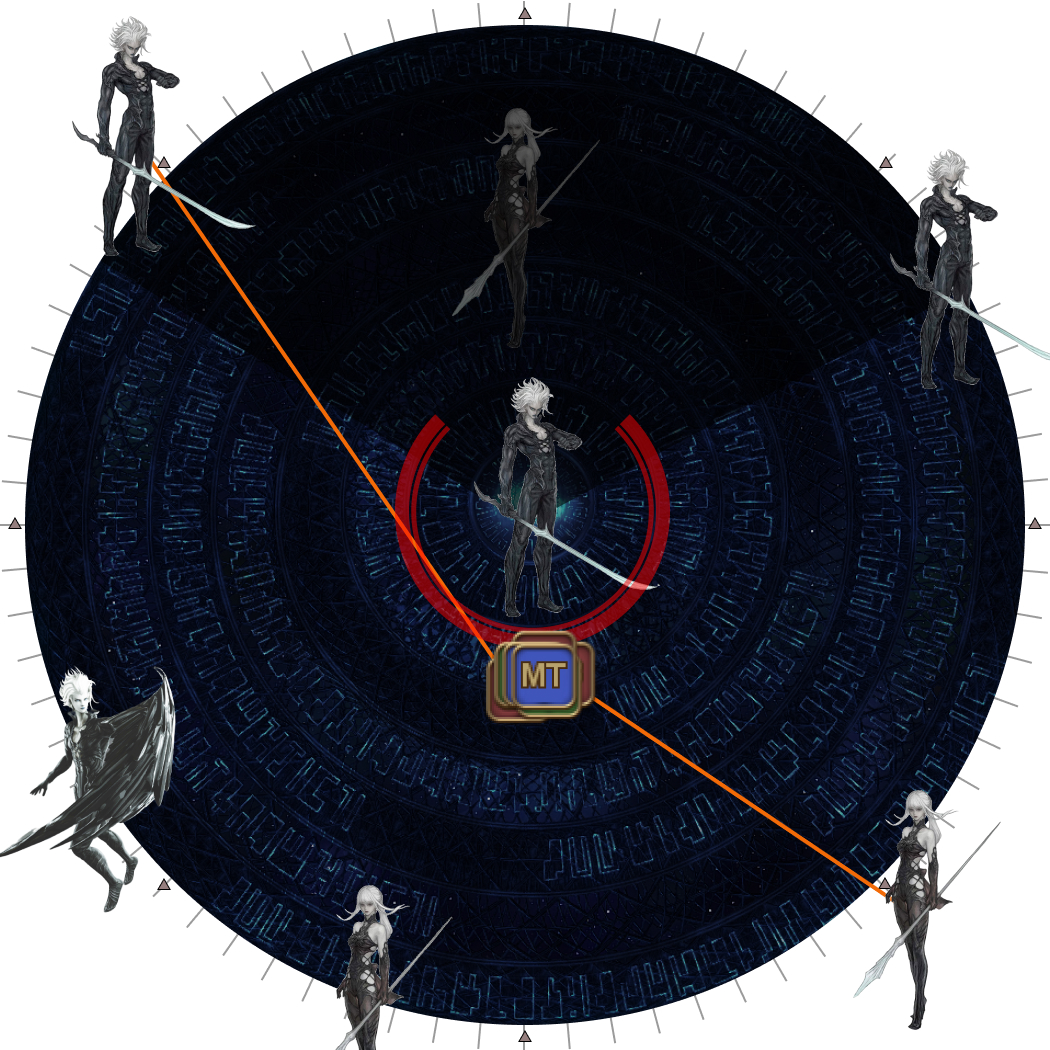 |
| 8. The two tanks take the two tethers and point them clockwise.
| 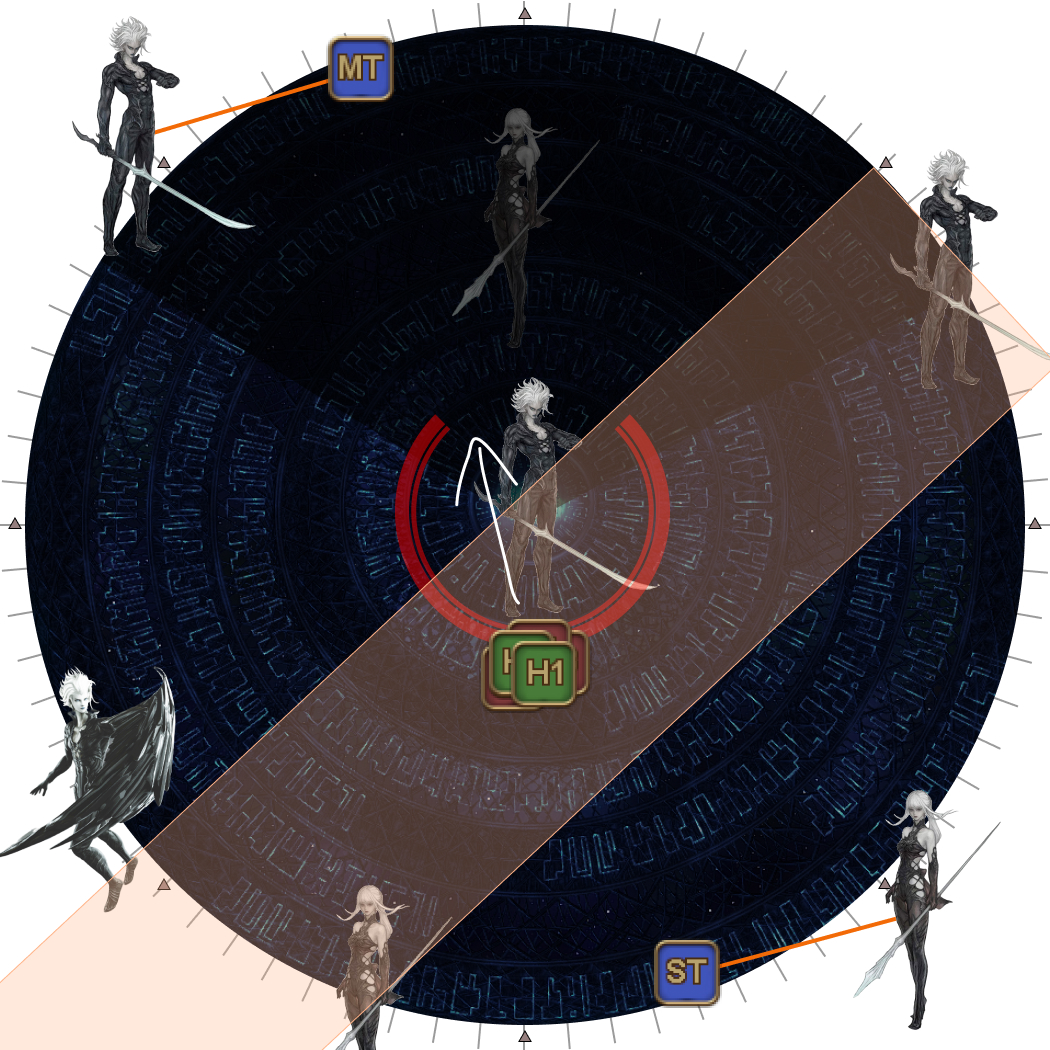 |
| 9. When the Sagittarius Arrow's telegraph appears, dodge it, by moving into the boss's target circle. | 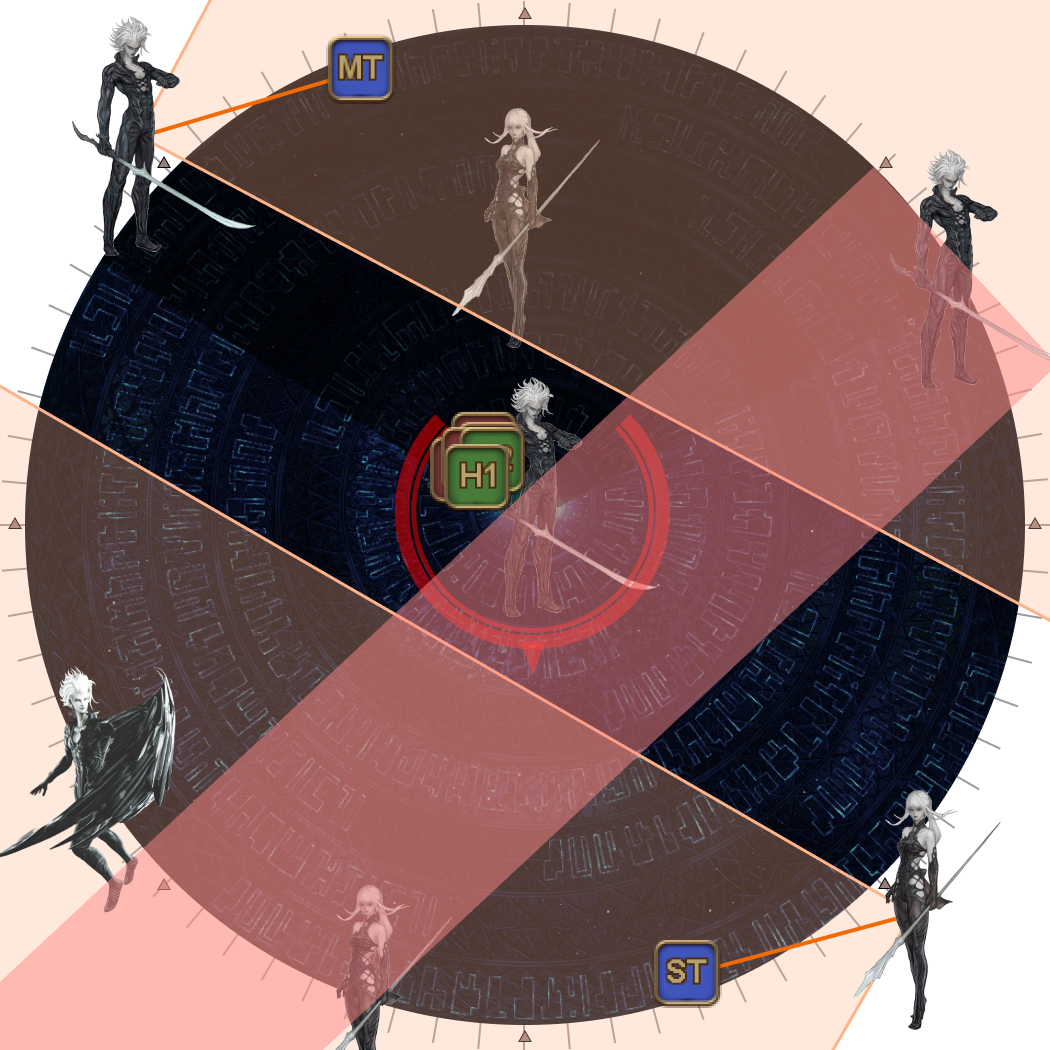 |
| 10. Identify the Omega-M clone on the outside with the shield.
|  |
| 11. The shield clone will cast Beyond Defense, and randomly charge to one of the two closest players (which should be a tank).
Meanwhile, an Omega-F clone will cast Optimised Meteor, placing three Flare markers on three random players. Ignore the Flares, and stack together in the middle. | 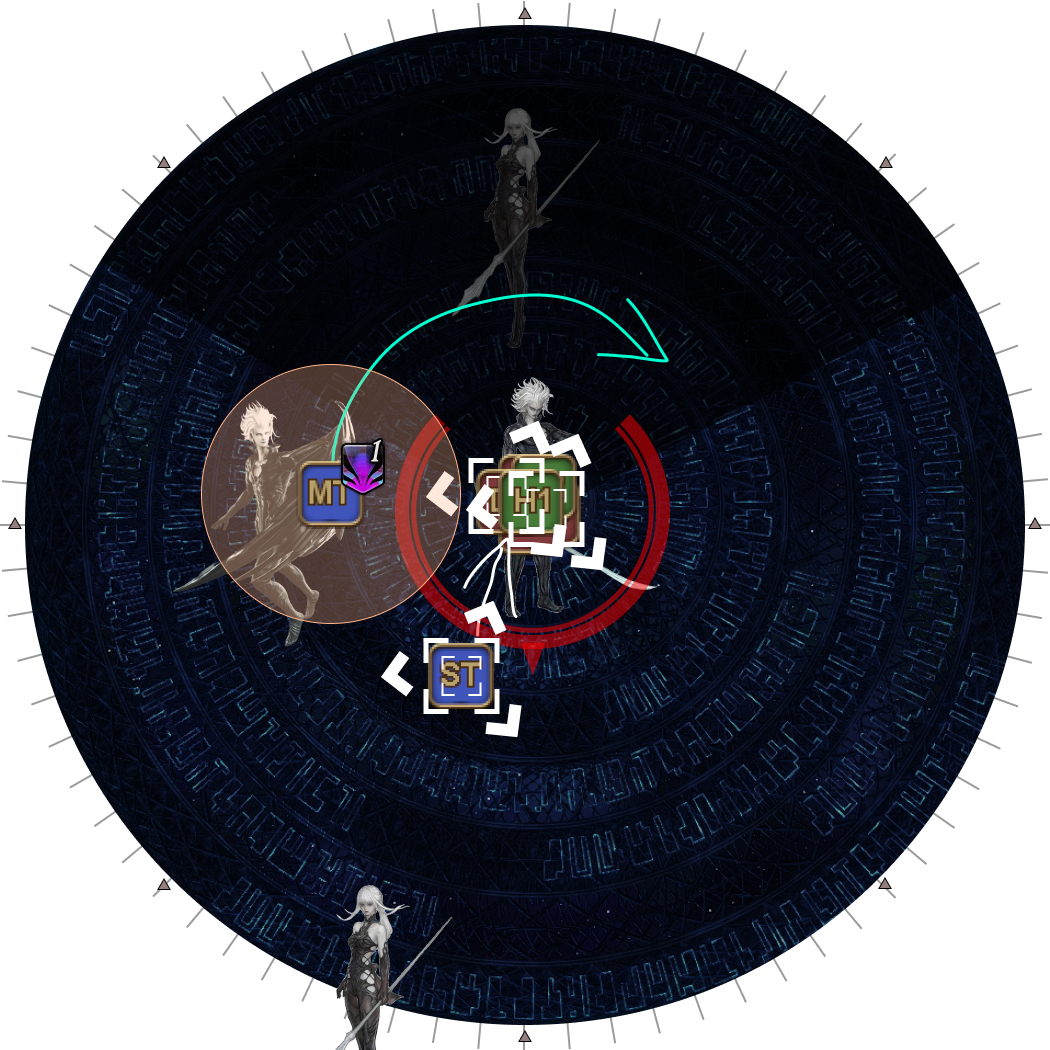 |
| 12. The shield clone then casts Pile Pitch on one of the two closest players at random (neither of whom should be the tank that was hit with Beyond Defense) together with Optimised Meteor. This will need to be heavily mitigated. | 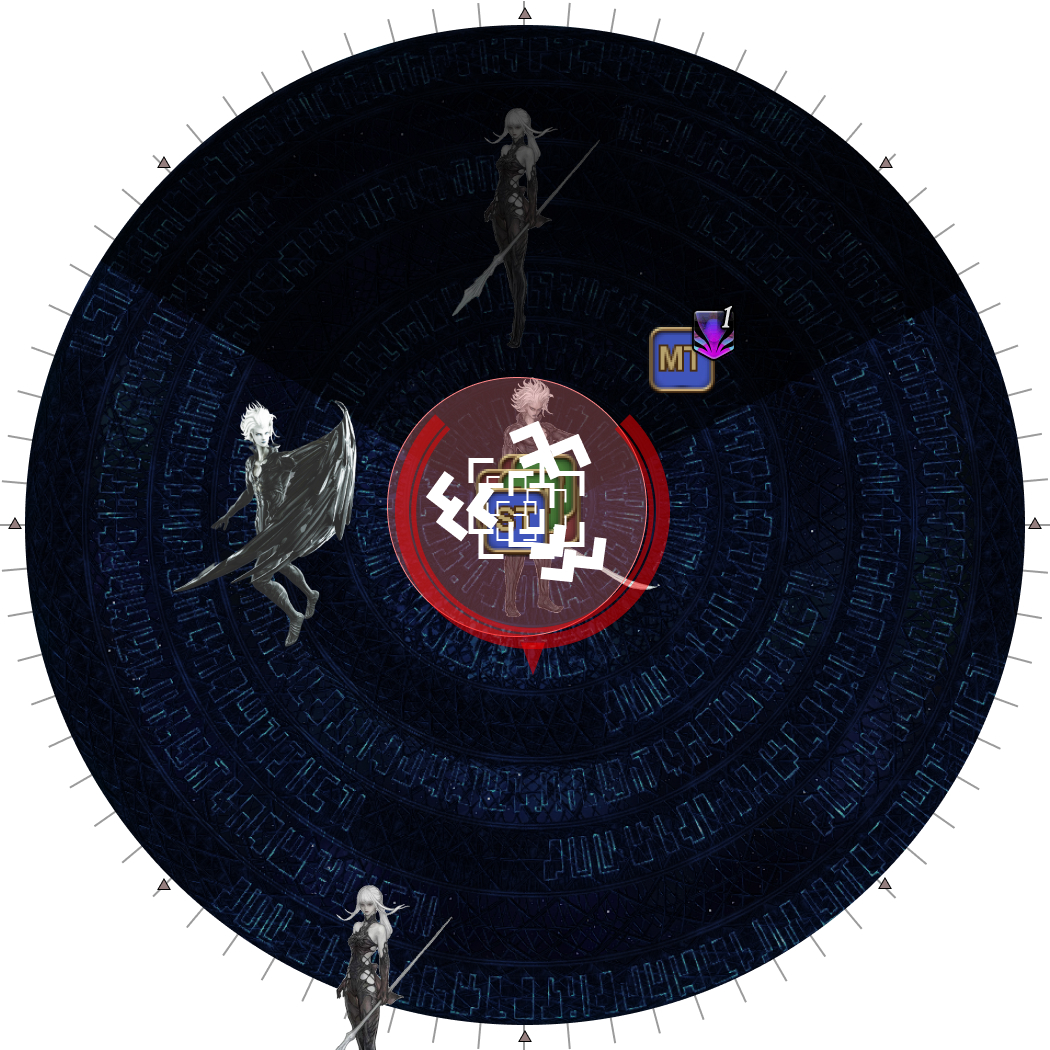 |
After Pile Pitch resolves, the eye will cast Cosmo Memory, another raid-wide. Because Cosmo Memory is cast by the Eye, this damage cannot be mitigated through targeted debuffs (Addle, Dismantle, Feint, Reprisal).
With no other mechanics left in the phase, the party must defeat Omega-M, followed by Omega-F (in that order) before Omega-F’s Laser Shower resolves as the hard enrage.
Frequently Asked Questions
[Firewall] Should I apply DoTs on the other target before Firewall resolves?
| No. The Firewall effectively only lets you damage either Omega-M or Omega-F, but not both (even certain abilities like Reprisal are blocked). If you apply a DoT on the other target before Firewall resolves, it will technically tick, but deals 0 damage. |
[Party Synergy] Is there a reason why the order is 〇×▽□?
| The four shapes are lined up in order of the number of lines used to draw the shape.
|
[Party Synergy] Can each side have more than one duplicate Playstation symbol?
| It's rare (3/35 chance), but yes, it's possible. The rule still stays the same- the player further from the eye switches sides (two people on each side adjusts). (For completeness, the chance nobody swaps is 8/35, while the chance one person on each side swaps is 24/35.) | 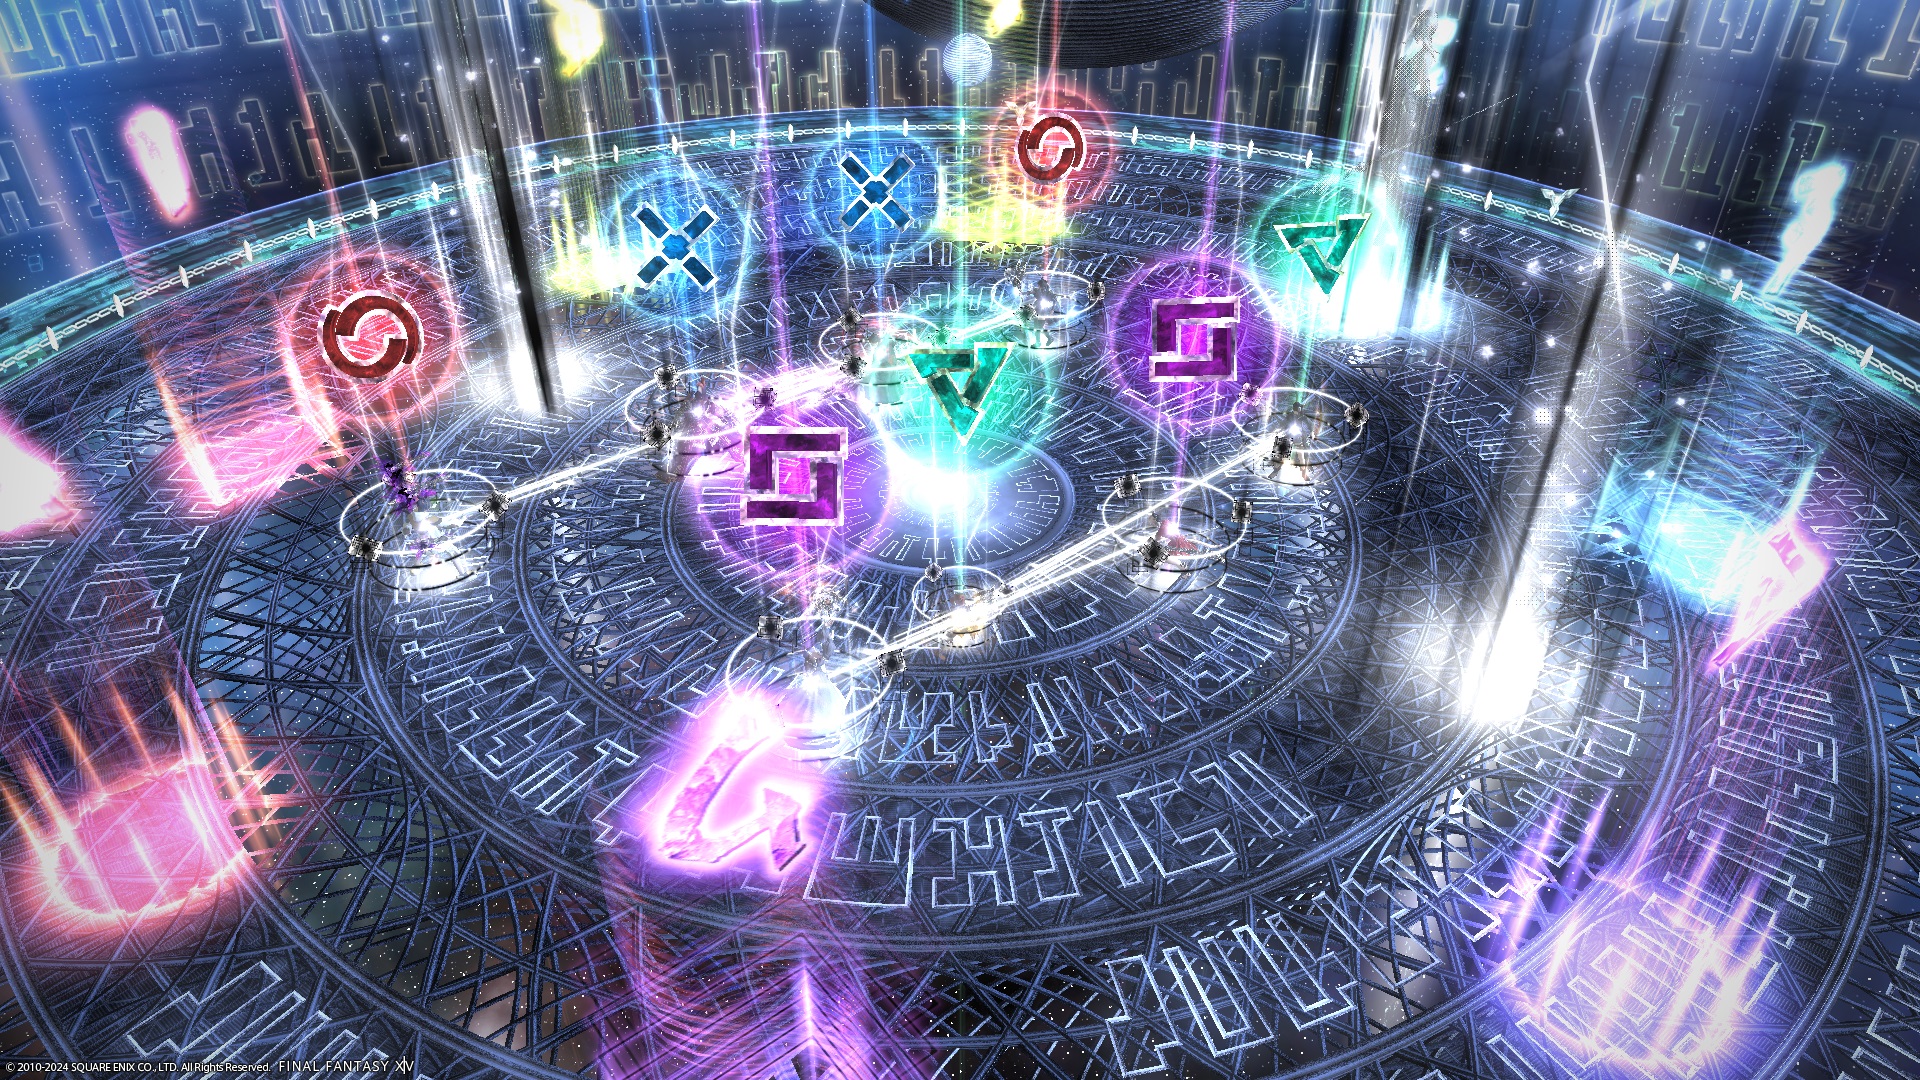 |
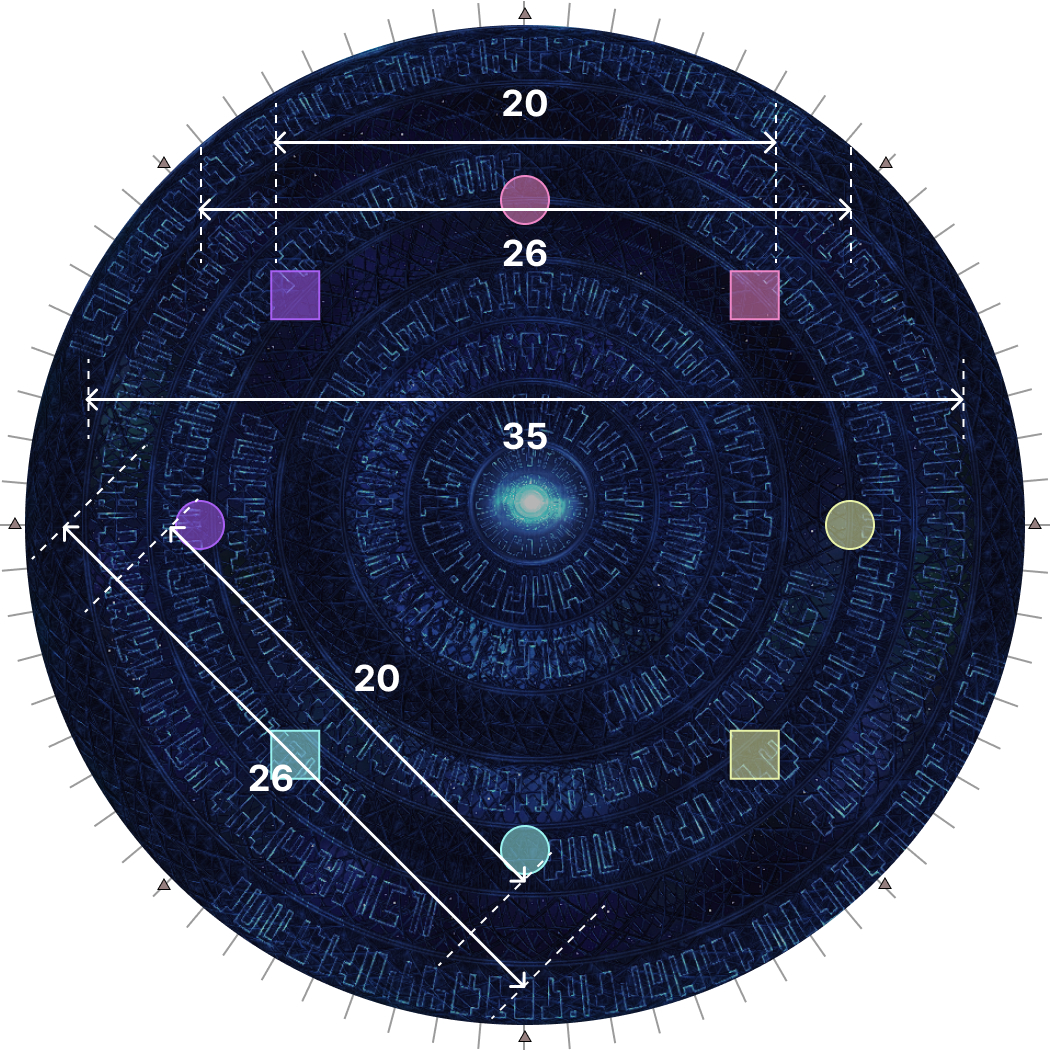
[Limitless Synergy] How far should the tethers be stretched to maximise the width of the safe corridor?
| Short answer: the tanks should aim to stretch the tethers five tick marks from the clones. Long answer: We want to point the conal cleaves as far outwards as we can without going outside the arena. In other words, we want the tether to be tangent to the arena's circumference, creating a right-angled triangle with the center of the arena, and where the clones spawn. From there:
Trigonometry then gets us cos(θ) = 20/22, so θ = 24.62 degrees. Each tick mark on the outside of the arena corresponds to 5 degrees, so we want the tanks to pull the tethers 5 tick marks to maximise the safe zone for the party to dodge to (particularly helpful for "cursed" patterns). Done correctly, there should still be some space between Omega-M's targeting circle, and the cleaves. | 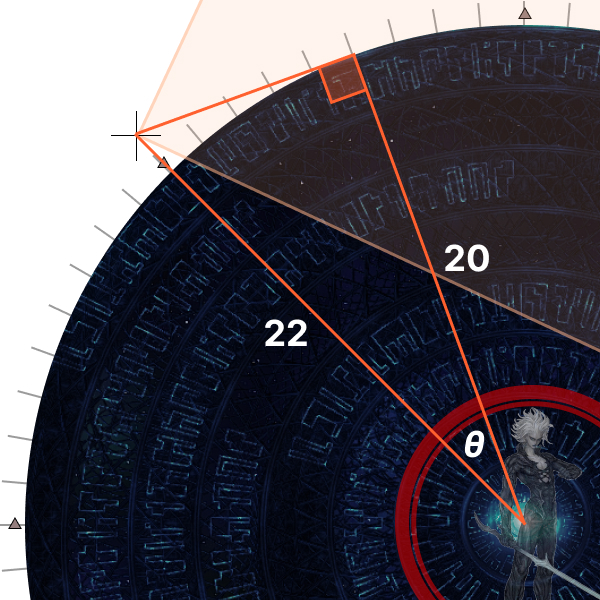 |
Troubleshooting
[Firewall] Why did someone get the wrong debuff?
| Check that all party members are both properly on the side of their target and not too far away. In particular:
|  |