The Weapon’s Refrain (Ultimate)
PF largely follows Clees’ UWU guide with a few differences:
- Ultima is pulled a little north after Ultimate Predation instead of south. Eruption baiters will start south instead of north.
- Green orbs during Ultimate Annihilation are taken 2211 instead of 3311.
The various phases can be broken down as follows:
- Garuda: Midruda
- Ifrit: Reverse-Z
- Titan: Mario Kart
- Ultimate Predation
- Ultimate Annihilation: 2211 orbs
- Ultimate Suppression: Fan Suppression
- Primal Roulette
BiS Notes
- Any gear at or above i500 will have their substats capped.
- Relic weapons will have their substats capped at 136.
- The lowest potions you can use and still get maximum benefits are HQ Grade 4 Tinctures.
Things to note
- Using automarkers to mark players in Titan Gaols is considered the norm (use at your own risk).
- There are edge cases to consider if you have a PLD or GNB and skipping Ifrit dashes are a possibility.
- If you skip Ifrit dashes, there is about 6:30 between Ifrit’s first set of Incinerates and the Homing Lasers after Ultimate Predation (PLD cannot invuln both).
- If you don’t skip Ifrit’s dashes, there is about 5:40 between Ifrit’s second set of Incinerates and the Homing Lasers after Ultimate Predation (GNB and PLD cannot invuln both).
- You can fix the tank invuln sequence in Ultima by choosing to tank swap Ifrit’s second set of Incinerates instead of using the MT invuln there (although this isn’t usually practiced).
English
―《Garuda》――――――――――――――――――
【Friction】D1 > D2 cleanse 2x Friction stacks
【Wicked Wheel + Mistral Song】
Garuda: mid, Party: SE
MT:N > W > S
ST:E > S > W
【Mesohigh Tethers】West: ST, East: D4
【Limit Break】Healer
―《Ifrit》――――――――――――――――――――
【Opener】ST tanks (Invuln first 3x Incinerates)
【Infernal Nails:Reverse-Z】
(Nails-relative orientation)
▲ D3:Hit and with Eruption
D4:Hit and with Eruption
D3 D4 ※ Destroy Nails in order after
【Searing Wind + Violent Eruptions】
(party) ※ Keep same orientation
▲ from earlier Nails
H D3D4 ※ D3D4 bait Eruptions CCW
【Crimson Charge】Start at/opposite , go CCW
【Limit Break】Caster
―《Titan》―――――――――――――――――――
【Granite Gaols】D1>D2>ST>D3>D4>H1>H2
【Weight of the Land + Awoken Landslides】
(Mario Kart) Melee:N → CCW
Ranged:N → CW
【Limit Break】Melee
―《Ultima》――――――――――――――――――
■ Active Phase I (before Predation)
【Homing Lasers】ST full buff
■ Active Phase II (after Predation)
Party:North
Eruptions:D3+D4 bait from south
【Feather Rains】MT → CW, Party → CCW
【Homing Lasers】MT Invuln (temp swap)
■ Ultimate Annihilation
【Green Orbs】(2211)
MTST → MTST → MT → MT
【Mesohigh Tethers】
D3 → Searing Wind Healer
■ Active Phase III (after Annihilation)
【Homing Lasers】
MT
Party ● ST ※ ST invuln
■ Ultimate Suppression (Fan)
【Spread】West:D1 H1 D3 D2 H2 D4:North
【Mesohigh Tether】MT
■ Aetheric Boom (Tank LB1)
MT+ST:SW → NW orbs
Party:SE → NE orbs
■ Primal Roulette
Order:Garuda → Ifrit → Titan
Ifrit → Garuda → Titan
Titan → Ifrit → Garuda
Movement:N → NW (→ N)
Mitigation:1st:MT + H2
2nd:D3 + stronger shields
3rd:ST + H2
日本語
―《ガルーダ》――――――――――――――――――
【低気圧】D1, D2 デバフ2xを解除する。
【ウィケッドホイール + ミストラルソング】
ガルーダ:中央, 他: 南東
MT:12時を含む半時計周り
ST:1時から時計周り
【メソハイ】西: ST,東 : D4
【LB】ヒーラー
―《イフリート》――――――――――――――――――――
インシネレート3連→ST無敵
【楔逆-Z字】
(方角は楔を基準とする)
▲ D3:左下のエラプション誘導+破壊担当
D4:右下のエラプション誘導+破壊担当
D3 D4 ※ 数字の順に楔を破壊する
【エラプション誘導時の散会場所】
(パーティー)
▲
H D3D4 ※D3D4 半時計周りにエラプション誘導
【LB】キャスター
―《タイタン》―――――――――――――――――――
【三連ジェイル優先順位】D1>D2>ST>D3>D4>H1>H2
オートマーカーがある場合には数字が小さい順にタイタンの近くにジェイルを置く
【二連ランドスライド + 落石】
近接ジョブ:北から半時計
遠隔ジョブ:北から時計
【LB】メレー
―《アルテマ》――――――――――――――――――
■ アクティブフェーズ 1 (追撃の究極幻想前)
【ホーミングレーザー】ST フルバフ
■ アクティブフェーズ II (追撃の究極幻想後)
パーティー:北
D3+D4 南でエラプション誘導
【フェザーレイン】MT → 時計周りに回避,その他 → 半時計周りに回避
【誘導レーザー】MT 無敵 (MTがデバフをとったらSTが挑発)
■ 爆撃の究極幻想
【玉取り】(2211) MTST > MTST > MT > MT
【メソハイ】D3 > Healer
■ アクティブフェーズ III (爆撃の究極幻想後)
【誘導レーザー】ST 無敵
MT
その他 ▲ ST
■ 乱撃の究極幻想 (fan式)
【散会位置】西:D1 H1 D3 D2 H2 D4:北
【メソハイ】MT
■ Aetheric Boom (タンクLB1)
玉取り
MT+ST:南西→北西
その他:南東→北東
■ 3蛮神フェーズの軽減
1回目:MT + H2
2回目:D3
3回目:ST + H2
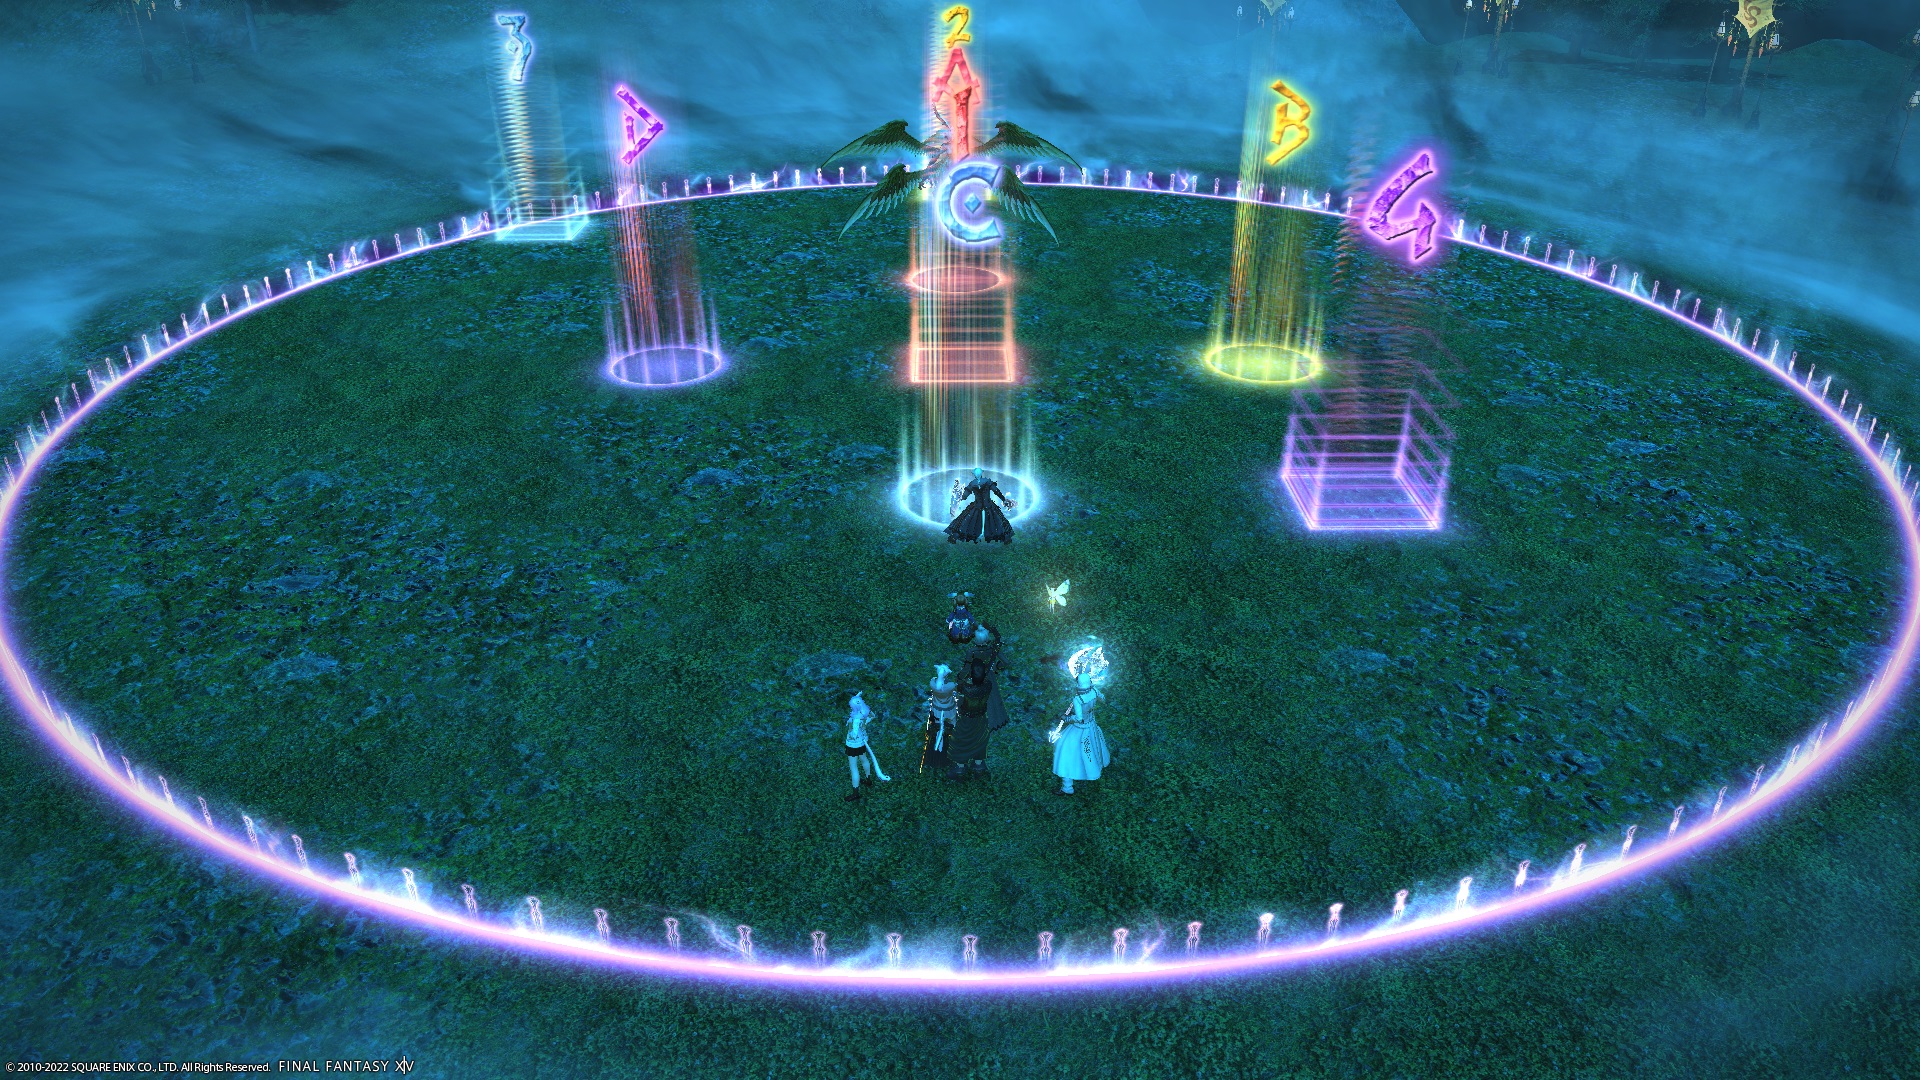
Markers
ABCD: Orientation.
Garuda:
4: Party stack during the two Mistrel Songs (“midruda”)
Ifrit:
ABCDdemarcates the cardinal positions (dodging the first Crimson Charge)
Titan:
ABCDand1: Titan Gaols.
Ultima:
3: Dodging Crimson Charges during Annihilation and the Primal Roulette.4: Granite Gaol during Suppression.B: Fireball stack during Suppression.
XIVLauncher WaymarkPresetPlugin positions
{
  "Name":"UWU",
  "MapID":539,
  "A":{"X":100.0,"Y":0.0,"Z":93.3,"ID":0,"Active":true},
  "B":{"X":106.7,"Y":0.0,"Z":100.0,"ID":1,"Active":true},
  "C":{"X":100.0,"Y":0.0,"Z":106.7,"ID":2,"Active":true},
  "D":{"X":93.3,"Y":0.0,"Z":100.0,"ID":3,"Active":true},
  "One":{"X":100.0,"Y":0.0,"Z":100.0,"ID":4,"Active":true},
  "Two":{"X":107.3,"Y":0.0,"Z":107.3,"ID":5,"Active":true},
  "Three":{"X":100.0,"Y":0.0,"Z":81.0,"ID":6,"Active":true},
  "Four":{"X":87.0,"Y":0.0,"Z":87.0,"ID":7,"Active":true}
}