Asphodelos: The Fourth Circle (Savage) - Part 1
PF uses Inumaru’s strat as a base, and:
- Swap in YPP’s strat for passing/resolving tethers and debuffs.
- Orb strats differ depending on the party.
- Japanese parties will use Inumaru’s strat, with cardinal Braindead orbs.
- English parties will use Inumaru’s strat, typically with Gumi’s orbs.
Things to check on Party Finder
- Check green orb spread positions (There are multiple orb strats)
English
I personally recommend “Braindead” orbs, although English parties often prefer Gumi orbs (below, in the hideaway) for legacy reasons.
―《Basic Spread》―――――――――――――――
 D3 MT D4  ※ Rotate clockwise as needed
 H1 ▲ H2    for towers/tethers
 D1 ST D2
―《Director's Belone:YPP strat》―――――――
 T/H: North DPS: South
 ※Taking Debuffs:T > H > D1 > D2 > D3 > D4
―《Pinax (Fire):Stacks》―――――――――――
 MTH1D1D3 ● STH2D2D4
―《Pinax (Fire):After Shifting Strike》――――
 Towards mid:MTH1D1D3 Edge:STH2D2D4
―《Pinax (Poison):Spread》―――――――――
   MT ● ST
    D1 D2
 D3 H1  H2 D4
―《Pinax (Poison):After Shifting Strike》―――
   MT  ※MT brings boss center
 D1▲D2 ※Ranged spread appropriately
   ST    towards the edge
―《Green orbs:Braindead (cardinals)》――――
 ST MT H2  ※MTH2→D3 STH1→D4
  H1  ▲ D4  ※D1D3→MT D2D4→H1
 D1 D3 D2
 ※Take orbs as above, then rotate clockwise
Gumi orbs
―《Basic Spread》―――――――――――――――
 D3 MT D4  ※ Rotate clockwise as needed
 H1 ▲ H2    for towers/tethers
 D1 ST D2
―《Director's Belone:YPP strat》―――――――
 T/H: North DPS: South
 ※Taking Debuffs:T > H > D1 > D2 > D3 > D4
―《Pinax (Fire):Stacks》―――――――――――
 MTH1D1D3 ● STH2D2D4
―《Pinax (Fire):After Shifting Strike》――――
 Towards mid:MTH1D1D3 Edge:STH2D2D4
―《Pinax (Poison):Spread》―――――――――
   MT ● ST
    D1 D2
 D3 H1  H2 D4
―《Pinax (Poison):After Shifting Strike》―――
   MT  ※MT brings boss center
 D1▲D2 ※Ranged spread appropriately
   ST    towards the edge
―《Green orbs:Gumi》――――――――――――
 D4 MT H1  ※MTH1→D1 STH2→D2
  D2  ▲ ST  ※D1D3→MT D2D4→ST
 D3 D1 H2
 ※Take orbs as above, then rotate clockwise
Japanese
This is the game8 macro often used by Japanese parties.
―《基本散開》―――――――――――――――――
 D3 MT D4  ※塔は時計回りの場所に入る
 H1 ▲ H2
 D1 ST D2
―《毒線:YPP式》――――――――――――――――
 TH:北 DPS:南
 ※受け渡し優先度:T > H > D1 > D2 > D3 > D4
―《ピナクス炎:頭割り》―――――――――――――
 MTH1D1D3 ● STH2D2D4
―《ピナクス炎:シフト後頭割り》―――――――――――――
 ボス正面:MTH1D1D3 ボス背面:STH2D2D4
―《ピナクス毒:散開》―――――――――――――
   MT ● ST
    D1 D2
 D3 H1  H2 D4
―《ピナクス毒:シフト後散開》――――――――――
   MT  ※MTは中央へ誘導
 D1▲D2 ※遠隔は適宜外周寄り散開
   ST
―《緑玉:脳死十字》―――――――――――――――
 ST MT H2  ※MTH2→D3 STH1→D4
  H1  ▲  D4  ※D1D3→MT D2D4→H1
 D1 D3 D2
 ※上記の玉を取った後、時計回りに玉を取る
Markers
All markers are for orientation. 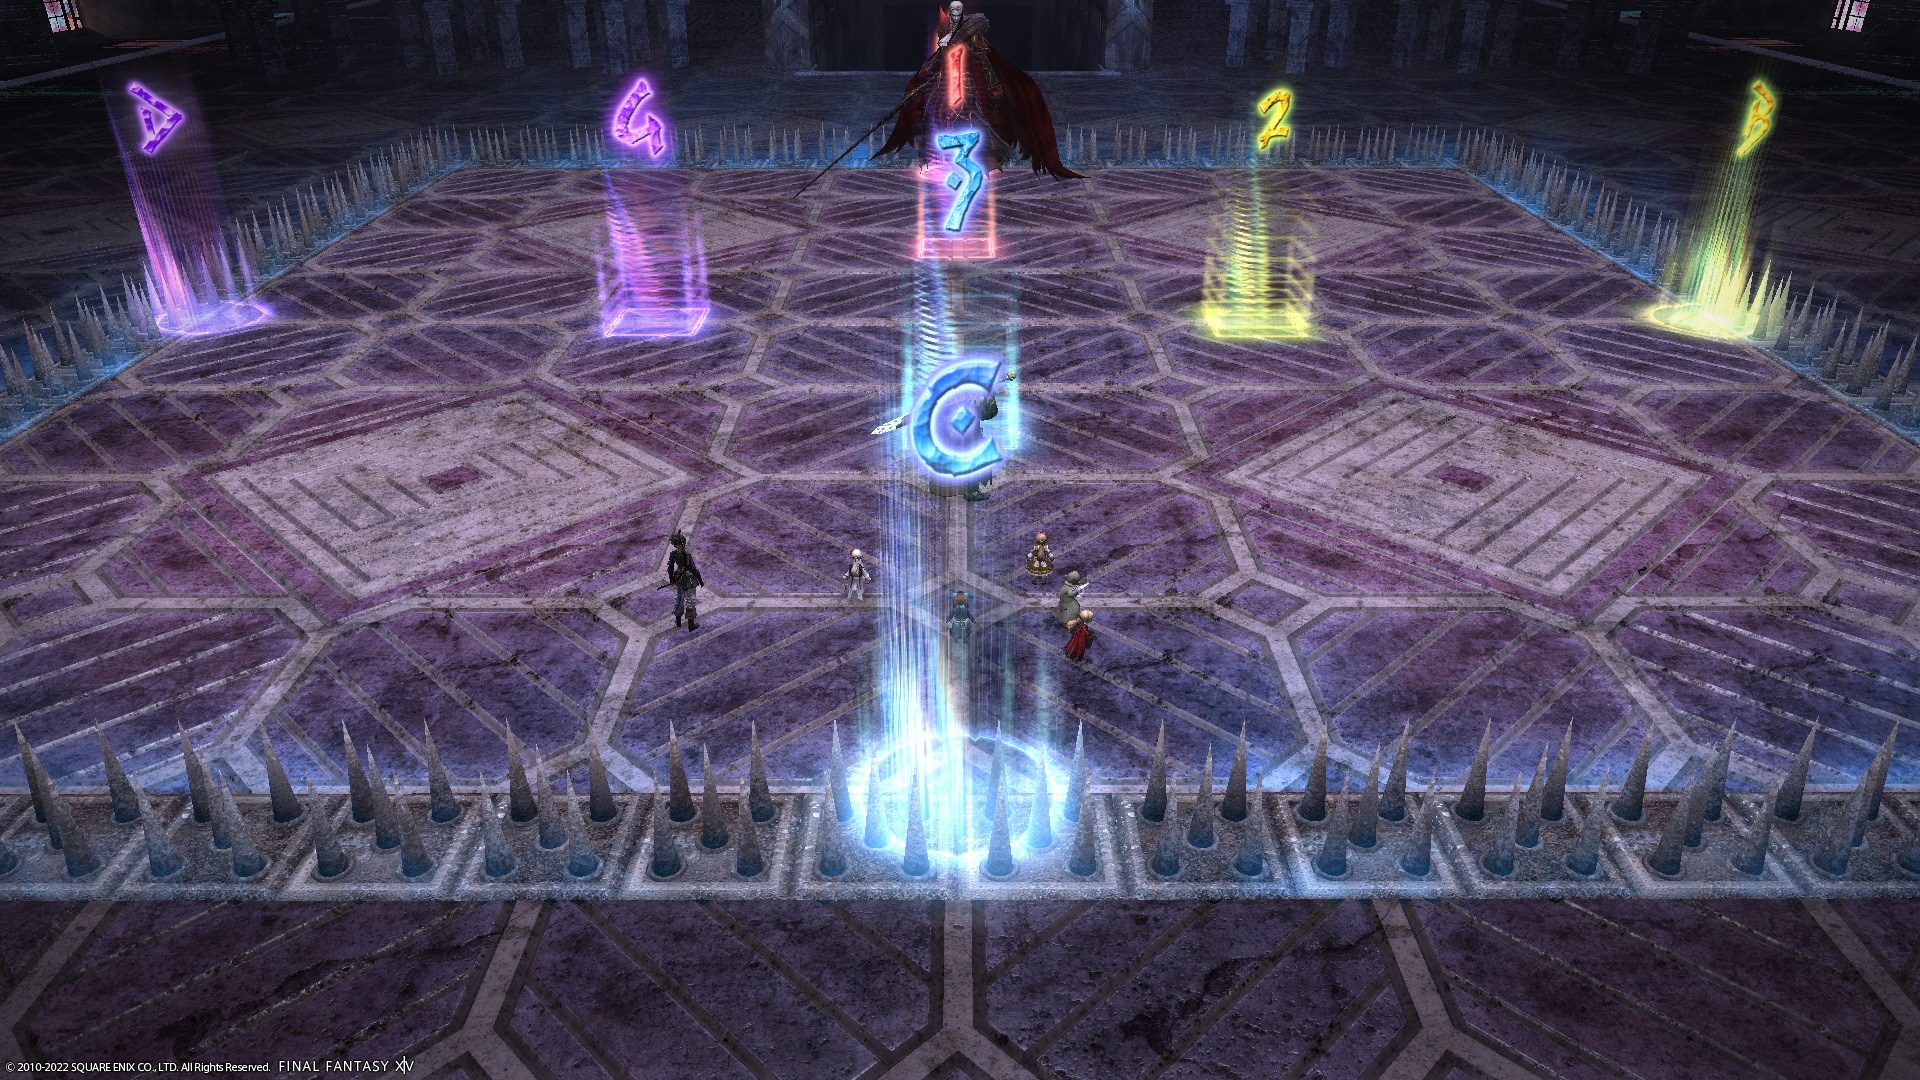
XIVLauncher WaymarkPresetPlugin positions
{
  "Name":"P4S P1",
  "MapID":801,
  "A":{"X":100.0,"Y":0.0,"Z":81.5,"ID":0,"Active":true},
  "B":{"X":118.5,"Y":0.0,"Z":100.0,"ID":1,"Active":true},
  "C":{"X":100.0,"Y":0.0,"Z":118.5,"ID":2,"Active":true},
  "D":{"X":81.5,"Y":0.0,"Z":100.0,"ID":3,"Active":true},
  "One":{"X":95.0,"Y":0.0,"Z":95.0,"ID":4,"Active":true},
  "Two":{"X":105.0,"Y":0.0,"Z":95.0,"ID":5,"Active":true},
  "Three":{"X":105.0,"Y":0.0,"Z":105.0,"ID":6,"Active":true},
  "Four":{"X":95.0,"Y":0.0,"Z":105.0,"ID":7,"Active":true}
}
YPP
“YPP” refers to how PF resolves passing tethers/debuffs for Director’s Belone + Inversive Chlamys.
- Tanks/Healers take the north side.
- DPS take the south side.
- First, pass debuffs.
- If you are passing debuffs stack on your side.
- If you are taking debuffs, spread on your side.
- Take debuffs in the order
Tank > Healer > D1 > D2 > D3 > D4.
- Then, pass tethers.
- If you are passing tethers, stack on your side.
Please also refer to the following guides:
Timeline
 (Credit: u/Syldris)