Eyes
There are many Eyes strats out there. The following illustrates the strat used in the macro.
T/H red, DPS blue
This phase references the Fang and Claw phase from Nidhogg EX.
Players get tethered with either blue or red tethers where:
- When a player with a blue tether takes damage, the blue eye gets healed.
- When a player with a red tether takes damage, the red eye also takes damage.
When two players with different coloured tethers touch one another, they will swap tethers. Doing so also applies a 3-second Bound and Determined debuff, which prevents an additional swap for the duration.
| 1. Ghosts of Haurchefant and Ysayle spawn.
All players stack on Alphinaud (who's standing south of center) to get the two buffs from Haurchefant and Ysayle that lets you attack the two eyes. This also means if a player dies and is revived, they will lose Haurchefant's and Ysayle's buffs and be unable damage the eyes. | 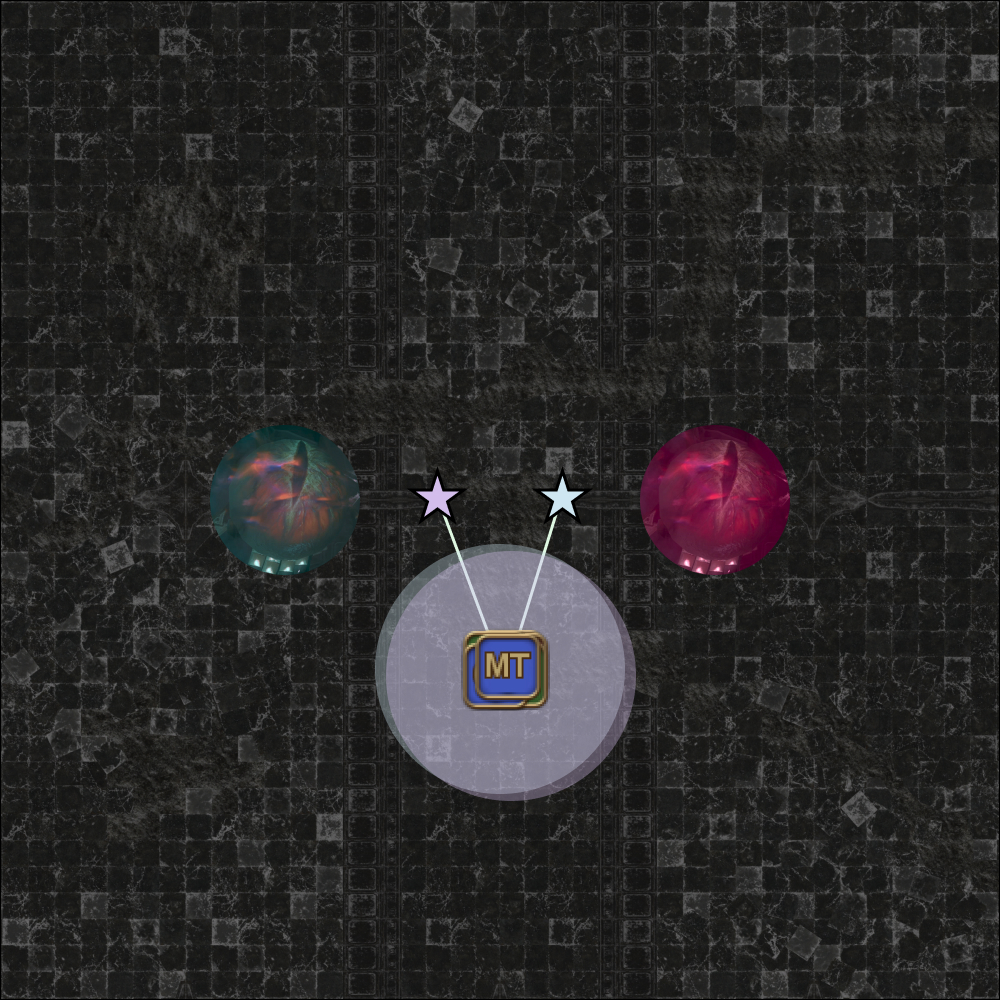 |
| 2. After getting the Soul of Friendship and Soul of Devotion buffs, spread out to your initial positions. | 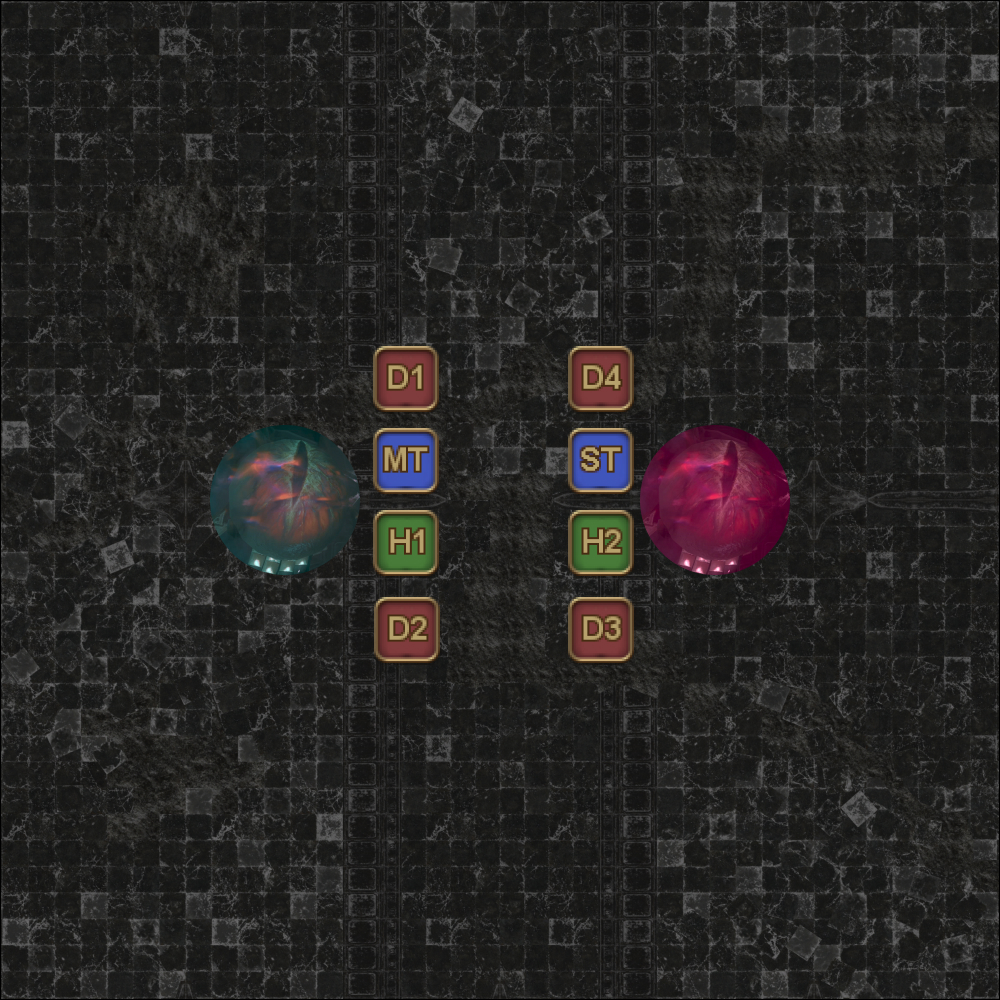 |
| 3. After the eyes cast Hatebound, blue and red tethers spawn and attach to four random players each.
If you have the wrong-coloured tether/debuff, stack on top of Estinien, who's in the middle of the arena to swap with someone else (who will also have the wrong tether). | 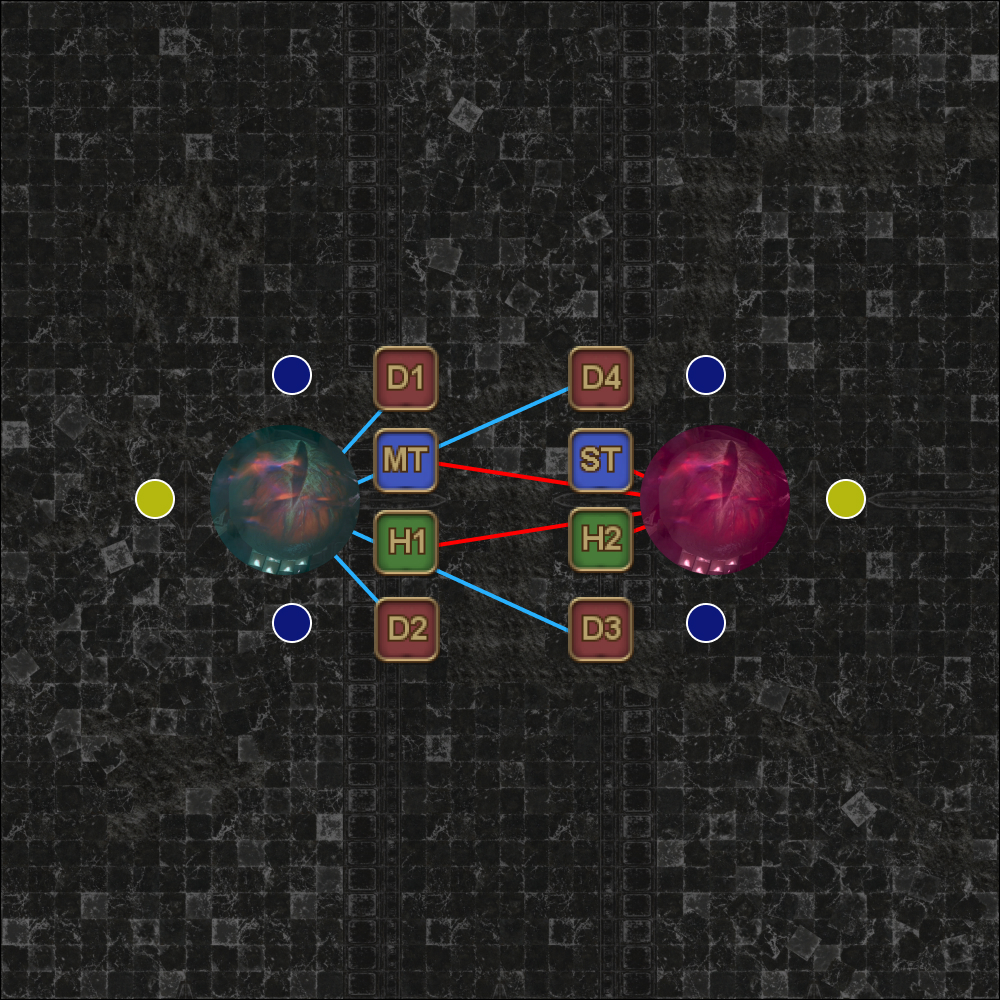 |
| 4. When the yellow orbs grow for the second time, tanks and healers pop the yellow orb together (shared damage). | 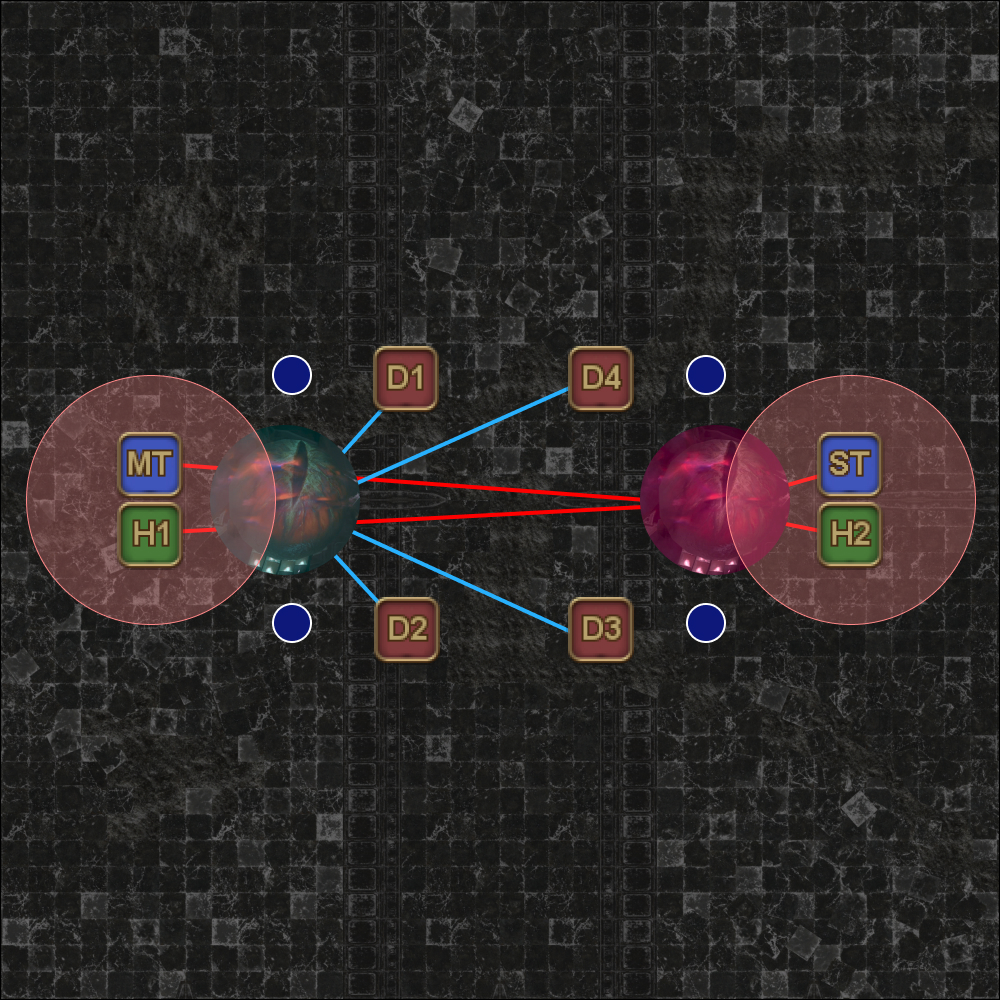 |
| 5. After the yellow orbs have been popped, DPS go to the tanks and healers to swap tethers (giving them blue and picking up red). | 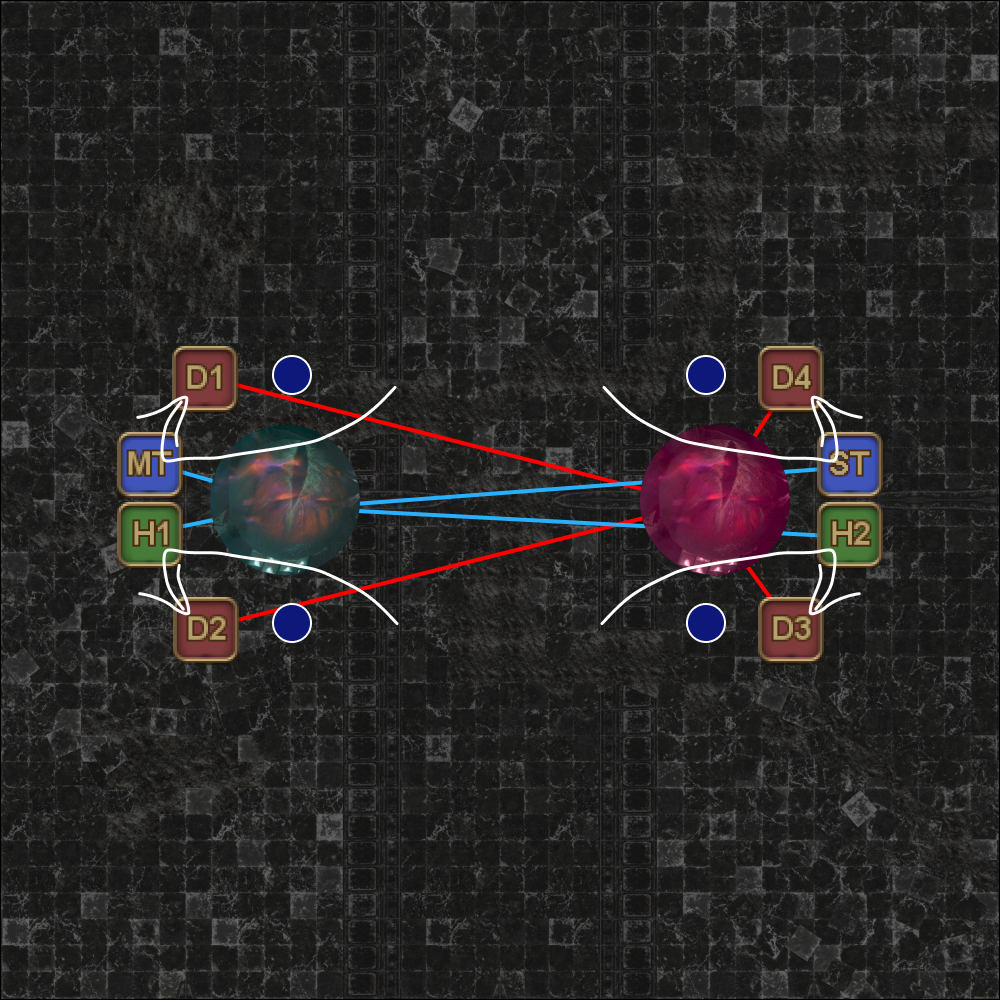 |
| 6. When the blue orbs grow for the second time, DPS pop the blue orbs (one each). | 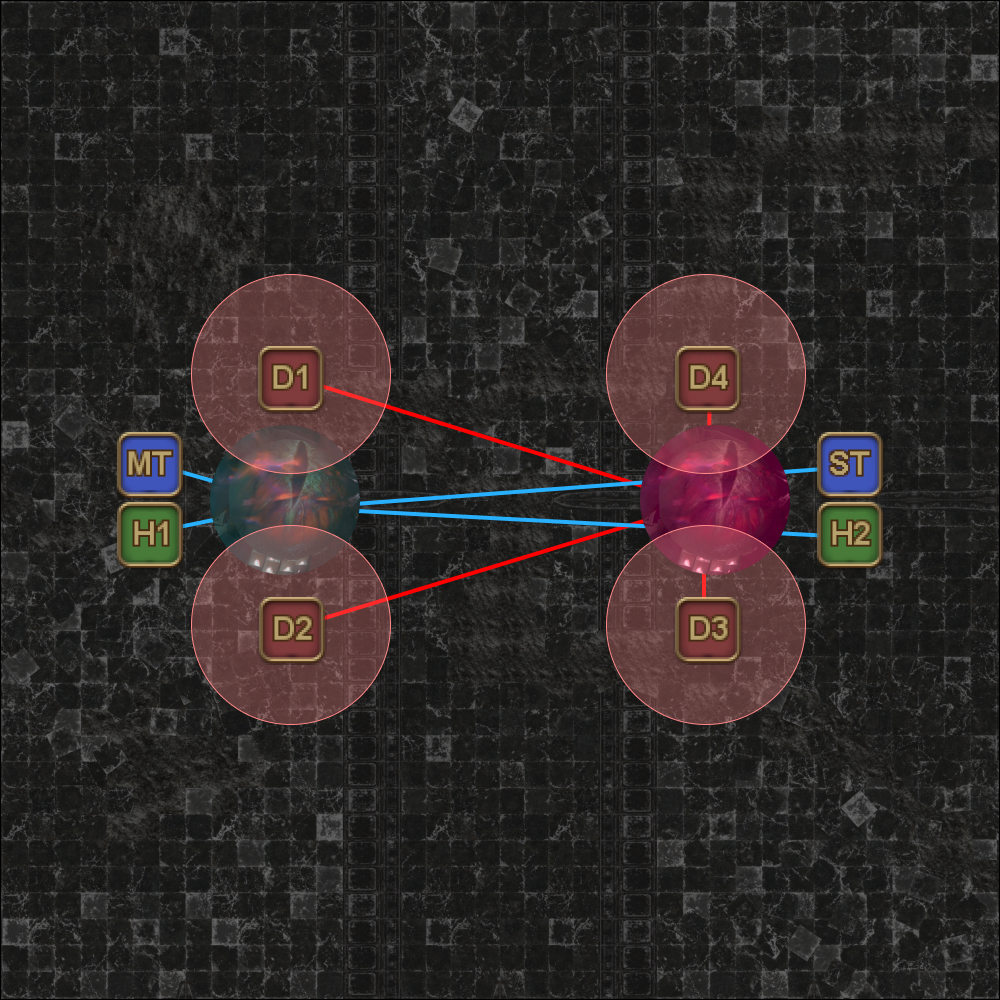 |
| 7. All players gather west to prepare for Mirage Dives. At this point, all DPS should have red tethers and be spread around the west Eye, and all tanks/healers should have blue tethers and be stacked on top of the Eye. | 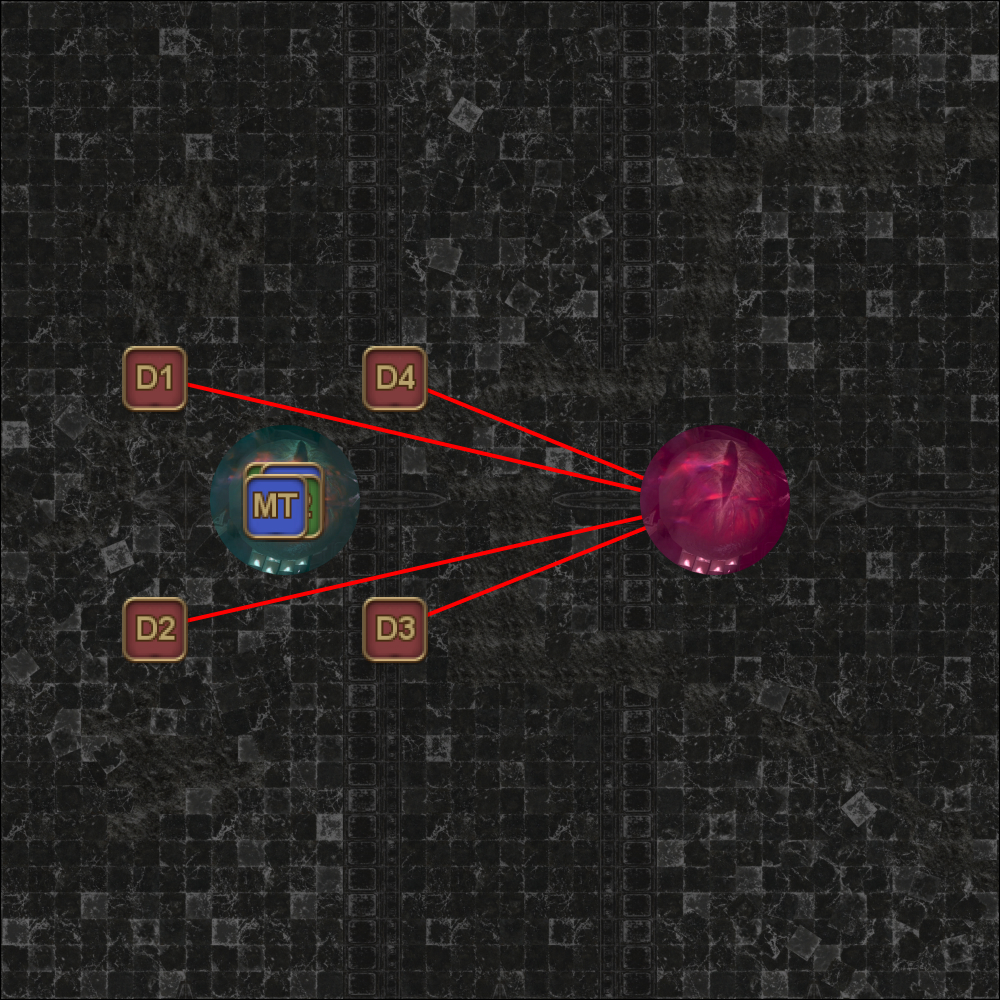 |
| 8. First pair of dives. Two Nidhogg clones will each do a Mirage Dive on two players with red tethers, applying a Piercing Resistance Down debuff on them. Healers swap with the two dive targets. ccw from N: H1 > H2 :cw from N Remember which two DPS were hit here, as those two DPS will be the ones swapping tethers after the third set of dives. |  |
| 9. Second pair of dives, again targeting players with red tethers. Tanks swap with the two dive targets. ccw from N: MT > ST :cw from N | 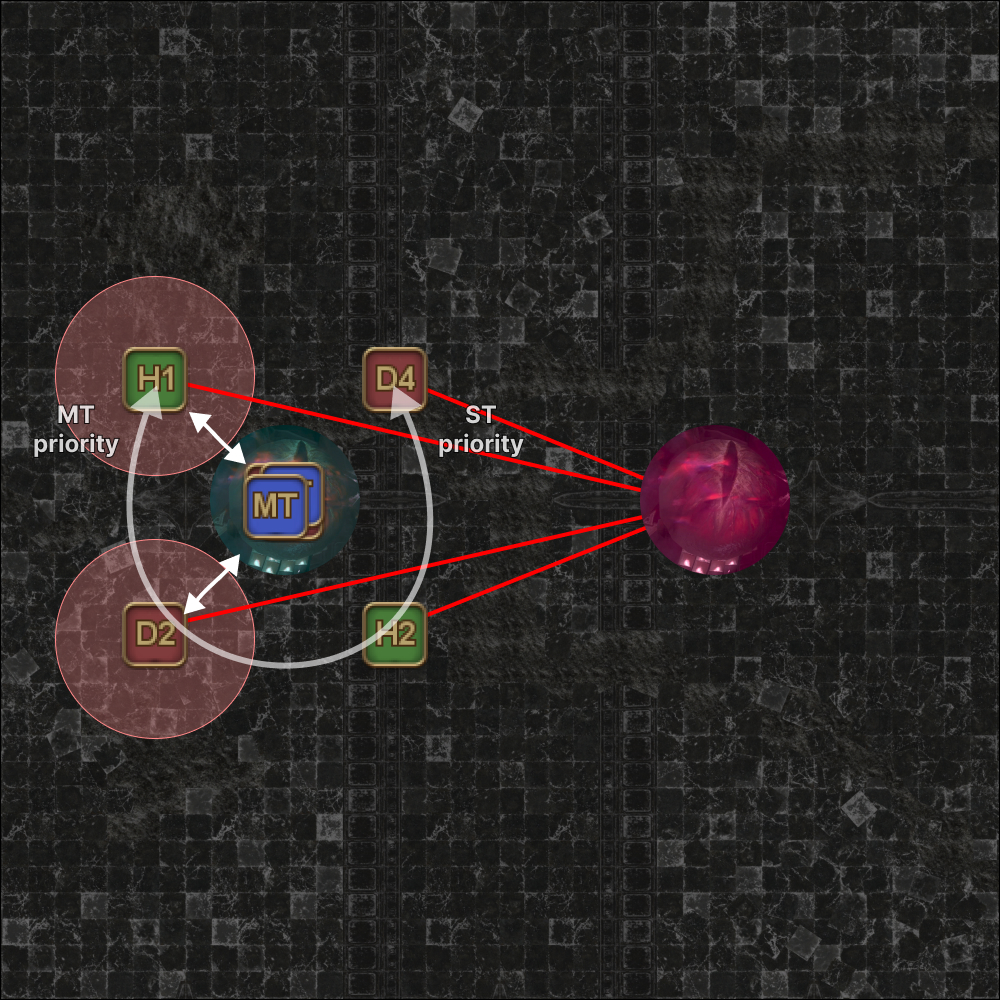 |
| 10. Third pair of dives. The two DPS that were hit earlier swap with the two dive targets. ccw from N: D1 > D2 > D3 > D4 :cw from N (In this example, D1 and D3 were hit earlier in Step 8.) | 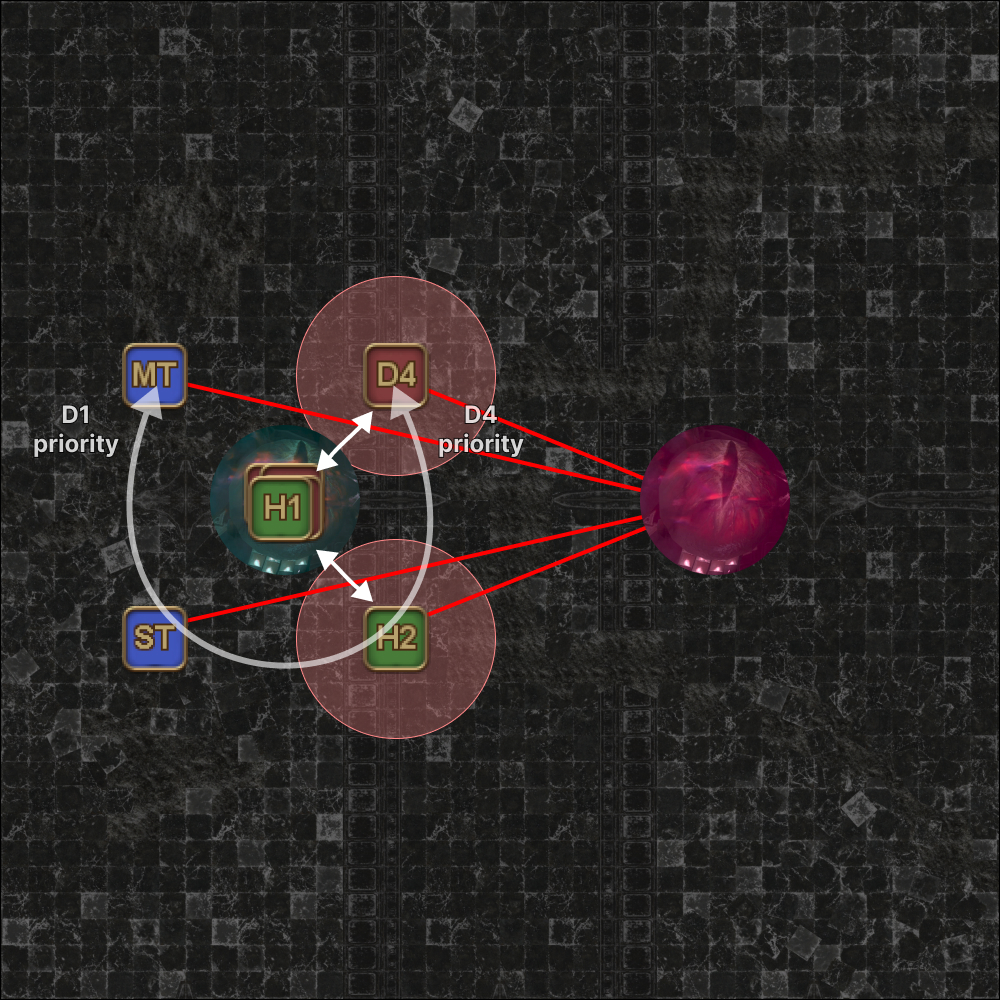 |
| 11. Fourth (final) pair of dives. Both eyes will begin to cast Steep in Rage shortly after. At least one eye must be killed before Steep in Rage resolves, or the outgoing damage will wipe the party. Note that because red-tethered players take damage from Steep in Rage, the red eye will also take damage as a result. Similarly, the blue eye will revive (as the blue-tethered players took damage). | 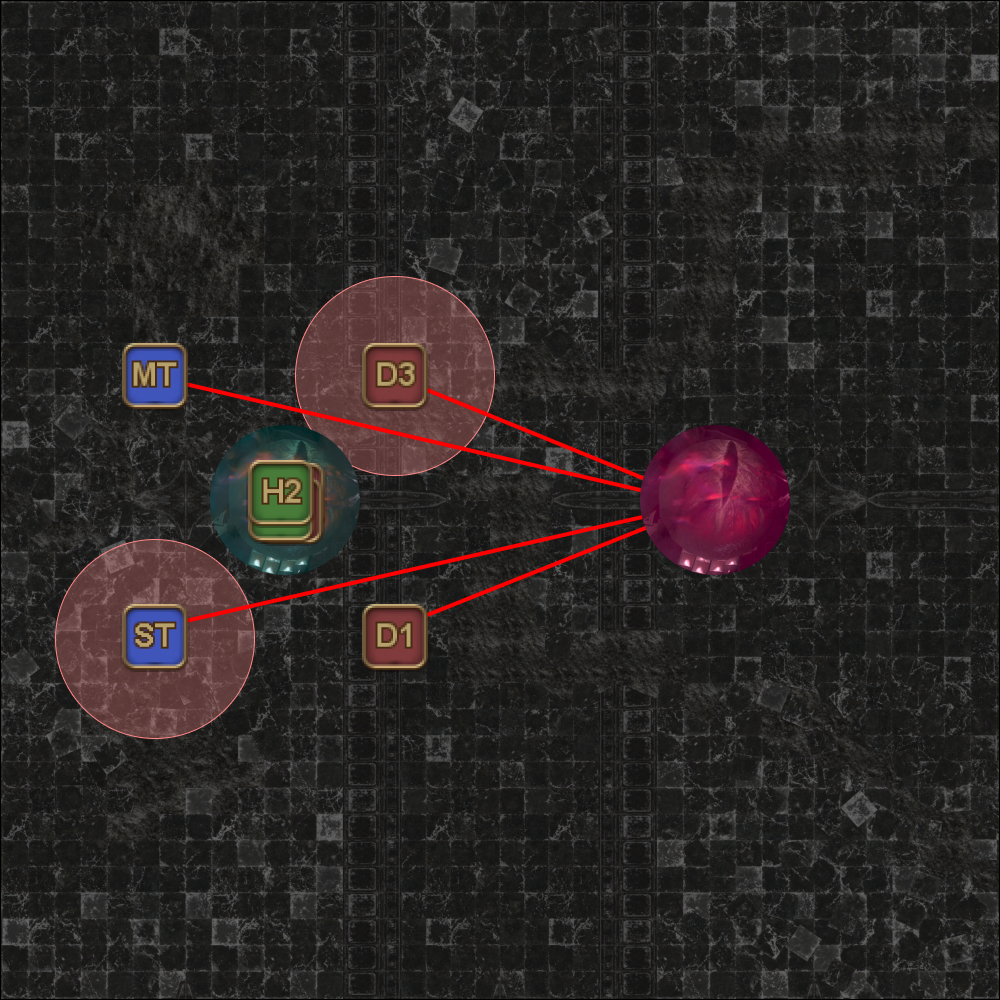 |
Saving Haurchefant
Once the eyes are defeated, time rewinds to the end of Phase 1. The key difference is that now players have access to a Tank LB3 that’s needed to save Haurchefant.
- The method for Pure of Heart is exactly the same as Phase 1.
- Tank LB3 must be used after Haurchefant appears on the arena, but before he gets hit by the Spear of the Fury.
The Tank LB3 will reduce the damage Haurchefant takes, and also allows him to be healed.
After Pure of Heart resolves, the Spear of the Fury becomes targetable, and casts Pierce. The Spear must be destroyed before Pierce resolves, or Haurchefant dies.
If Haurchefant dies in this phase, the fight loops back to Thordan in Phase 2.
Notes
- The first two Brightwind hits on the healers will be covered by the Tank LB3.
- In Phase 1, the pulsing AoE damage from the Spear ends early when Haurchefant is killed. This time around, Haurchefant stays alive so the pulsing AoE damage will continue until Pure of Heart resolves.
- Haurchefant will take heavy damage from Pure of Heart, and will need to be roughly 65% health to survive.
- Benediction works on Haurchefant.
Frequently Asked Questions
[Fangbound] Does the Right Eye recover HP from autoattacking a tank with a blue tether?
| Unlike the original Fang and Claw mechanic from Nidhogg EX, the Right (blue) Eye will not recover HP from a tank with a blue tether getting autoattacked. |
[Clawbound/Fangbound] Do mitigations affect the amount of damage taken by the Left Eye (or HP recovered by the Right Eye)?
| No, mitigations do not affect the amount of HP recovered or damage taken. It's a binary "did you get hit by this mechanic or not" decision. |
[Clawbound/Fangbound] How much HP will the Left Eye take over the course of the Mirage Dives?
| The Left Eye will take a total of 40% of its max HP during Mirage Dives, so there's no reason to damage it past that point during the orbs phase (other than padding...). |
[Haurchefant] WHMs can Benediction Haurchefant- what other abilities work?
| Read the tooltips carefully. Abilities that can be used on Haurchefant will not put any restrictions on who can be targeted. For example, WHMs can Benediction Haurchefant: "Restores all of a target's HP. While other abilities that cannot be used on Haurchefant, like a SGE's Haima say: Erects a magicked barrier around self or target party member that absorbs damage equivalent to a heal of 300 potency. |