Dragonking Thordan
There are a couple of details that we should first go over before going into the main mechanics loop.
Mitigations
This phase requires some mitigation planning. As a baseline, start with:
[Click to Expand] Mitigation Notation
| Party mitigations | |
| MT 90s, ST 90s | Shake It Off, Dark Missionary, Heart of Light, Divine Veil |
| H1 120s | Temperance, Neutral Sect |
| H2 30s | Sacred Soil, Kerachole |
| H2 90s | Deployment Tactics, Zoe |
| H2 120s | Expedient, Holos |
| D1, D2 | Feint |
| D3 | Troubadour, Tactician, Shield Samba |
| D4 | Addle |
| Akh Morn's Edge #1 | MT Reprisal, H1 120s, D1 |
| Gigaflare's Edge #1 | ST Reprisal, D2, D4 |
| Akh Morn's Edge #2 | MT Reprisal, H1 180s, D3 |
| Gigaflare's Edge #2 | ST Reprisal, D1 |
| Akh Morn's Edge #3 | MT Reprisal, H1 120s, D2, D4 |
Note that the above is just a baseline and does not make any recommendations on how to use the other available party mitigations, like MT 90s, ST 90s, H2 120s (Expedient/Holos and Consolation/Panhaima), or other pieces of mitigation like Magick Barrier or Dismantle.
Add those mitigations as appropriate to supplement the above framework.
Tip: H2's 30s mitigations should be used when Akh Morn's Edge begins its cast (after the second Trinity attack) to be back up in time for Gigaflare's Edge.
90s mitigations used when Akh Morn's Edge begins its cast will cover the Akh Morn's Edge and be back up in time for the next Akh Morn's Edge.
Basic Mechanics
Dragonking Thordan has two basic mechanics that are worth mentioning.
Fire/Ice of Ascalon
All of Dragonking Thordan’s major mechanics are combined with either Fire or Ice of Ascalon, which resolves together at the beginning of the mechanic.
| If Dragonking Thordan's swords glow red, he will use Fire of Ascalon, which is a point-blank AoE. Players must be outside his targeting circle. | 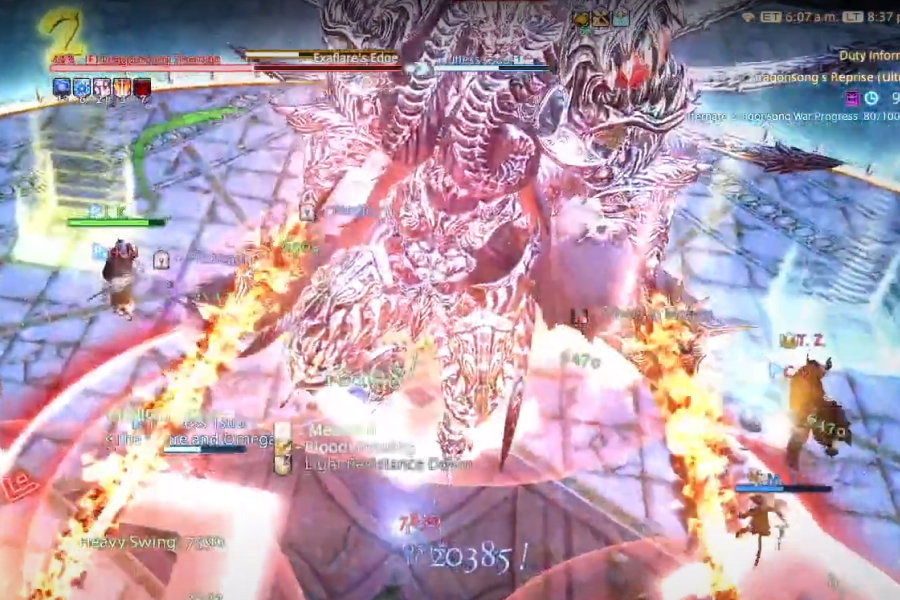 | 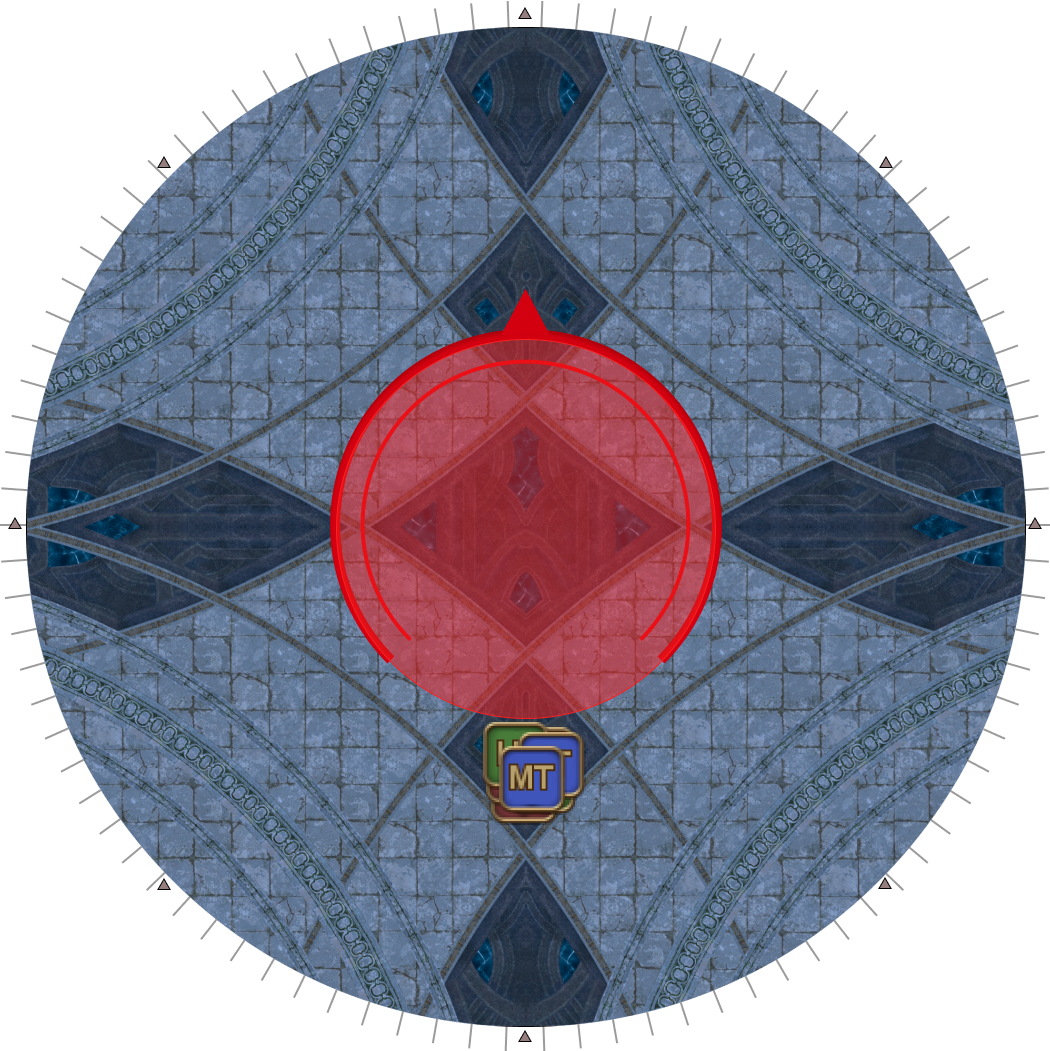 |
| If Dragonking Thordan's swords glow blue, he will use Ice of Ascalon, which is a donut AoE. Players must be inside his targeting circle. | 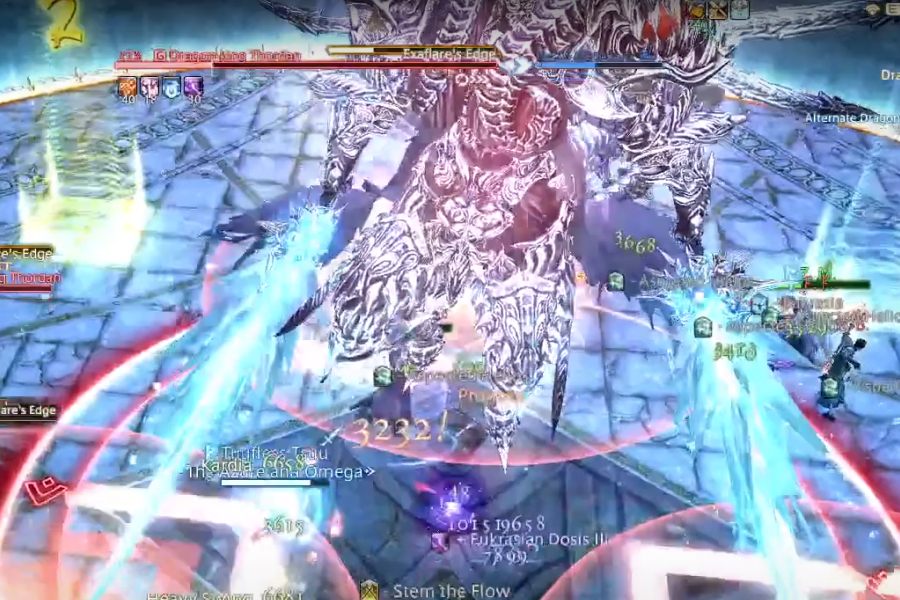 | 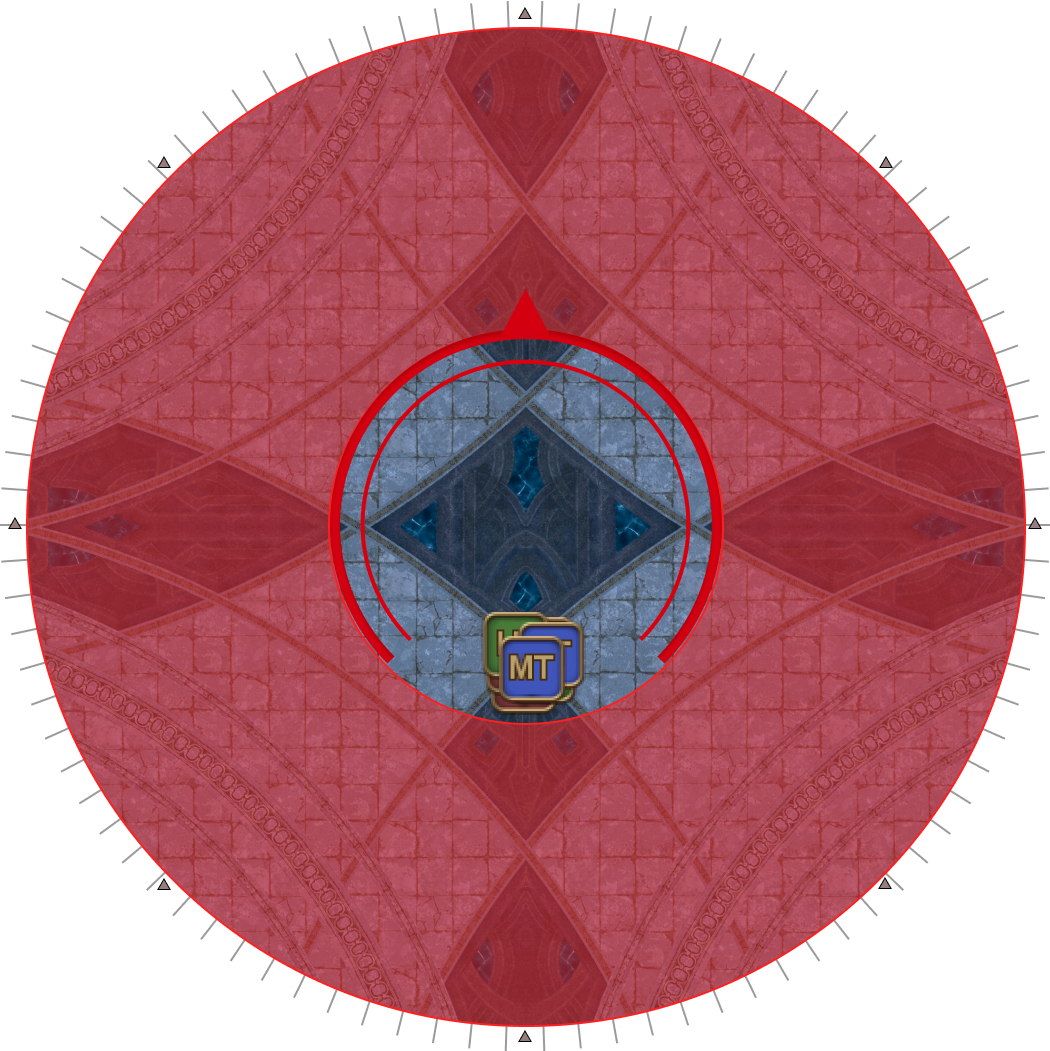 |
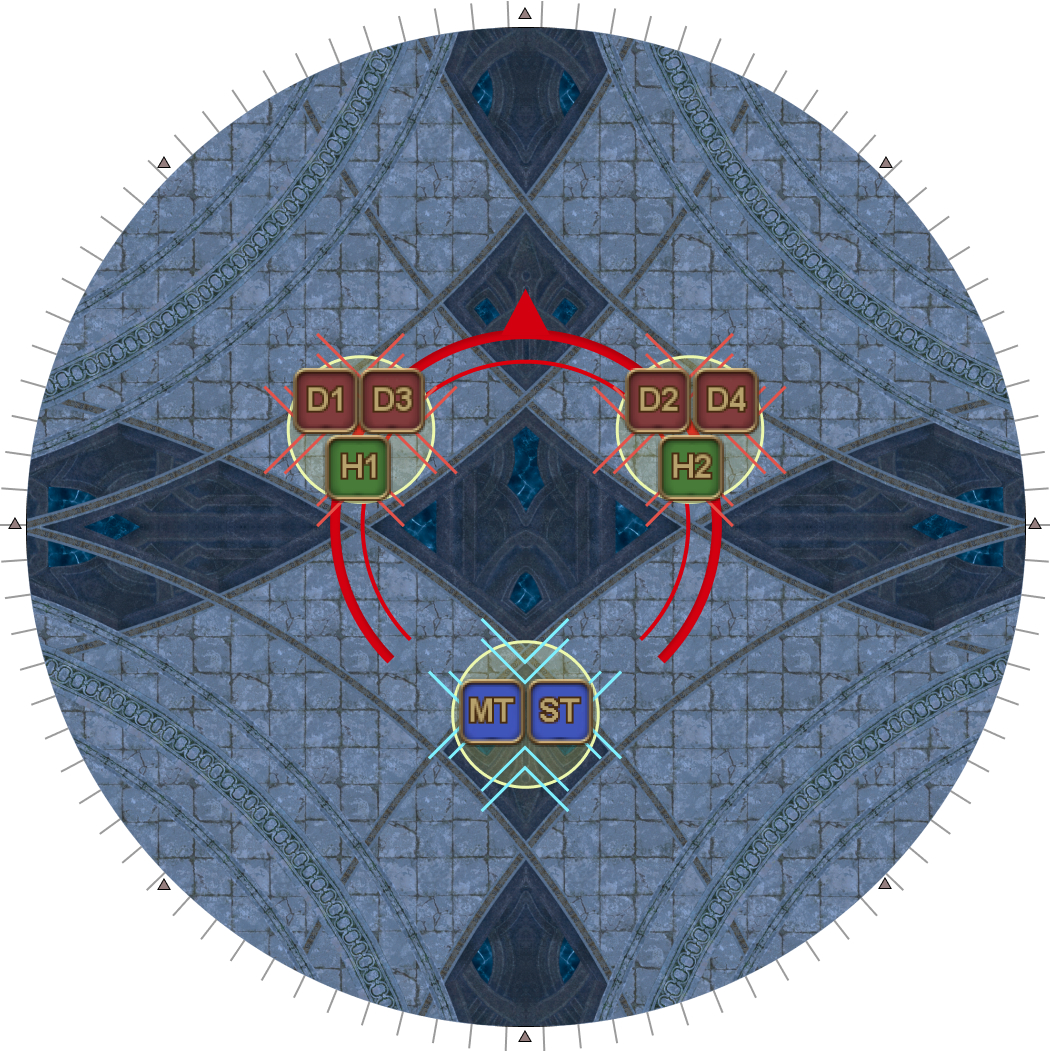
Trinity
After each mechanic has completed, Dragonking Thordan will auto-attack twice.
Each auto-attack hits three players:
|  |
Over the course of the fight, the non-tank players will rotate in to take one auto-attack each.
| After Exaflare's Edge | D1 → D2 |
| After Akh Morn's Edge | D3 → D4 |
| After Gigaflare's Edge | H1 → H2 |
Because of the stacking Light/Dark Resistance Down debuffs on the tanks, the tanks will be constantly swapping aggro throughout the fight.
Tip: It's easy for the tanks to lose track of who is supposed to be tanking the boss. To help keep track of things:
- Add text to a Provoke macro so the chat log has a record of who last Provoked.
- The tank with 0 or 1 stack of Dark Resistance Down should be holding aggro.
With all that setup, we can now go over Dragonking Thordan’s major mechanics.
Mechanics Loop
Dragonking Thordan will execute the following loop three times:
- Exaflare’s Edge
- Akh Morn’s Edge
- Gigaflare’s Edge (this will be replaced with Morn Afah’s Edge on the third loop.)
Exaflare’s Edge
Have the tank with aggro point Dragonking Thordan either North or South before the start of this mechanic.
| 1. Three Exaflare telegraphs will appear relative to Thordan's orientation. | 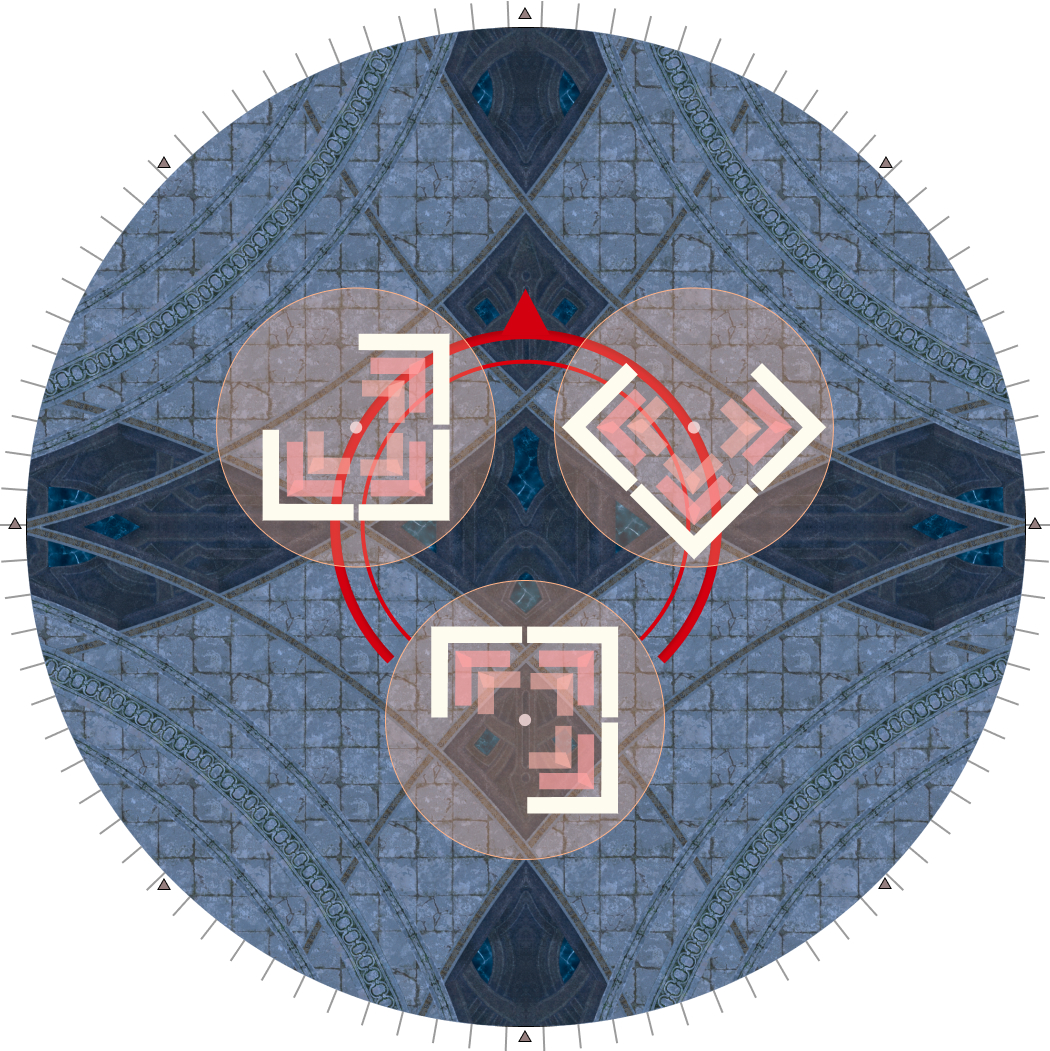 |
| 2. Focus on the bright dot at the center of the Exaflares. This will be your first dodge point. If Dragonking Thordan is facing either north or south, you can also use the floor markings to guide your movement. |  |
| 3. When the Exaflares resolve, dodge to where the bright dot was. | 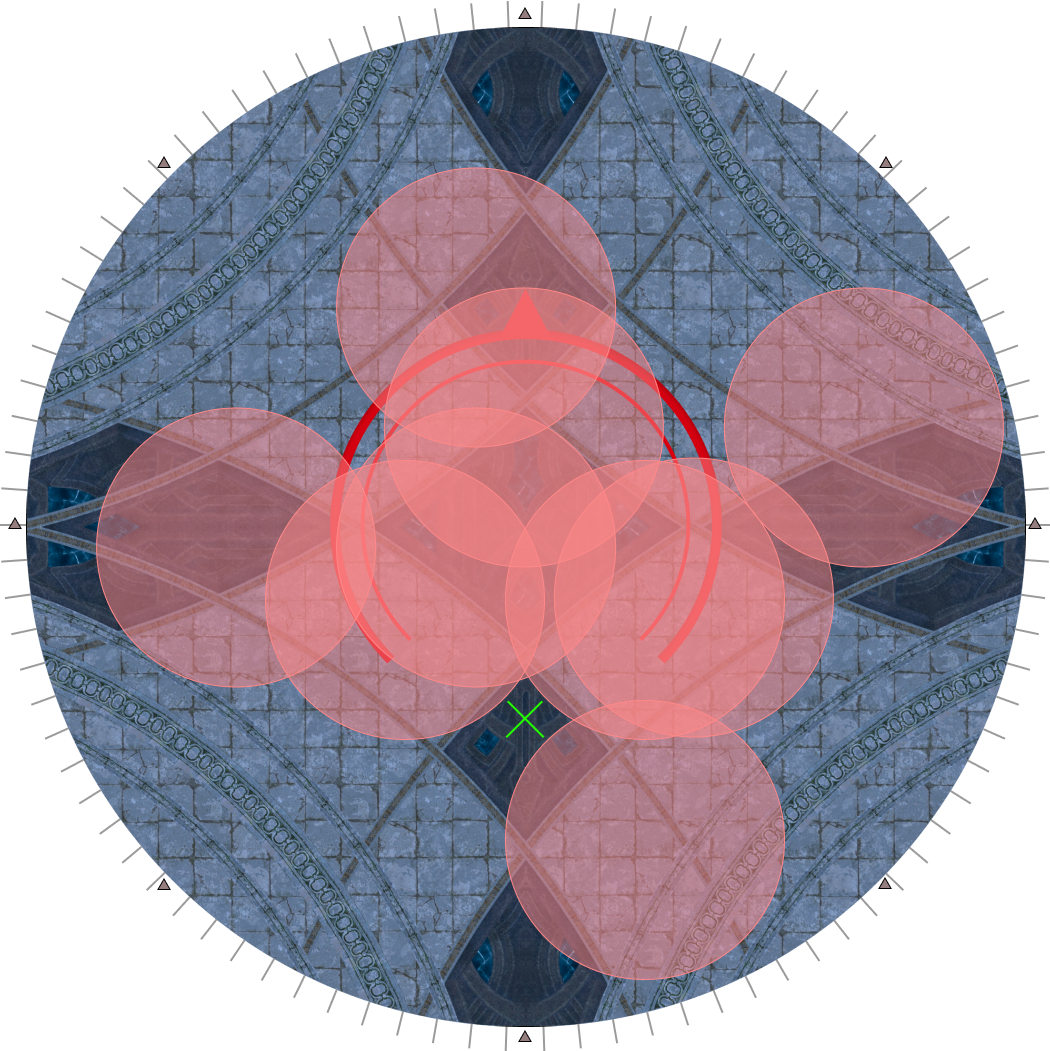 |
| 4. Continue dodging the next set of Exaflare AoEs. Dodging backwards (see the diagram) will always be safe. As you get more experienced with the mechanic, you will notice Exaflare patterns where you can maintain melee uptime (dodging to the left in this case), but this is not necessary. | 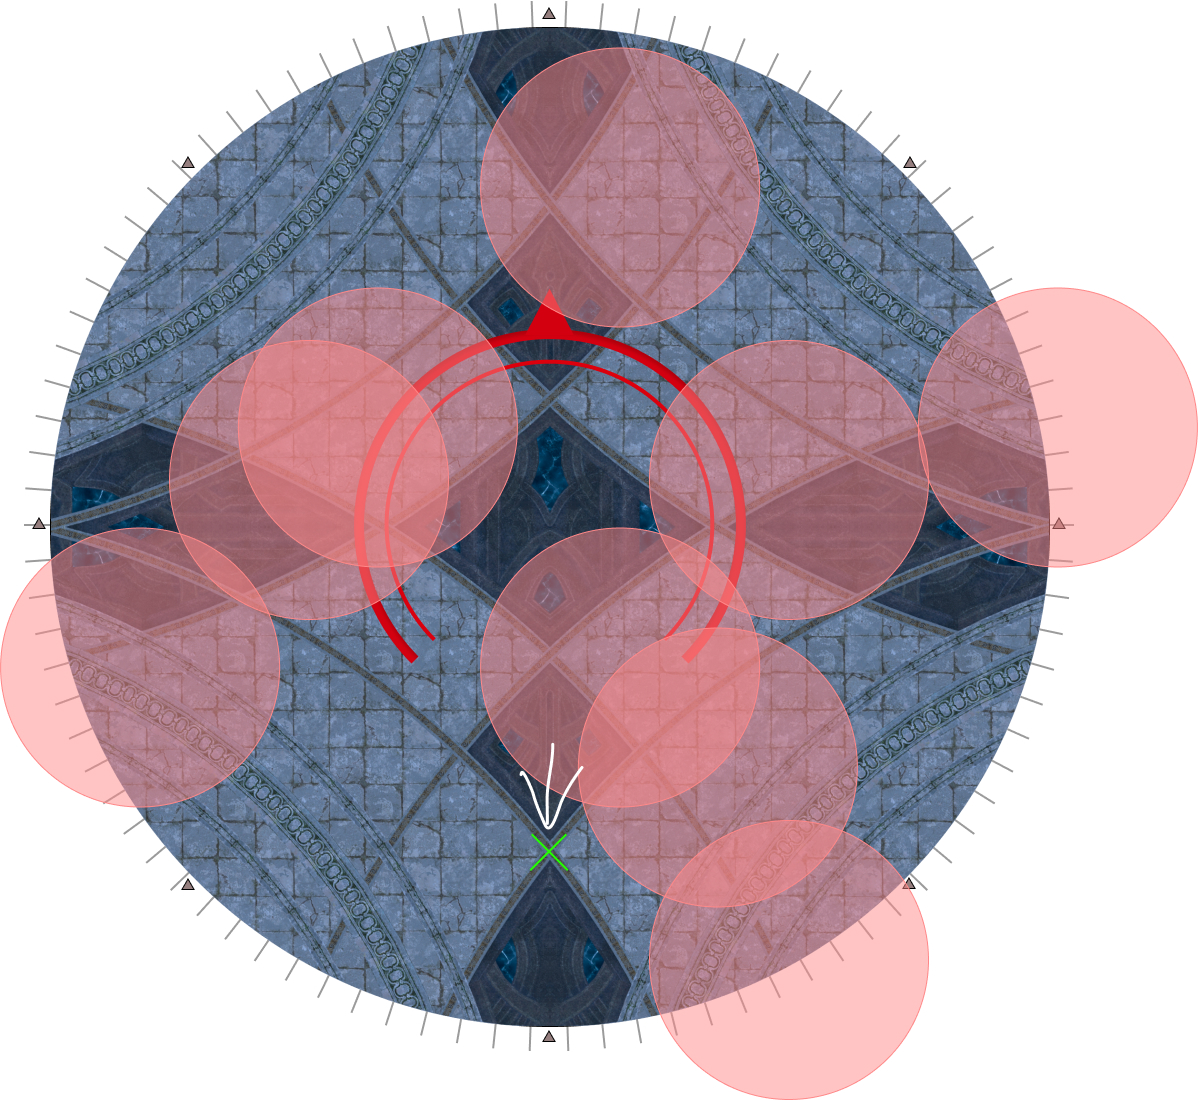 |
Thordan will then auto-attack twice, which should be taken by the two tanks, and D1, followed by D2.
The tanks should continue to face Thordan north or south, away from the party.
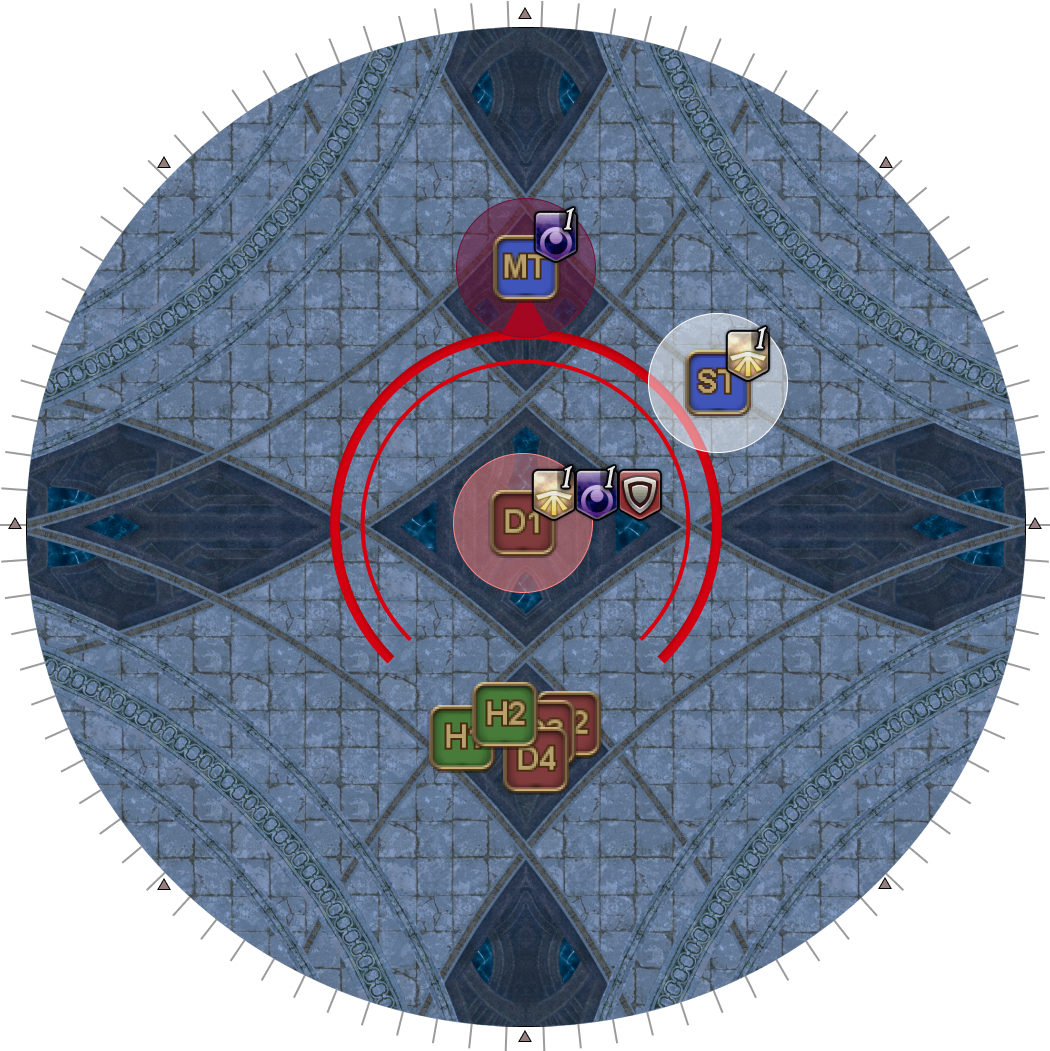
Akh Morn’s Edge
Thordan will spawn three towers relative to where he is facing:
- One red tower at his front-left
- One red tower front-right
- One blue tower at his rear
The blue tower deals increased damage, and is meant to be taken by the tanks.
All players must be inside Thordan’s hitbox in order to be within healing range of both healers- remember to step inside if Thordan’s swords were originally red.
Akh Morn’s Edge will be resolved with a 3-3-2 split.
|  |
Thordan will then auto-attack twice, which should be taken by the two tanks, and D3, followed by D4.
Where Thordan faces after Akh Morn’s Edge doesn’t matter.
Gigaflare’s Edge
| Gigaflare's Edge is a series of three raid-wide AoEs, each with an epicenter in a triangle going clockwise or anti-clockwise around Dragonking Thordan. This is not falloff damage- standing inside the marked region (illustrating a South Gigaflare) will one-shot a player, while standing outside just deals heavy damage. Mitigations for Gigaflare's Edge should be timed as the entire sequence lasts 8 seconds, while several debuffs (Reprisal, Feint, Addle) lasts only 10 seconds. | 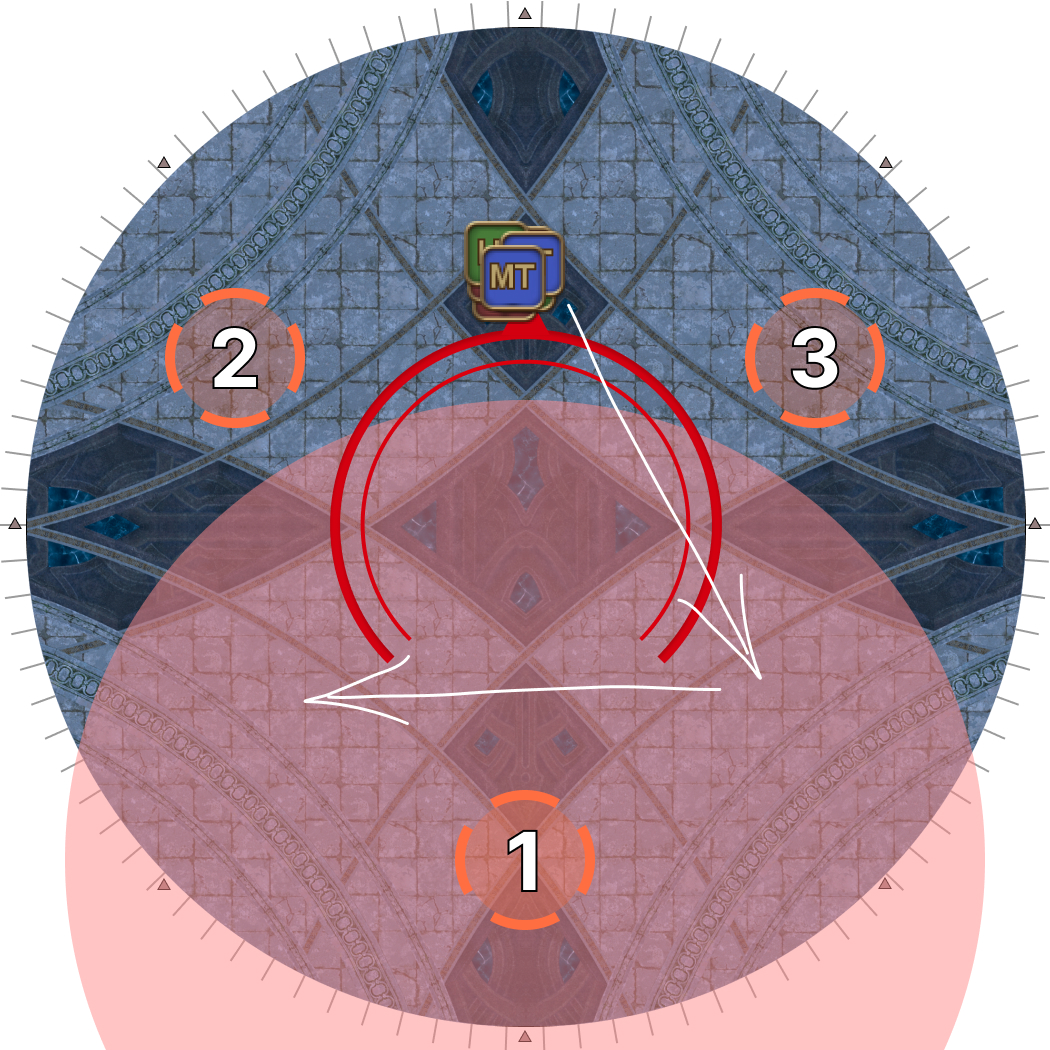 |
Thordan will then auto-attack twice, which should be taken by the two tanks, and H1, followed by H2.
After Gigaflare’s Edge, whoever’s tanking the boss should face the boss directly North or South to prepare for Exaflare’s Edge.
The loop then repeats from Exaflare’s Edge.
Morn Afah’s Edge
Dragonking Thordan will put three towers and will continually hit them in quick order.
As each set of towers kills three players, the party can only take two rounds of towers as there aren’t enough players to take the third set.
A general kill order should resemble:
| First set of towers | H1, H2, ST |
| Second set of towers | D3, D4, MT |
| Third set of towers | Ignore (let the tower failed animation wipe the party instead of having D1 and D2 killed by the towers.) |
Morn Afah’s Edge towers will match the Akh Morn’s Edge tower groups.
Buff windows
Assuming the party used potions at the start of P6, the buff/pot window timings are:
| First buff window + potions | After Gigaflare's Edge #1 |
| Second buff window | During Akh Morn's Edge #3 |
Frequently Asked Questions
[Mitigation] Why doesn't the mit plan contain all the basic party mitigations for the phase? Why are MT90s, ST90s and H2 120s missing?
| This is partly a spillover effect from Alternative End, because depending on whether the party has a SCH or a SGE, the H2 may or may not have their 120s mitigation (Expedient versus Holos) available. SCH and SGE also have different preferences when it comes to their shielding 120s (Consolation versus Panhaima)- in particular, SGE would want to use Panhaima to mitigate Akh Morn's Edge, while the ability to Summon Seraph well in advance of applying Consolation makes it well suited for Gigaflare's Edge. Notationally, I also don't have a good way to separate the "shield" H2 120s (Consolation versus Panhaima) from the "mitigation" H2 120s (Expedient versus Holos) which would add to the confusion. As a result, I would prefer to just leave it up to the player to determine how to best supplement the provided framework. There are also differences with the tank mitigations- the "shield" 90s mitigations (Shake It Off versus Divine Veil) are particularly nice at Gigaflare's Edge (also for their added bonus heal), while the "mitigation" 90s (Dark Missionary and Heart of Light) shine against Akh Morn's Edge. The 90s cooldown also means that timed correctly, you can get a third use out of the tank mitigations for the second and third Akh Morn's Edge. There's also the fine print on Shake It Off which would dispel a WAR's mitigations if used in the wrong order. Since Vengeance use isn't specified, nor whether the WAR would be MT or ST, it is left to the player to determine when best to use Shake It Off. |
[Akh Morn's Edge] Why are we doing 3-3-2 instead of 1-1-6? Wouldn't that make it easier to heal?
| 1-1-6 at Akh Morn's Edge is easier to heal compared to 3-3-2, but it does not come for free. The biggest obstacle to 1-1-6 is having to mitigate Wyrmsbreath 2 and Cauterize with the same 30% at the end of P6.
While this is doable, it's much tighter in execution than simply invulning Cauterize, and makes P6 even less forgiving. Prog groups especially should aim to get more practice at P7, and it's difficult to justify potentially spending more time in P6 for both tanks to consistently (and independently!) get the timing down. Even if Cauterize is properly mitigated, executing 1-1-6 still has some intangible tradeoffs. While it is easier to mitigate and heal through, you open up different lines of error:
|
[Gigaflare's Edge] Is Gigaflare's Edge really a point-blank AoE, or is it proximity-based damage?
| Gigaflare's Edge is actually proximity-based, but the falloff is very steep, making it act like an AoE. Here's a graph plotting the damage vs distance (in centiyalms). | 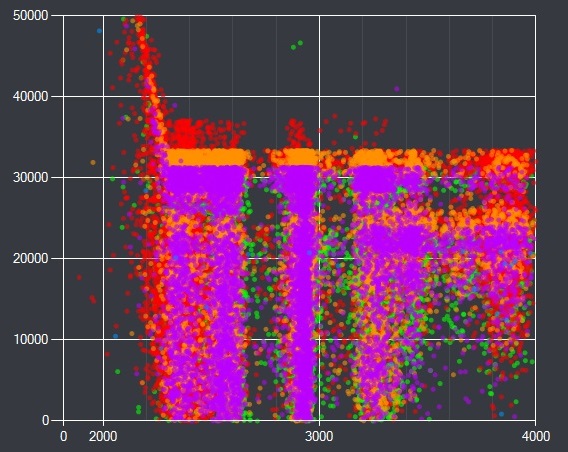 (Credit: radrauser) (Credit: radrauser) |
[Mitigation] Is there a reason D2 is paired with D4? What happens with double caster parties? Wouldn't that overlap Addles?
Pairing D1 with D4 is something I considered, but decided against as "D2 Feint first" breaks the usual pattern of D1 > D2. That being said, the important part of the mitigation plan is establishing the baseline for where D4 uses their Addle. That way, the second caster knows where not to Addle (regardless of whether they're D2 or D1). The same reasoning applies to double-ranged parties. |
Troubleshooting
[Akh Morn's Edge] How did my WAR die?
| Check that the WAR did not use Shake It Off after Vengeance, as Shake It Off removes a WAR's buffs (except for Rampart) if used later. This is something to pay attention to in the second Akh Morn's Edge in particular, as Shake It Off comes back off cooldown there after using it at Alternative End. |