Perfect Alexander
The MT will take hate to start this phase.
Forced March
This is the “tutorial” section of Perfect Alex, where Ordained Stillness, Ordained Motion, and the Light/Dark mechanics are introduced.
This section can be blocked out as follows:
- Ordained Stillness/Motion
- Forced March
- Ordained Motion/Stillness (whichever was not done before)
- Stack/Spread
- Spread/Stack (whichever was not done before)
Perfect Alex will open the fight with The Final Word, which splits the party into two teams- Light, and Dark.
[Click to Expand] Light/Dark breakdown
 | Final Word: Contact Regulation More commonly referred to as the "Light Beacon". If the Light Beacon dies, all Light players are killed. |
 | Final Word: Contact Prohibition More commonly referred to as just "Light". Light players will move towards the Light Beacon. They will be killed if they touch the Light Beacon. |
 | Final Word: Escape Detection More commonly referred to as the "Dark Beacon". If the Dark Beacon dies, all Dark players are killed. |
 | Final Word: Escape Prohibition More commonly referred to as just "Dark". Dark players will move away from the Dark Beacon. They will be killed if they move too far from the Dark Beacon, or if they get marched into a wall. |
Dark players need to pay attention to who the Dark Beacon is as they need to stay close to that player (so they don’t stray too far), and on the correct side (so they don’t get marched into the wall).
While the Forced March timers tick down, Perfect Alexander will then cast either Ordained Stillness or Ordained Motion.
Forced March:
|  |
After the Forced March, Perfect Alexander will then use the opposite Ordained Stillness or Ordained Motion, whichever was not done first.
Then, Perfect Alexander will then do two simple stack vs. spread mechanics in a random order.
| Two random players will be targeted with a stack marker. Stacks:
(N.B: These are not Light vs. Dark stacks.) If a group has two stack markers, only one moves to the other group, and resolve the groups 5-3. | 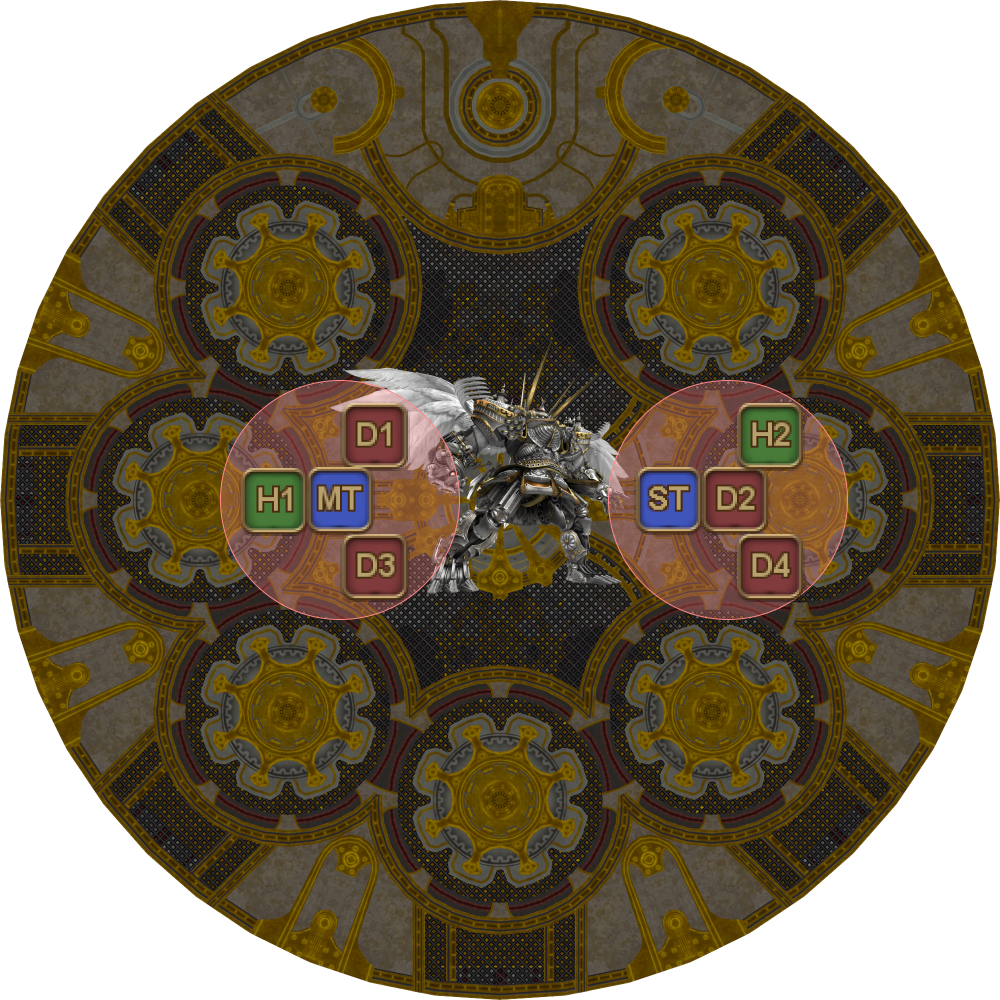 |
Fate Calibration α
If the party has the Enigma Codex buff from the previous phase, clones will appear next to each player.
- An arrow from your character will point towards your clone.
- An arrow from your clone will point towards you.
- A faint tether will connect you to your clone.
The effects from Fate Calibration α and β do not come with debuff icons on the player list, or castbars.
Instead, the clones will telegraph the mechanics that will resolve. Watch your clones to see what debuffs they receive.
The debuffs will appear in the same order as they resolve:
- Ordained Stillness/Motion #1
- Defamation
- Shared Sentence + Aggravated Assaults
- Ordained Stillness/Motion #2 + 3x Sacraments
All players will need to identify the debuffs based on their visual effects when they resolve.
[Click to Expand] Fate Calibration α debuffs
| Ordained Stillness All players in the party must keep still.
Three players will get this. | 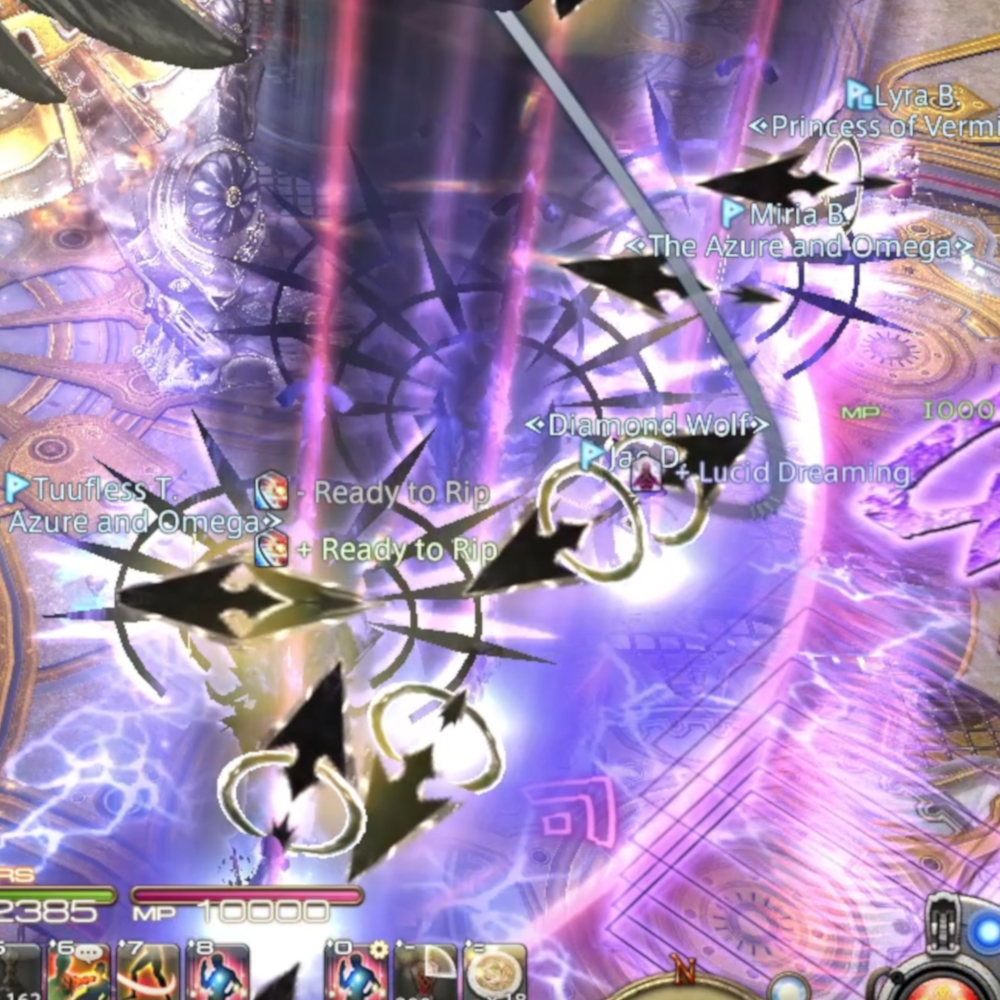 |
Ordained Motion All players in the party must be moving.
Three players will get this. You can either wiggle your character around, or continually jump up and down to trigger movement. Do not wiggle around and jump, especially when near the edge of the arena. | 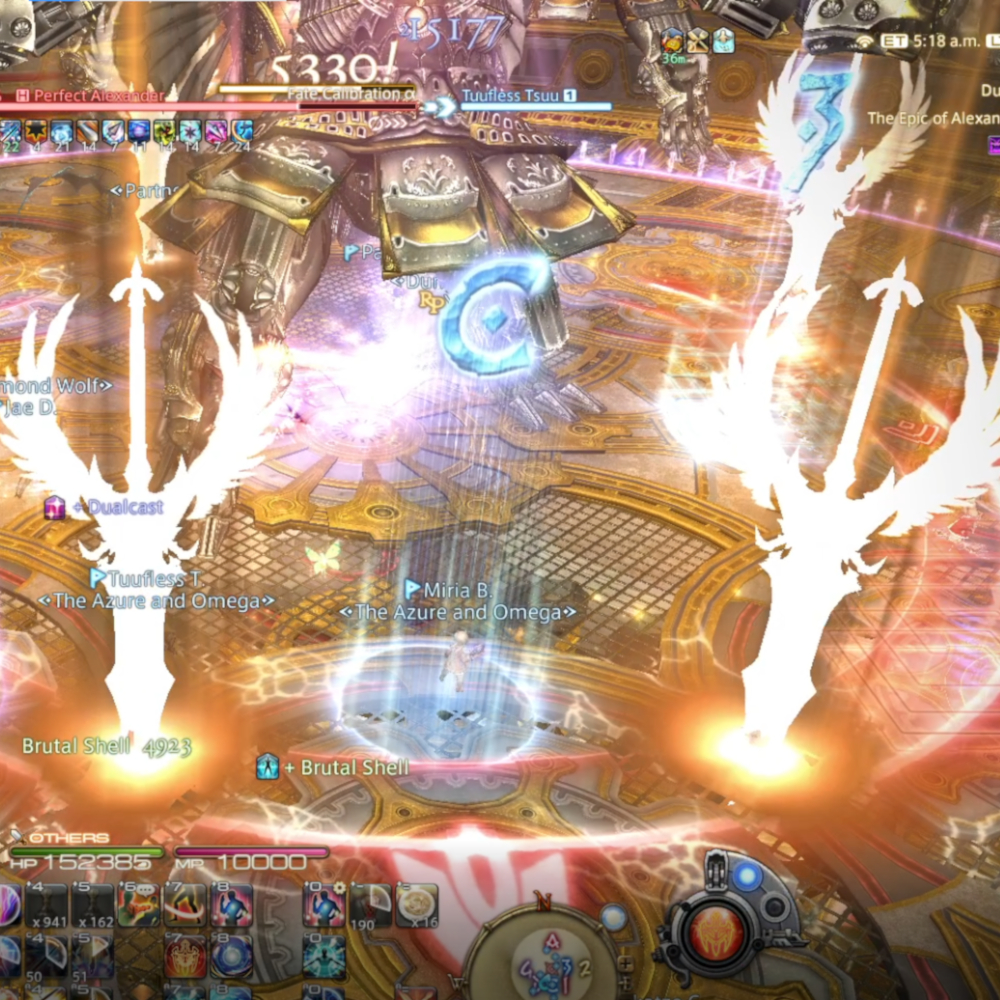 |
Defamation
Stand in front of the Alexander clone that does not cast Sacrament (the white laser beams). This will always be one of the two center Alexander clones. One player will get this. | 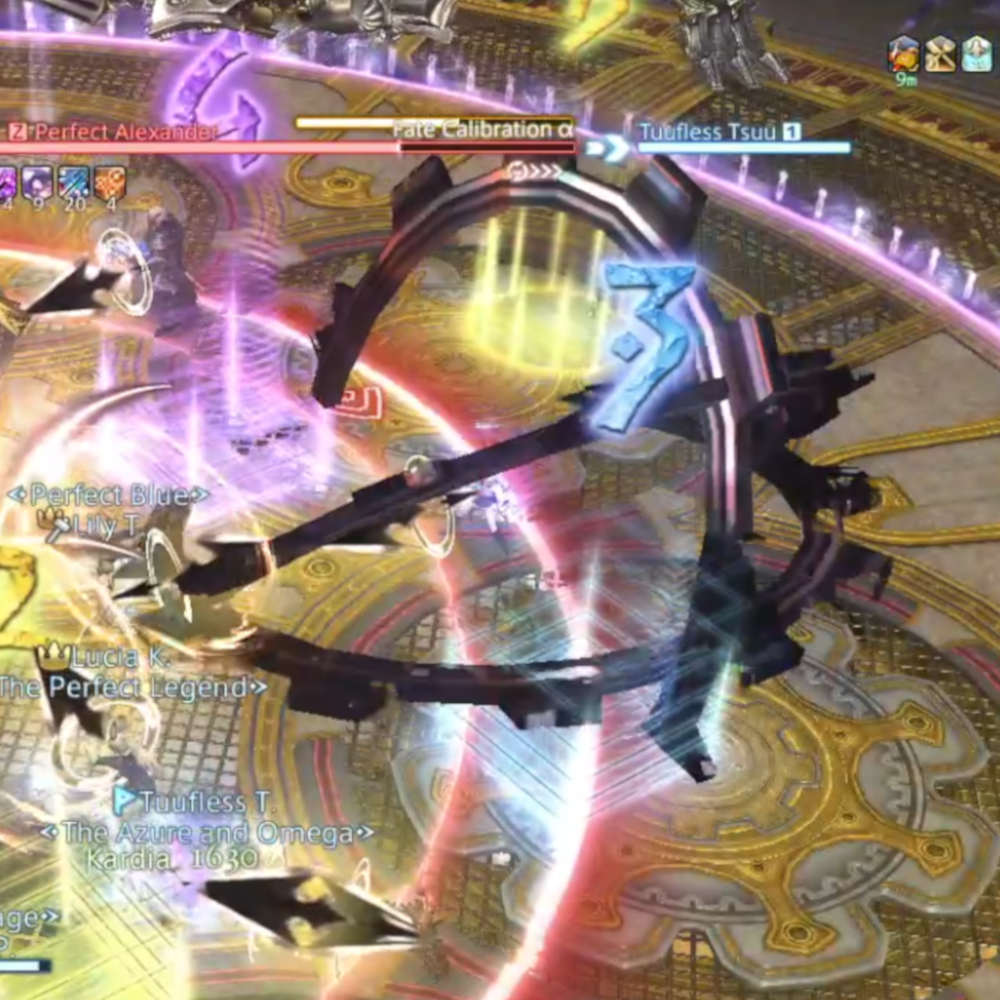 |
Shared Sentence
Stack on the west side with the three players that did not get any debuff. One player will get this. | 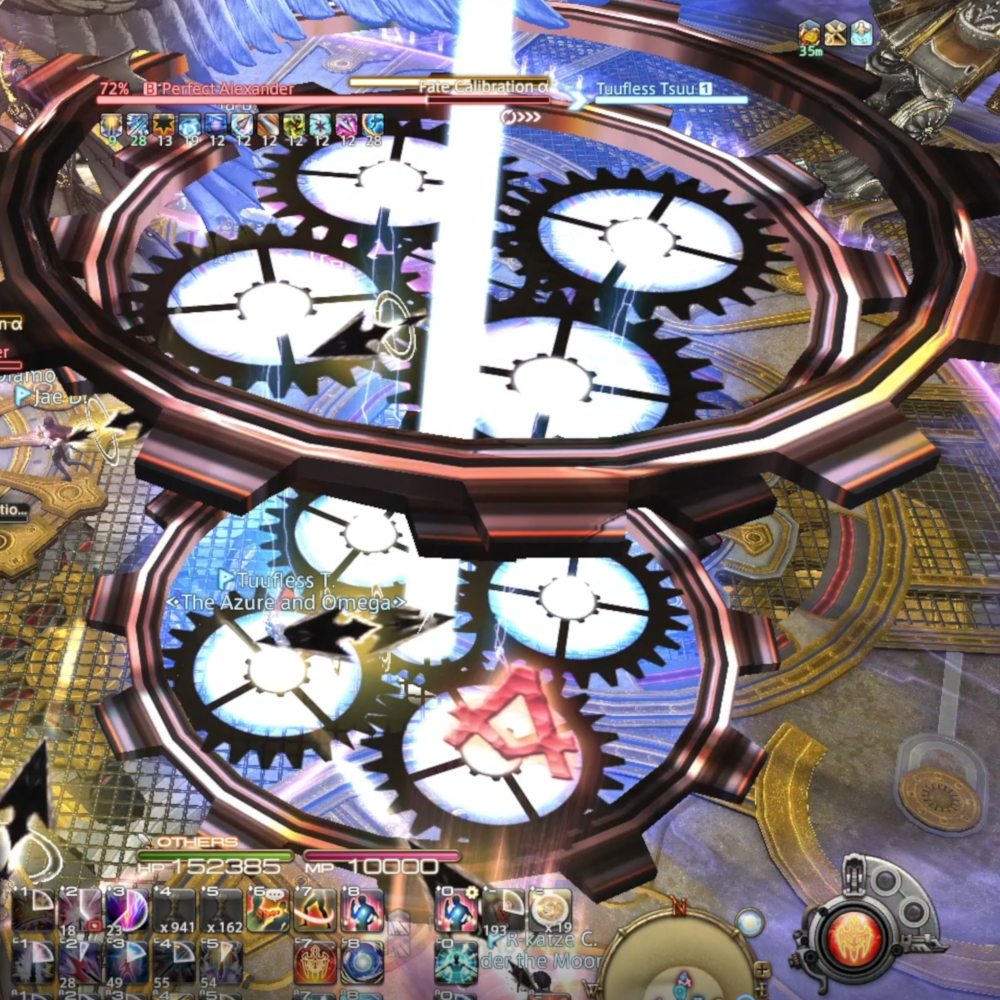 |
Aggravated Assault
Stack together on the east side (away from the Shared Sentence) Three players will get this. | 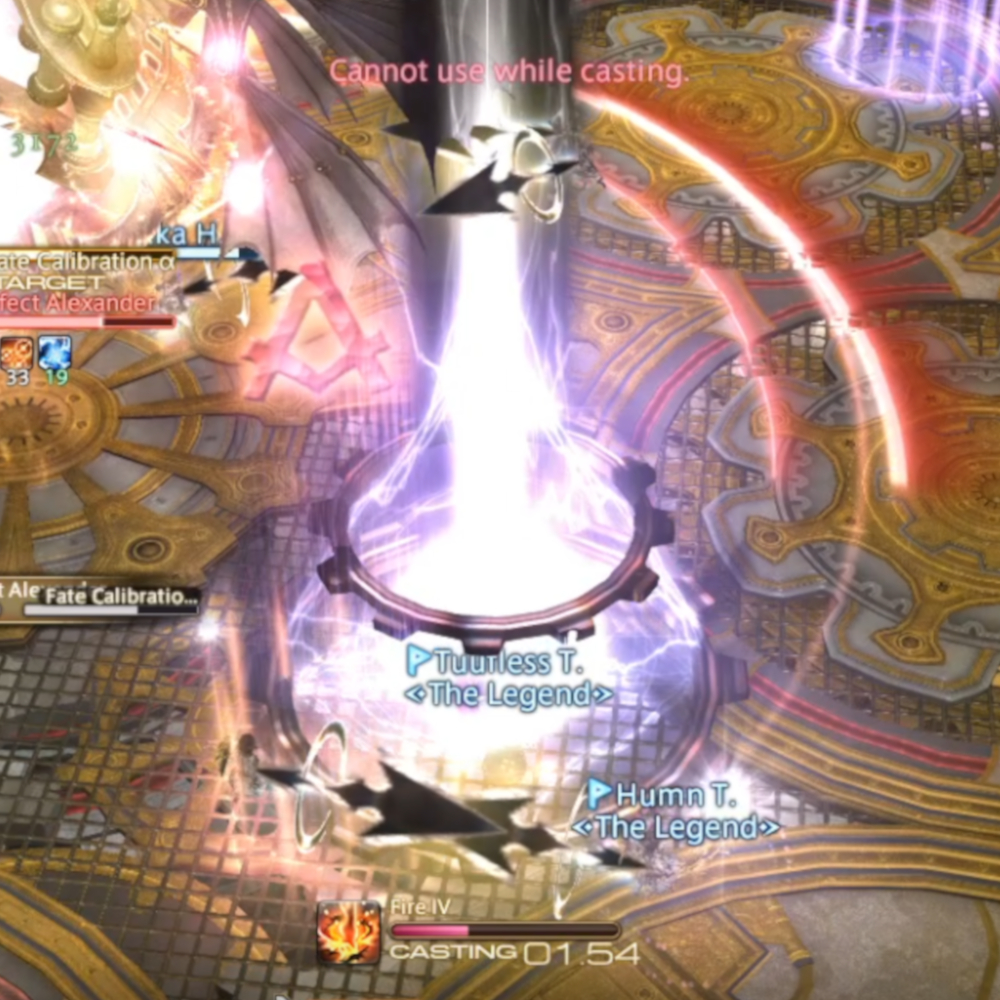 |
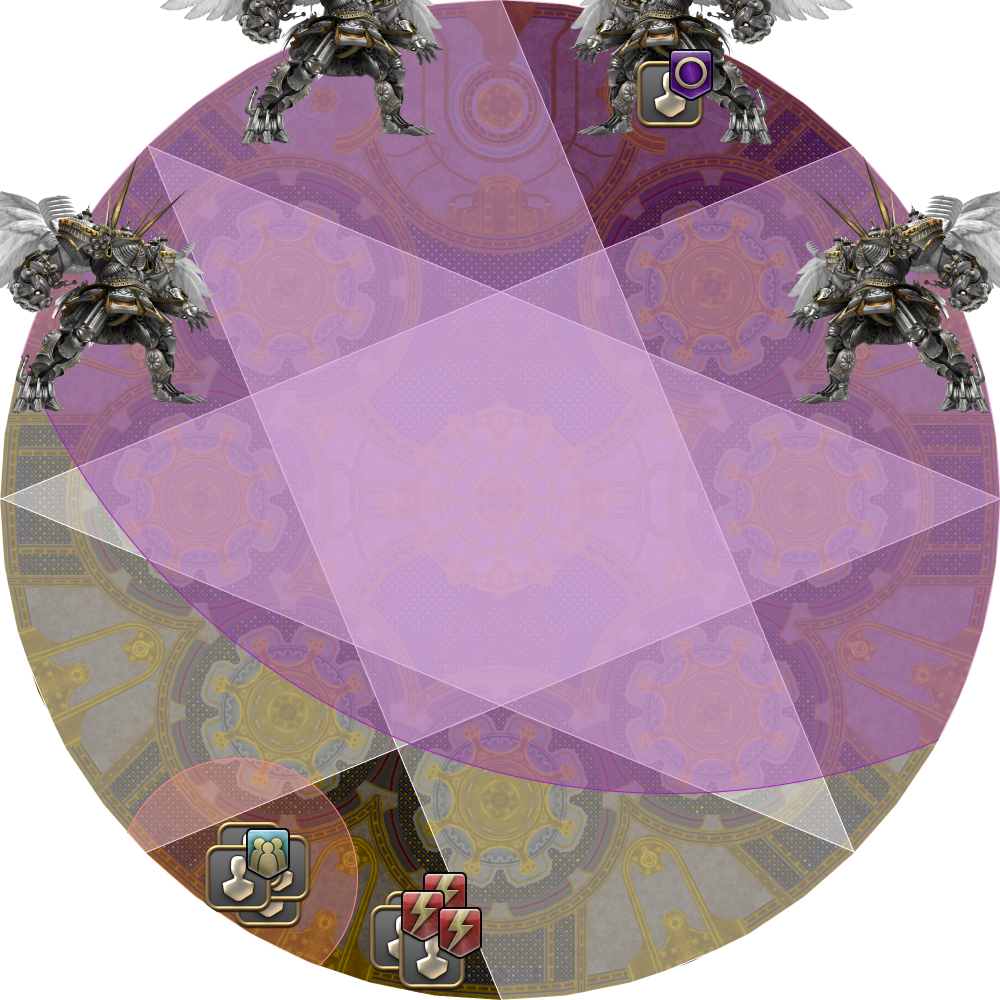
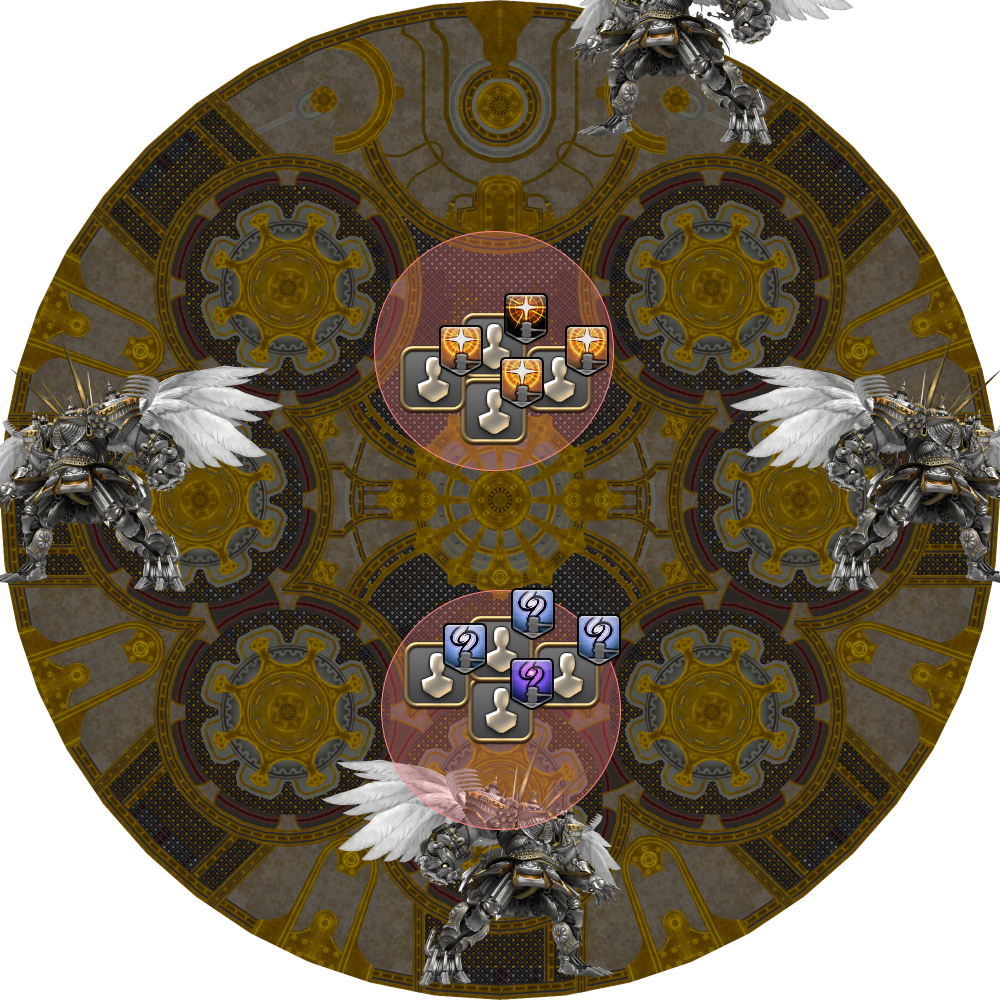
When Fate Calibration α finishes its cast, Perfect Alexander will disappear and the mechanics that were telegraphed earlier by the clones will now resolve for real.
The safe spots to resolve the mechanics will always be opposite one of the two middle Perfect Alexander clones.
Fate Calibration α:
|  |
After Fate Calibration α, Perfect Alex will cast the first Ordained Capital Punishment, which will be shared between both tanks (ST Provokes to take hate).
| Ordained Capital Punishment #1 | MT + ST full buffs. Tank swap from MT to ST. |
Fate Calibration β
Just like Fate Calibration α, clones will appear next to each player that will telegraph the upcoming mechanics.
All players will need to identify the debuffs based on their visual effects when they resolve.
The debuffs will appear in the same order as they resolve:
- Light/Dark + tethers
- Shared Sentence + Super Jumps
- Collective/Individual Reprobation (stack/spread)
- Radiant Sacrament
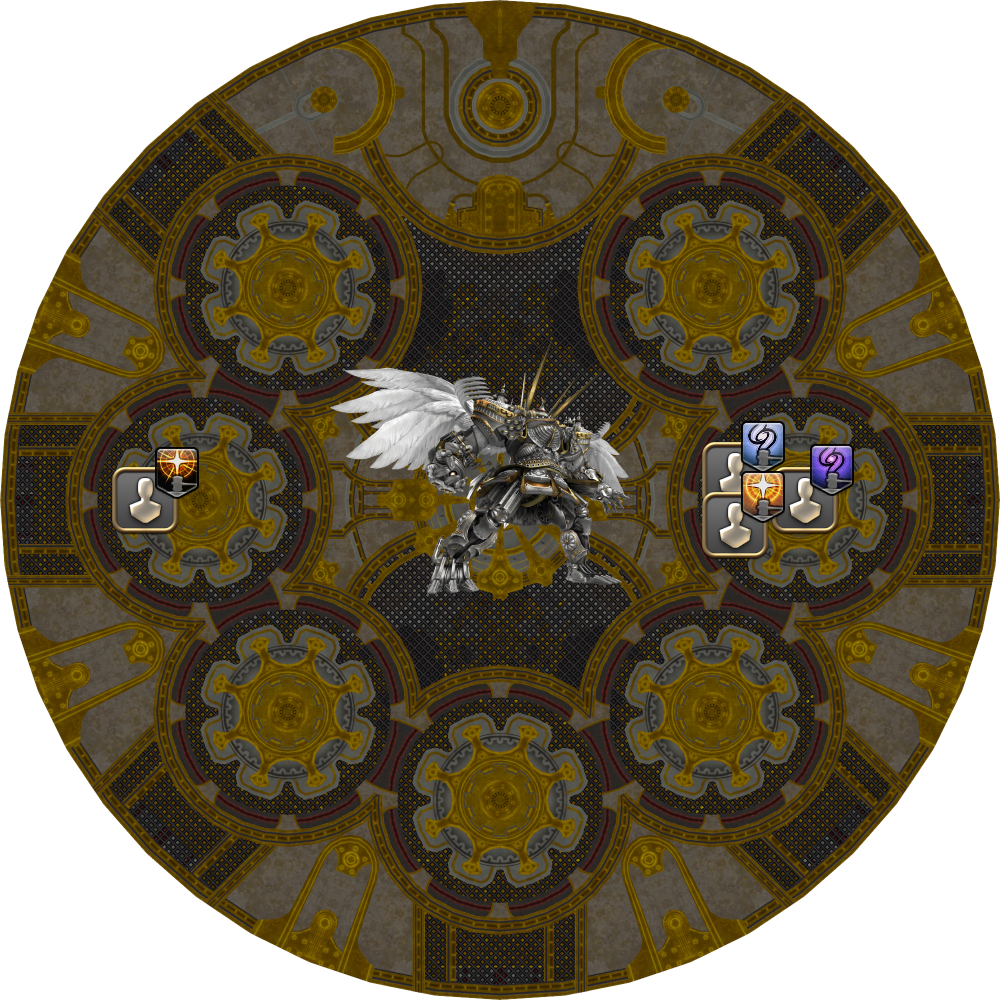
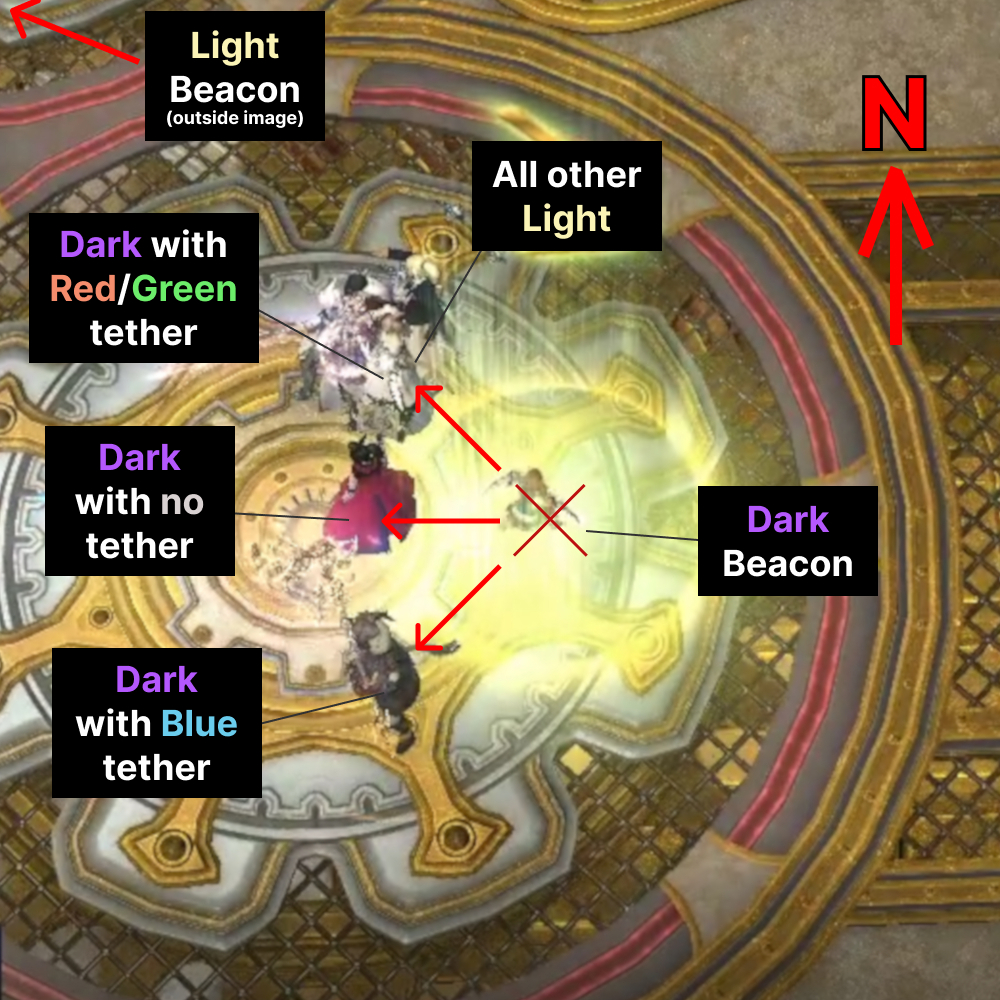
[Click to expand] Fate Calibration β debuffs
Light Four players will be light, that can be further broken down. Light players just need to determine whether they are the Beacon or not.
|  |
Dark Four players will be dark, that can be further broken down. All four Dark players have different responsibilities, so they need to pay attention to their tethers.
|  |
It’s not entirely obvious, but Fate Calibration β should be lightly mitigated prior to the forced march. Note that you will still need to plan mitigations for the upcoming Exatrines.
| Fate Calibration β | ST 90s, H2 (strong) shields* (Deployed Adloquium, or Zoe'd Eukrasian Prognosis) |
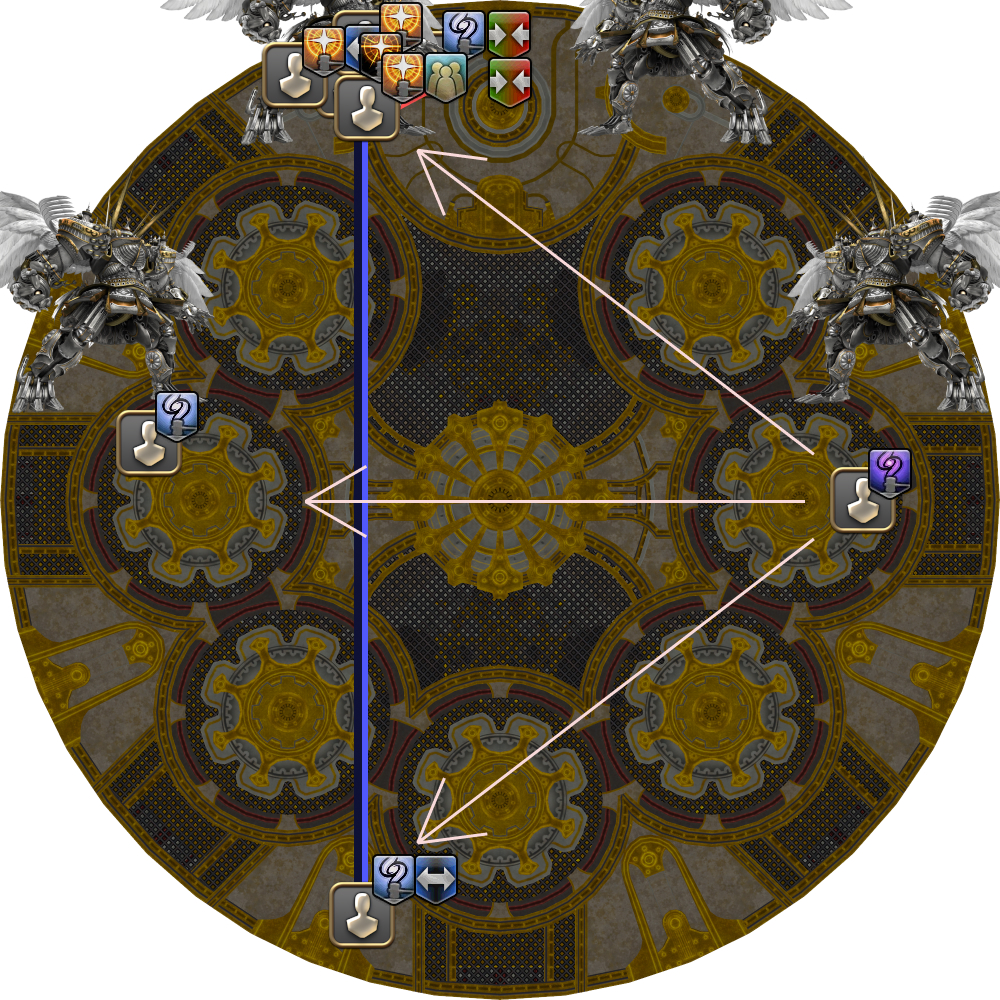
Once again, Perfect Alexander will disappear when Fate Calibration β finishes its cast. The mechanics that were telegraphed earlier by the clones will now resolve for real.
1. Initial positions
| 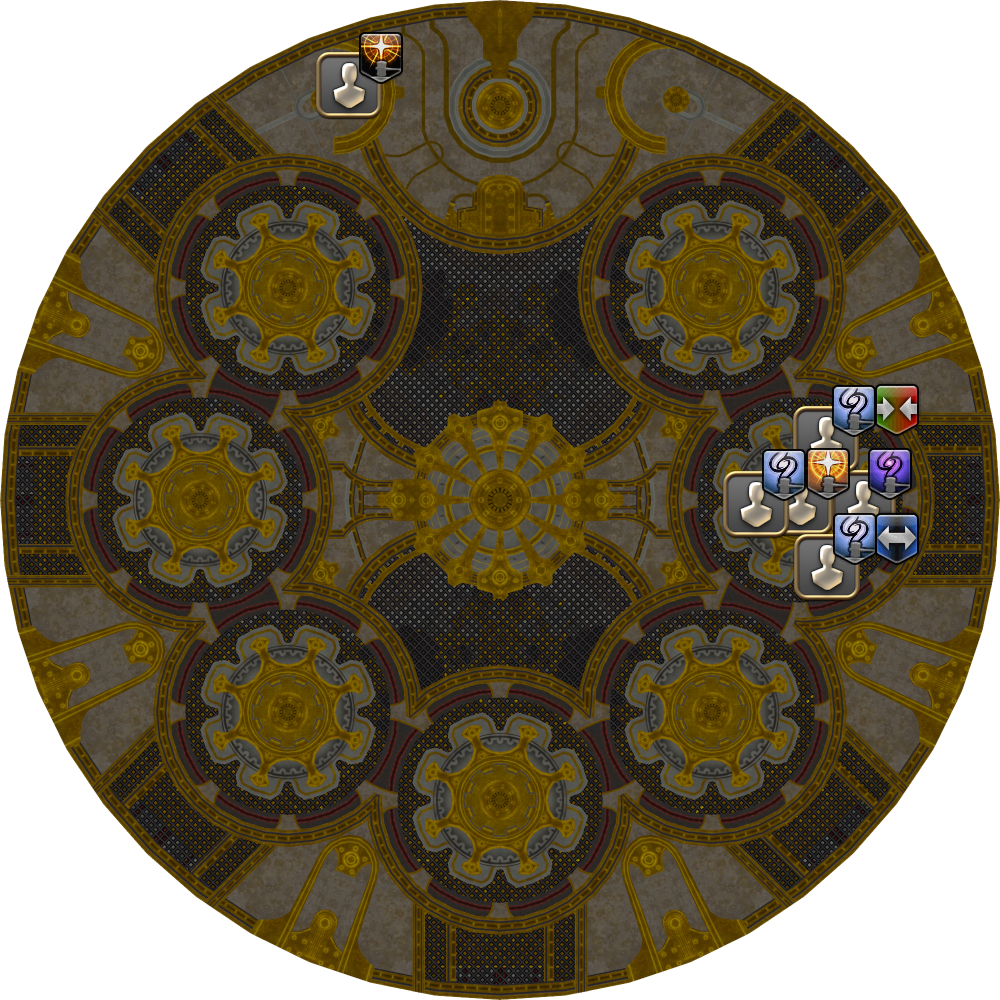  |
2. Forced March resolves.
|  |
| 3. Light Shared Sentence and Super Jump resolves. | 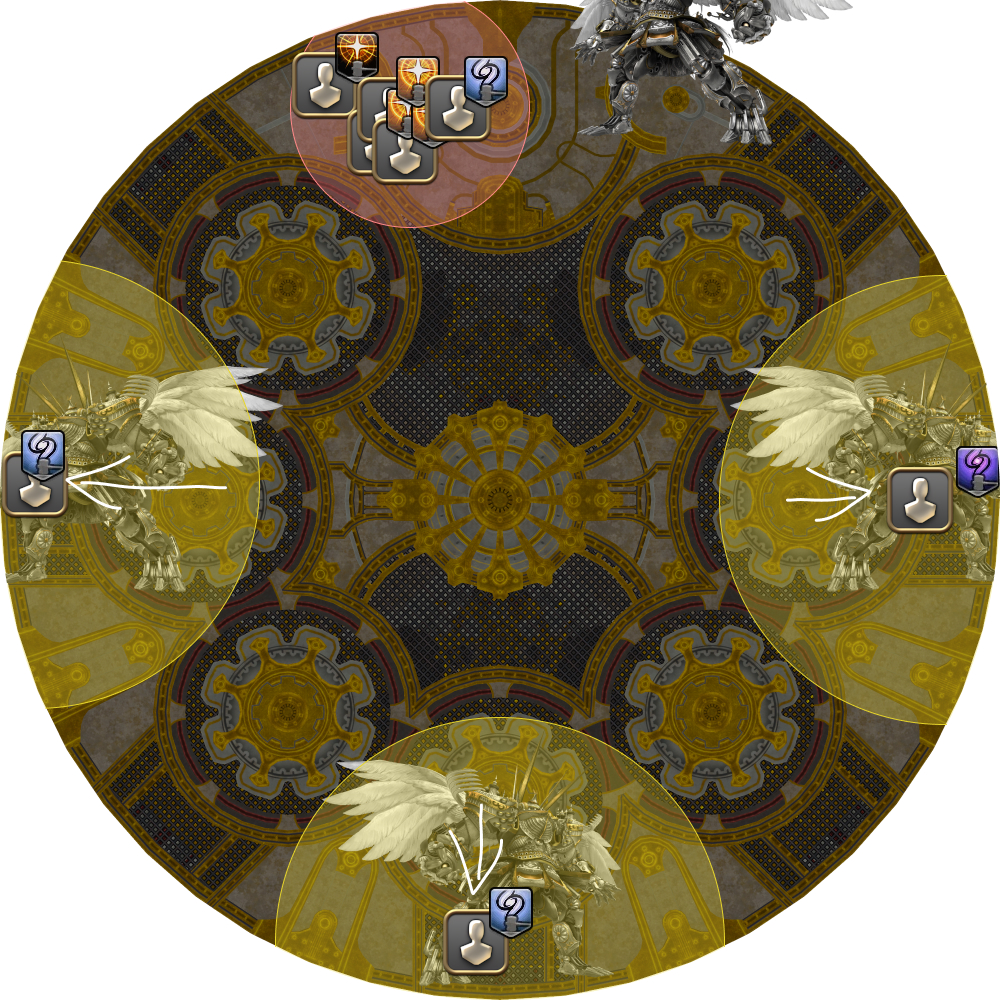 |
4.Stack/Spread. If Stacks:
|  |
| 5. Radiant Sacrament resolves. | 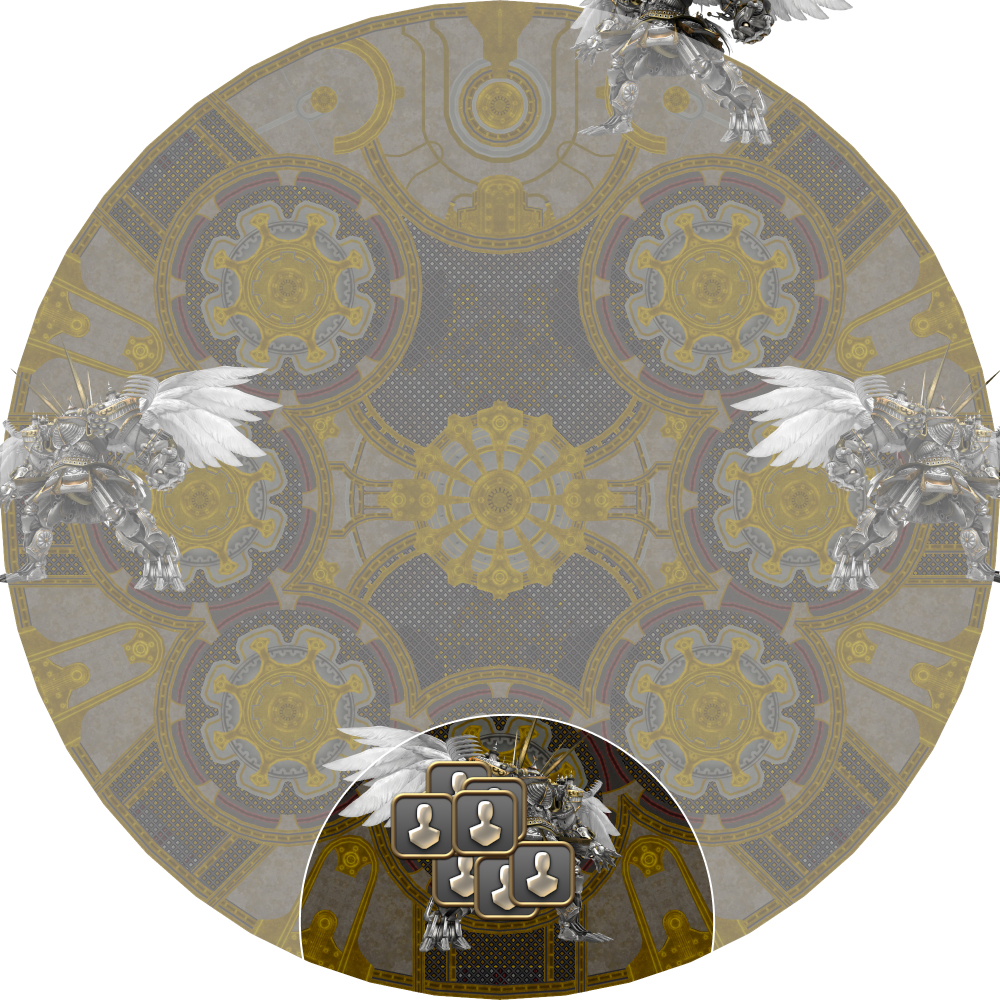 |
After Fate Calibration β, Perfect Alexander will cast the second Ordained Capitol Punishment (tankbuster).
| Ordained Capital Punishment #2 | ST invuln (solo). Tank swap from ST to MT. |
Exatrines
Almighty Judgment (also commonly referred to as “Exatrines”, after Exaflare from UCoB and Trine from O8S) are a series of three telegraphed ground AoEs before resolving for real.
The AoE locations are not entirely random- they spawn in a random order from the three diagrams shown below. The only positions the party will consider are the ones marked in red:
 | 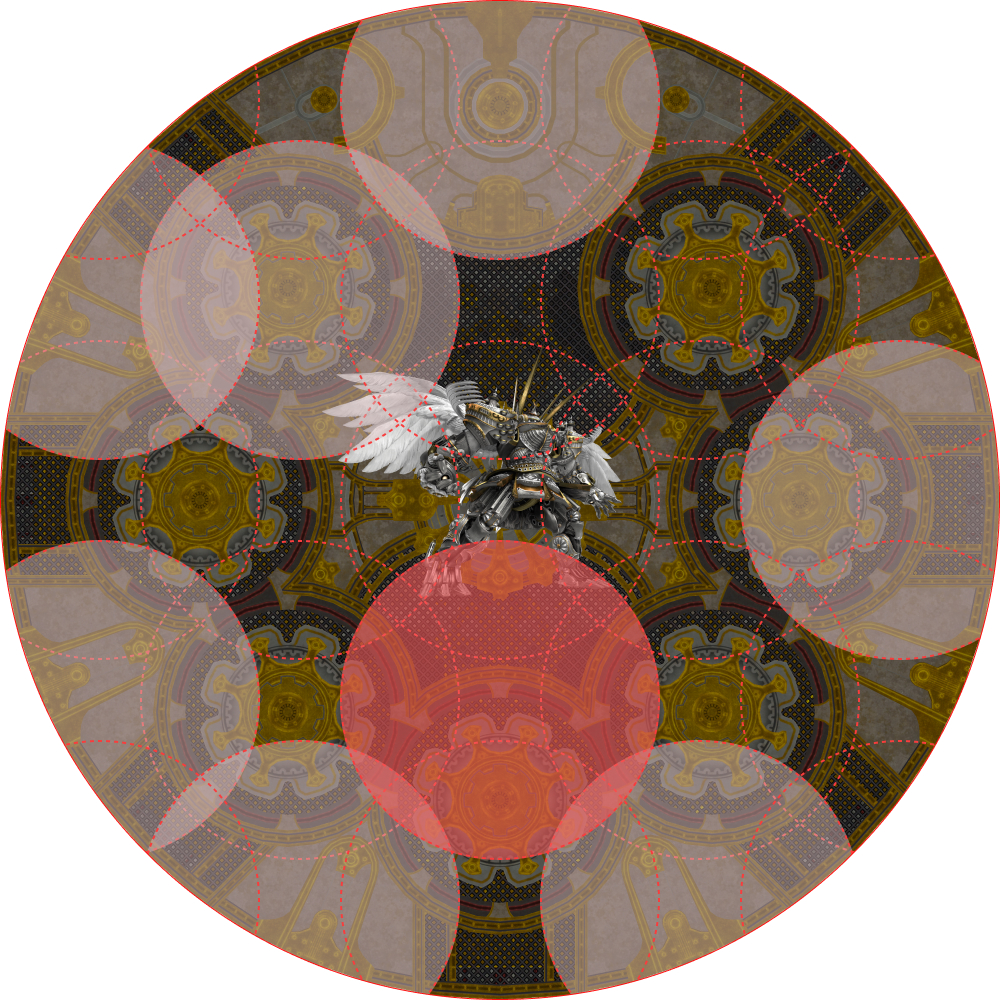 |  |
Note that there will always be an available 3-to-1 dodge.
- Look at the first set of telegraphs. This is where you will end.
- Look at the second set of telegraphs that are adjacent to your ending point. You will start at the remaining adjacent position.
- Look at the third (remaining) set of telegraphs that are adjacent to your ending point. This is where you will start.
Each Exatrine is immediately followed by Irresistable Grace, an 8-man party stack that must be heavily mitigated. The recommended mitigation plan is:
| Exatrine #1 | MT Reprisal, MT 90s, H1 120s, H2 shields, H2 30s, D1, D4 |
| Exatrine #2 | ST Reprisal, ST 90s, H2 120s, H2 shields, H2 30s, D2, D3 |
There will also be one last tankbuster after the first Exatrine.
| Ordained Capital Punishment #3 | MT invuln (solo). Tank swap from MT to ST. |
Temporal Prison
After the second Irresistable Grace, Perfect Alexander will then proceed to cast Temporal Prison, the hard enrage for this fight.
Seven towers/jails appear and resolve, starting from the NE and going clockwise around Perfect Alexander.
The jails are resolved with the lowest DPS players going first.
H2 > H1 > ST > MT > D3 > D4 > D2 > D1
Note that DoTs will continue to tick even after the player has been imprisoned.
Frequently Asked Questions
[Ordained Stillness] Do emotes count as movement?
No, they do not. |
[Light/Dark debuffs] Is there any relation between the Light and Dark players?
| No, the two groups are completely independent- Light and Dark do not interact with one another. |
[Forced March] Why is the forced march east-to-west, instead of south-to-north? Don't melee get positionals?
This is done to keep the Dark Beacon's position consistent with Fate Calibration β. If you really want positionals, you can always have the MT tank Perfect Alexander facing West, although that's rather janky. |
[Forced March] Why aren't the two stacks before Fate Calibration α split Light/Dark players just like Fate Calibration β?
The two stacks follow different targeting rules. The stacks in Fate Calibration β always target the Light Beacon and the Dark Beacon, which is why players group Light vs. Dark there. In contrast, the stacks before Fate Calibration α are random, hence the need for a priority order. |
[Fate Calibration α] How else can I tell which side is safe from the Sacrament beams other than observing the projected lasers?
| One of the two Perfect Alexander clones in the middle has a brief casting animation- this will be the clone that does not fire any Sacrament lasers, and thus will be the safe spot for the player with Defamation. |
 |
[Fate Calibration β] Why does Fate Calibration β need to be mitigated?
| This is to hedge against the worst case scenario, where the party has to spread (Individual Reprobation). The Dark players will bait Super Jump and the Light players have the Shared Sentence stack that will deal damage. The mitigations are to try and reduce this damage to let everybody survive the incoming spread damage, as there is no guarantee a healer will be nearby. |
[Exatrines] Why don't we use the center and have the positions in a box? Why use the SW position?
| You can use the center, and some groups do. However, the center has a few problems:
|
[Perfect Alexander] So, what does the Enigma Codex do? Why is it important?
| The Enigma Codex allows players to see their clones in Fate Calibration α and β. Without the Enigma Codex, there is no way to determine what debuffs players are assigned, or what attacks Perfect Alexander is going to do, and looks something like this: |
[Perfect Alexander] Is Perfect Alexander really impossible without the Enigma Codex? Didn't a Chinese group clear without it?
| That group super-shielded Divine Judgment to the point where they didn't need to Tank LB3, which let them cheese Fate Calibration α with a Healer LB3 instead. More importantly, the group abused two exploits to clear Fate Calibration β without the codex:
Without knowing who the Beacons are, they had their PLD suicide at a specific time, placed a group in the center of the arena, and spread other players around the outer edge.
Patch 6.1 fixed this by adding a delay from when players lose control of their character, to when the forced march starts. Now, if you try to jump, this delay will cause the forced march to begin only after your character lands, and you will march the full distance out of the arena. |
Troubleshooting
[Divine Retribution] What is this? What happened?
This happens when either a Light player touches the Light Beacon, or a Dark player moves too far away from the Dark Beacon. |
[Collective Reprobation (stacks)] Why did the party wipe? What is "Faithlessness"?
The stacks have an anti-cheese mechanic built into them, and cannot be taken solo. When a stack is solo'ed (even with invuln), raid-wide damage called "Faithlessness" is triggered, which wipes the raid. |
[Fate Calibration β] How did someone get hit with two J Jumps?
This happens when either the Dark Beacon, or the Dark player with no tether forgets to go to the edge of the arena to bait the jump. The Alexander clones target the furthest players from them to jump to- if either player forgets to bait this, then the Dark player with the blue tether (who is south) becomes the furthest player for two of the Alexanders. |