Twintania
Twintania’s mechanics start with a basic loop that slowly gets more elaborate as the fight progresses. This phase can be broken down into three sub-phases, each pushed by Twintania’s HP.
Part 1: 100% HP - 75% HP
Twintania’s first phase is a basic introduction to what to expect- Twisters, and the Fireball stack. The phase lasts until Twintania is pushed below 75% HP.
| 1. Pull Twintania over the NW marker, and point it away from the party so Plummet doesn't hit anyone else. Have the rest of the party spread out, but make sure all party members (except for the tanks) have a clear path to Twintania's rear. | 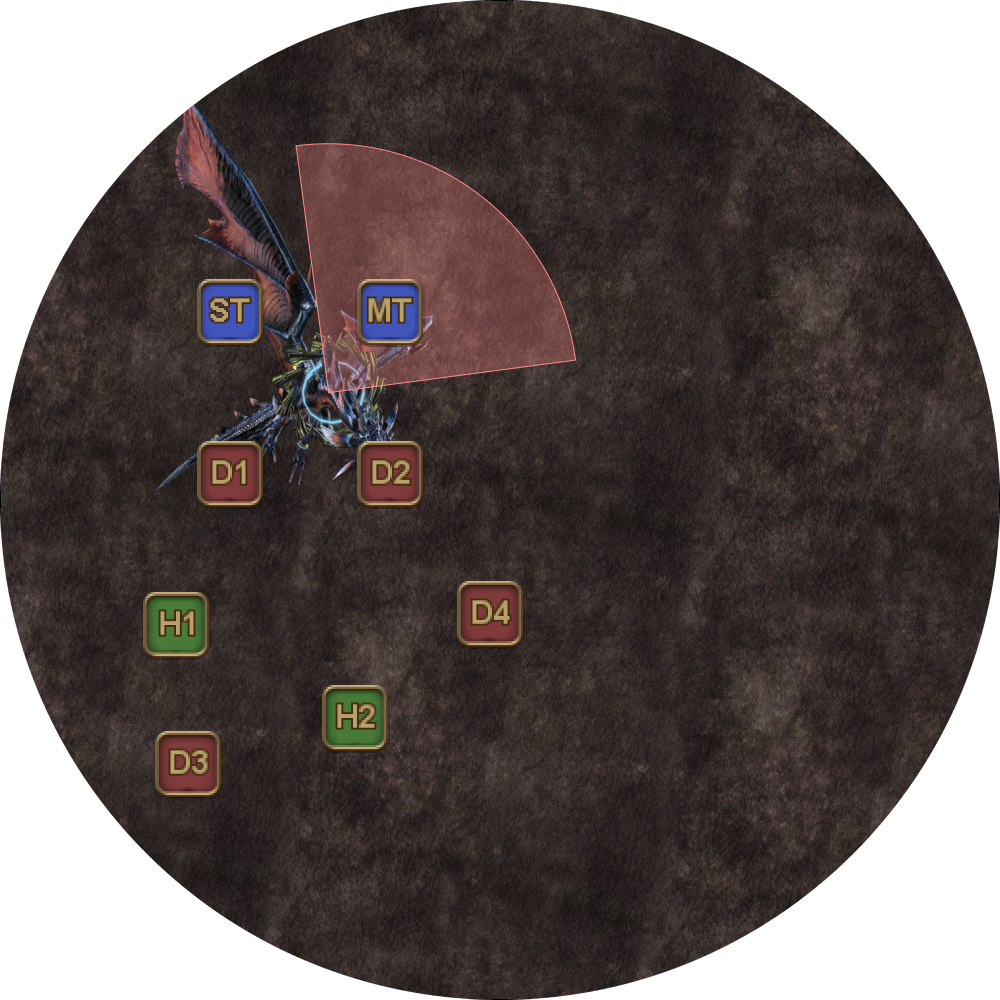 |
| 2. Twintania will mark one random (non-tank) player with a Fireball marker, and cast Twister. All players will bait Twisters where they stand. While doing so, all players except the tanks and D3 moves to stack together behind Twintania to split Fireball's damage in a 5-man stack.
You will need to mitigate this Fireball to survive- use effects like shields, Sacred Soil/Kerachole and Troubadour/Tactician/Shield Samba. Do not use debuffs like Reprisal, Feint, or Addle. | 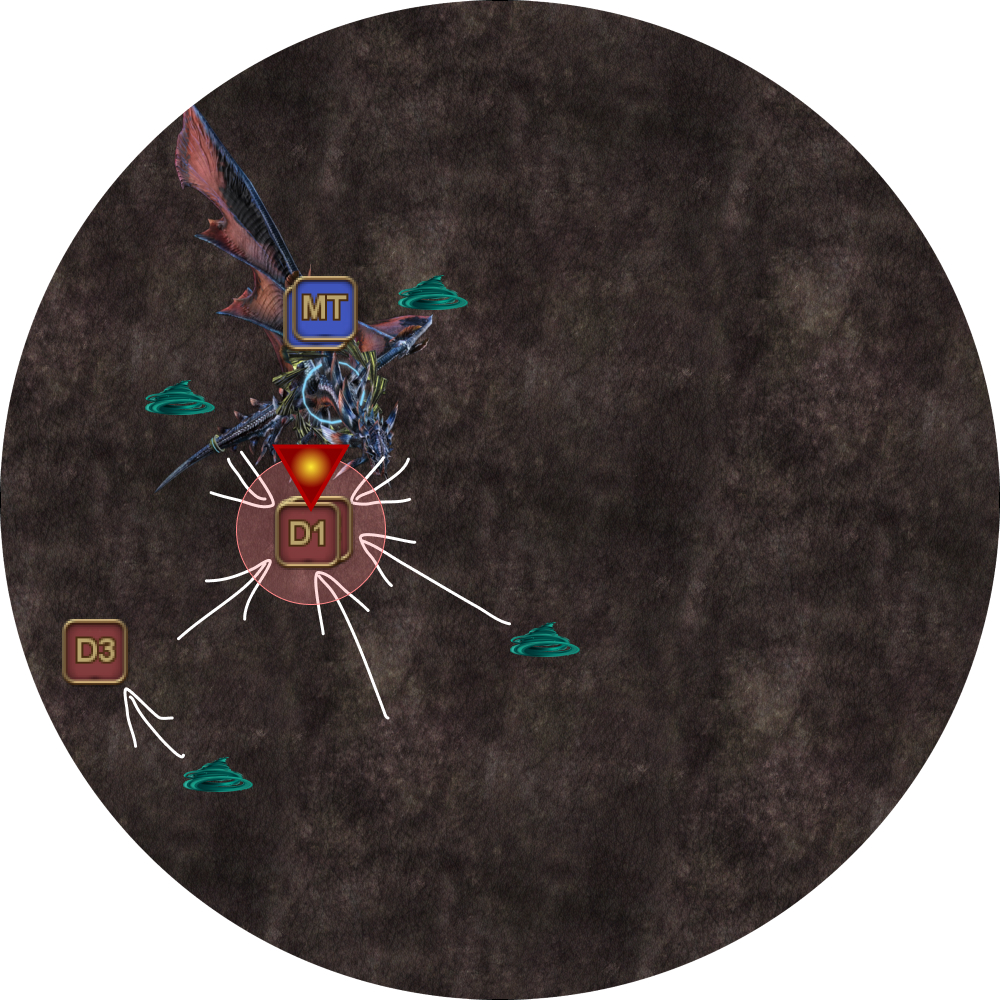 |
| 3. Twintania then uses Death Sentence, a single-target tankbuster that also applies a slashing damage debuff, thus mandating a tank swap. The loop then repeats from Plummet (with the MT and ST swapped). (Most groups will push Twintania into the next phase without seeing the second Fireball.) | 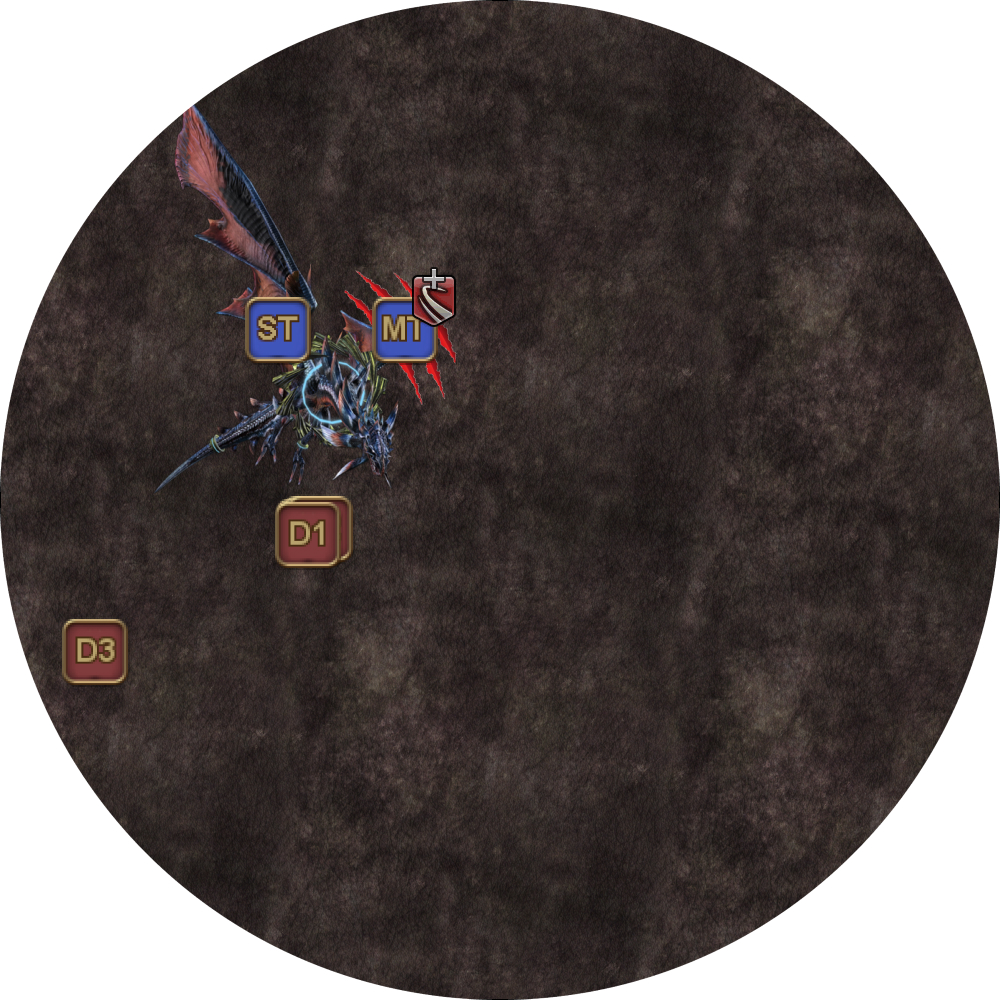 |
Part 2: 74% HP - 45% HP
This second phase builds upon the mechanics introduced in the first, adding Liquid Hell and Hatches to the mix.
The phase ends when Twintania is pushed below 45% HP.
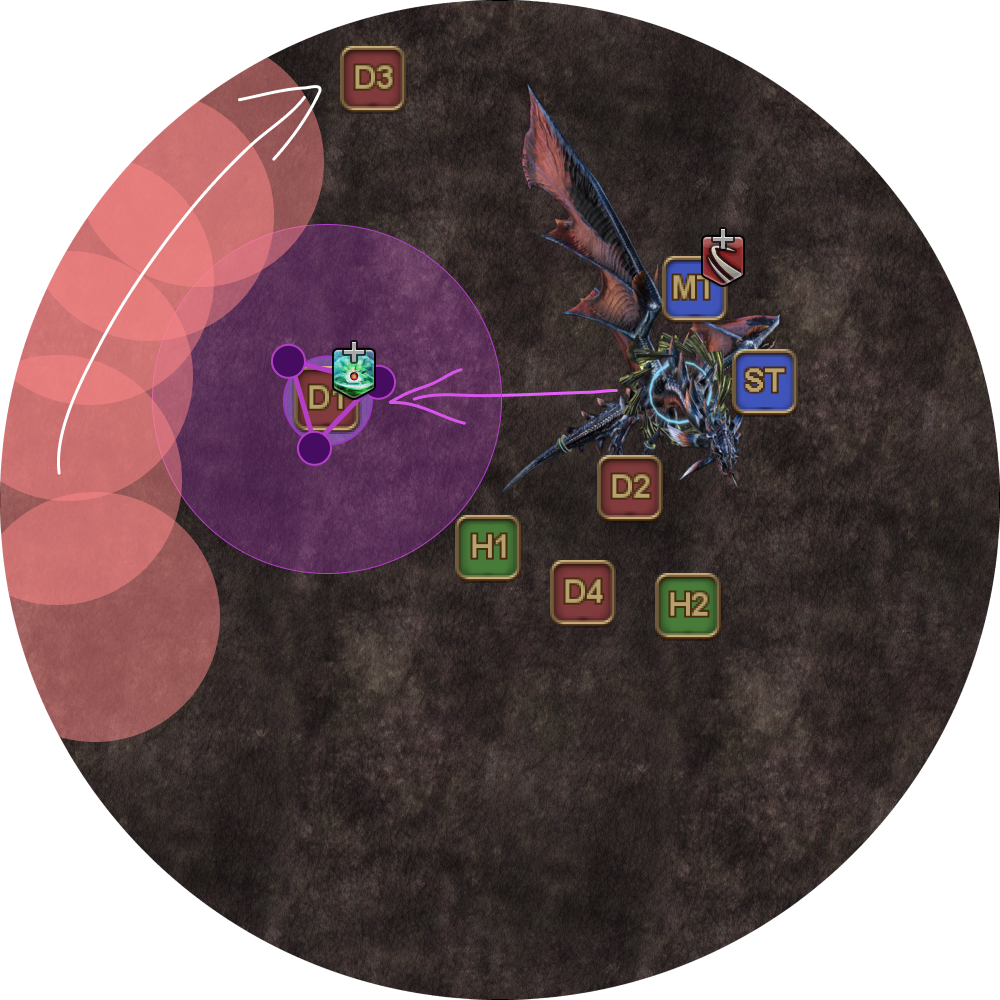
| 4. Pull Twintania clockwise to the next marker. | 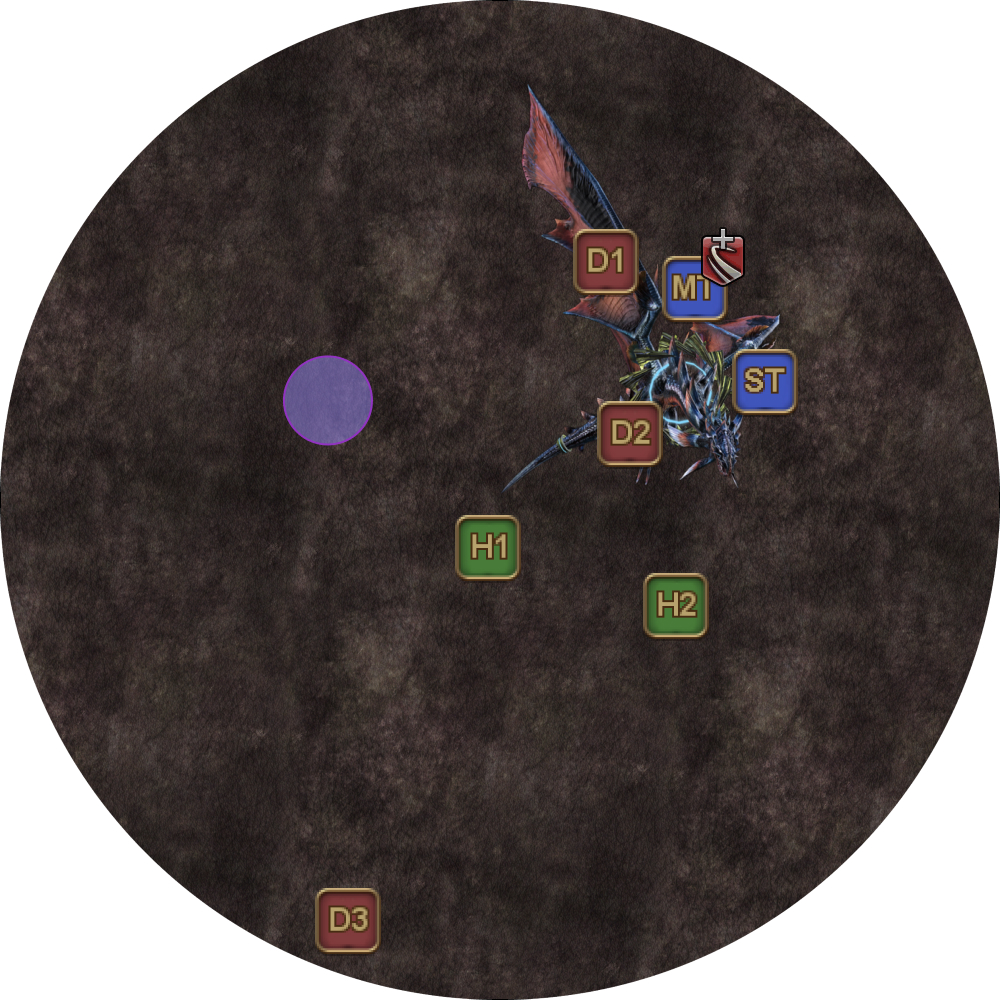 |
| 5. Twintania will then cast five rounds of Liquid Hell that is baited by a random player past a certain distance.
|  |
| 6. Twintania casts Generate, which marks a random DPS. A black orb will spawn under Twintania and move towards the marked player. All players should keep clear of the area between Twintania and the Neurolink to avoid getting hit by the black orb. | 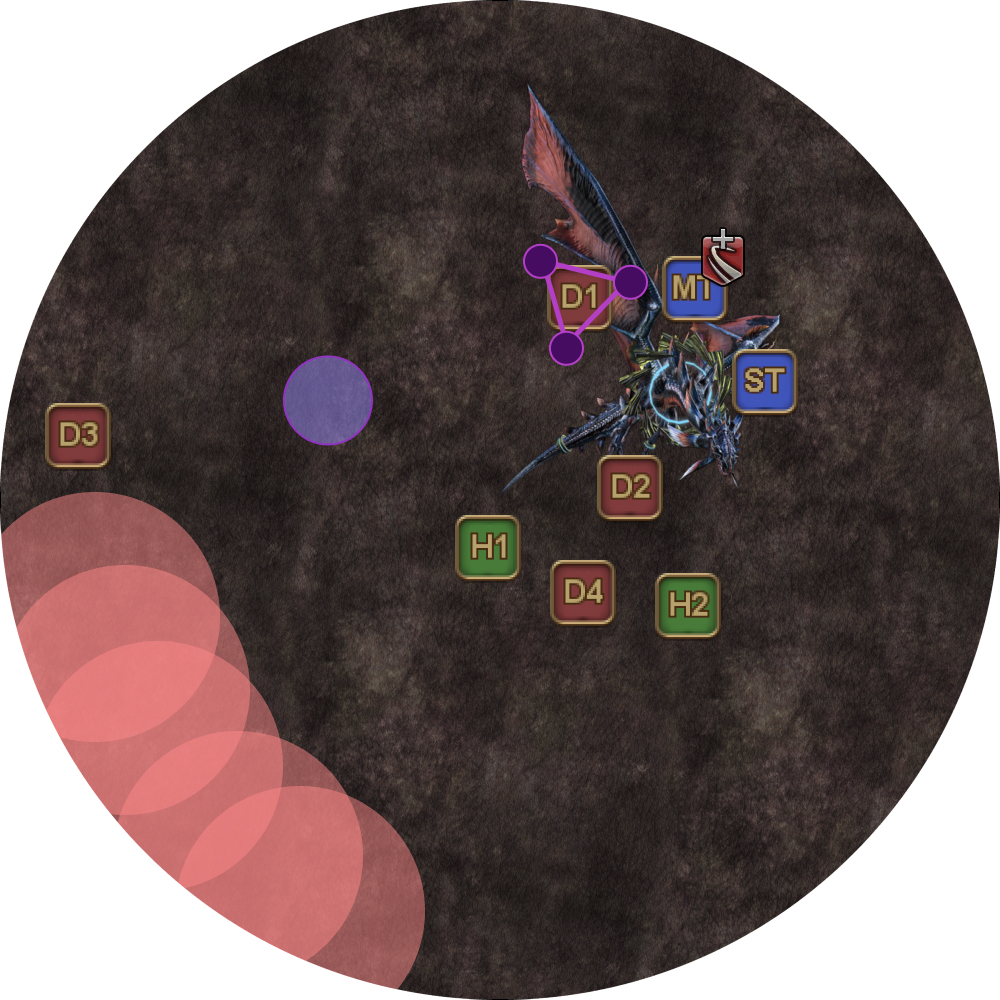 |
| 7. The marked player must get hit with the black orb while inside the Neurolink that Twintania left behind earlier, or wipe the raid. The orb will also explode in an AoE around it, so make sure other players don't get hit. It also puts a Mana Hypersensitivity debuff which means that player cannot be hit by a second orb- this does not do anything now, but will be relevant later. Meanwhile, Twintania will begin another round of five baited Liquid Hells.
|  |
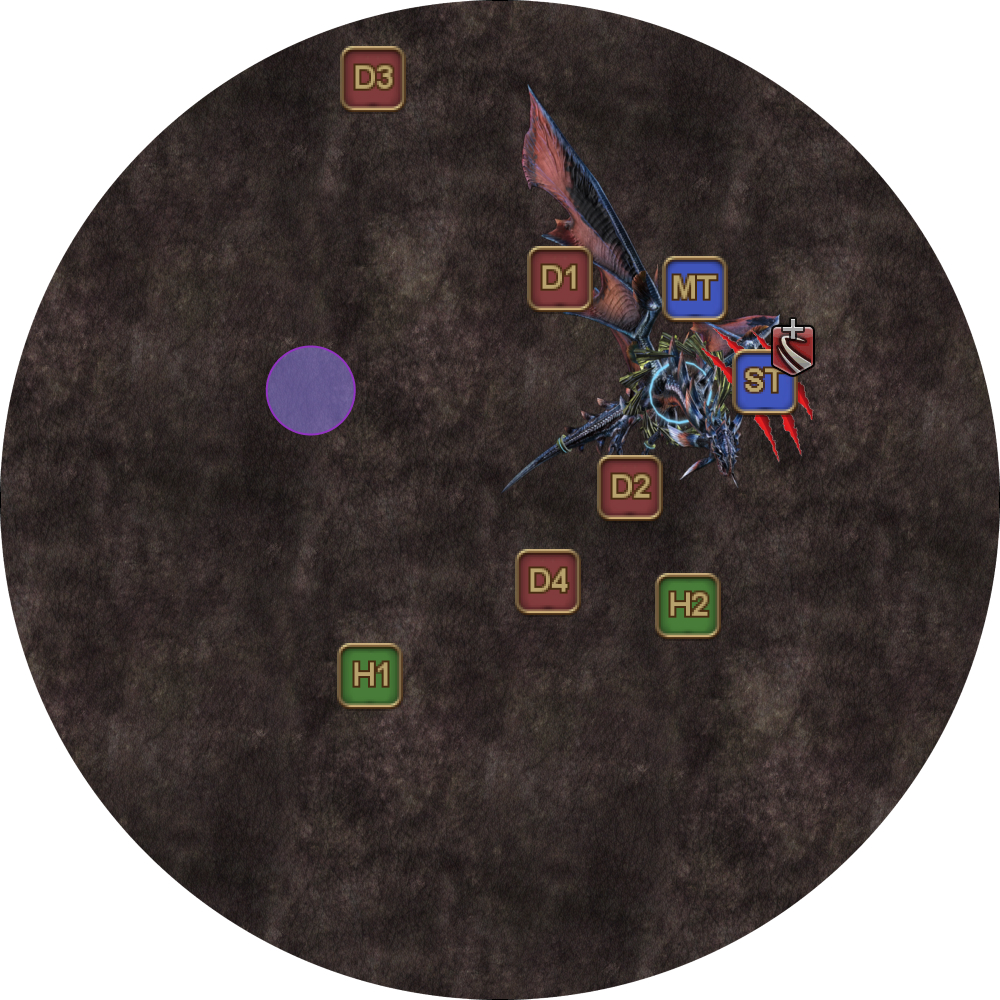
| 8. Twintania then does another Death Sentence on the current target.
|  |
| 9. Twintania targets a random DPS with Hatch. This time, the DPS needs to preposition outside the Neurolink. | 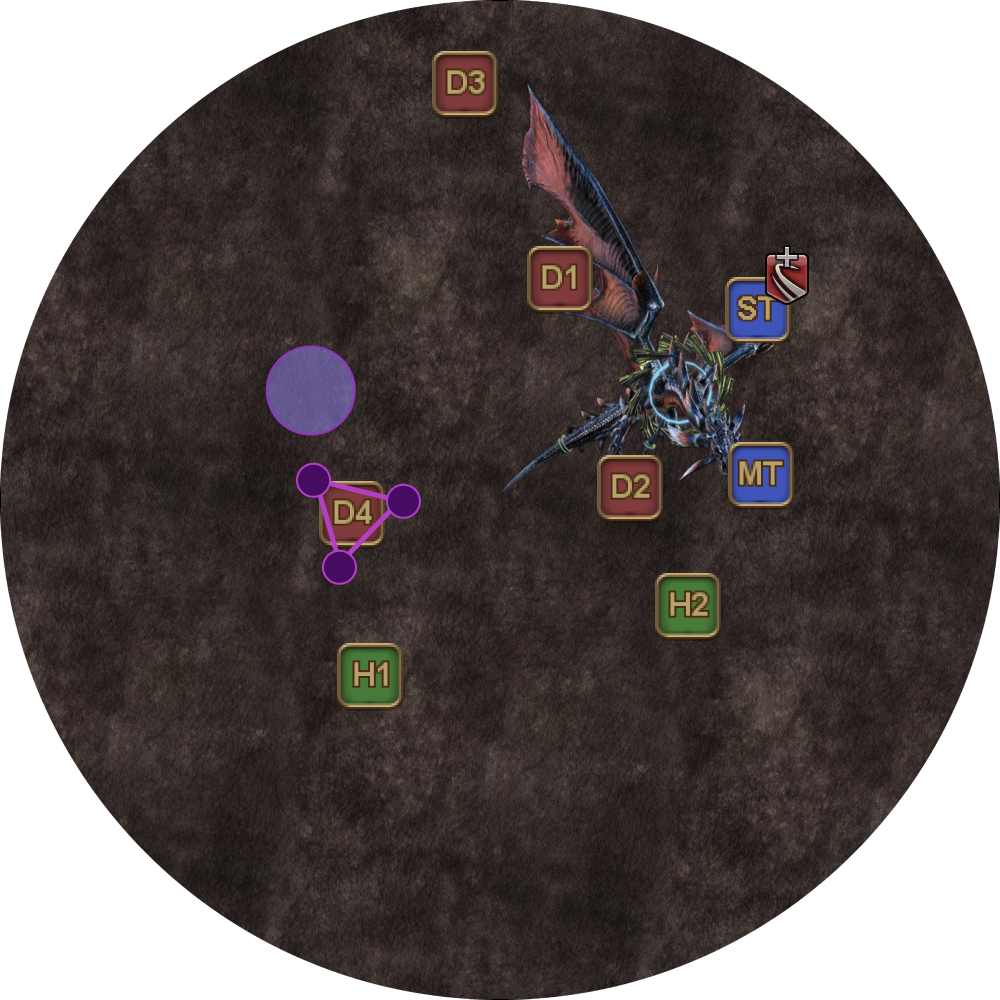 |
| 10. Twintania then casts Twister. All players move to dodge Twister. The DPS targeted with Hatch baits their Twister outside the Neurolink first, before entering the Neurolink to resolve Hatch. (If party DPS is high, you may skip this set of Twisters. The DPS with Hatch should watch Twintania's HP to check whether the Twisters are skipped.) | 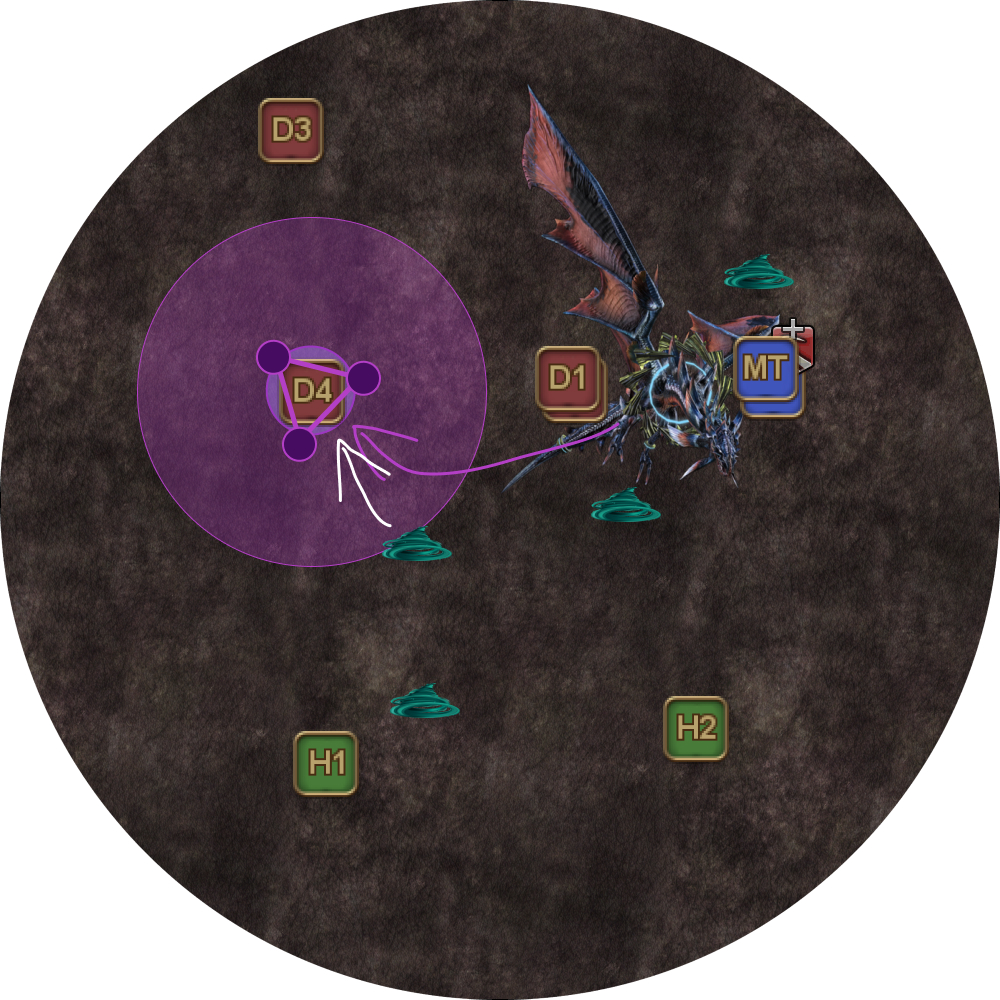 |
| 11. Twintania then Plummets before restarting the loop from the first set of baited Liquid Hells. | 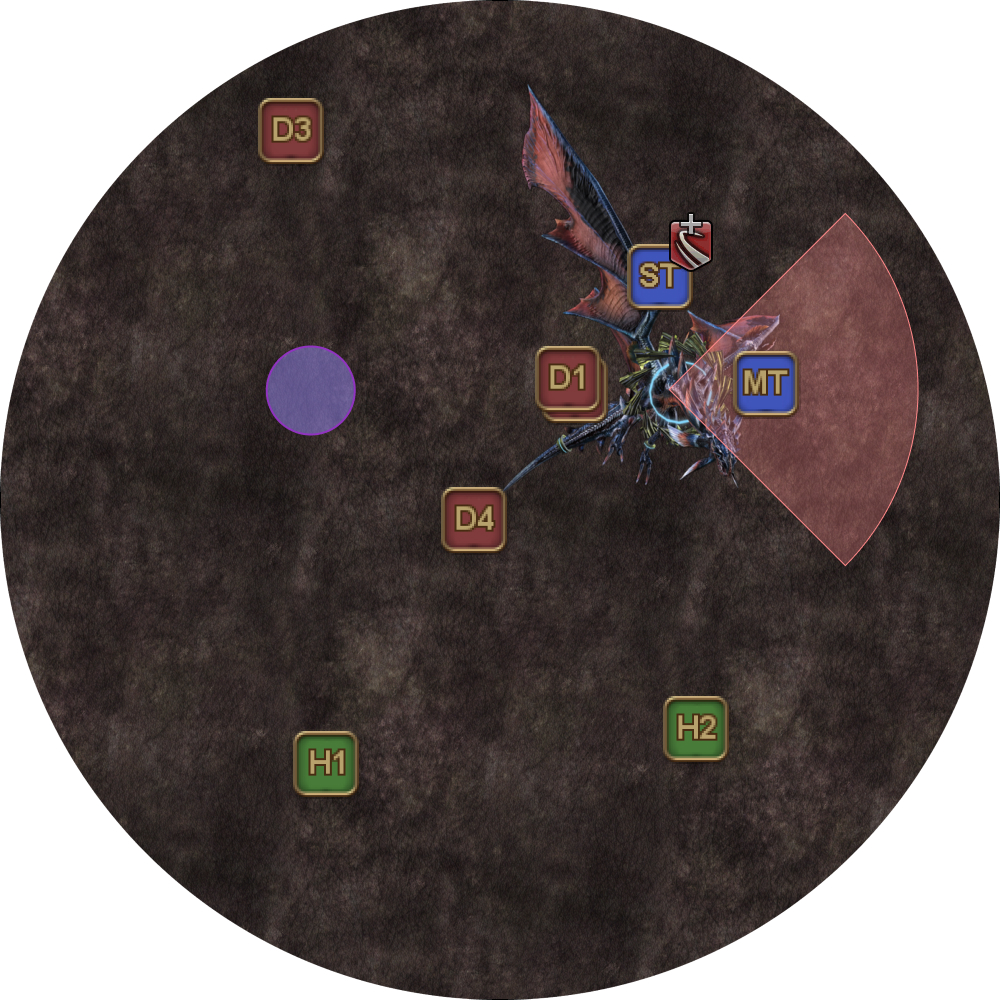 |
Part 3: 44% HP - 0% HP
This phase is the culmination of all the mechanics introduced thus far.
| 11. Pull Twintania clockwise to the next marker. | 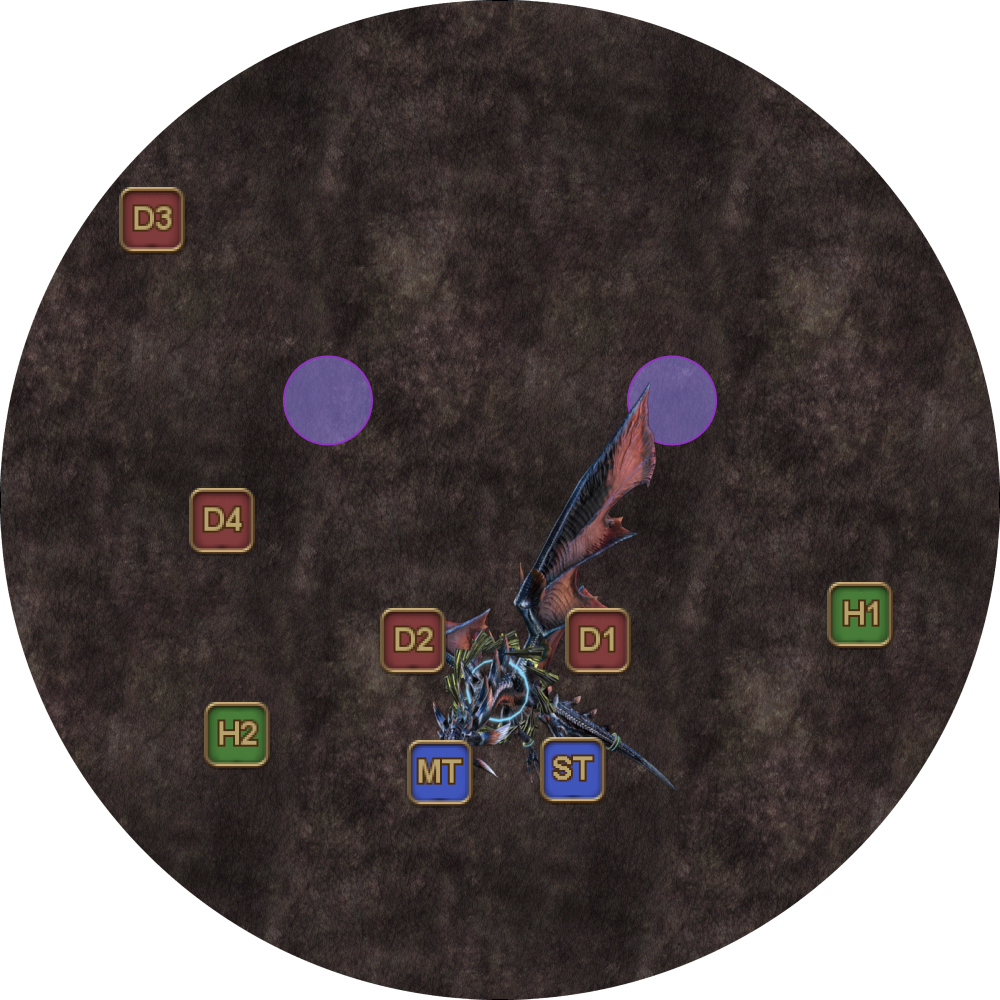 |
| 12. Twintania casts five rounds of a baited Liquid Hell.
|  |
| 13. Twintania casts Generate, this time marking two random DPS players and spawning two black orbs that will move towards the marked players. All players should stay outside the triangle formed by Twintania and the two Neurolinks to avoid bumping into the black orbs. | 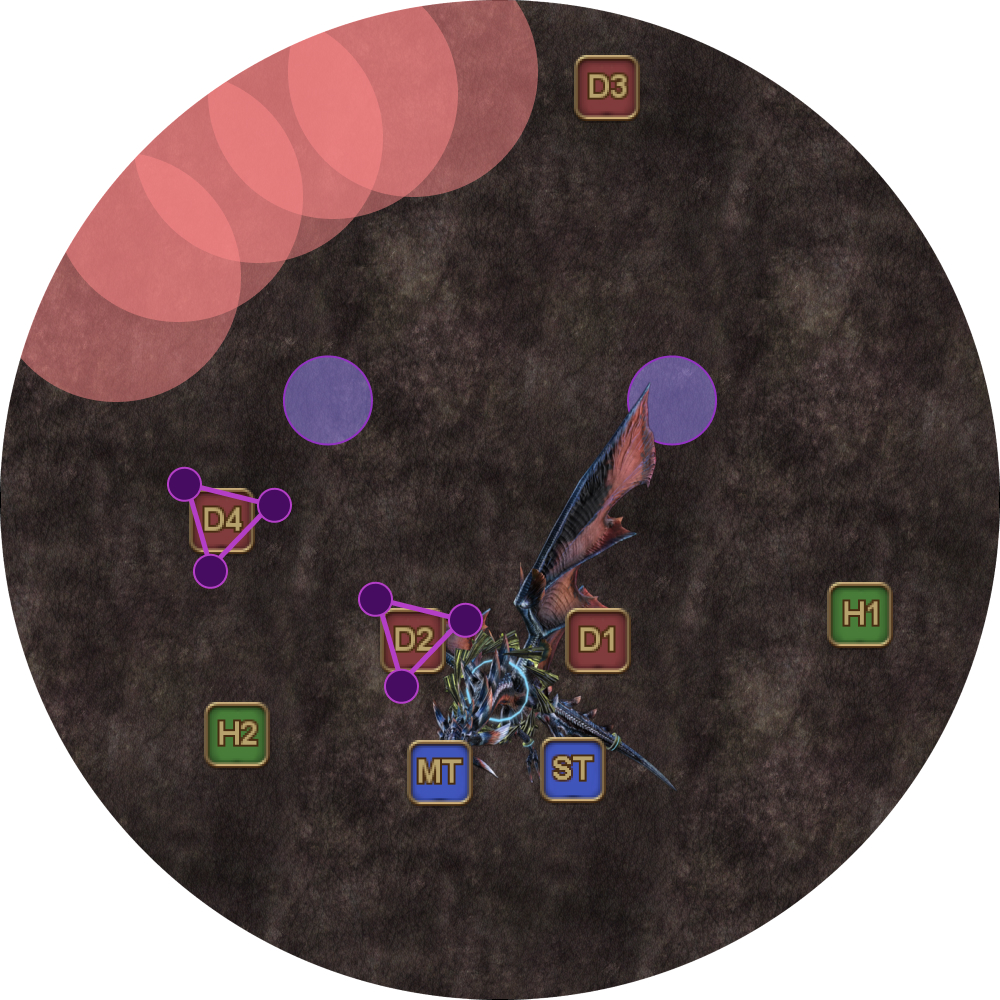 |
| 14. Because getting hit by the black orb applies the Mana Hypersensitivity debuff, the two targeted DPS must go into separate Neurolinks. | 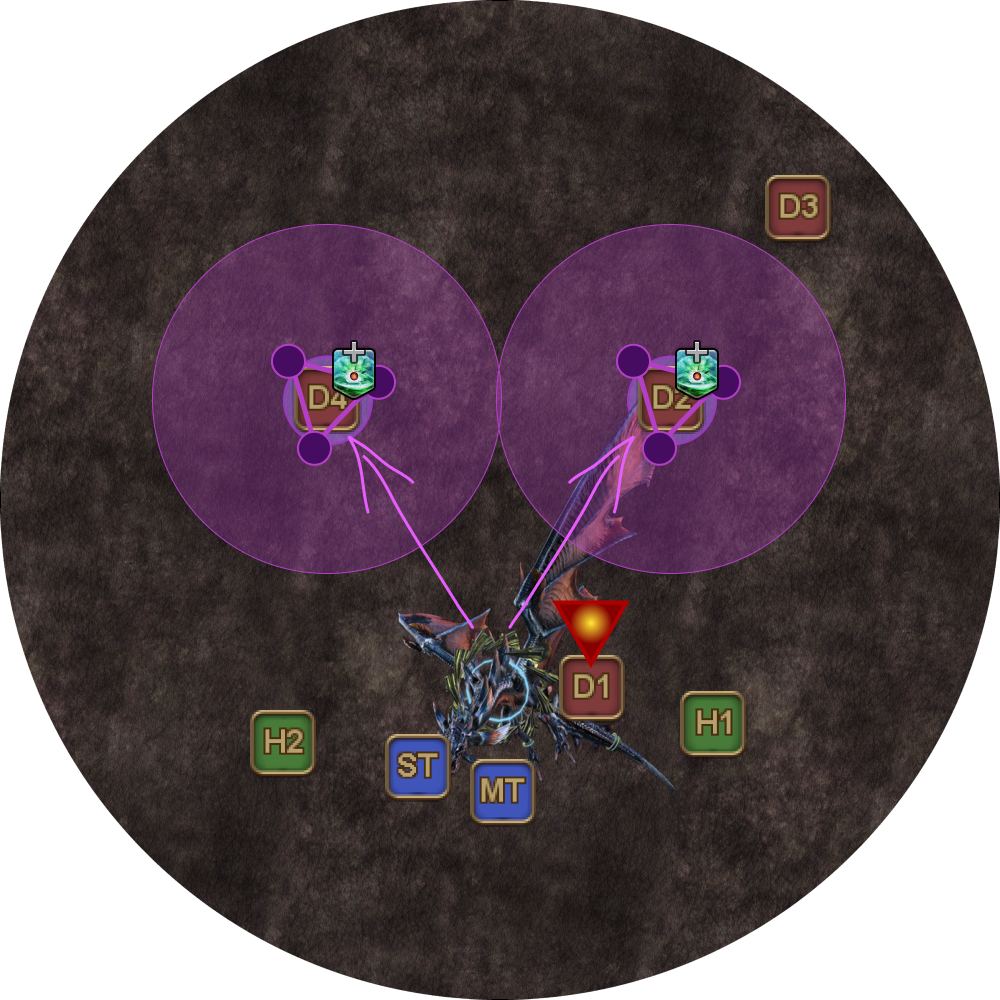 |
| 15. Twintania targets a random player with a Fireball stack, and readies another set of five Liquid Hells. This set of Liquid Hells is not baited, but targets a random player (other than the tank currently holding hate) instead. Resolve the Fireball stack behind Twintania, while the player targeted with Liquid Hell makes sure not to place a fire puddle where the stack point is. Note that Hatch, Fireball, and Liquid Hell targets are independent of one another, and one player can potentially be targeted with all three mechanics at the same time. In such cases, resolve Hatch first. As the Liquid Hell player takes damage with each Liquid Hell, they should stay out of the Fireball stack (unless they are also the Fireball target). | 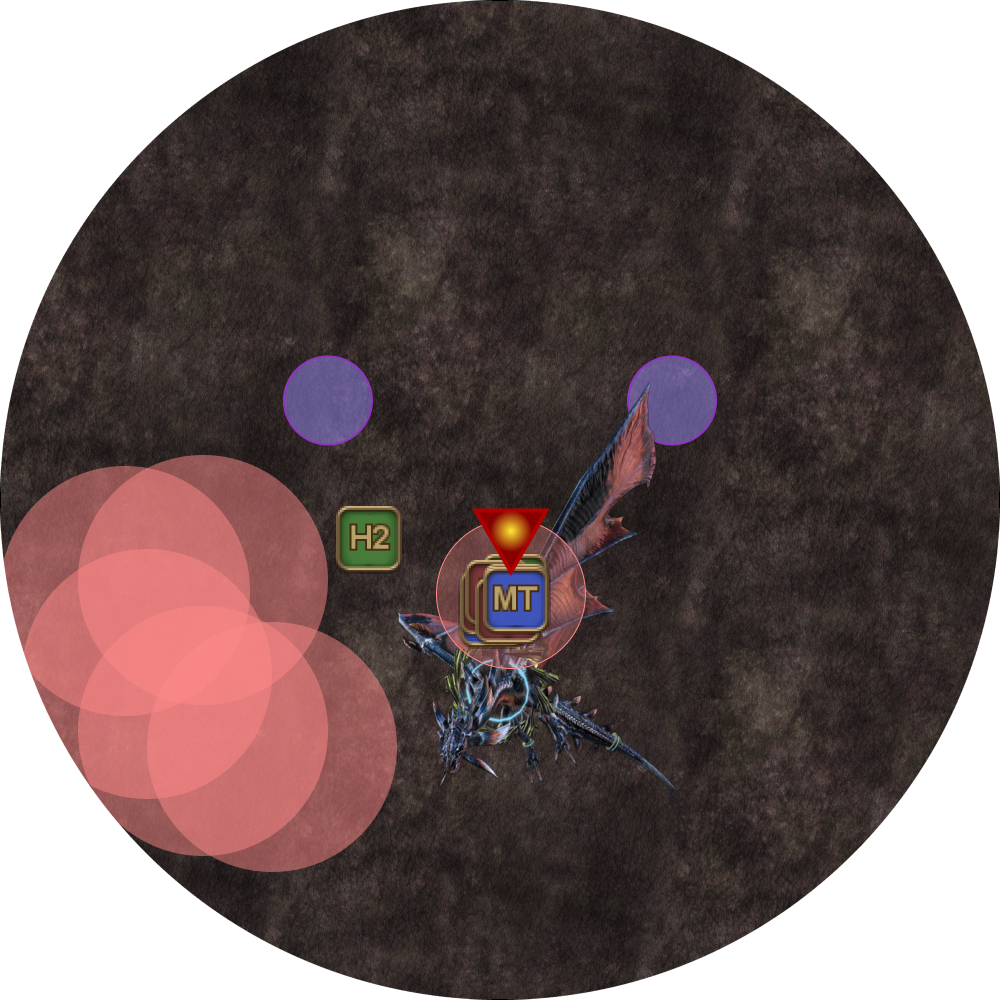 |
| 16. Twintania then readies Death Sentence on the tank with hate.
| 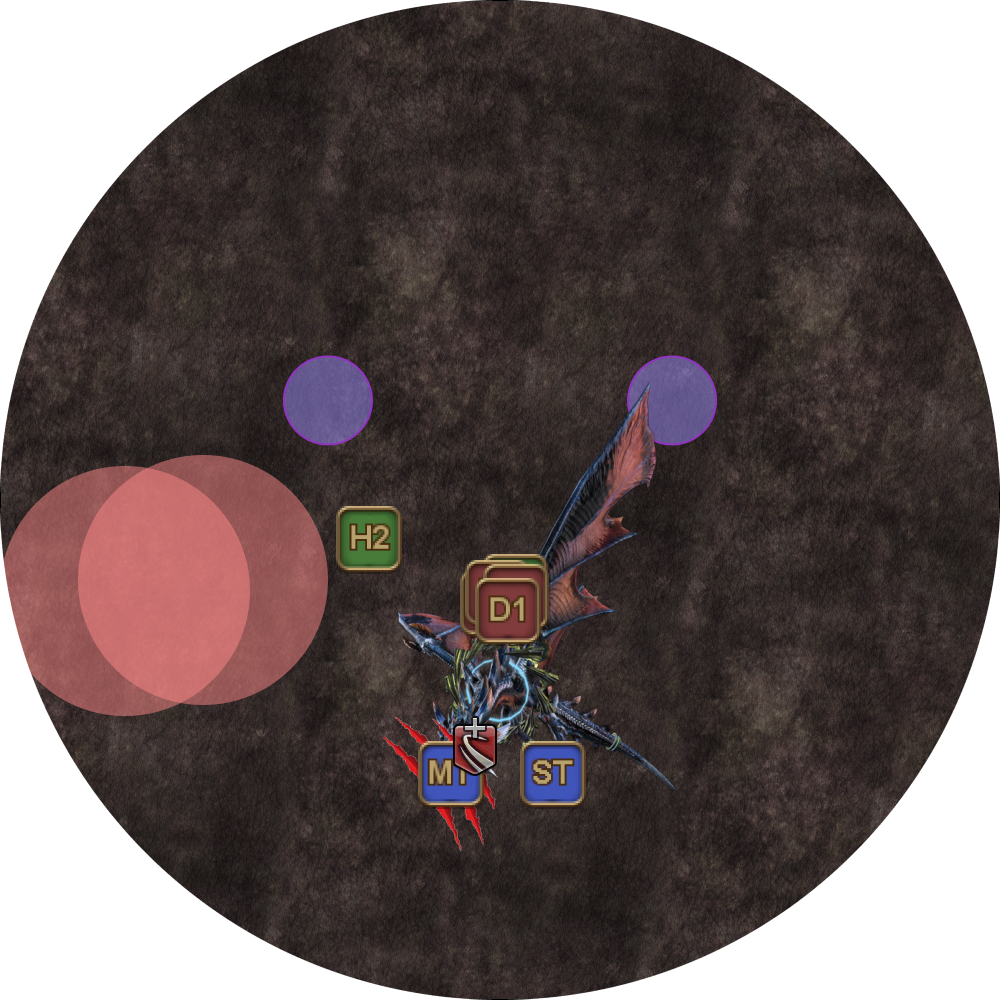 |
| 17. Twintania then Plummets on the new tank. The old tank should quickly move out of the way to avoid taking unnecessary damage. | 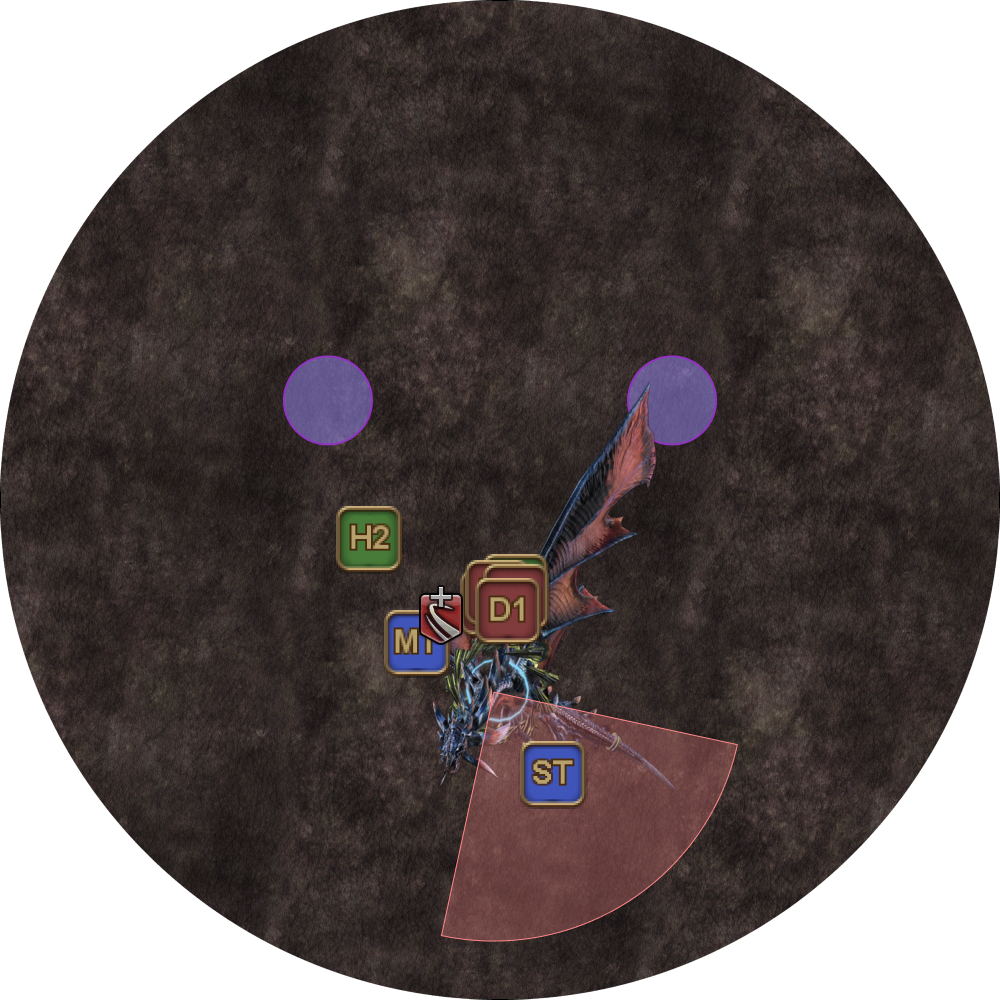 |
| 18. Twintania casts Generate, targeting two random DPS with Hatch. As with the previous phase, the targeted players should stay beside their Neurolinks and not enter. | 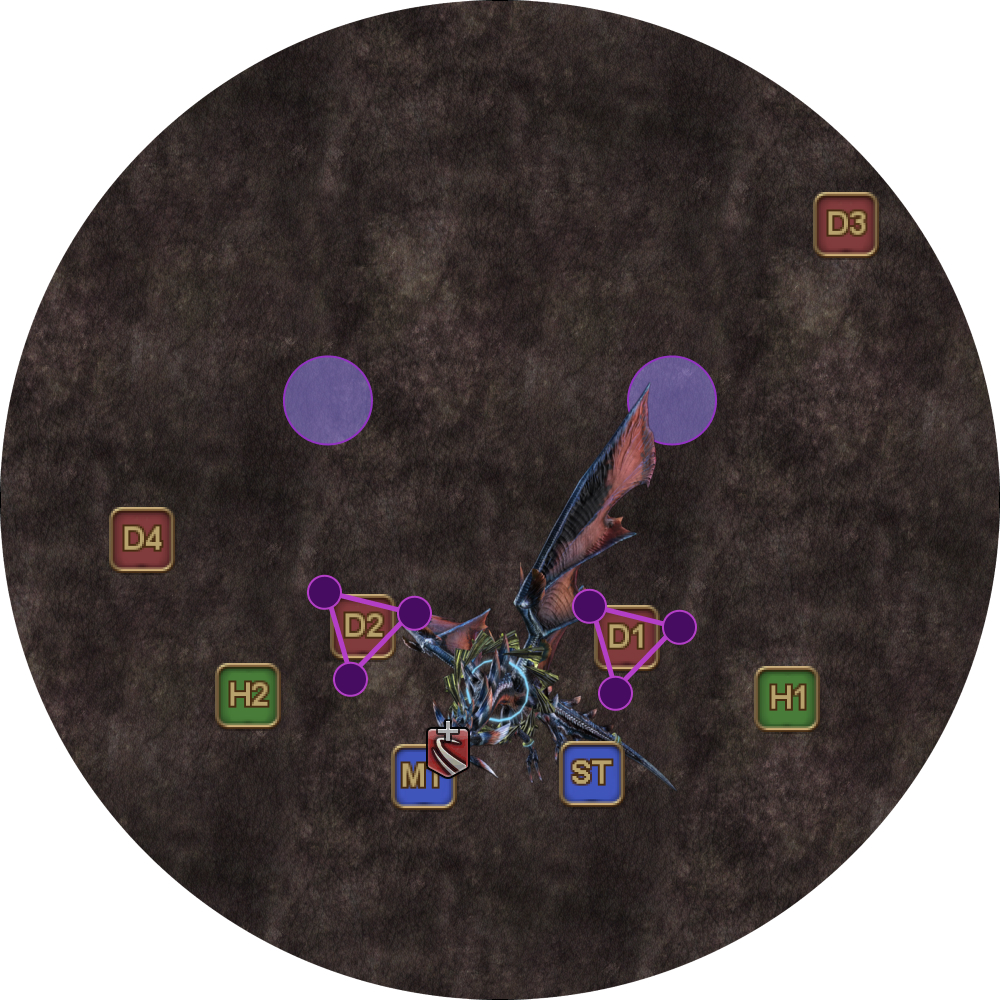 |
| 19. Twintania casts Twister. All players move to dodge Twister, while the two DPS with Hatch bait their Twisters outside first, before entering their Neurolinks to resolve Hatch. | 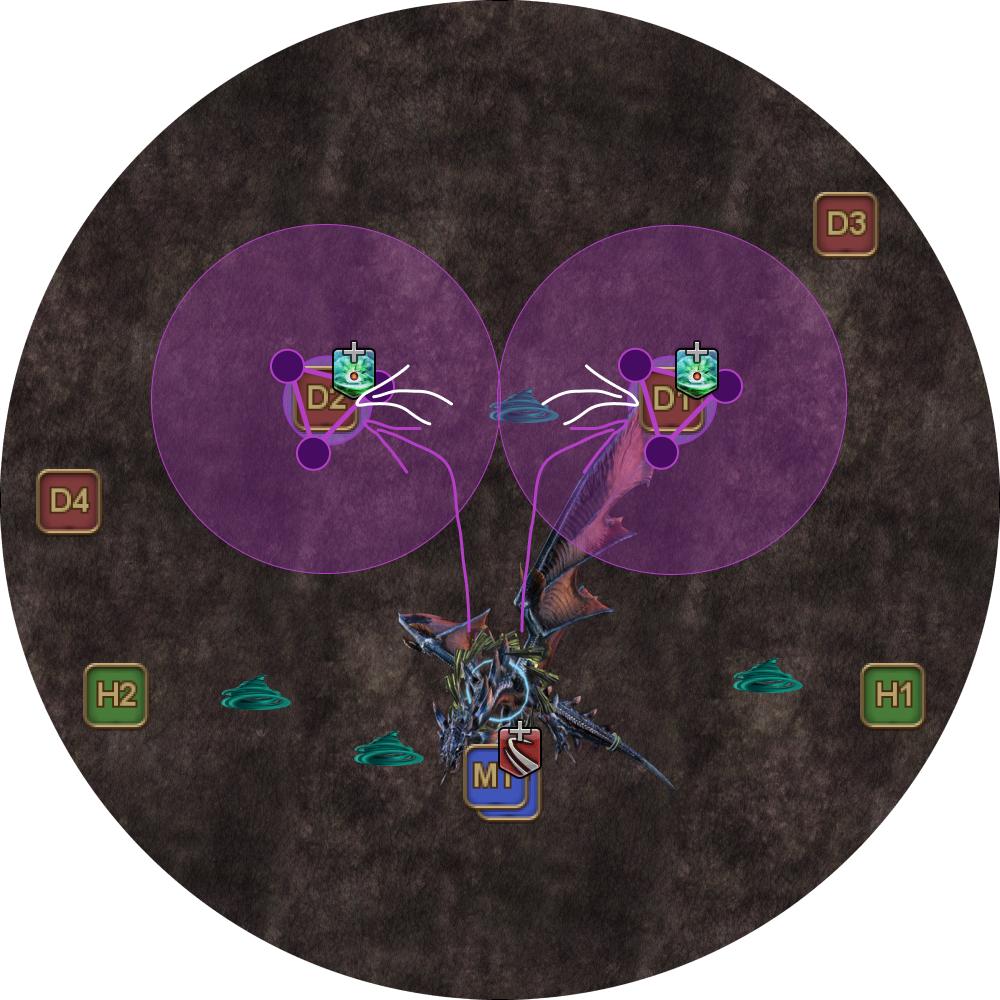 |
| 20. Twintania then Plummets the current tank, before restarting this phase from the baited Liquid Hells. (Nowadays, parties will kill Twintania around the next set of Hatches.) | 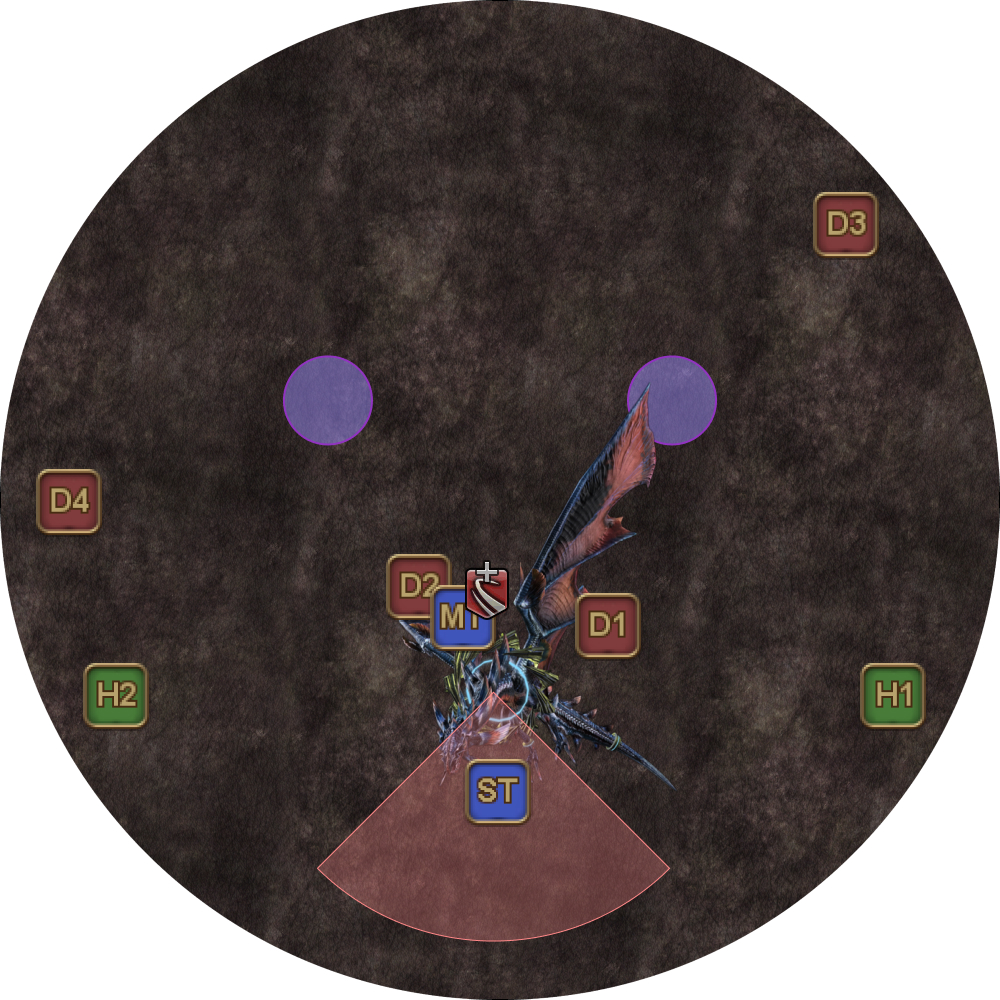 |
Heavensfall (Transition to Nael)
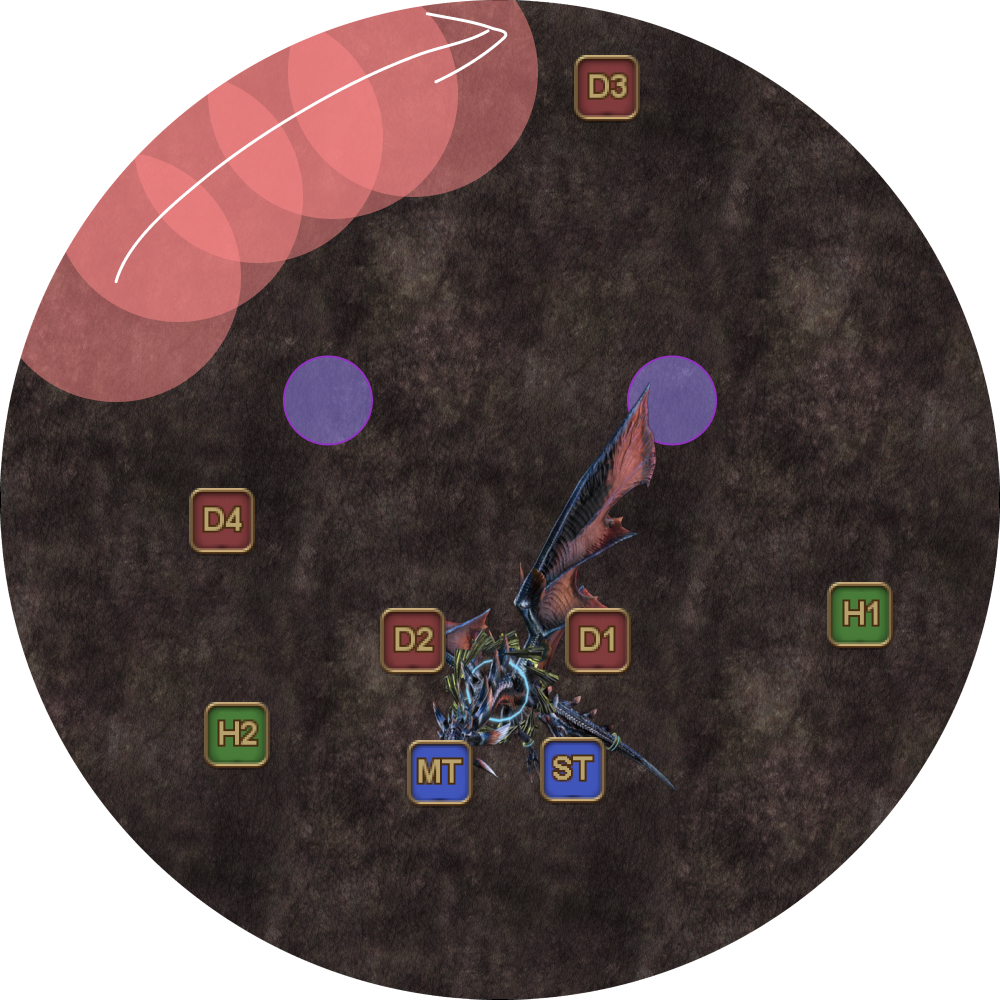
| 21. Twintania will leave the third and final Neurolink behind, before disappearing. The party should stack on the south waymark. Optionally, the tanks may stand on the north side instead. | |
| 22. A Heavensfall tower drops in the center of the arena, dealing proximity damage to all players, and knocking them back towards the edge. | |
| 23. Players should fan out and spread as shown in between conal AoEs from the Heavensfall tower. Four random players will each get hit by a Meteor Stream AoE, which should not overlap. | |
| 24. A second set of cone AoEs (hitting the previously safe slices) comes together with a second set of Meteor Streams hitting the remaining four players. Players should rotate clockwise or anti-clockwise as appropriate to move away from the south position in order to avoid dodging into the same slices for this second set. | |
| 25. Nael then arrives with a Dalamud Dive on whichever tank held hate at the end of Twintania (which is usually the ST), and immediately follows up with a five-hit Bahamut's Claw. Note Dalamud Dive is an AoE tankbuster, so players should stay away from the ST.
| |
Frequently Asked Questions
[Fireballs] Why do only 5 people stack for the Fireballs at the start of the fight?
| This is to help build LB. To make the transition from Nael to Bahamut, there must be at least a tank LB2 to keep the party alive. However, as the DPS check has gotten easier over time, there's a chance that insufficient LB will be built if the whole party split the Fireball damage. The Fireball stacks in the last phase are resolved with the full party as it's not worth wiping the party to insufficient players/mitigations unless the healers know what they are doing. |
[Fireballs] Why does D3 stay out of the initial Fireball stack, instead of D4 who would have to cast and move?
| This is done to keep D3's HP high as they will be baiting Liquid Hell shortly after. |
[Fireballs] Why don't we debuff Twintania with Reprisal/Feint/Addle at the first Fireball stack?
| LB is built whenever someone in the party survives damage that is equal to, or greater than their current HP due to mitigation or shields. By splitting the Fireball damage between just five players instead of eight, we intentionally "kill" the five players, but save them through shields and mitigations, thus building LB. However, there is some fine print- the order of operations are:
If enough debuffs are applied at Step 1, the damage at Step 2 is no longer lethal, and thus LB is not generated, thus defeating the purpose of a 5-man Fireball stack in the first place. |
Troubleshooting
[Hatch + Liquid Hell] The orb takes too long to get to me and I end up standing in a fire puddle and dying. What's wrong?
| The orbs start moving towards the players before Twintania starts the Liquid Hells. During this time, the orbs are supposed to reach the players inside the Neurolinks. If they are taking too long, either the targeted players are curving the orbs too much (increasing their travel distance), or the Neurolinks are too far from Twintania (the markers are placed too far apart). |