Brute Justice + Cruise Chaser
My preferred method of doing this phase is using my Tollgate strat that is very similar to MOOF’s strat that stacks both bosses in the middle.
The “Tollgate” name comes from the third Nisi pass, where the tanks and healers line up to take/pass Nisi. Someone mentioned that passing Nisi here felt like passing through a tollgate, and the name stuck.
The strat simplifies the Water/Lightning and Nisi passes, but at the cost of increased Tank damage. This phase is already one of the more healing-intensive fights, so be prepared.
Tanks should try to have minor cooldowns available for the Lightning passes.
| At a basic level, the tanks will keep both bosses stacked in the center, with some healer movement. The DPS make up much of the movement in this phase. | 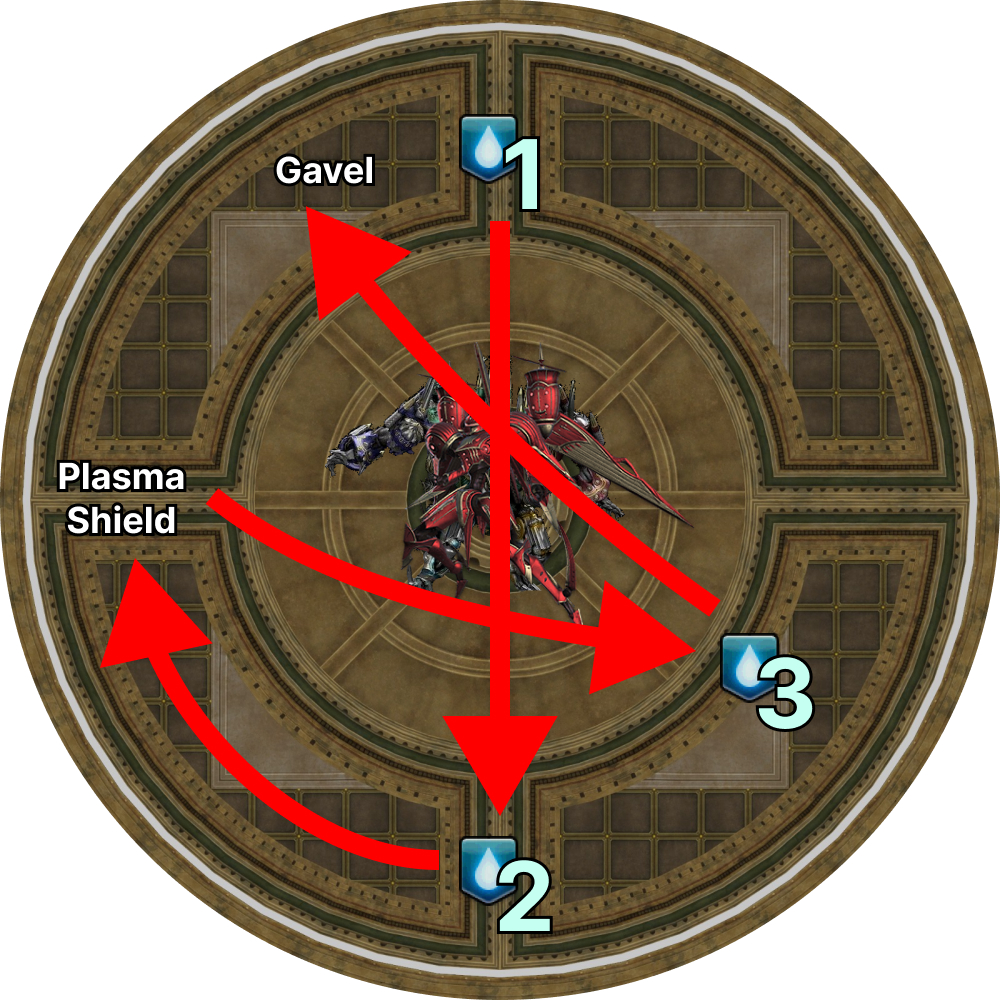 |
[Click to Expand] Water/Thunder and Nisi breakdown
This phase contains two "hot potato" loops that the party must handle simultaneously.
Loop 1: Water/Thunder:
These are two 30-second debuffs that are applied on two players when Brute Justice casts Link-up.
When the timer expires, the debuff explodes in a shared-damage AoE, centered on the affected player.
- If the player with the debuff ever dies, the debuff explodes and wipe the raid.
- After the explosion, the debuff transfers to a random player that was hit.
- If the debuff cannot be passed to a new player this way (e.g: nobody else was hit), it explodes and wipes the raid.
- The player that originally had the debuff gets an elemental resistance down debuff, so they cannot participate in two stacks of the same element in a row.
 | Compressed Water
|
 | Compressed Lightning
|
Loop 2: Nisi:
These are DoTs that are applied on either all the DPS, or all the tanks and healers when Brute Justice casts Judgment Nisi.
    | Final Decree Nisi αβγδ
|
During the fight, Brute Justice will cast Verdict, which sets up for a checkpoint later in the phase when it casts Gavel.
When Verdict is cast, it applies the following additional debuffs on all players:
    | Final Judgment Decree Nisi αβγδ
|
The party must essentially keep both debuff loops going, passing Water, Thunder, and all Nisis around until Brute Justice casts Gavel, which removes all the debuffs.
Movement
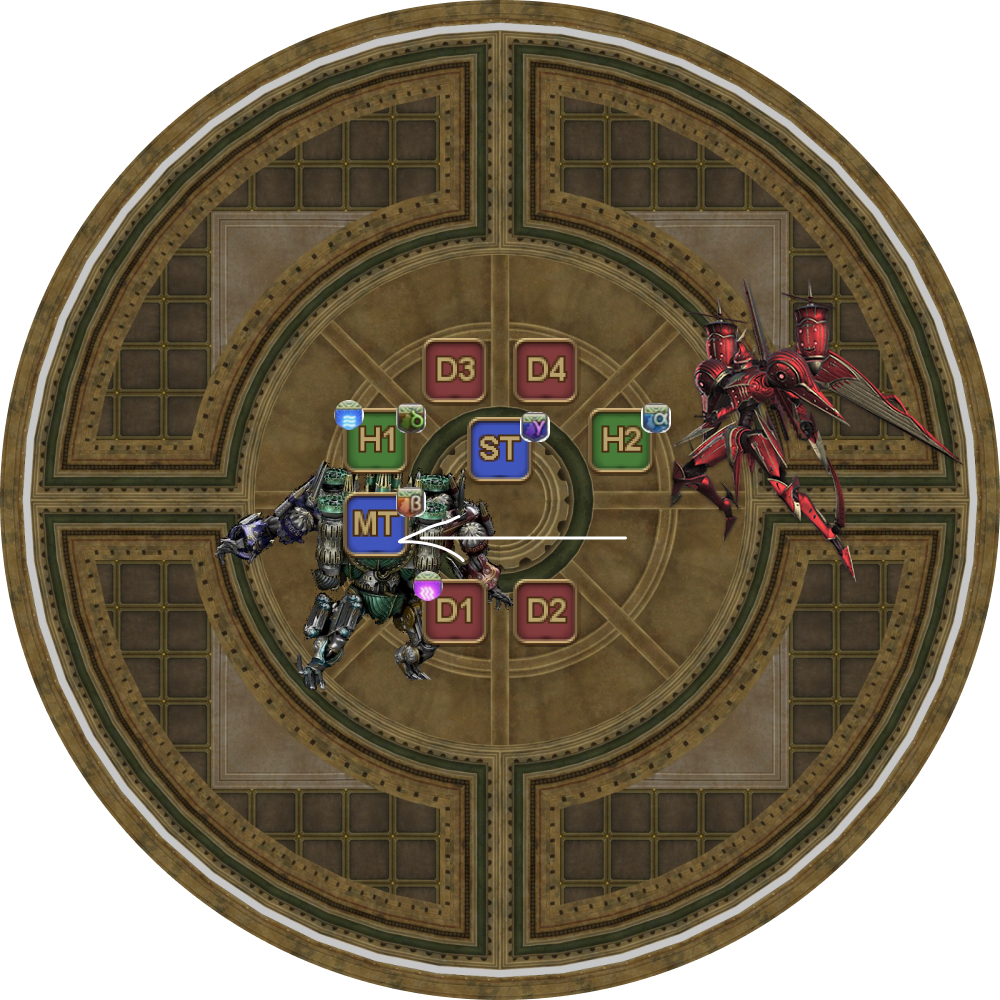
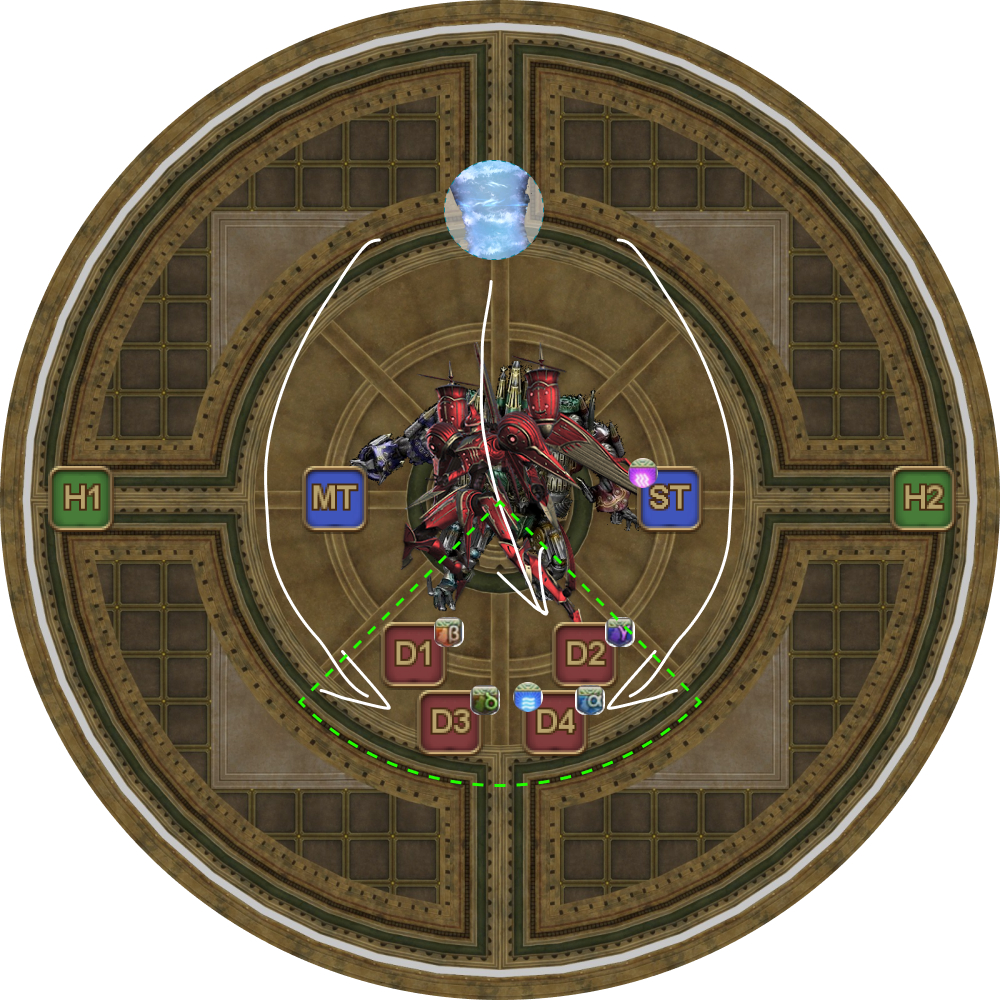
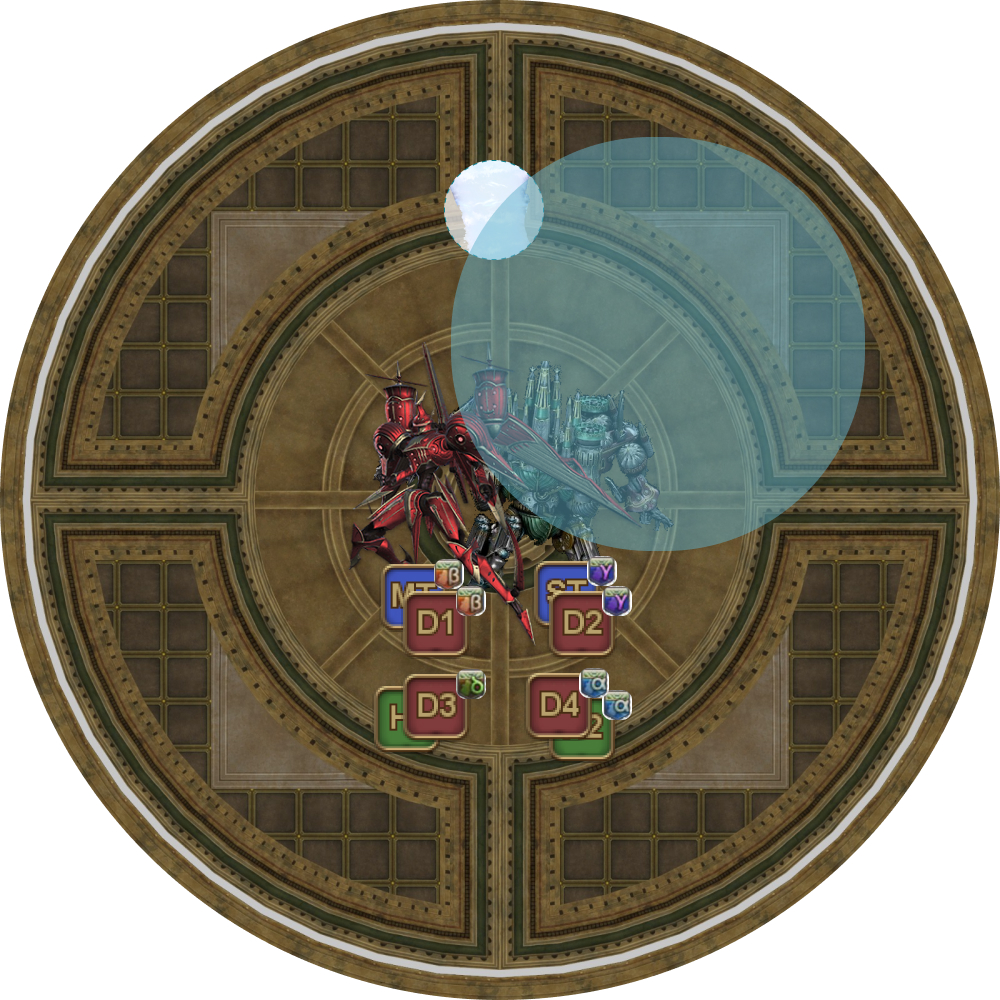
1. Initial positions.
(Note the MT and ST starting positions are swapped from the usual convention. The bosses each tank takes spawns on their respective starting side.) Cruise Chaser will cast Whirlwind, while Brute Justice will cast Judgment Nisi which debuffs the party with Nisis, Compressed Water, and Compressed Lightning. Stand as close as you can towards the center of the arena, without passing Nisi debuffs. | 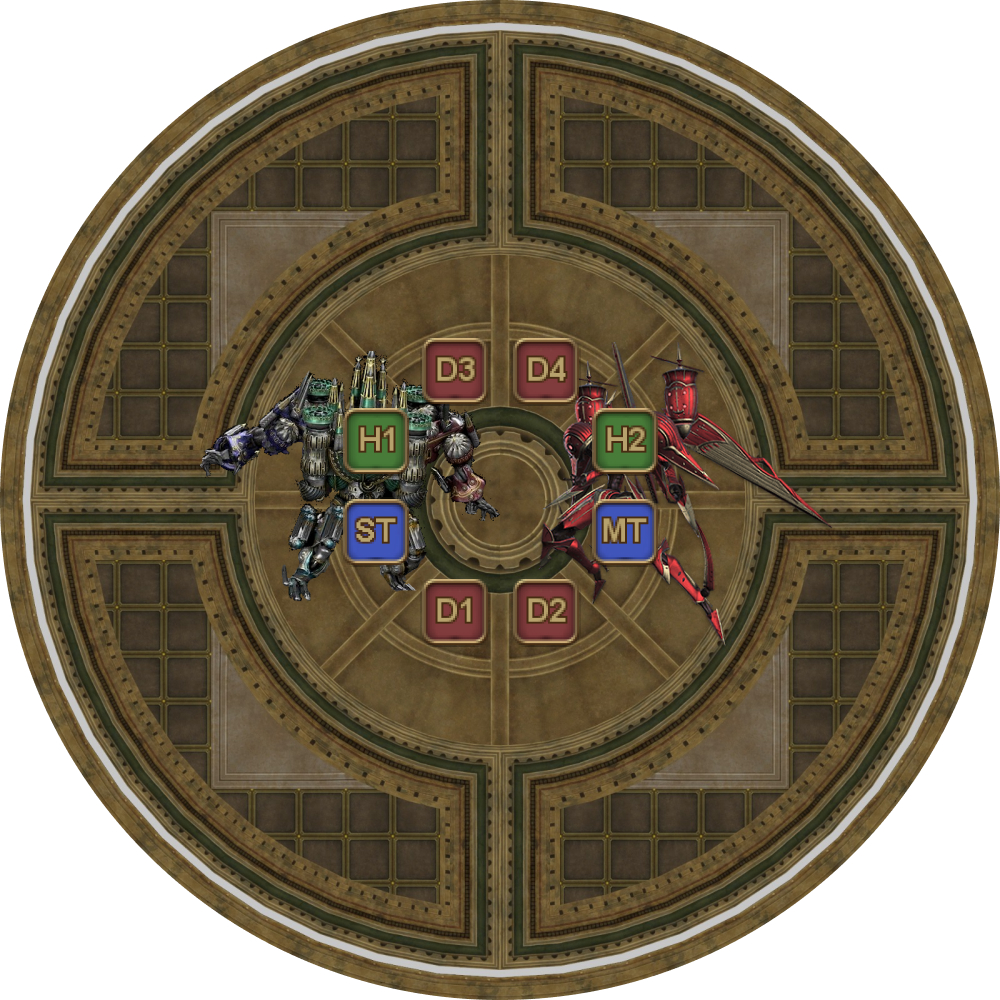 |
2. Two Chakrams will spawn directly opposite one another at any of the eight intercardinal directions and target a random party member's position. Move towards the edge of the arena to dodge the Chakrams' path. | 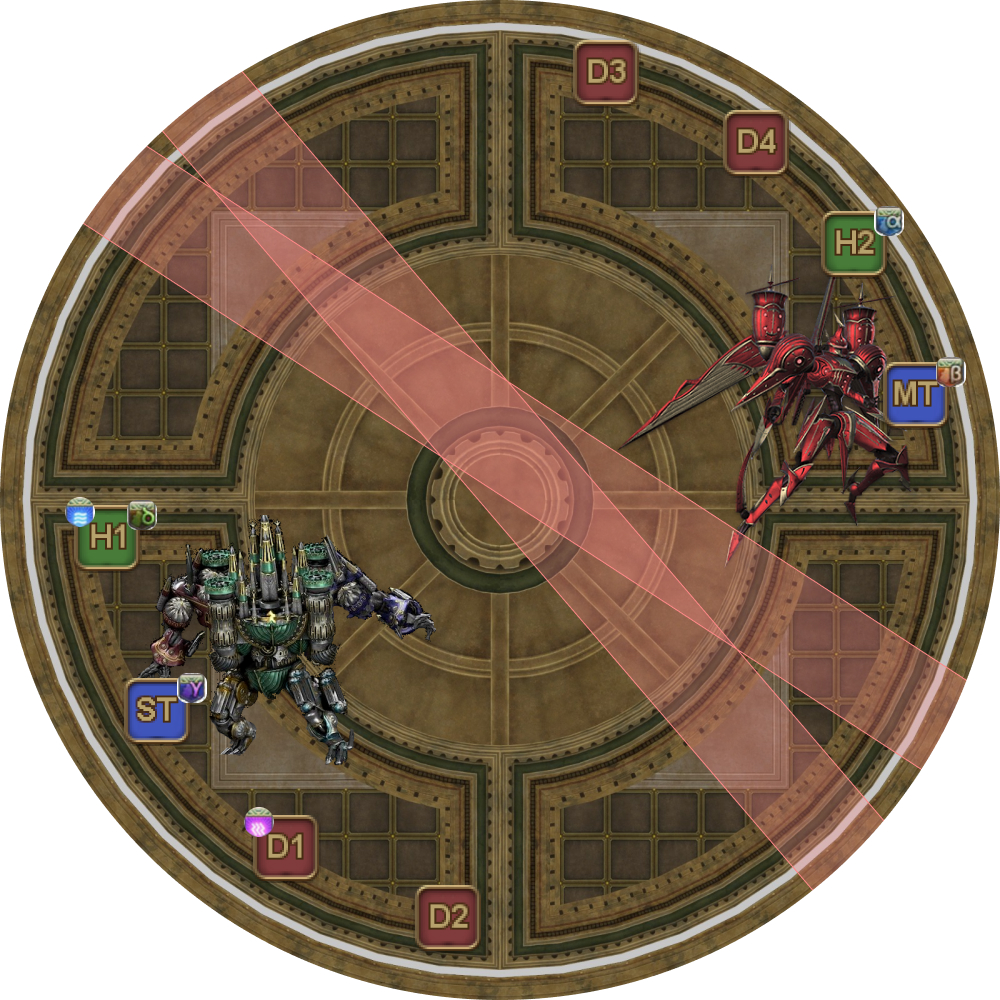 |
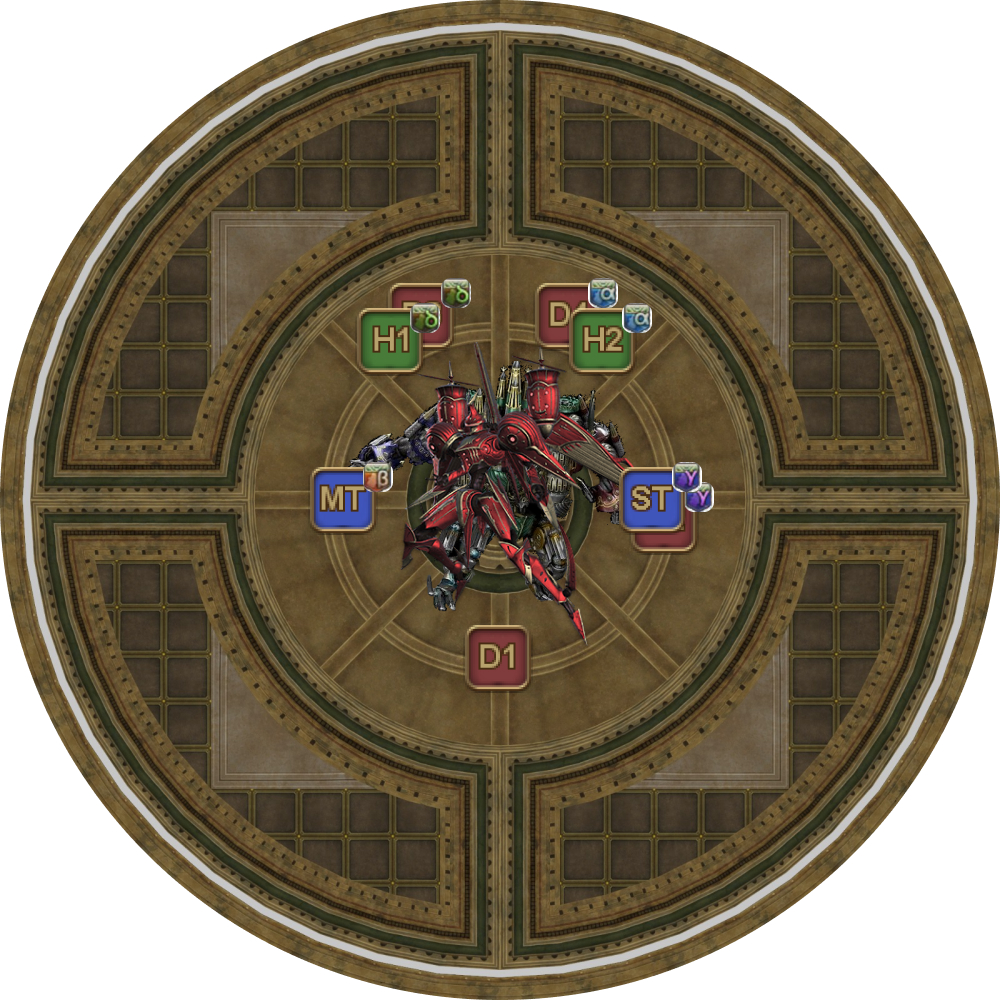
3. When the Chakrams go off, Cruise Chaser will cast Optical Sight, targeting large baited AoEs on all players current positions. All players move back to the center. The tanks will swap sides.
|  |
4. Cruise Chaser will stop to cast Photon. This is a shield check as Photon will bring all player's health down to 1HP. If there are no shields, the DoT from the Nisis will kill their players.
|  |
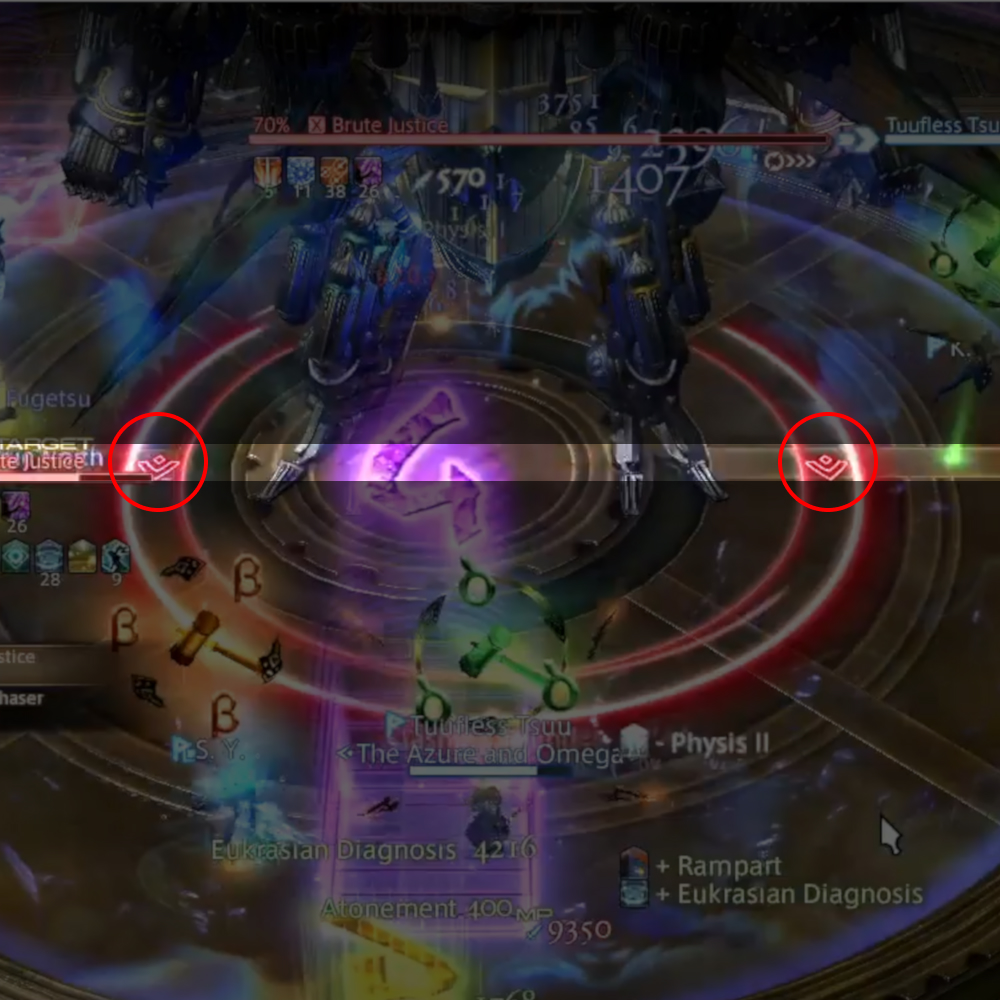
5. The two tanks should use this time to try and center the bosses, particularly the ST that's holding Brute Justice. (Use the arrowheads on the side of the boss's targeting circles to help) The bosses don't really need to be centered N/S, but should be centered E/W. After Photon is cast is the first Nisi pass.
|   |
6. Cruise Chaser casts Spin Crusher.
|  |
7. First Water/Thunder pass.
Tip: If tanks pop Rampart just before the first Water/Thunder, it will mitigate the Thunder, autoattacks from Cruise Chaser/Brute Justice, the upcoming Hidden Mine if the tanks are quick, and be back up in time for Double Rocket Punch at the end of the phase. | 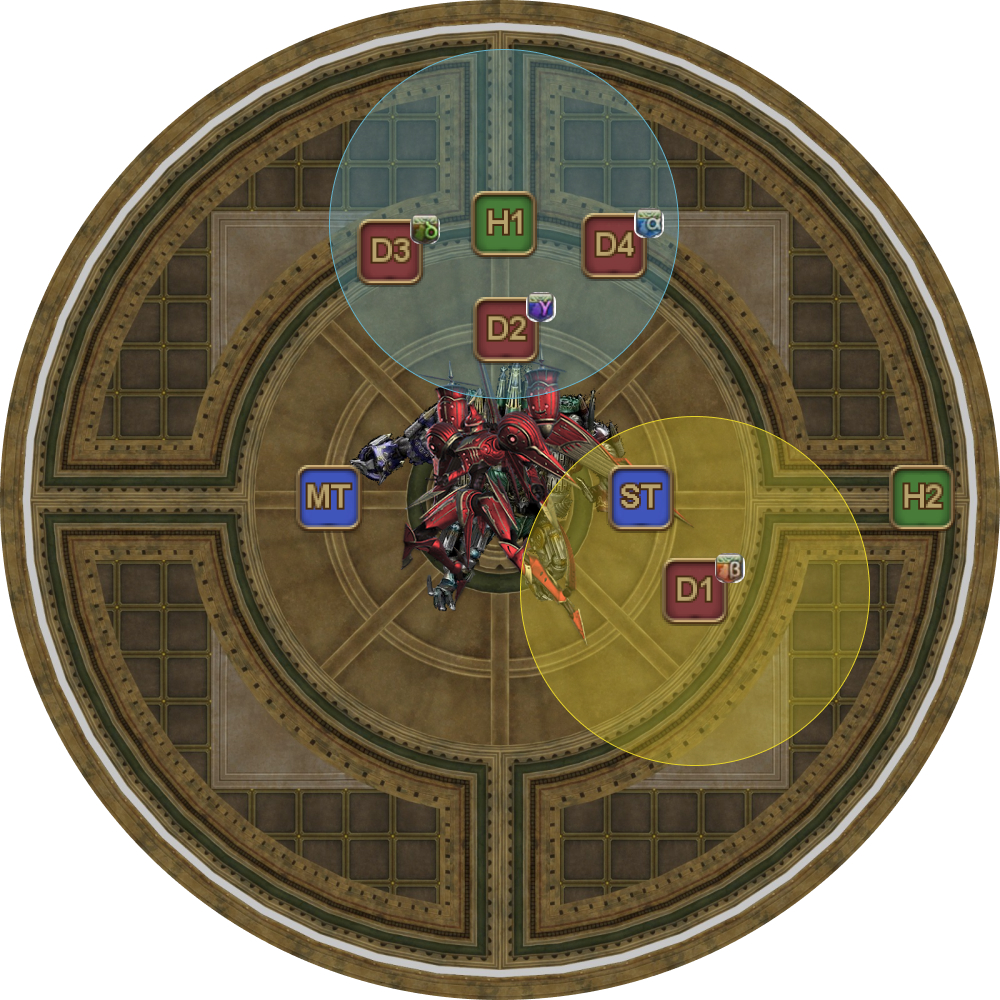 |
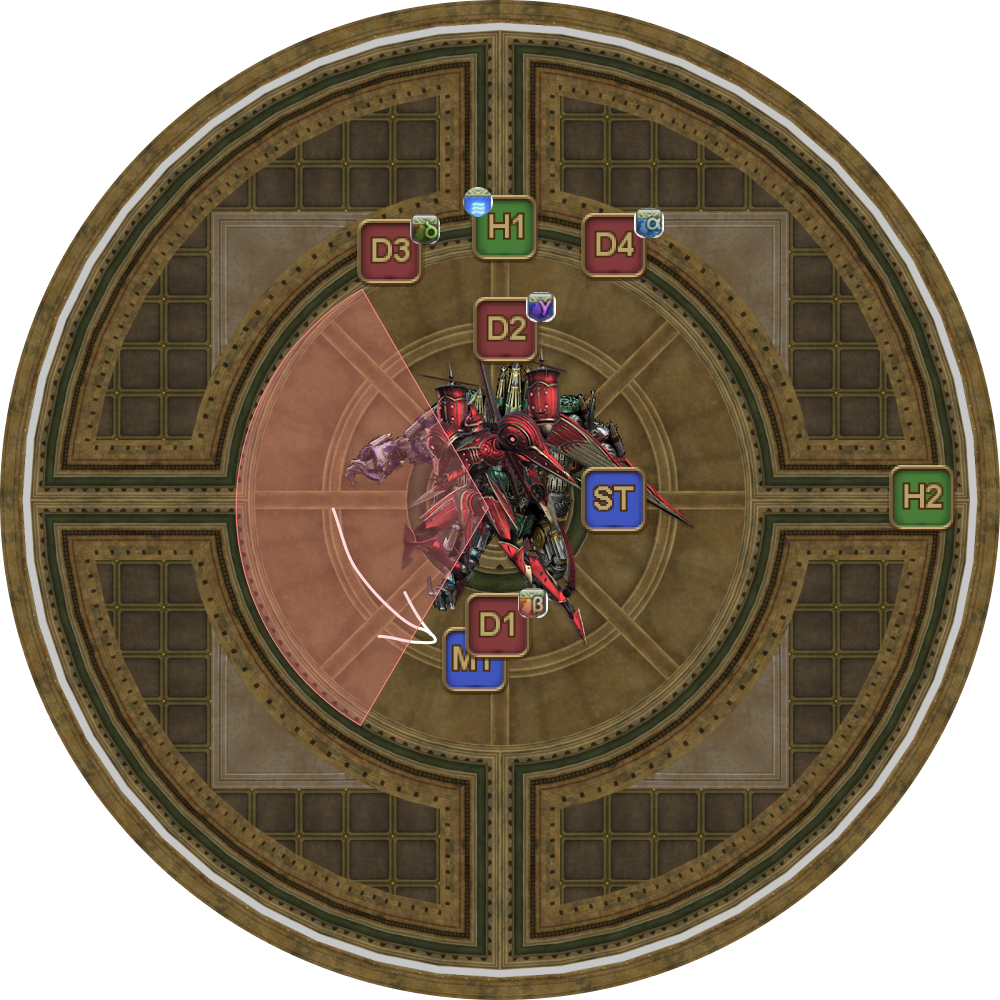
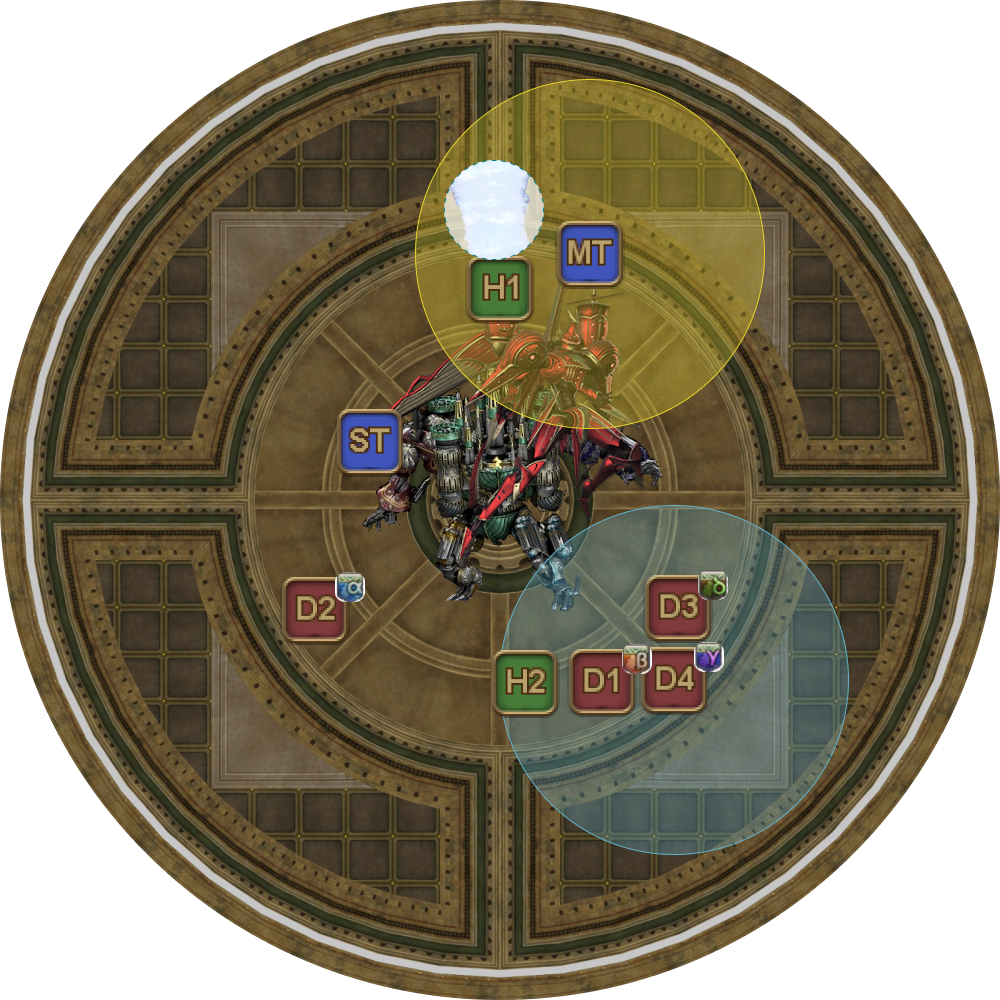
8. After Water resolves, Healers and DPS move to prepare for Hidden Mines and Enumeration.
All DPS should stay within the sector marked by the green dotted line:
|  |
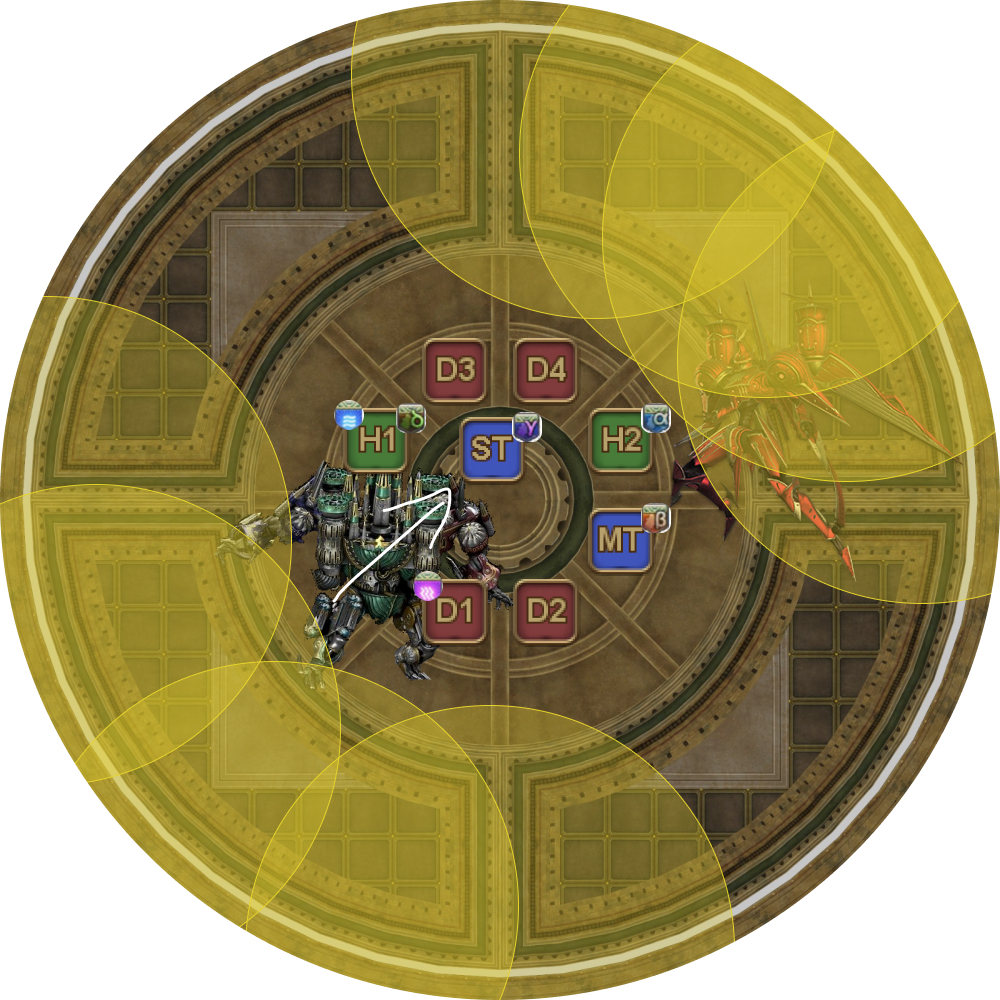
| 9. This is the most involved step for everybody in this phase. Tanks: One tank (at random) will be chosen to resolve Ice.
Healers: Bait Fire puddles and Hidden Mines before joining the Enumeration groups.
DPS: Resolve Enumeration with the Healers. If either side has both Enumerations (or equivalently, no Enumerations), D1 and D2 swap sides.
All non-tanks should stay inside the sector marked by the green dotted line (note it has expanded since the Hidden Mines have been baited). | 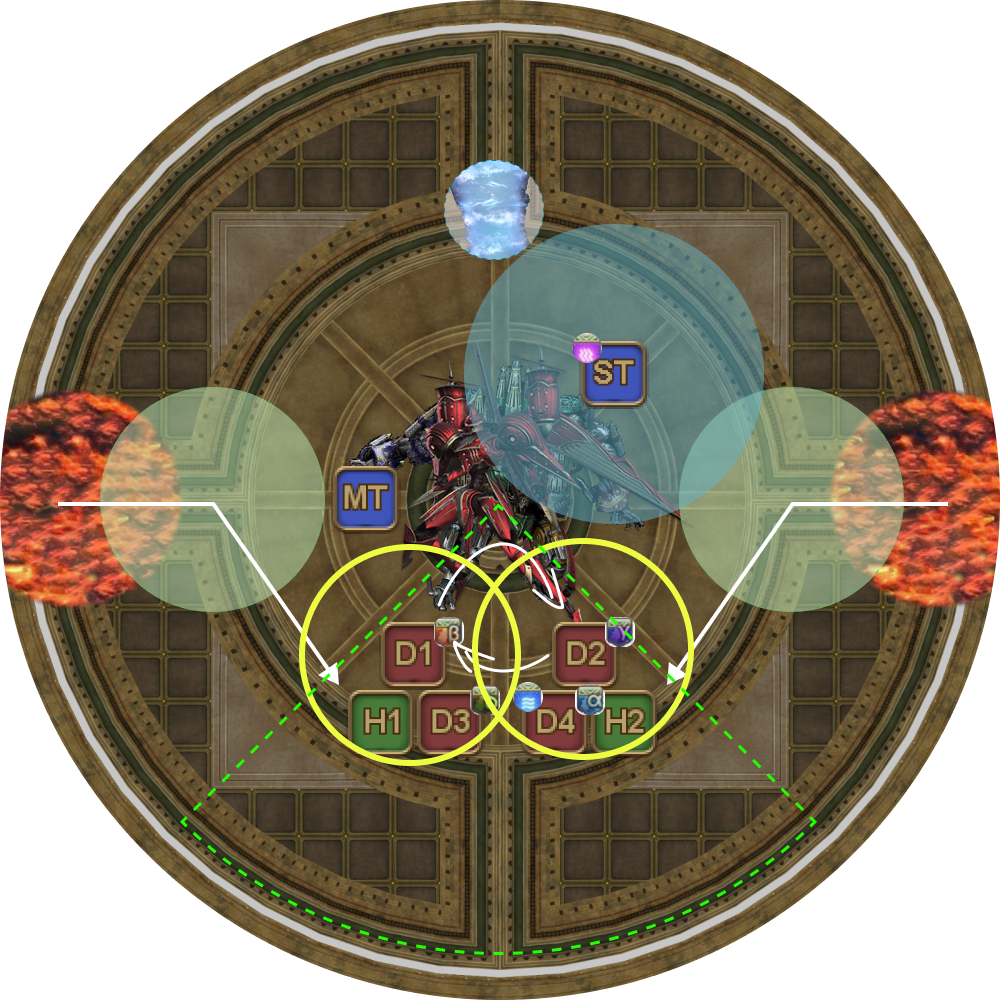 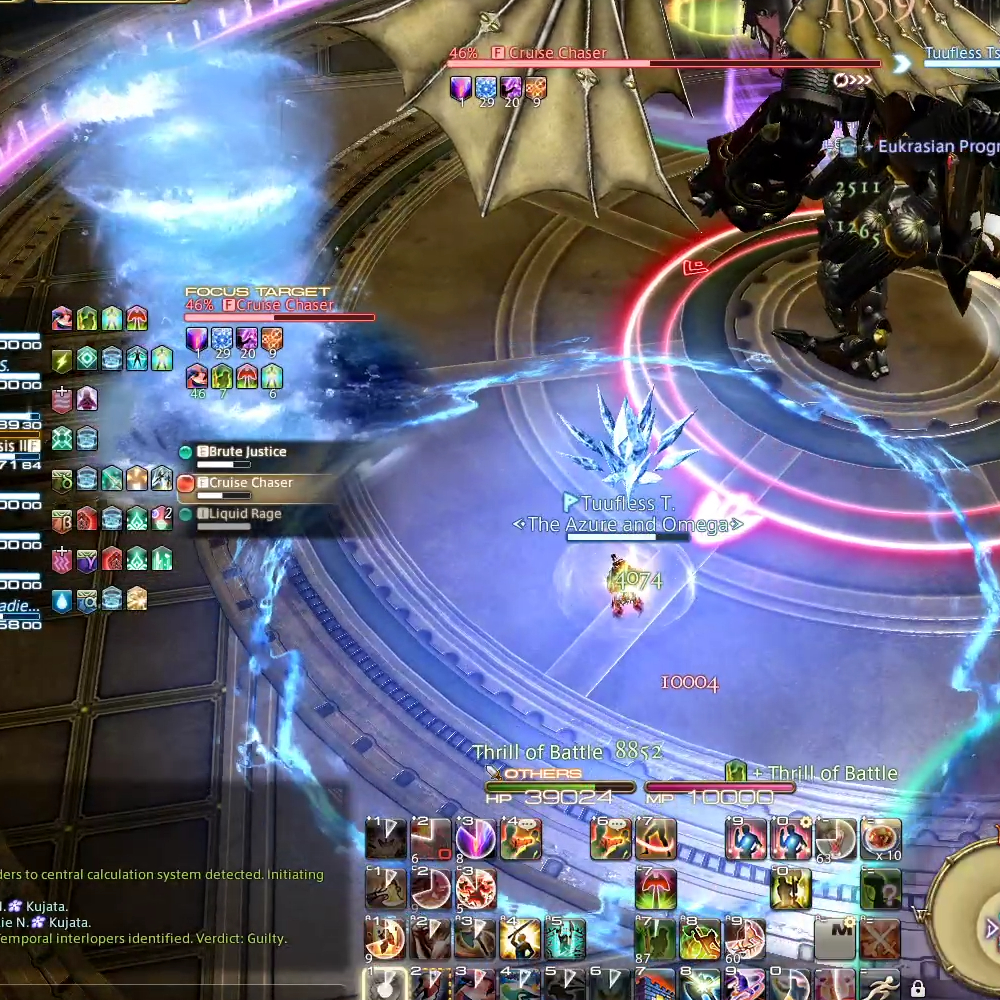 |
10. After resolving Ice (if applicable), tanks wait for the Hidden Mine to drop first, before taking the Hidden Mine on their side. This is a heavy AoE tankbuster. Healers and DPS should stay inside the sector marked by the green dotted line to avoid getting clipped by the Hidden Mine's AoE. | 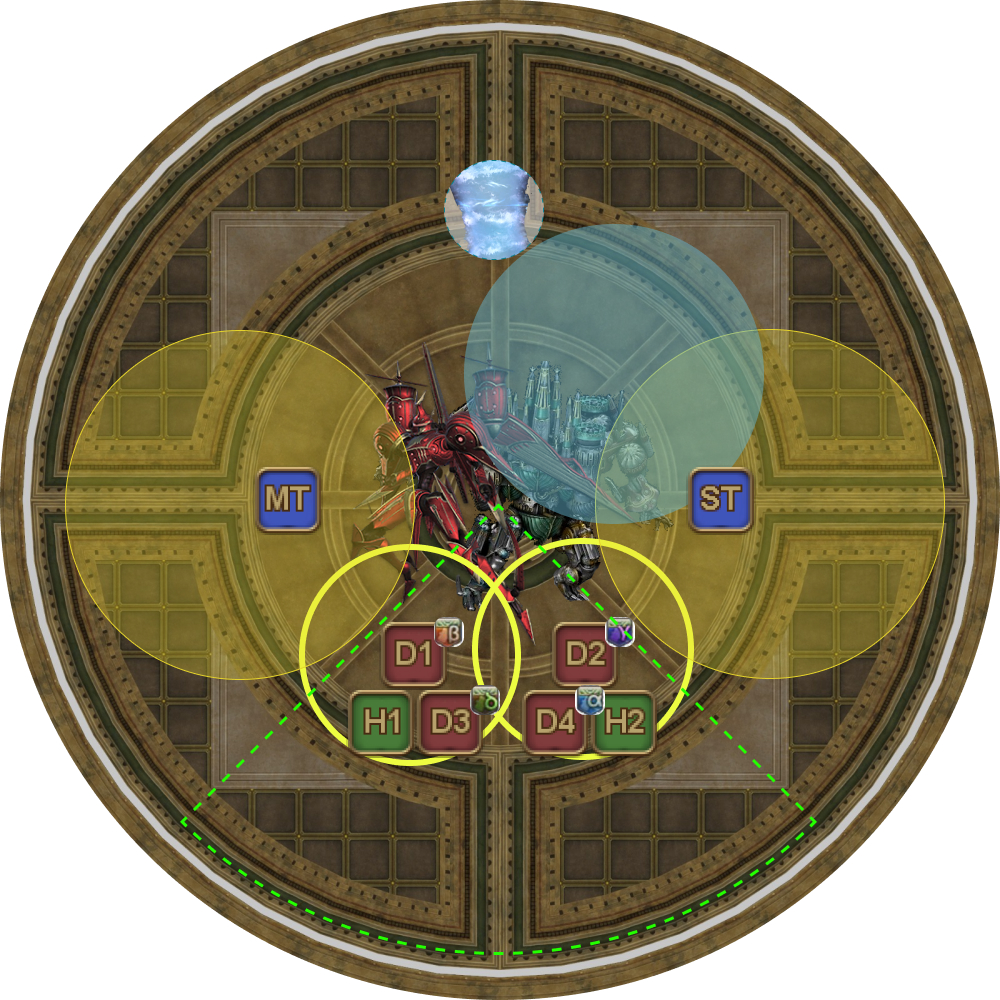 |
11. Second Nisi pass. Melee + Tanks be careful as the Ice will expand.
|  |
12. Second Water + Lightning pass.
Keep in mind that Cruise Chaser will autoattack the MT after this Lightning pass. Brute Justice casts Verdict, which gives all players their Final Judgment Decree Nisi debuffs which determines the next two Nisi passes. | 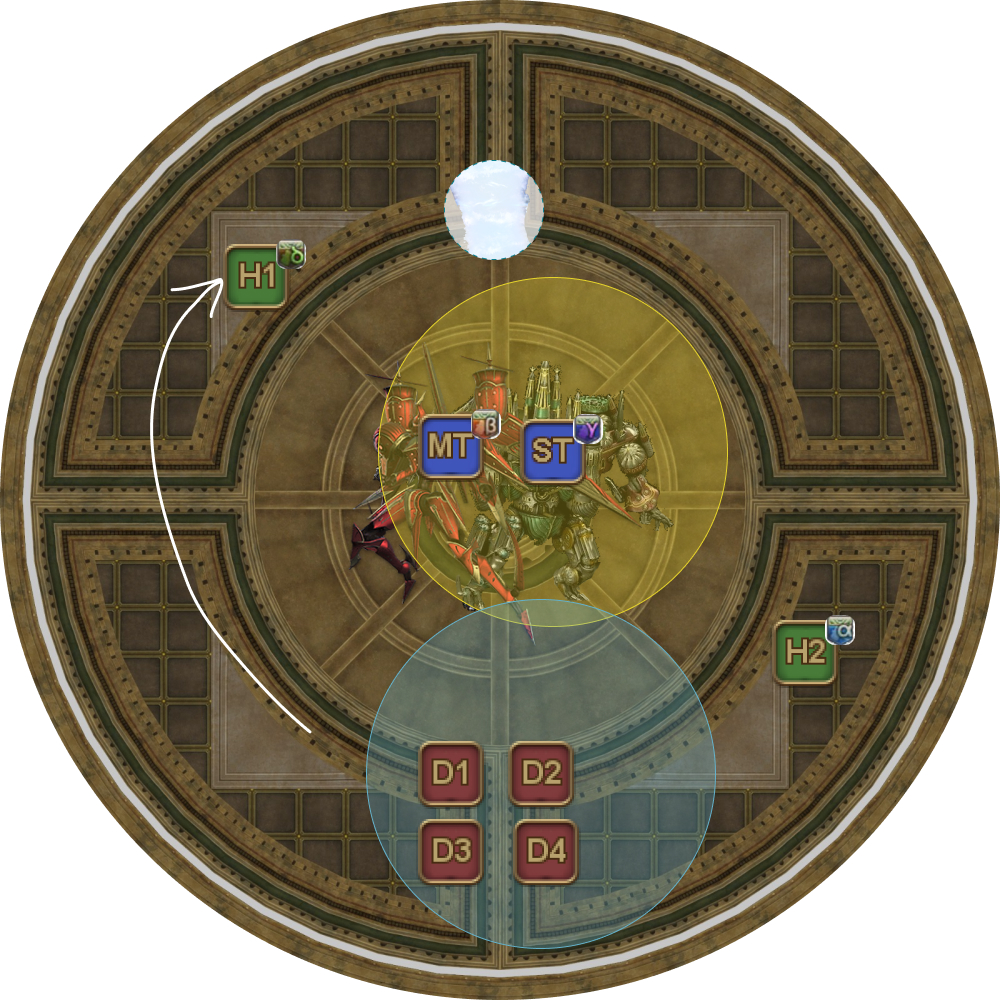 |
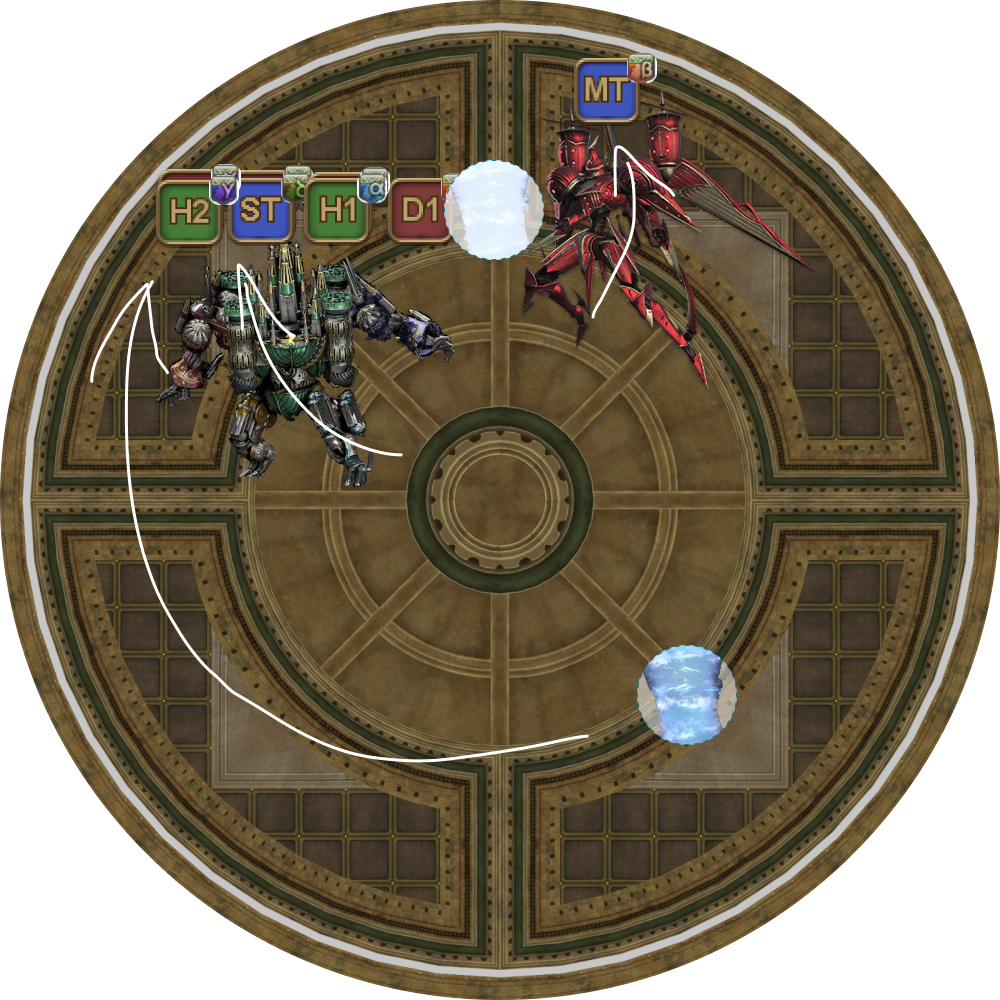
13. Cruise Chaser casts "Limit Cut", which will spawn a Plasma Shield in front of Cruise Chaser. Meanwhile, Brute Justice will prepare Flarethrower, which we will use to destroy the waterspout left behind by the 2nd Water.
Tanks and Healers line up to form the "tollgate" while the DPS destroys the Plasma Shield. |  |
14. Third Nisi pass. After the Plasma Shield is destroyed, the DPS pass through this "tollgate" to pass Nisi with the appropriate tank/healer before gathering in the south-east corner for the third Water pass.
|  |
15. Third Water + Lightning pass.
|  |
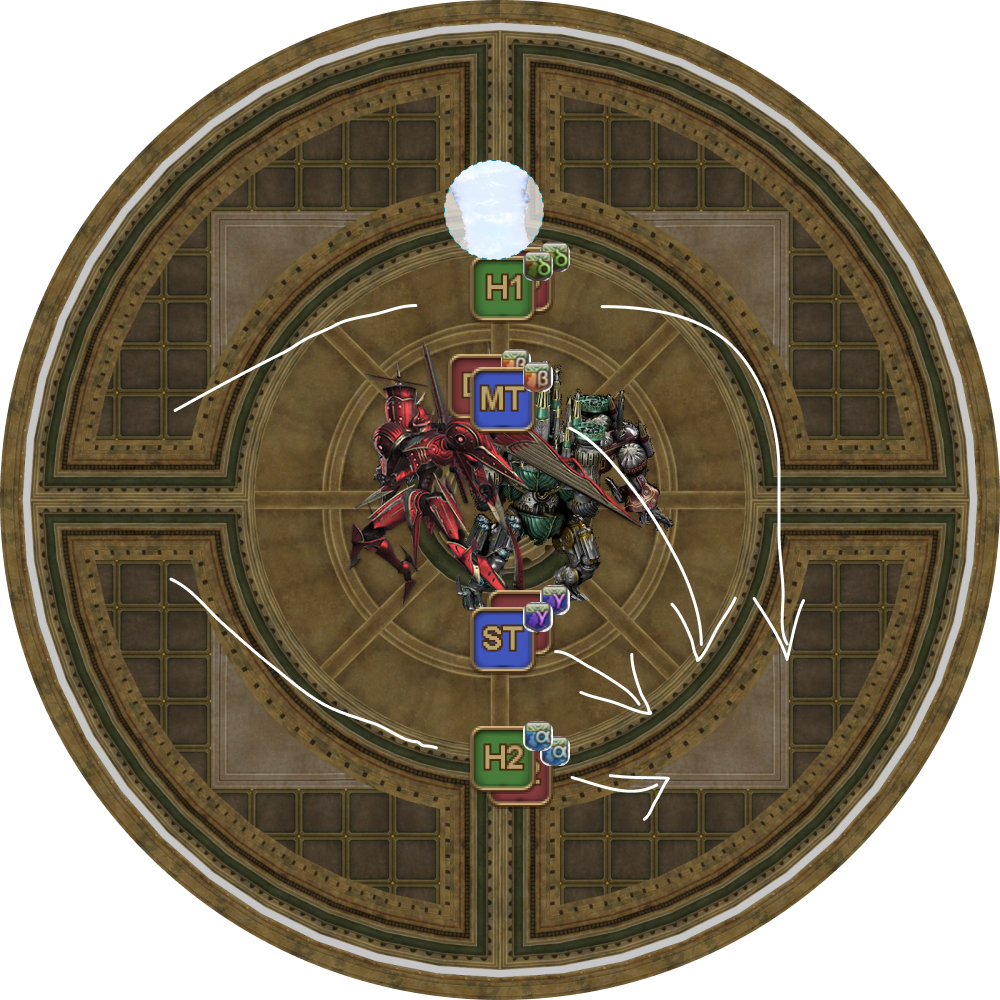
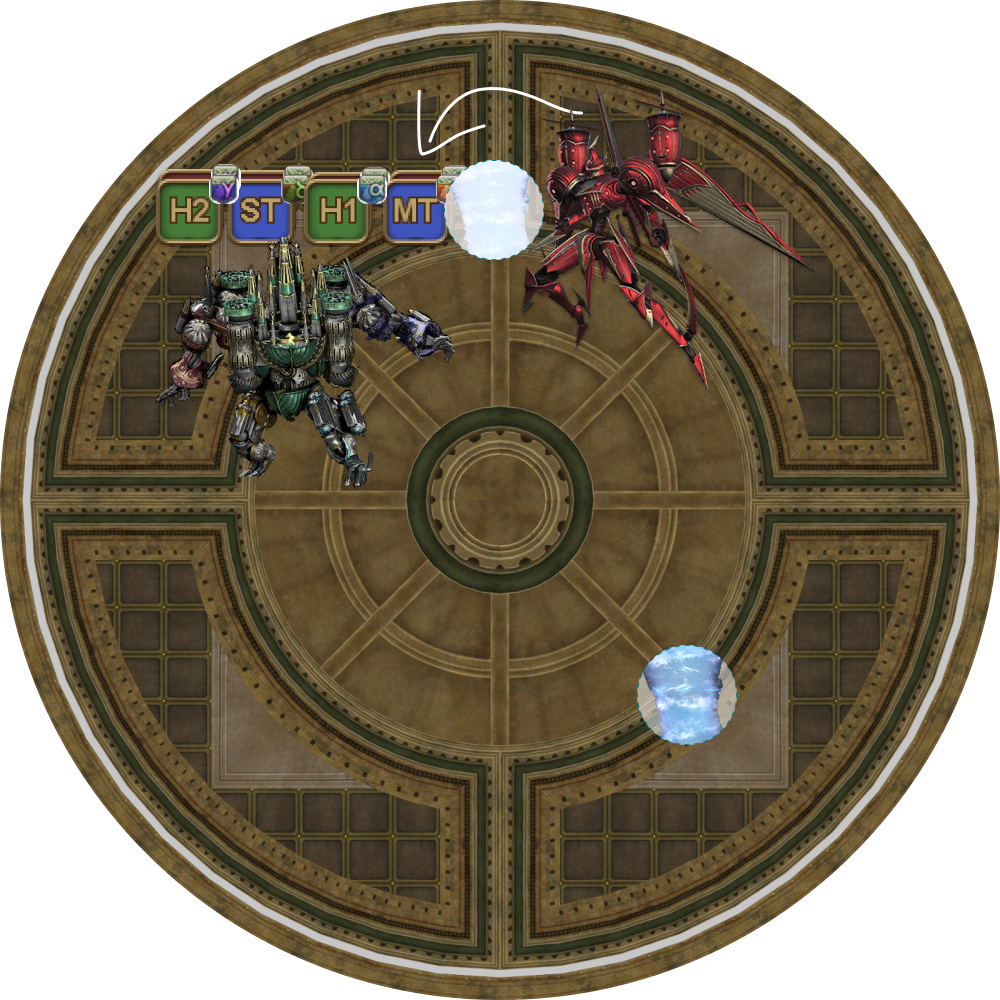
16. Fourth Nisi pass. Tank and healer positions are fixed (MT > H1 > ST > H2). DPS pass with the appropriate tank or healer.
|  |
17. Cruise Chaser casts Propeller Wind. Players must use the frozen Ice to block line-of-sight to Cruise Chaser, or they will become confused and run around uncontrollably.
|  |
18. Cruise Chaser casts Photon, bringing both tanks down to 1HP. Brute Justice then prepares Double Rocket Punch, a two-man shared tankbuster.
| 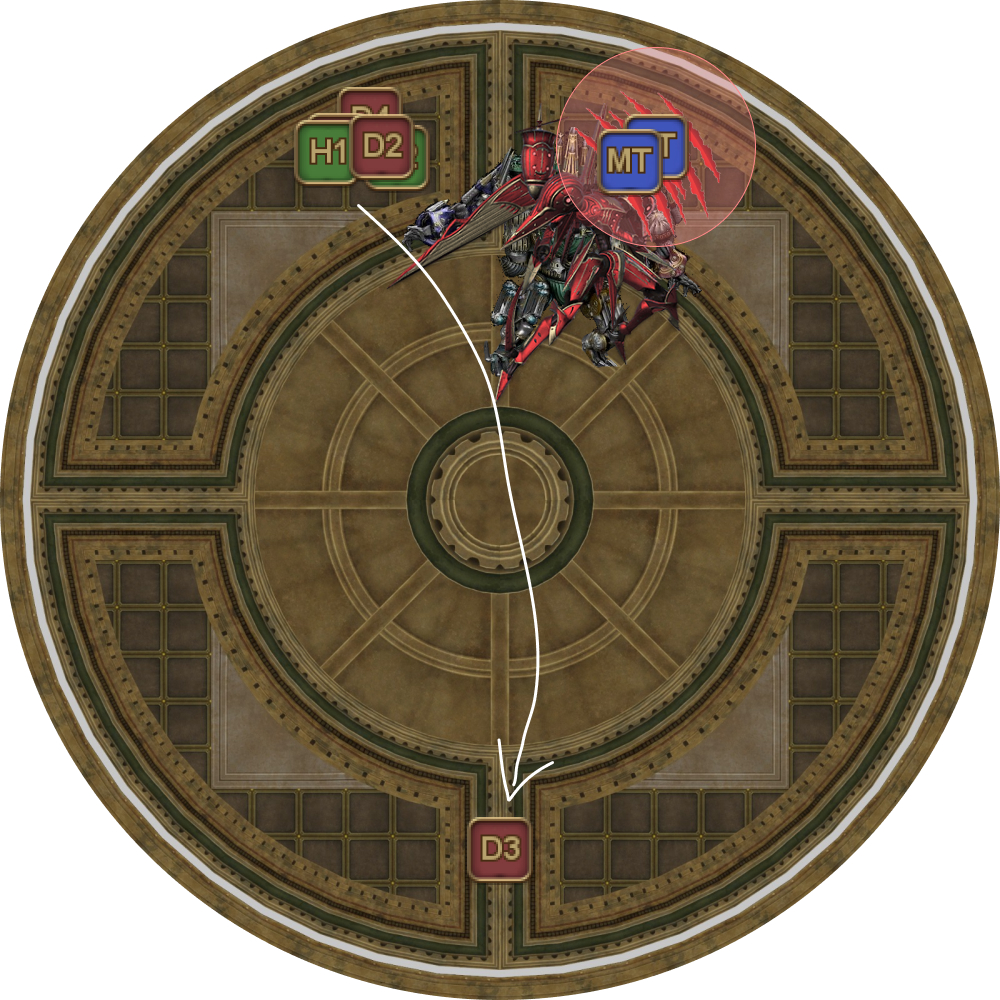 |
19. Brute Justice targets the furthest player and casts Apocalyptic Ray. After this, Cruise Chaser casts two Whirlwinds (one after the other) before both bosses start casting their enrage. If one boss dies, the other starts casting their enrage. | 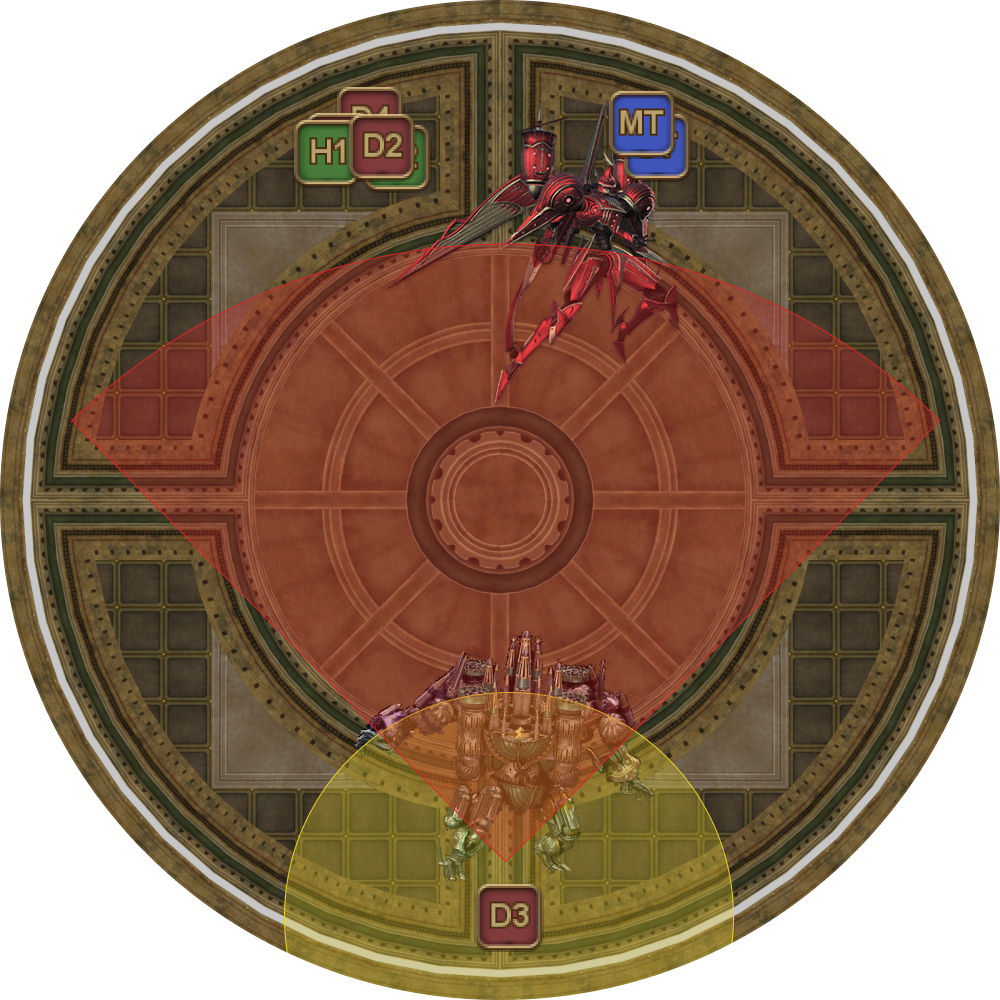 |
Passing Nisi (after Verdict)
Here are some examples on passing Nisis during the third pass.
At this time, either all the tanks and healers have Nisi (who the DPS need to collect the appropriate Nisis from), or the DPS have all the Nisis (which they need to pass to the appropriate tank or healer).
Example 1: Tanks/Healers have Nisi. Third pass:
Fourth pass:
|  |
Example 2: Tanks/Healers have Nisi. Third pass:
Fourth pass:
|  |
Example 3: DPS have Nisi. Third pass:
Fourth pass:
|  |
Example 4: DPS have Nisi. Third pass:
Fourth pass:
|  |
Frequently Asked Questions
[Tank swap] Why don't we do a Provoke swap instead of having the two tanks cross each other (especially with Nisi)?
Two reasons:
|
[Hidden Mines] Why doesn't D3 bait the west Hidden Mine instead of H1?
The objective is to have both Enumeration targets visible and in close proximity to one another. Suppose D3 and H2 baited the Hidden Mines instead and D2 and D3 were targeted for Enumeration. D2 only sees the Enumeration on D2, but now has to look at D3 to determine whether they need to switch positions with D1, with two giant robots in the center blocking the view. |
[Hidden Mines] Why don't we bait the Hidden Mines towards the outer edge of the arena? Doesn't that put the healers further away from Brute Justice so a ranged DPS doesn't bait a Hidden Mine by mistake?
The idea is to keep both bosses in the center. In particular, if the West mine is baited towards the edge, the MT has to pull Cruise Chaser closer to the edge in order to take the Hidden Mine, and doesn't leave much space for the DPS to fit in for the Plasma Shield. Of course, you could have the MT and ST switch sides again to recenter the bosses, but that violates a different principle which is to try and keep the tanks and healers to their half of the arena as much as possible. |
[Plasma Shield] Why are all four DPS on the Plasma Shield? Isn't that overkill?
Yes, it's overkill. You really only need three DPS to destroy the Plasma Shield in time, but this is a single point of failure and having all four DPS on the shield is insurance against someone targeting the wrong thing by accident, or one of the DPS angled too far from the shield's front so they don't do any damage. |
Troubleshooting
[Crashing Thunder] Why did this deal more damage than usual?
Water and Thunder work differently. While Crashing Wave works like any other stack damage (damage is lowered as more people are hit by Crashing Wave), Thunder is the opposite; damage increases as more people are hit by Crashing Thunder. This is why we want the Thunder stacks to contain exactly two players. |
[Compressed Water] What is "Severe Contamination"?
This is the pulsing raid-wide damage that you get if the waterspout left behind from Compressed Water is not frozen or destroyed by Flarethrower. |
[Hidden Mines] What went wrong with the Hidden Mine baits? Why was a mine baited on the DPS instead of a healer?
The Hidden Mines are baited by the two furthest players from Brute Justice, which should be the healers. If a DPS ended up baiting the Hidden Mine, it is likely because:
|
[Plasma Shield] How did the MT get one-shot?
Cruise Chaser gains a damage-up buff if the Plasma Shield is not destroyed in time, and its auto-attack will one-shot the MT. Even if the MT survives this, the follow-up Whirlwind (before third Water) will wipe the party. |