Alphascape V4.0 (Savage) - Part 2
English
【Patch】 Far T → Near T → H2 → H1
【Oversampled Wave Cannon】
  MT:Front OT:Side
【Index + Archive】 |【Delta Attack】
   MT ST    |    MTOT
  D3   D4  |   D3  D4
  D1   D2  |  D1    D2
   H1 H2   | H1   ●   H2
 ※Use True North |※Stack where AoEs went
Japanese
【エンバグ】ファー青T→ニア緑T→H2→H1
【検知式波動砲】MT:正面側 ST:背面側
 【アームX】 | 【デルタアタック】
  MT ST  |    MTST
 D3   D4 |   D3  D4
 D1   D2 |   D1    D2
  H1 H2  | H1    ●   H2
 ※12時A基準 |※AoE消えた場所で頭割り
Patch
There are two main ways of doing this:
- TTHH (Far tank → Near tank → H2 → H1)
- HTHT (Near healer → Far tank → Far healer → Near tank)
Each tether is broken in between Patch mechanics in the chosen order above:
- 1st: ASAP
- 2nd: After Diffuse Wave Cannon
- 3rd: After Oversampled Wave Cannon
- 4th: After debuffs from 3rd break wear off
Hello, World
The “big” mechanic for O12S-2 is “Hello, World”. There were two main strategies, 1313 (also referred to as the “One-Ace”, or “1A” strat) and 134.
The digits refer to the number of Critical Overflows that were being resolved in each stage. While both strategies were used, 1313 eventually took over and became the default once Savage lockouts were removed.
Separate macros were made to describe everybody’s movement for each strategy, but it’s easier to just use a diagram instead.
Hello, World #1 (1313 strat): 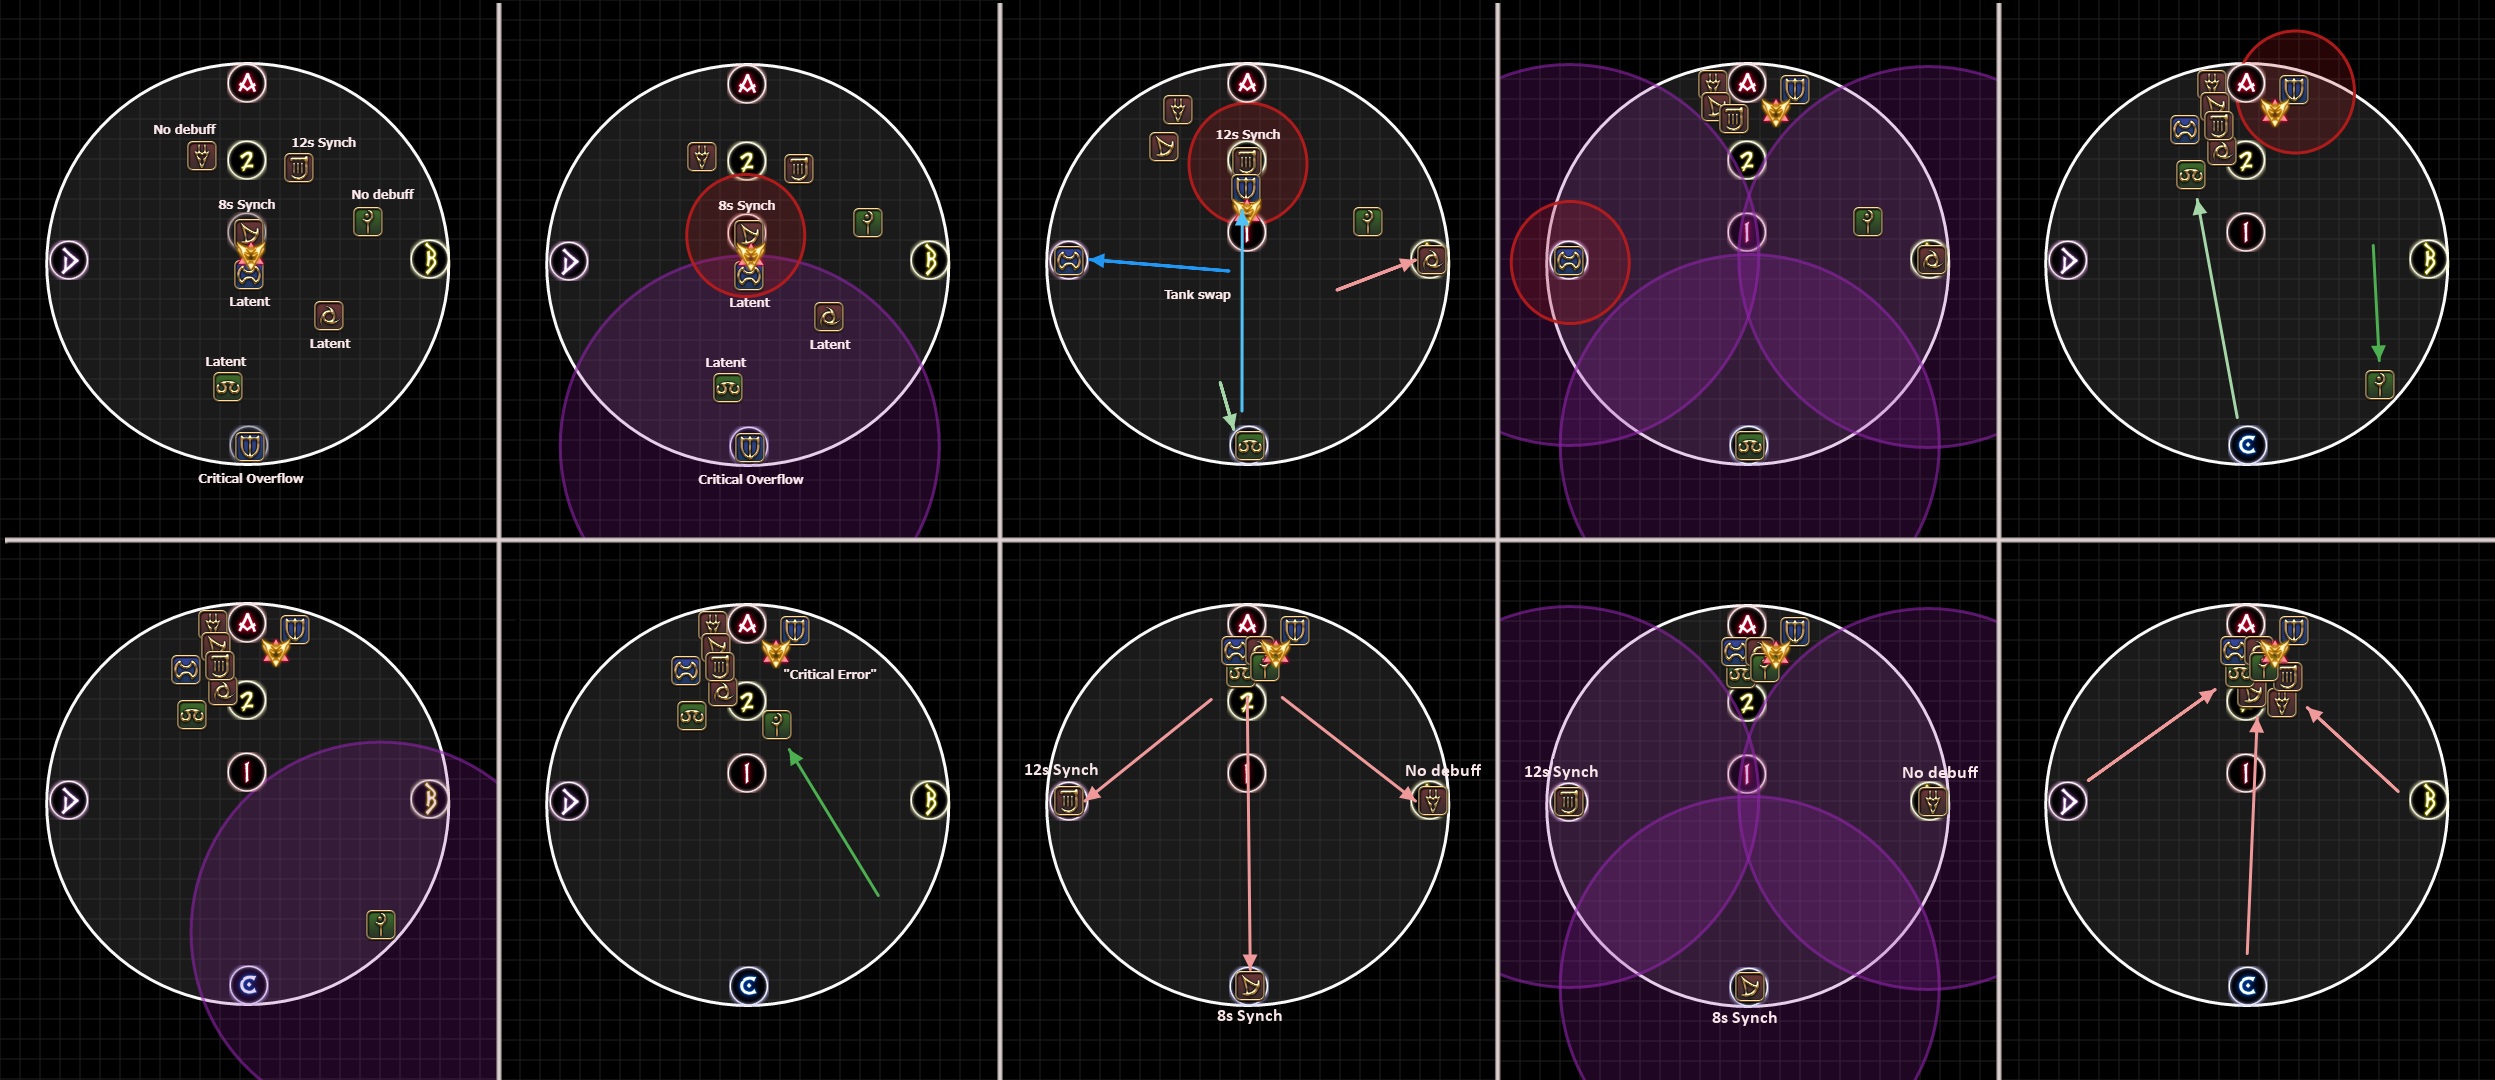
Hello, World #2 (1313 strat): 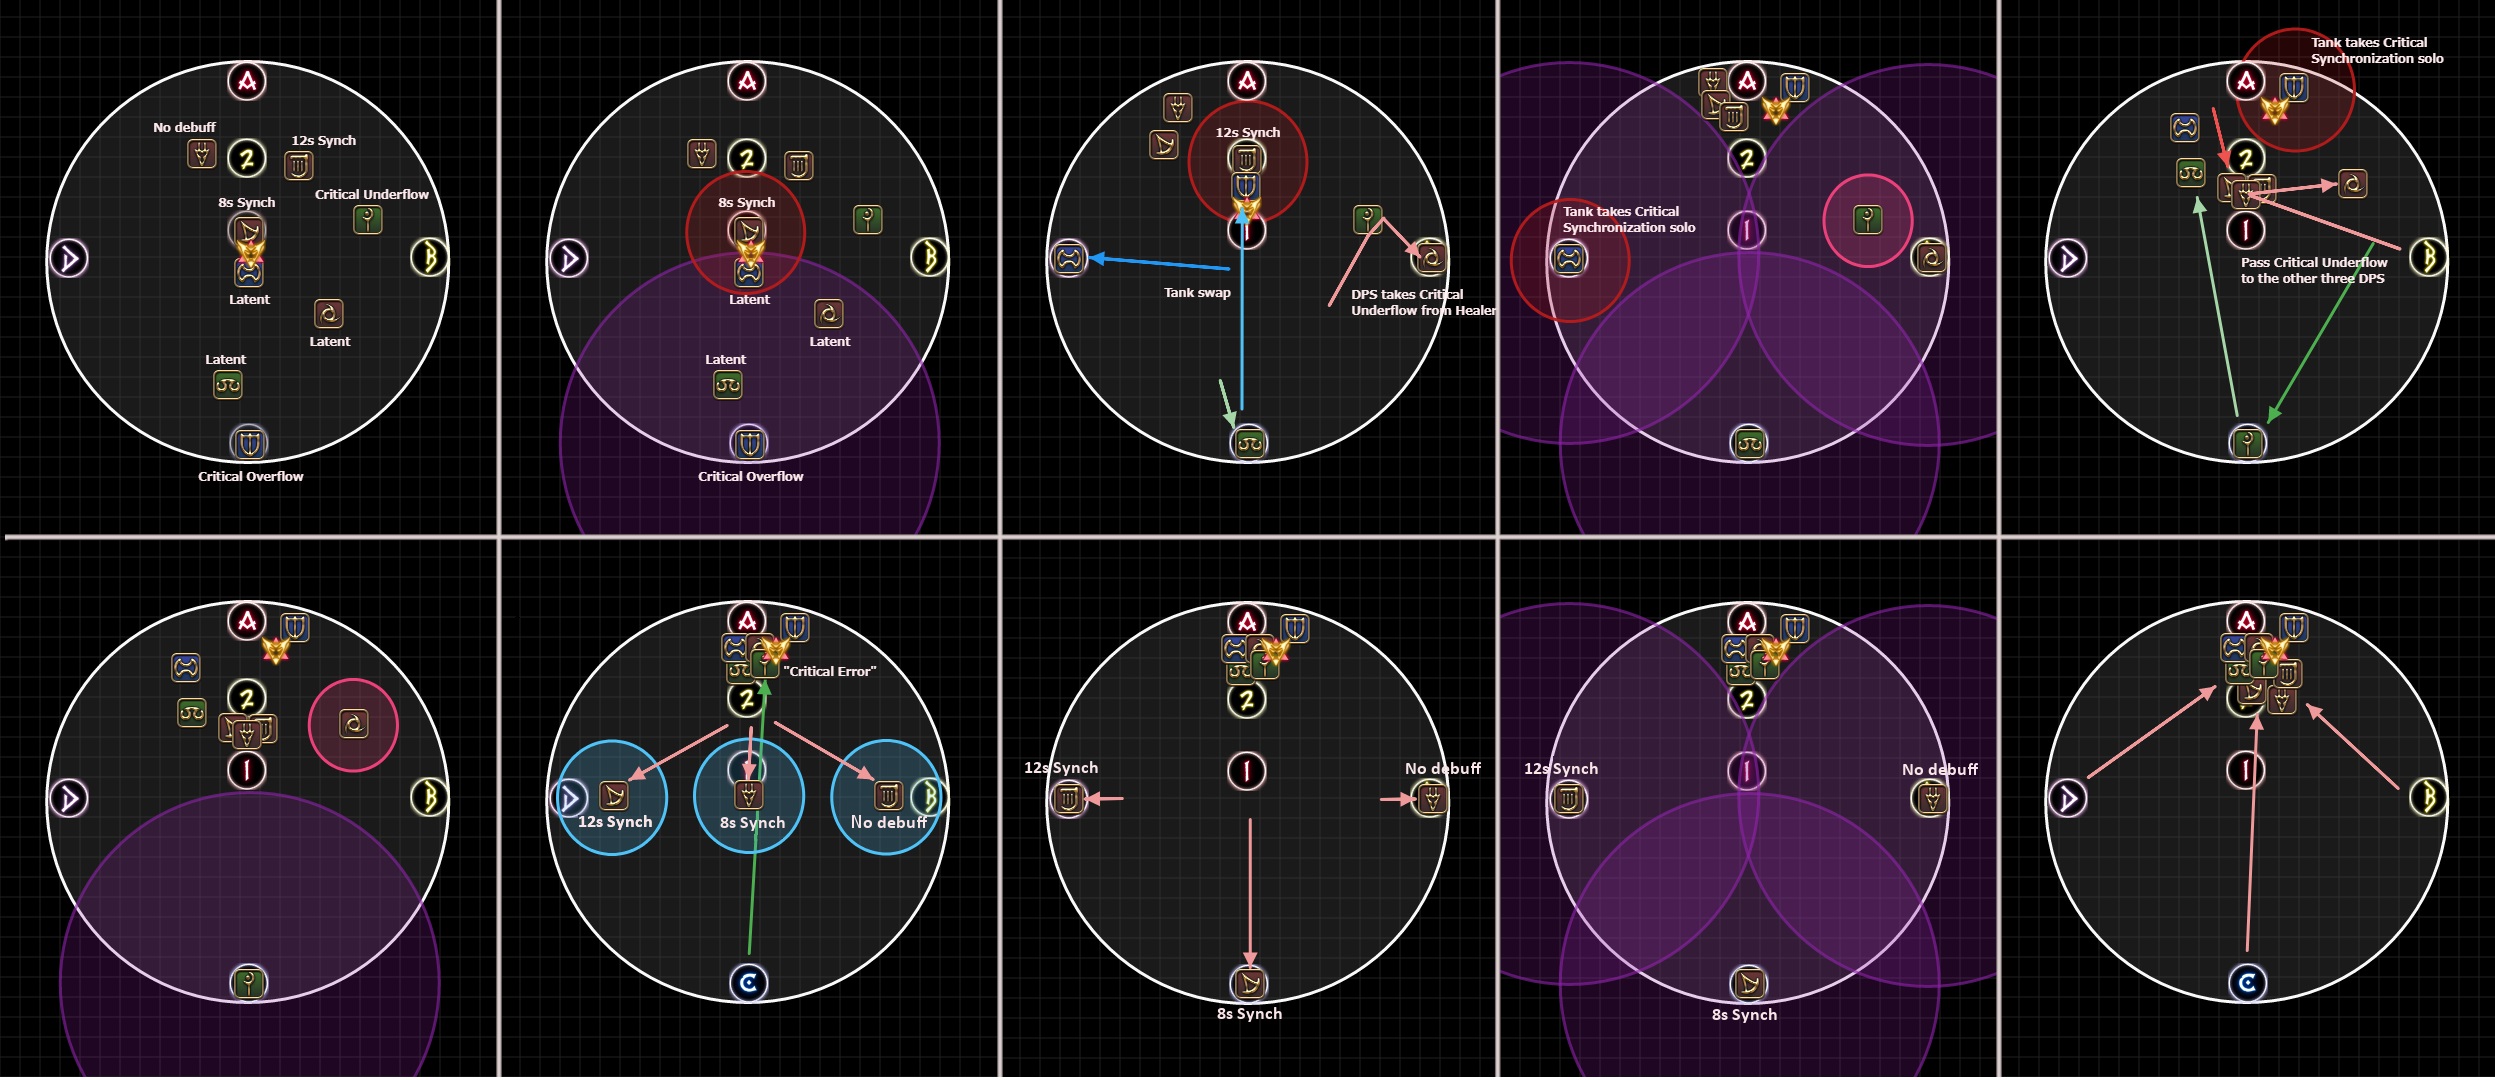
Hello, World #1 (134 strat): 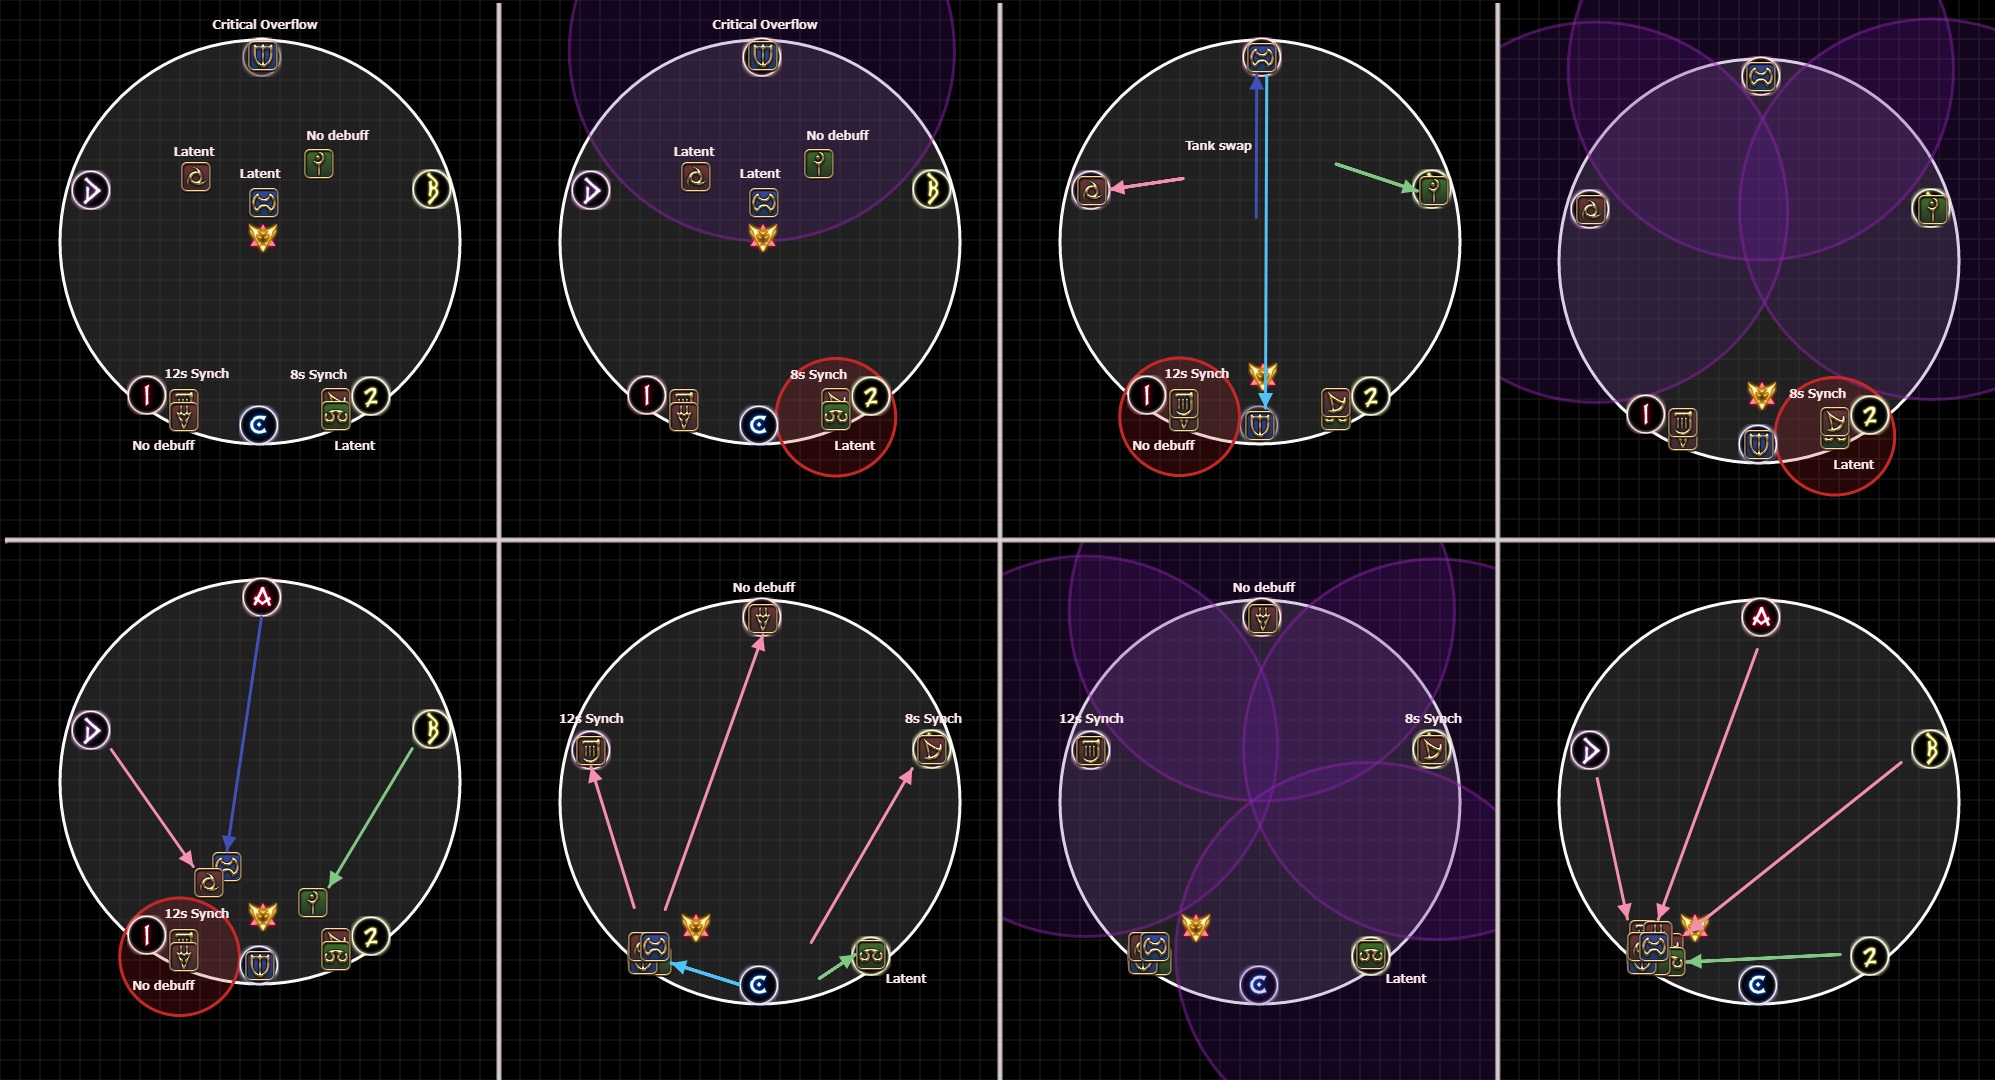
Hello, World #2 (134 strat): 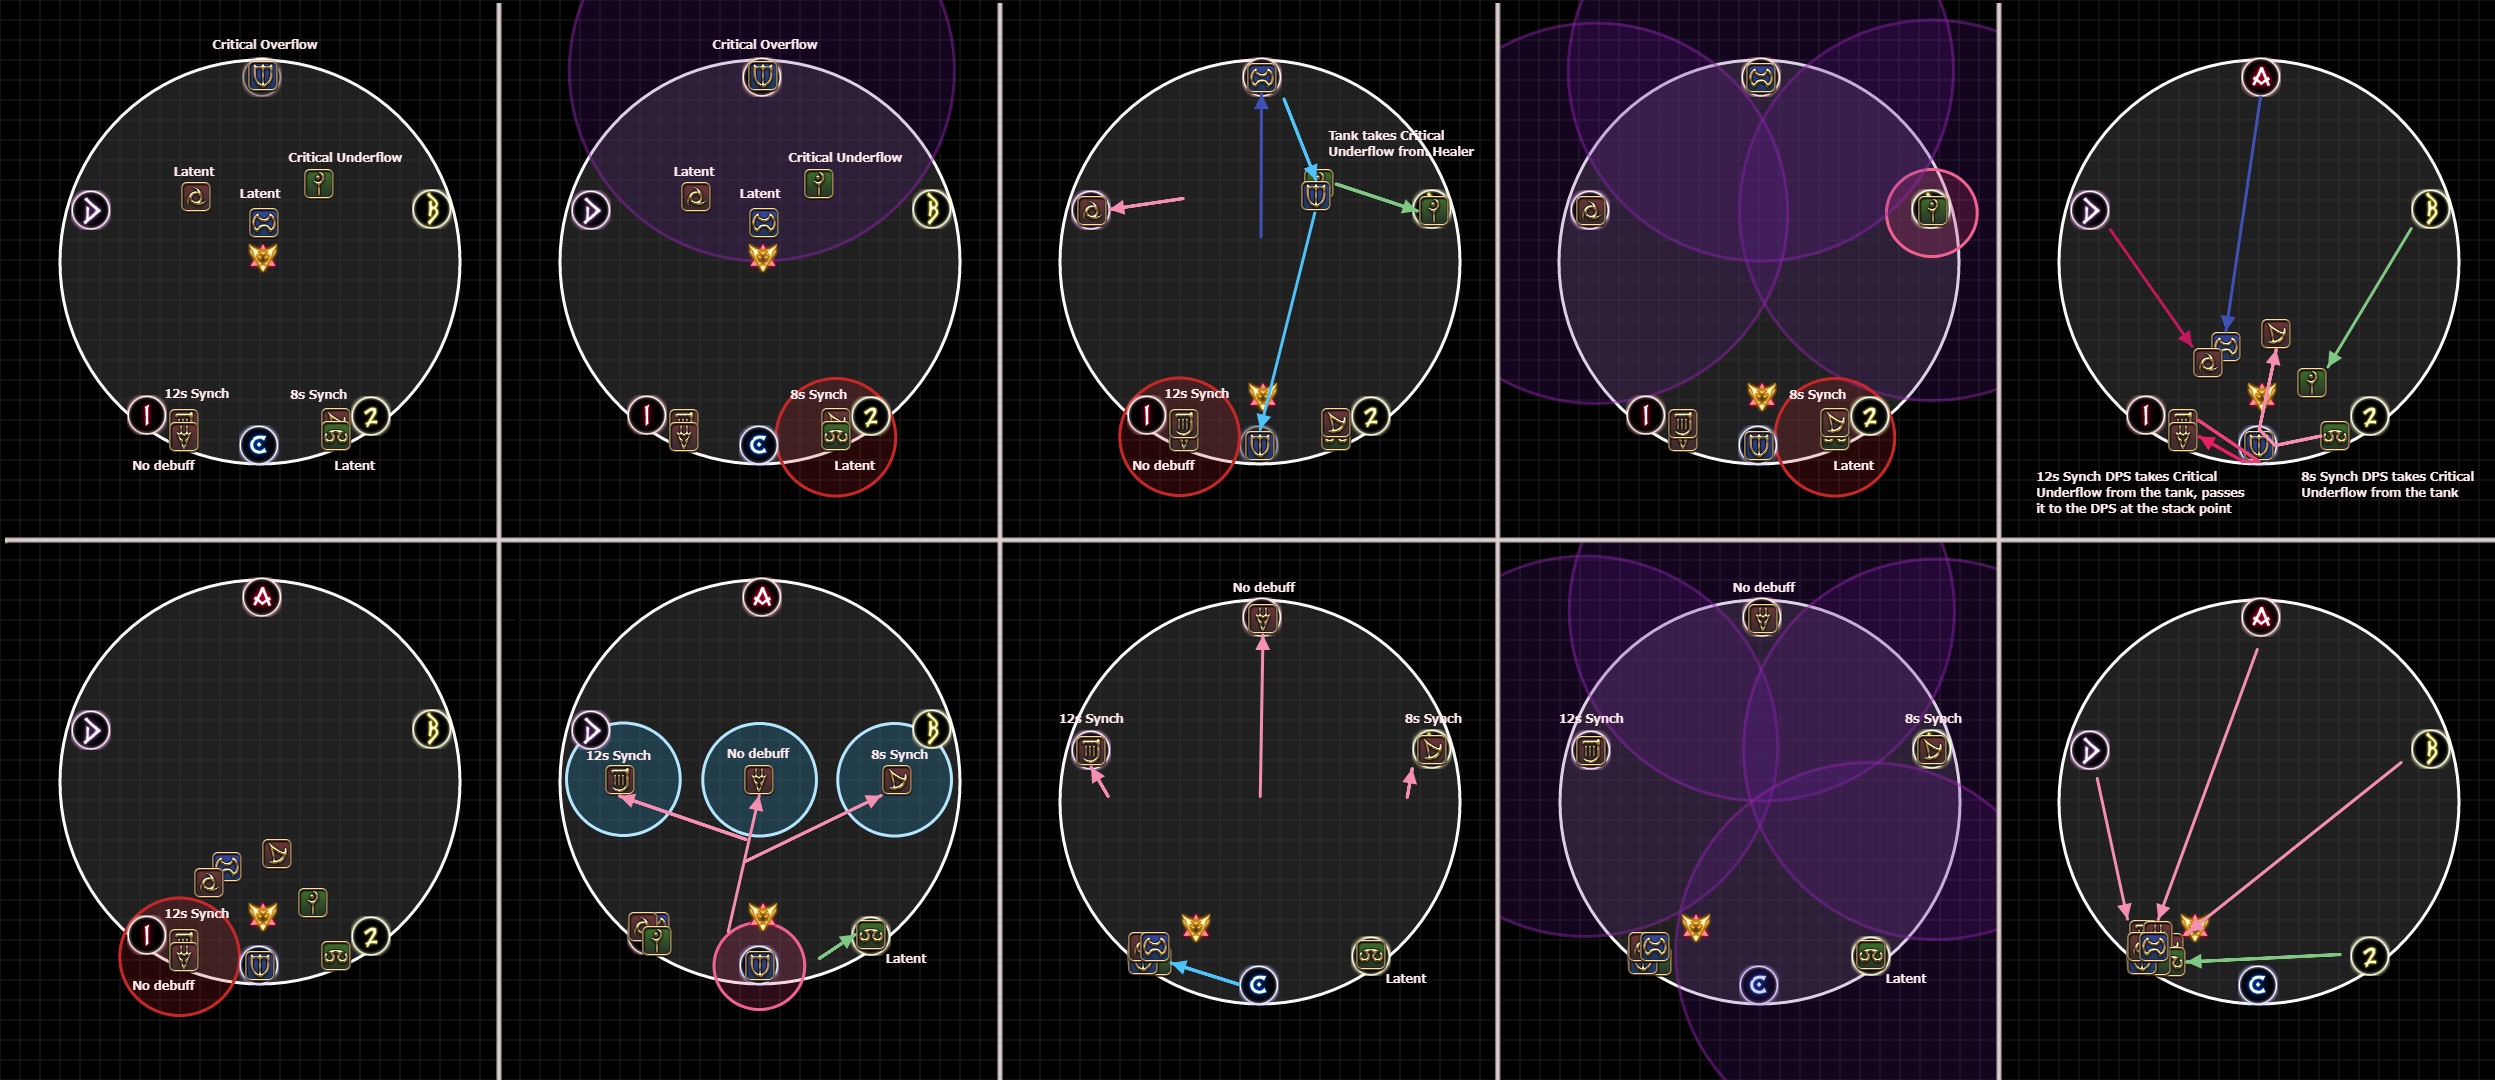
Markers
These are for the 134 strat. 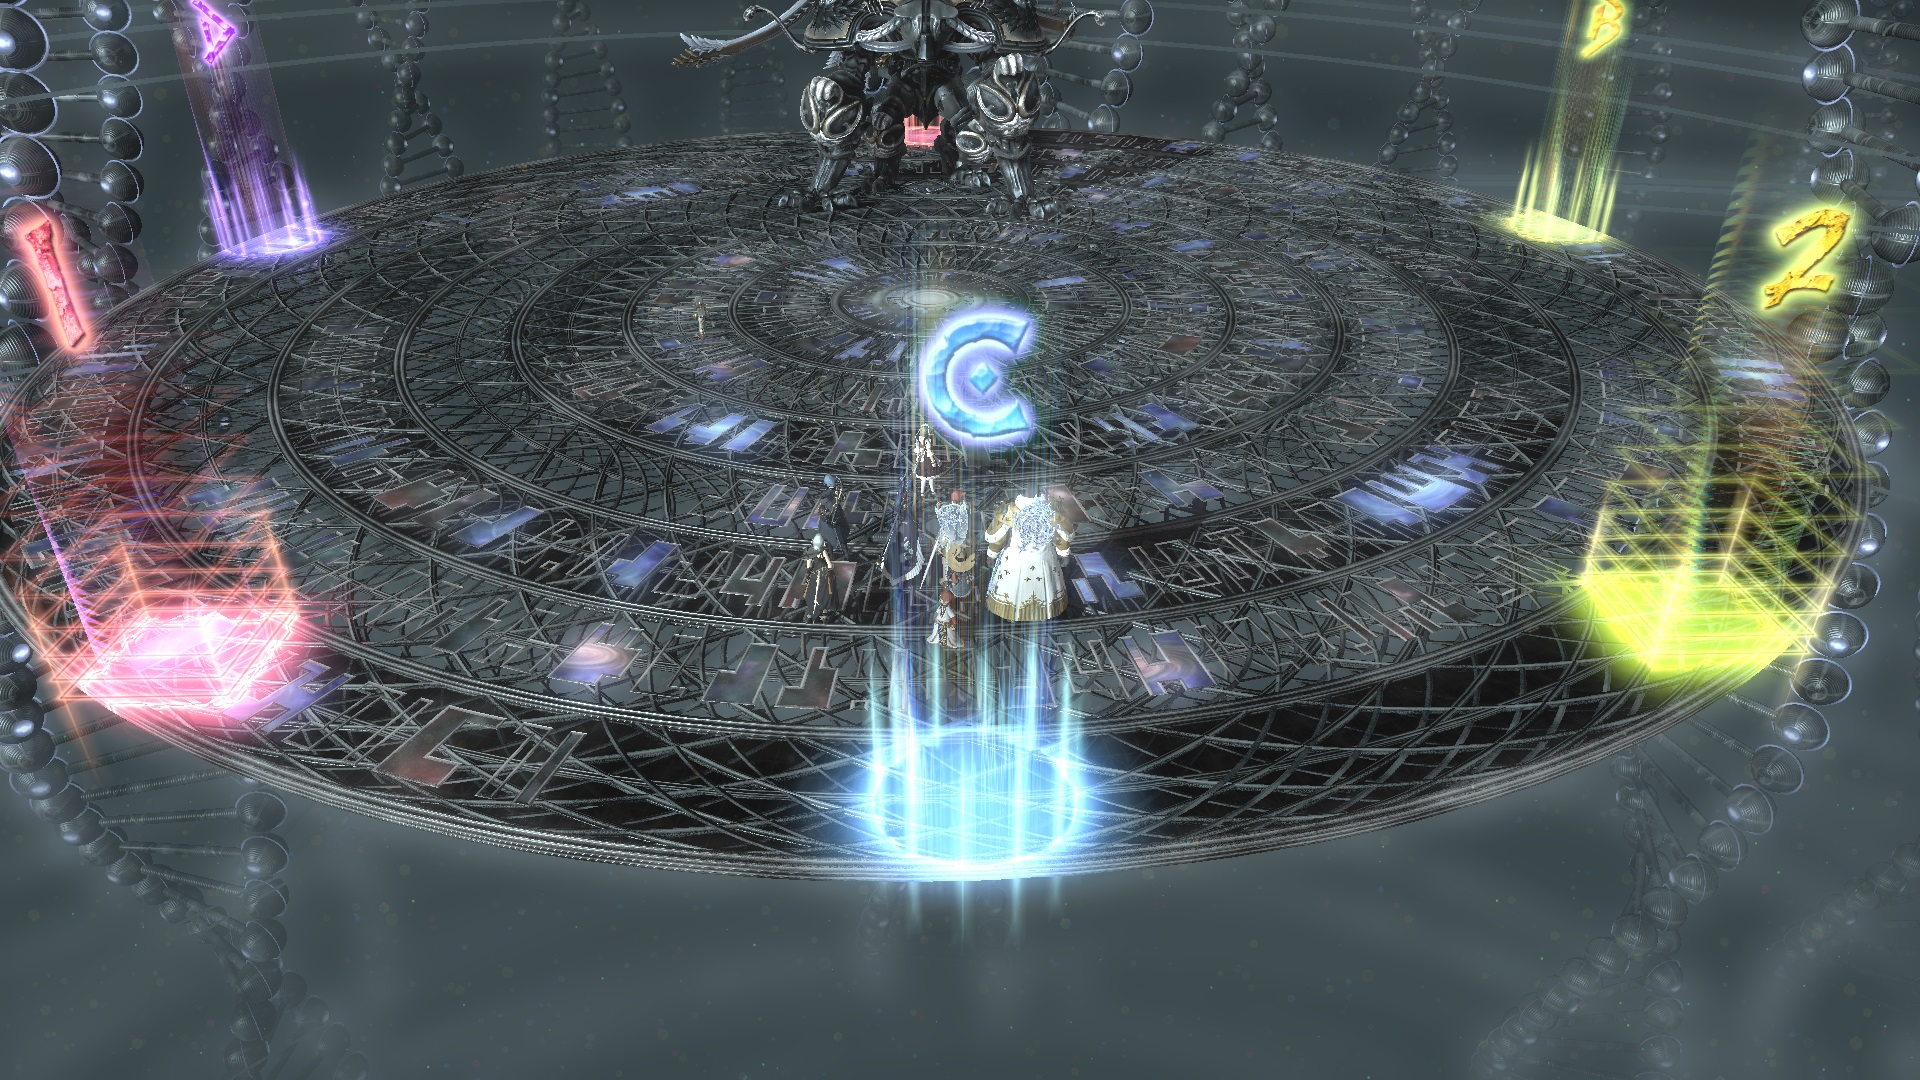
XIVLauncher WaymarkPresetPlugin positions
{
  "Name":"O12S (134)",
  "MapID":594,
  "A":{"X":100.0,"Y":0.0,"Z":81.5,"ID":0,"Active":true},
  "B":{"X":117.595,"Y":0.0,"Z":94.283,"ID":1,"Active":true},
  "C":{"X":100.0,"Y":0.0,"Z":118.5,"ID":2,"Active":true},
  "D":{"X":82.405,"Y":0.0,"Z":94.283,"ID":3,"Active":true},
  "One":{"X":89.126,"Y":0.0,"Z":114.967,"ID":4,"Active":true},
  "Two":{"X":110.874,"Y":0.0,"Z":114.967,"ID":5,"Active":true},
  "Three":{"X":0.0,"Y":0.0,"Z":0.0,"ID":6,"Active":false},
  "Four":{"X":0.0,"Y":0.0,"Z":0.0,"ID":7,"Active":false}
}
Timeline
 (Credit: u/Syldris)