Blue Screen
After defeating Omega in the previous phase, Omega will “reboot”, resetting its HP to 100% and begin the phase.
This phase is a short, 55-second race to bring Omega’s HP below 20% before Omega’s enrage (Blue Screen) goes off.
This is where groups will typically open with a melee LB3.
| Limit Break priority | NIN > DRG > MNK > RPR > SAM |
In the meantime, the party will need to deal with simple stack/spread mechanics while dodging the expanding donut AoEs from the earlier transition phase.
Tip: The stack deals more damage than the spread.
Mitigations that last 15-seconds are best used after the spread beams in order to cover two stacks.
First Wave
| 1. Spread out along Omega's sides, leaving a space in the south. From north-to-south, we have:
Omega will target two random players with Wave Cannon stack markers.
In this example, MT and H1 are targeted, so H1 and D2 will swap sides later. | 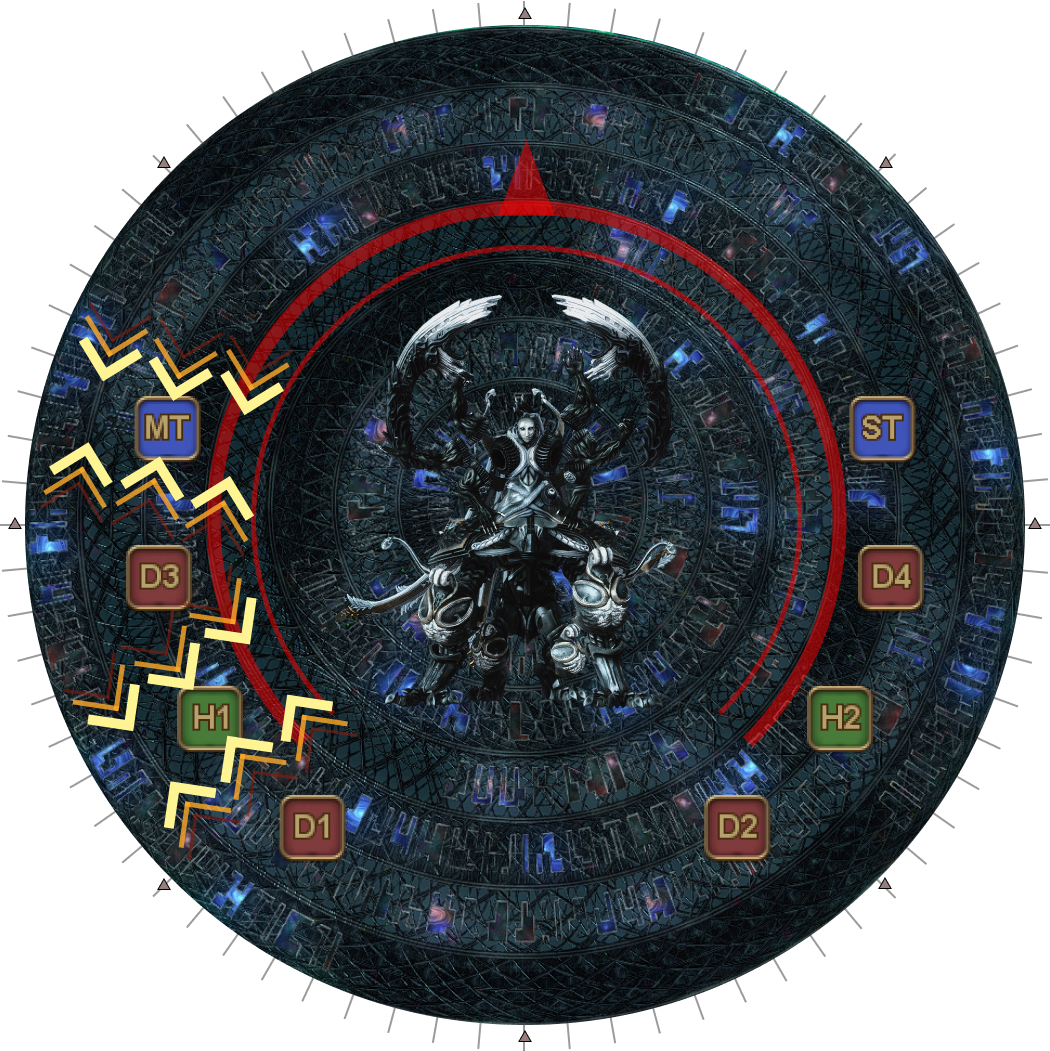 |
| 2. First set of Wave Cannons go out. Move to the south positions and stack in groups of 4, swapping if necessary. | 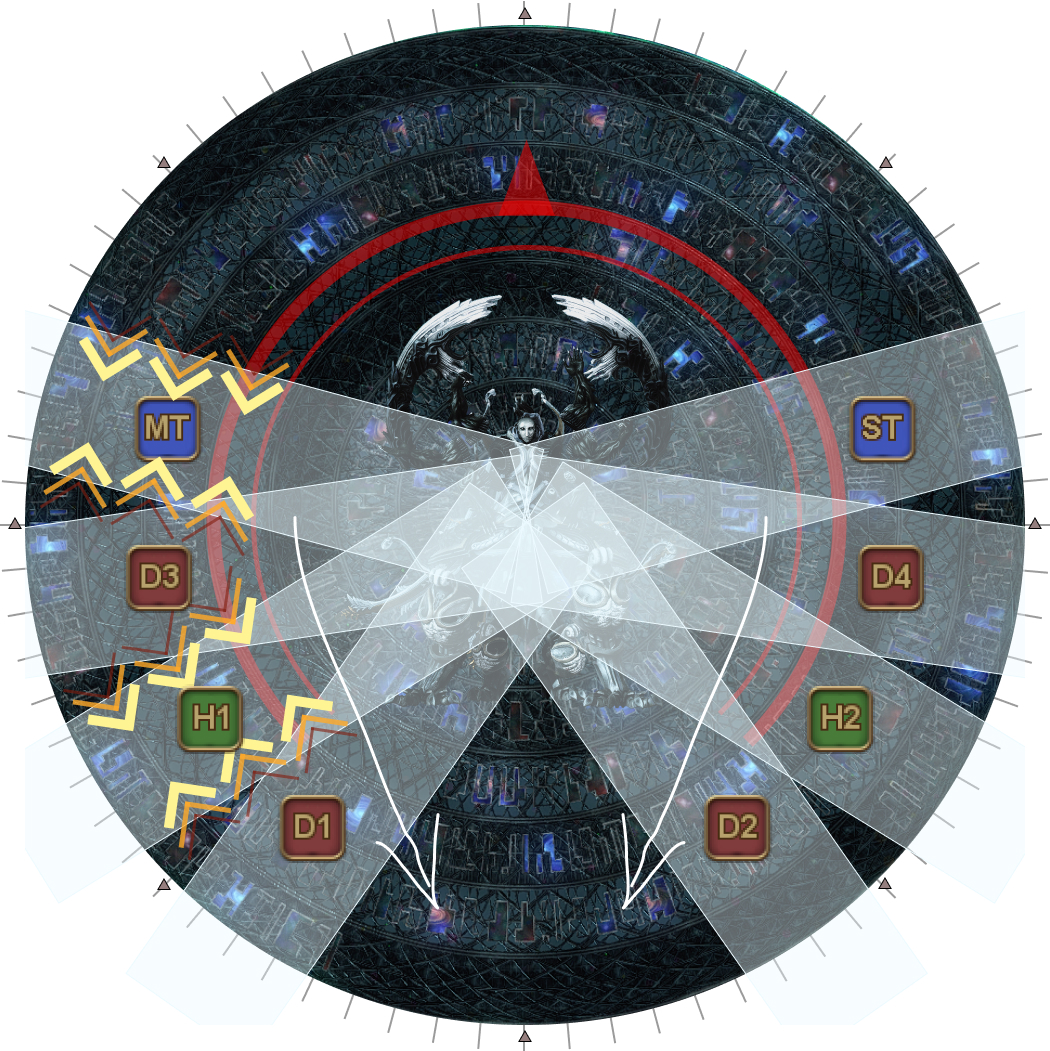 |
| 3. Stack markers resolve. Return to your original positions. Tip: This is a good place to use Sprint, especially for tanks | 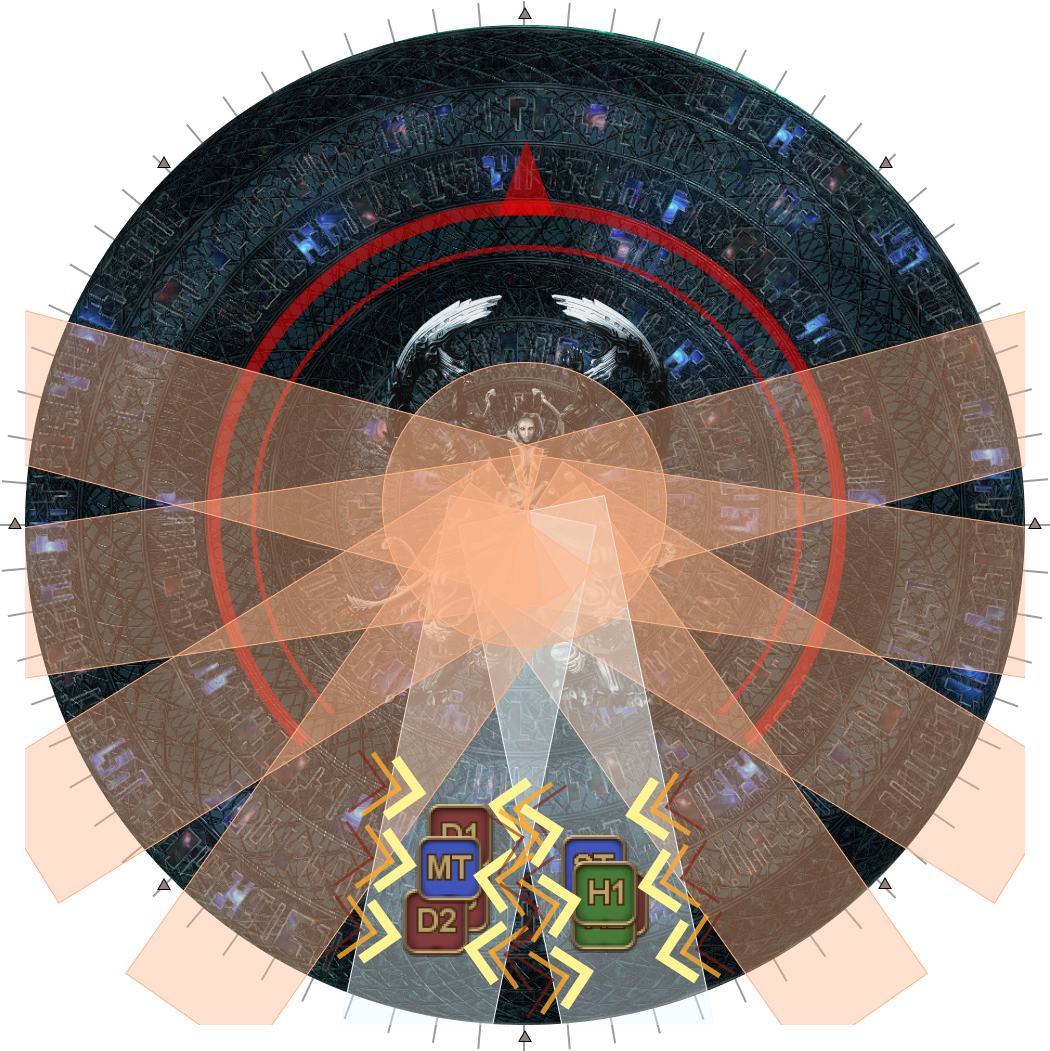 |
Second Wave
The following sets of Wave Cannons now come with the expanding Wave Repeater AoE from the center.
| 4. Omega targets two random players for Wave Cannon stacks. The first hit from the Wave Repeater resolves in the center. In this example, each side has one stack marker, so no swaps will be needed. | 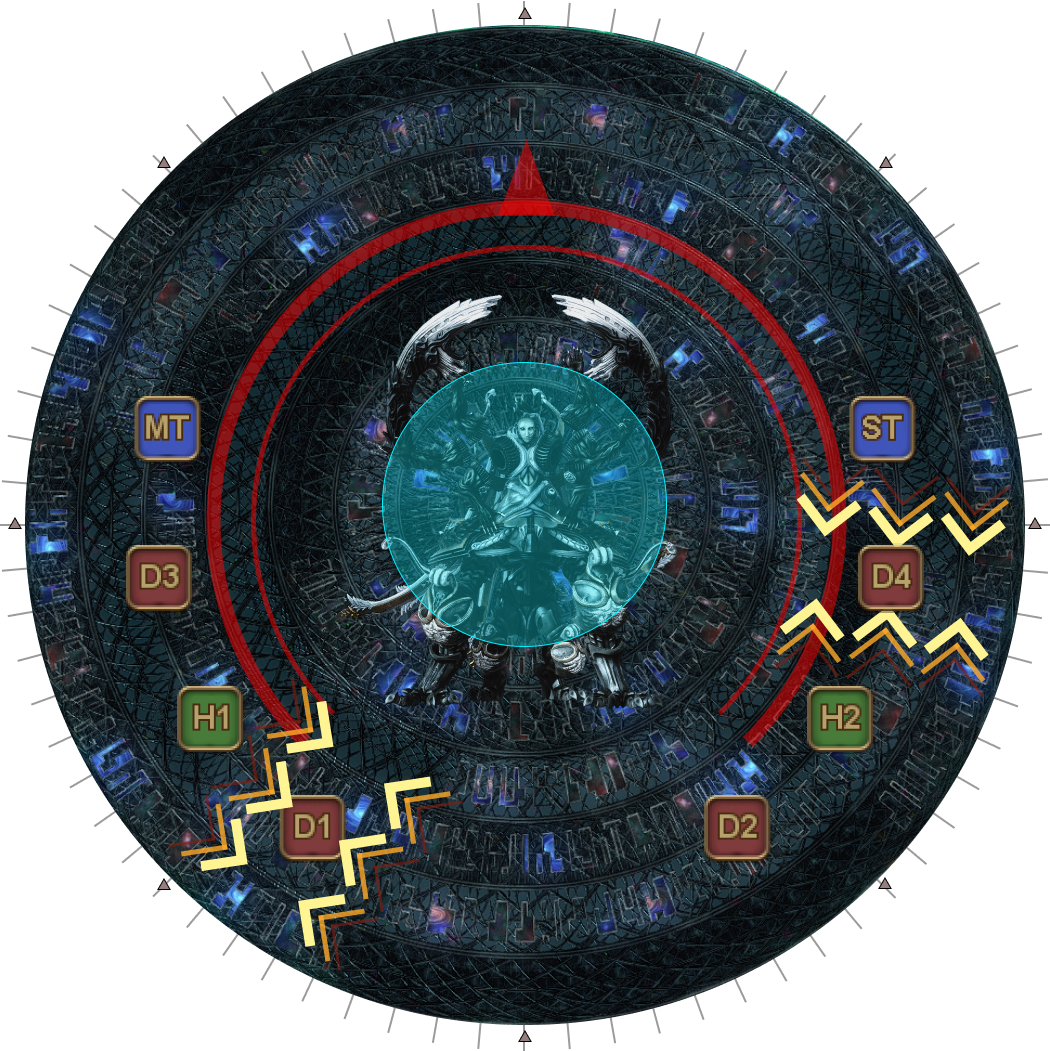 |
| 5. The second ring of the Wave Repeater resolves together with the first set of Wave Cannons. Dodge into the ring AoE and gather south, swapping if necessary. | 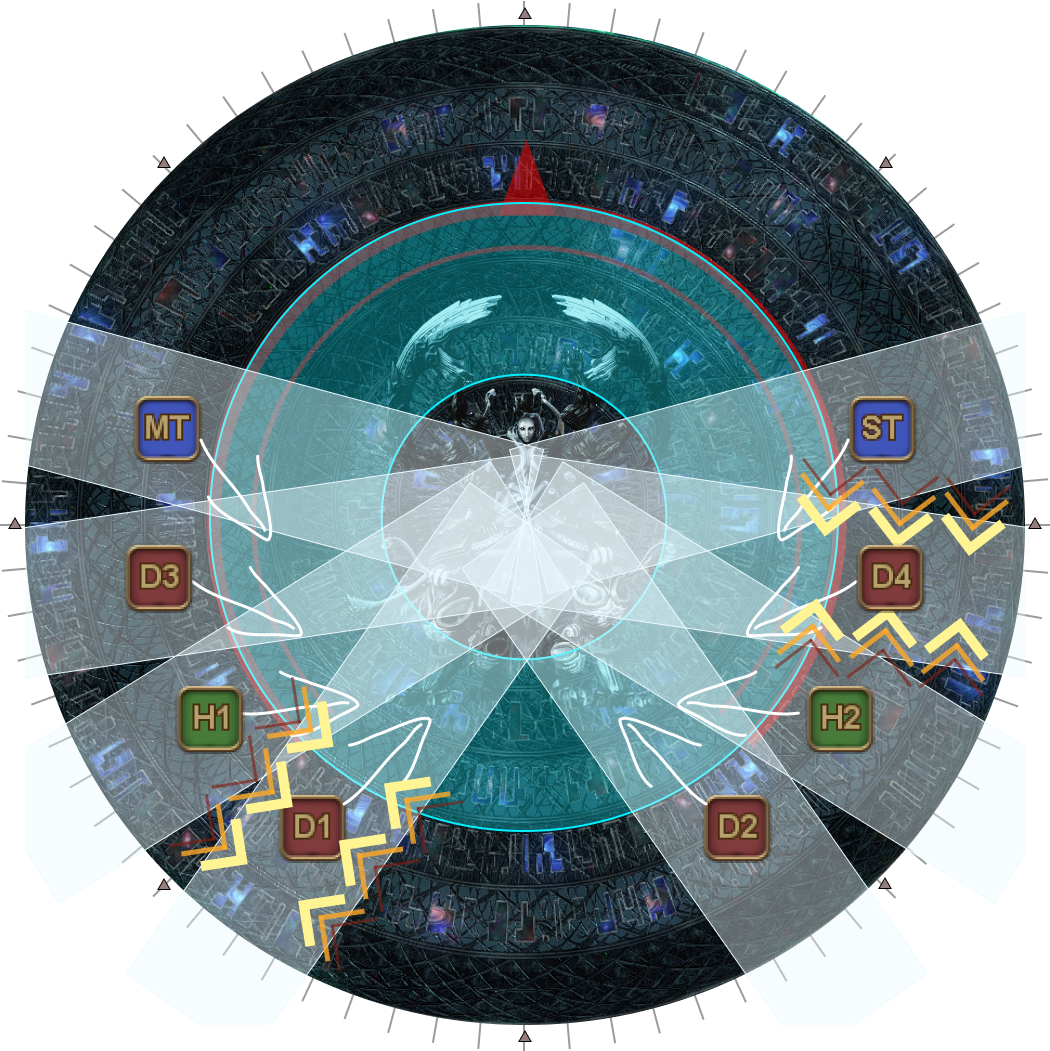 |
| 6. Dodge into the outer ring AoE when it resolves. | 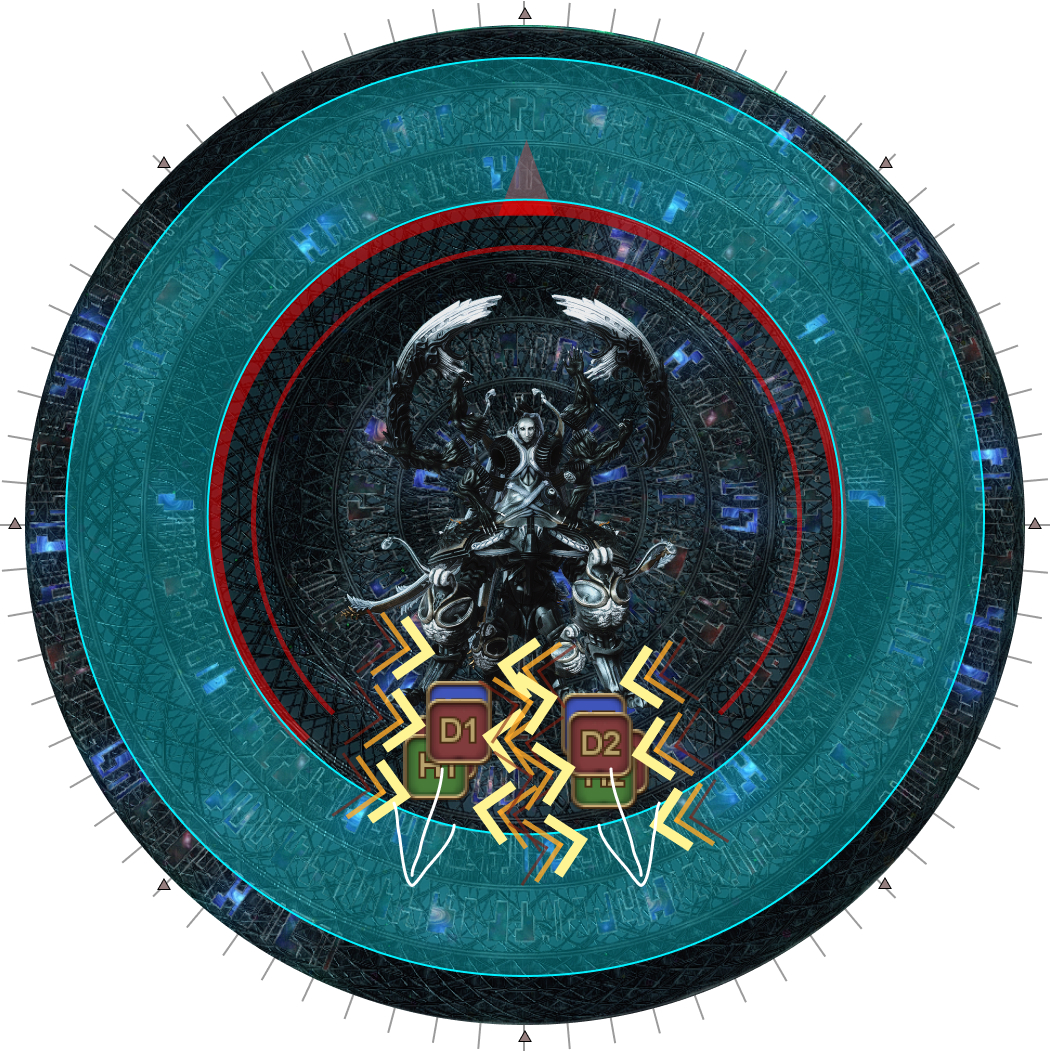 |
| 7. Wave Cannon stacks resolve. Return to your original positions. Tip: You can cut through the boss to get back to your position. | 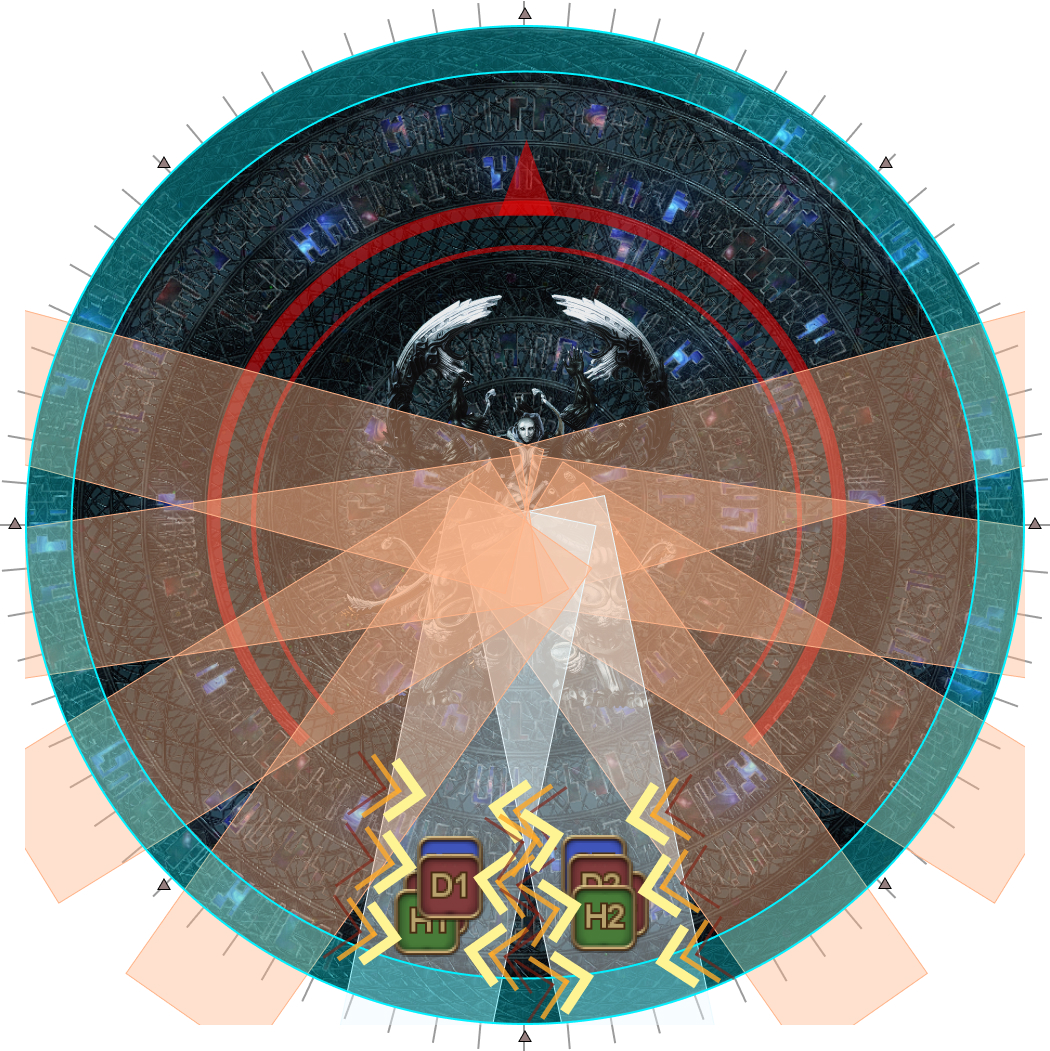 |
Third Wave
| 8. Omega targets two random players with Wave Cannon stacks. In this example, D2 and D4 are targeted, so D1 and D2 will swap groups later. | 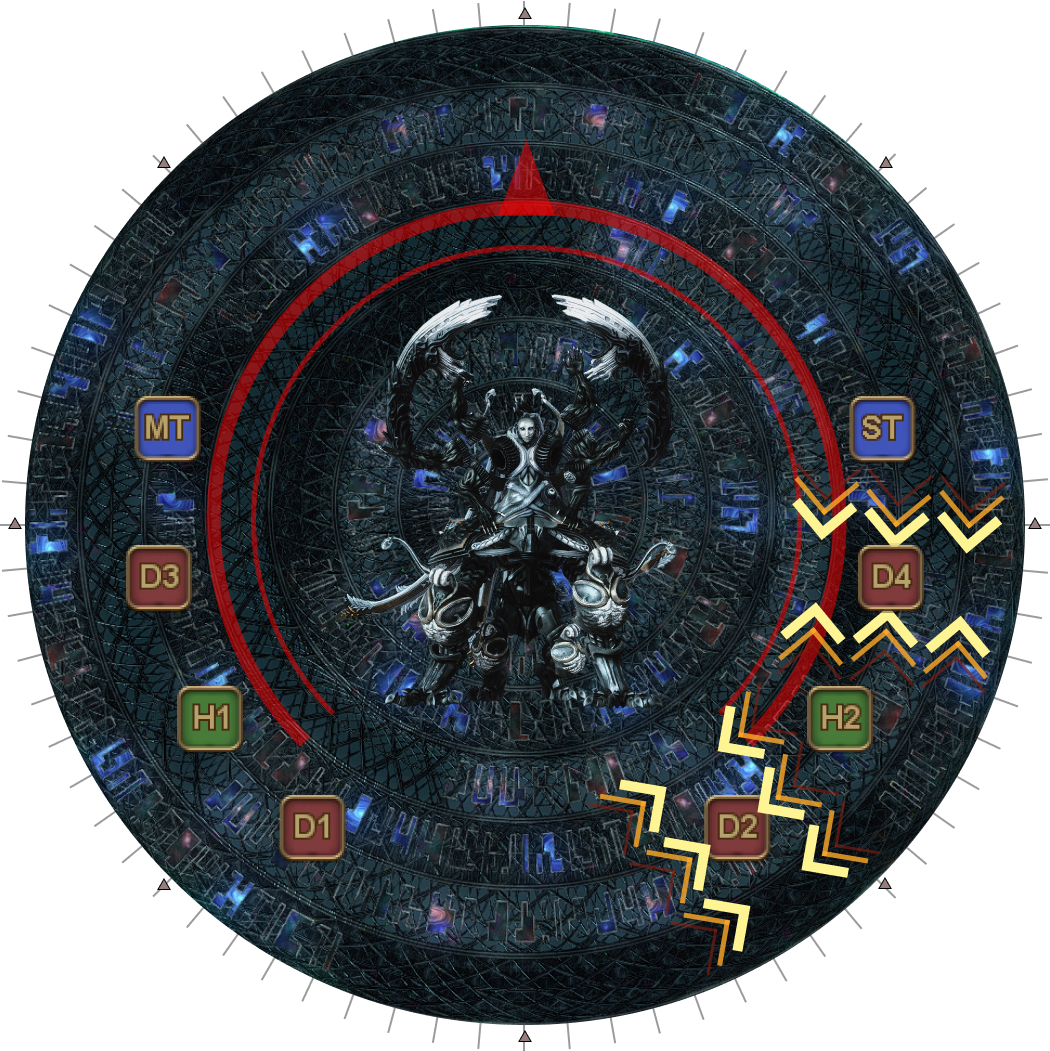 |
| 9. First set of Wave Cannons go off. Gather south to stack in groups of 4, swapping if necessary. | 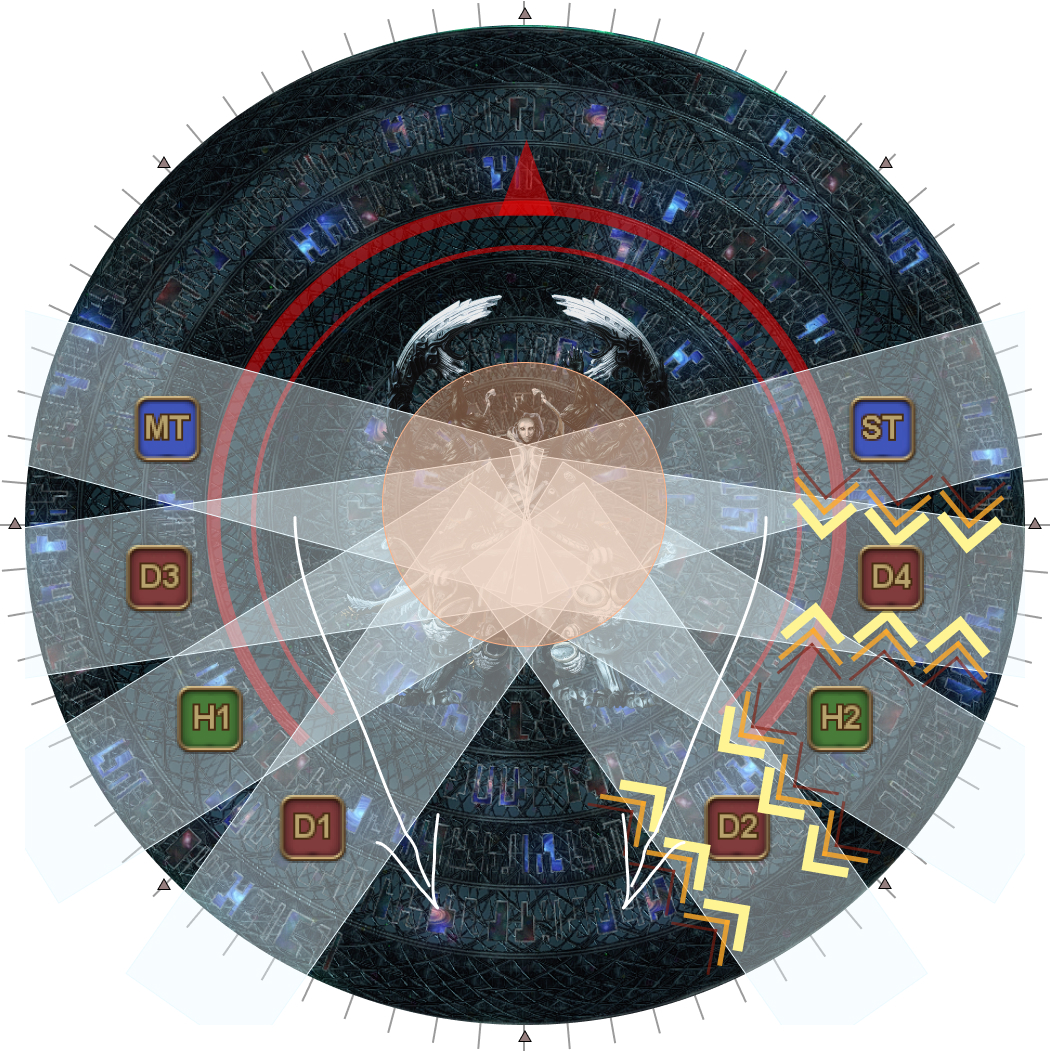 |
| 10. Wave Cannon stacks resolve. Wait where you are for the Wave Repeater to go off. | 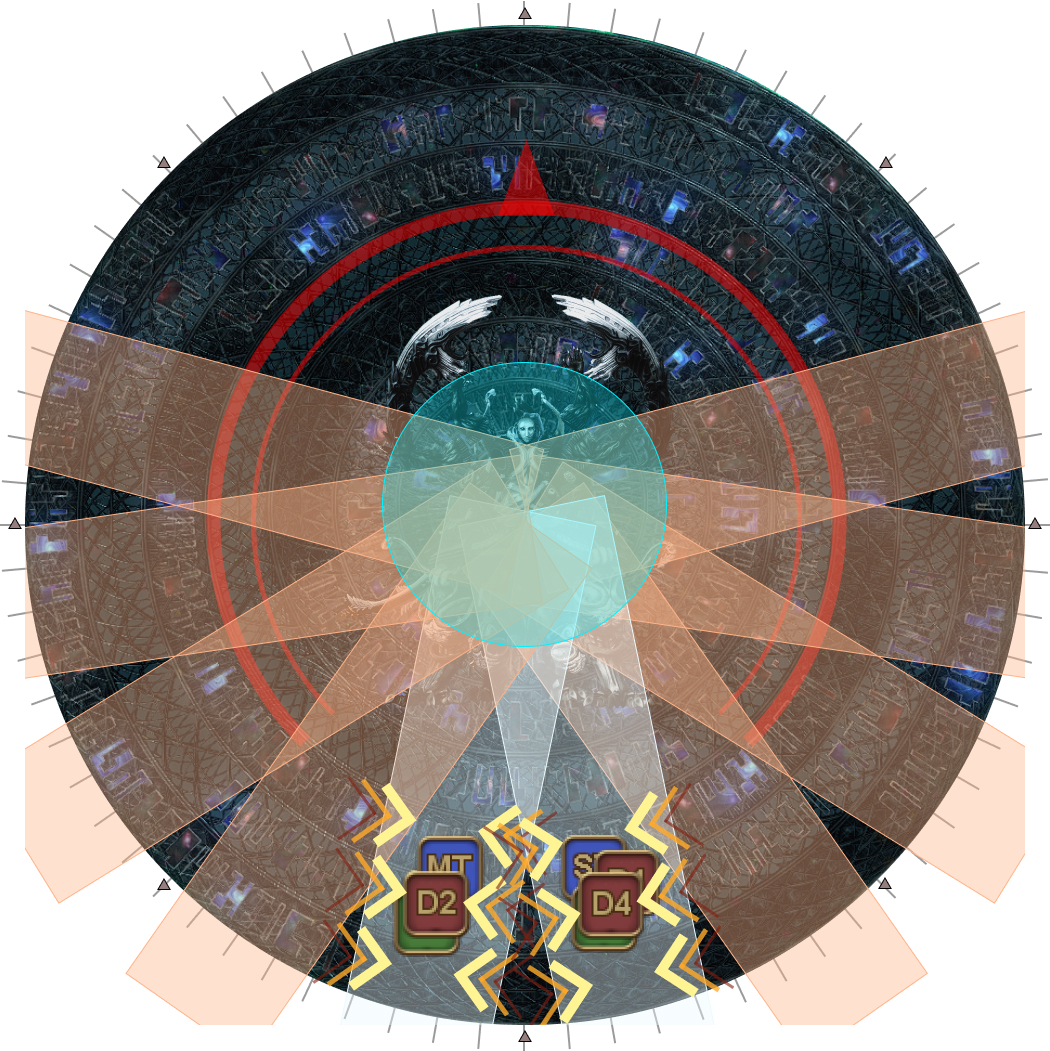 |
| 11. Dodge into the Wave Repeater's AoE. | 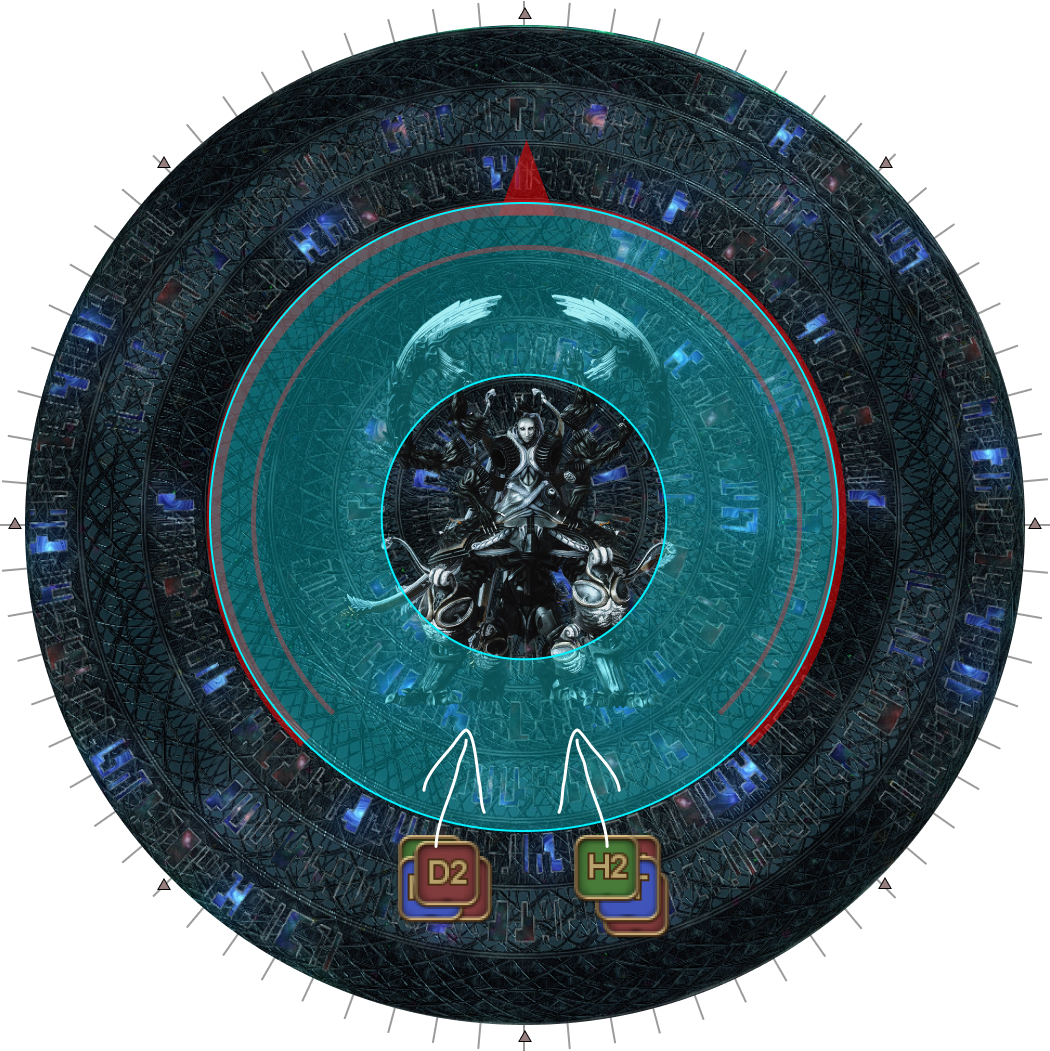 |
| 12. Omega casts Blue Screen, the hard enrage for this phase. Omega must be brought down to below 20% HP to clear this DPS check. | 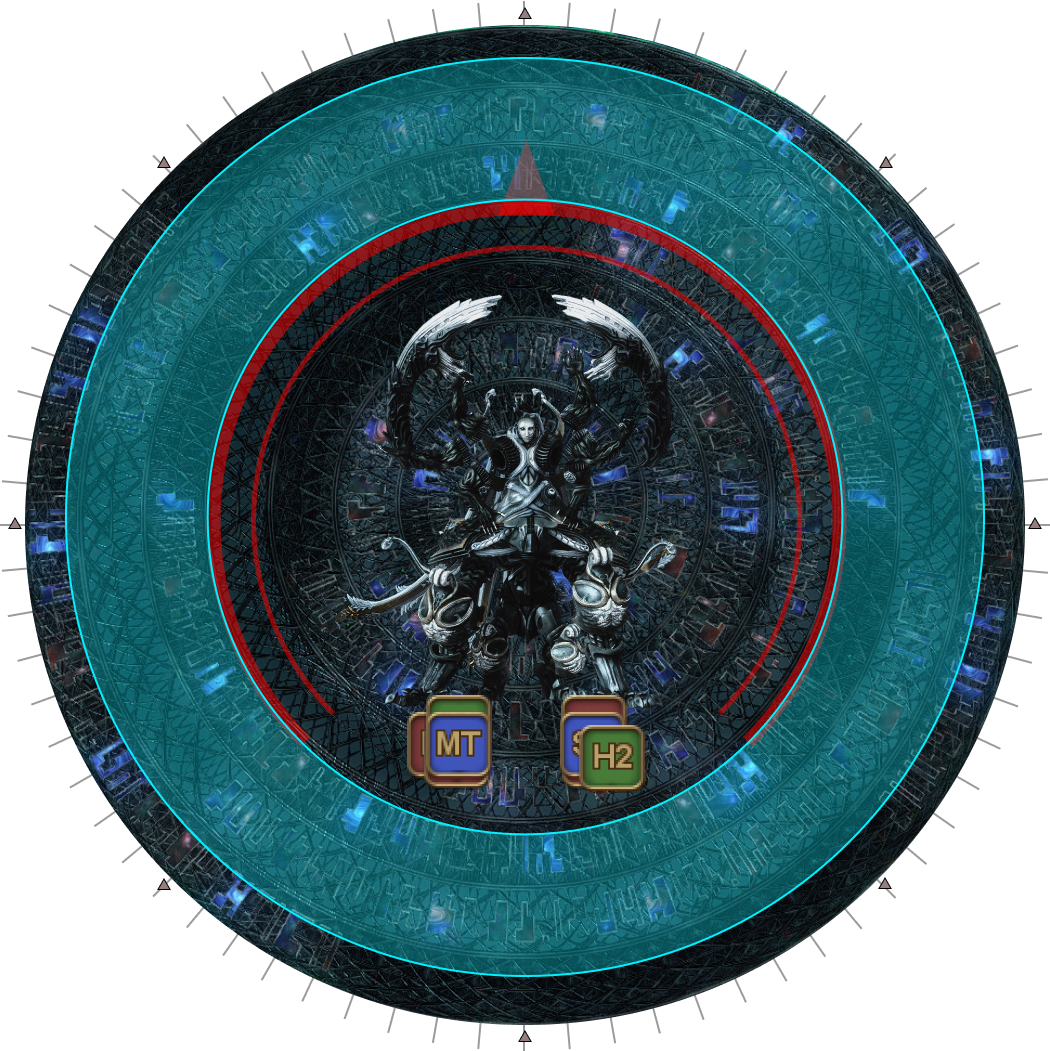 |
Frequently Asked Questions
[Limit Break] What determines who should melee LB3 here?
| The order is determined by who loses the least from doing so. This is obviously affected by Dance Partner, but as a general guideline, the order looks like: NIN > DRG > MNK > RPR > SAM
|
[Wave Cannon (stacks)] Can a tank solo the stack? How much damage would it deal?
| The Wave Cannon stack deals approximately 210k damage to a tank taking it solo. This is actually rather tame compared to other tankbusters in the encounter, so some tanks will take the stack North and solo it instead with mitigation, provided the first Solar Ray in P5 isn't mitigated (which should be the case for most party compositions). |