Omega
Omega’s first form is often nicknamed “Beetle Omega”, and is one of the many iterations of Omega players will encounter this Ultimate raid.
Program Loop
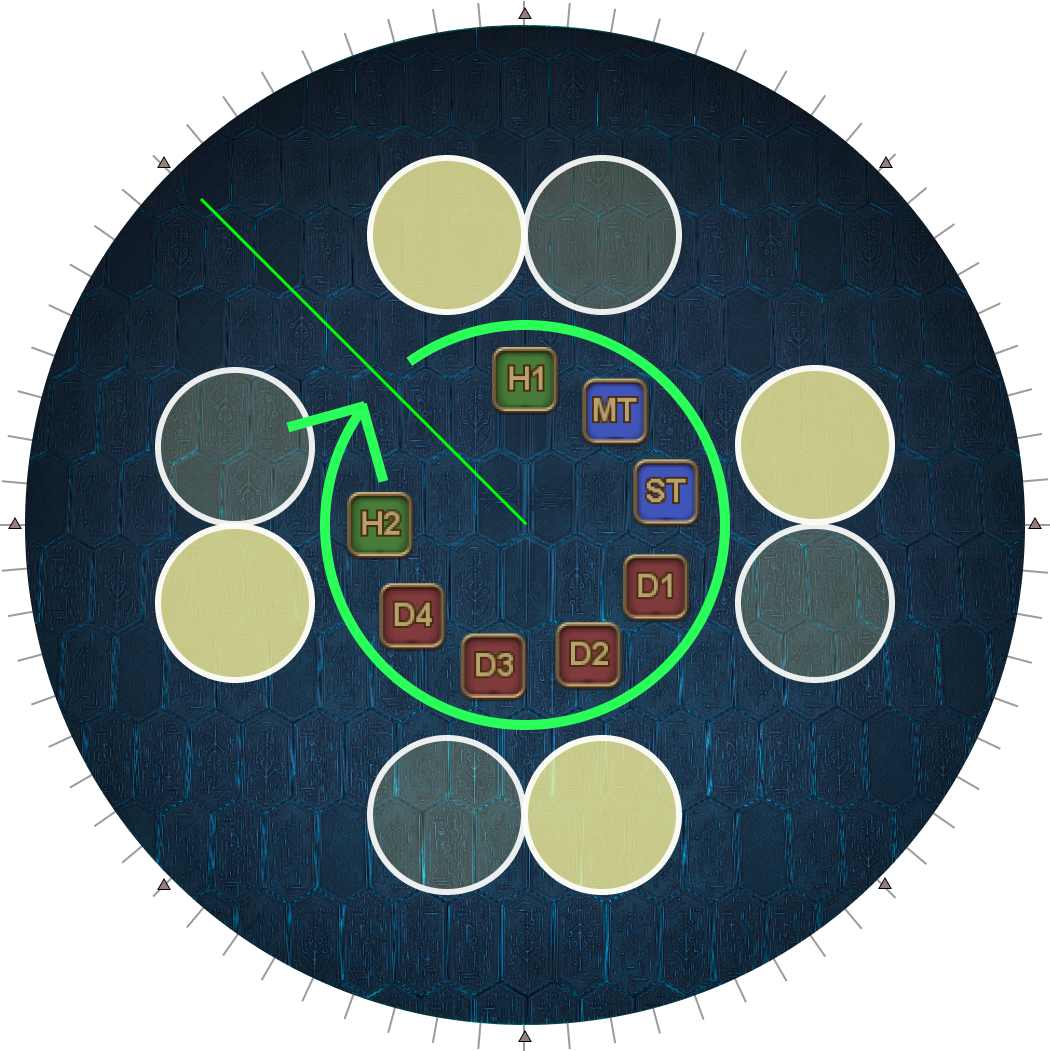
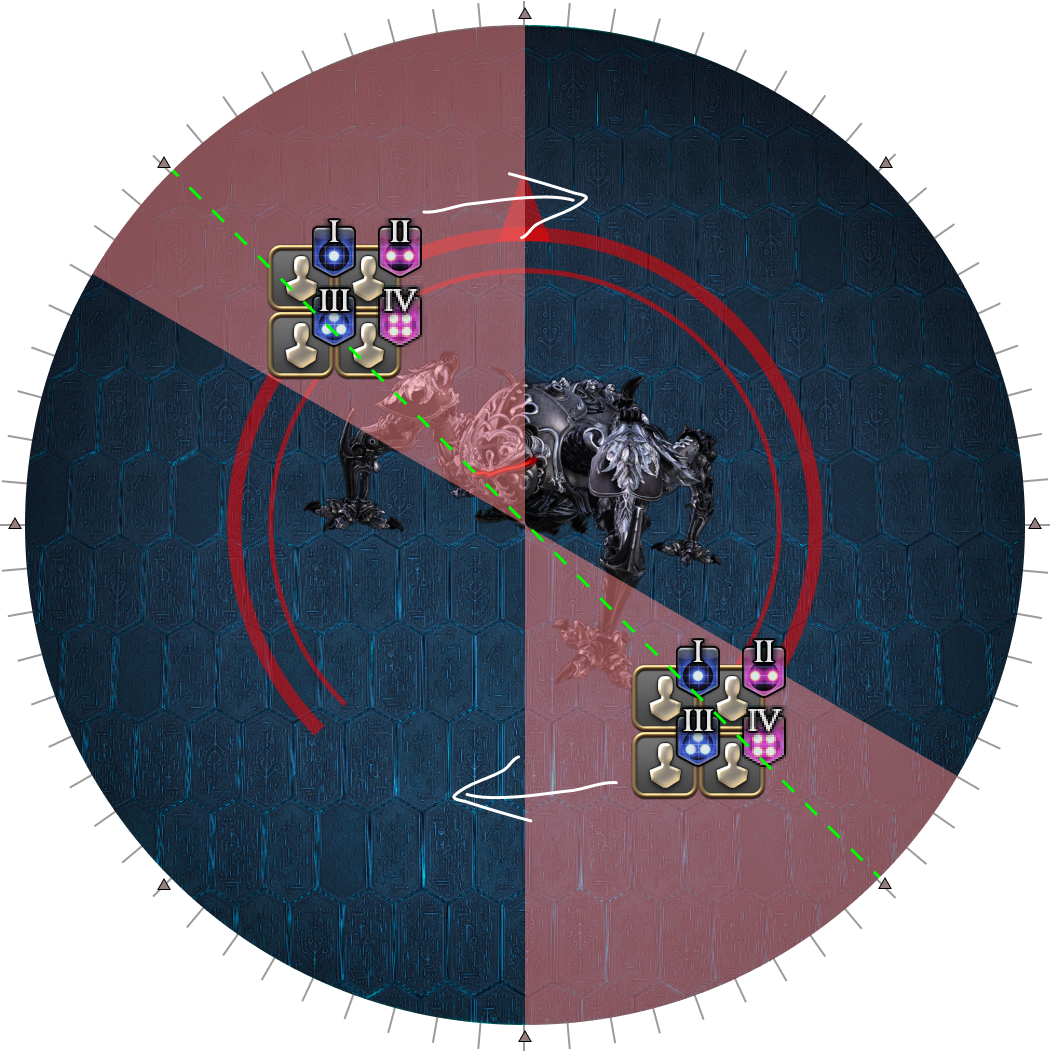
Players receive a set of numbered debuffs. Each number (1, 2, 3, and 4) each have two players.
- The numbered debuffs incidate the order players need to take towers (1 > 2 > 3 > 4).
- Tethers are resolved two steps away from the towers (3 > 4 > 1 > 2)
When tethers resolve, they explode in a large AoE, applying one stack of Twice-come Ruin and a HP Penalty debuff that reduces that player’s maximum HP to 1%.
The HP Penalty debuff will wear off within two steps (players numbered 3 and 4 will need healing to survive their towers).
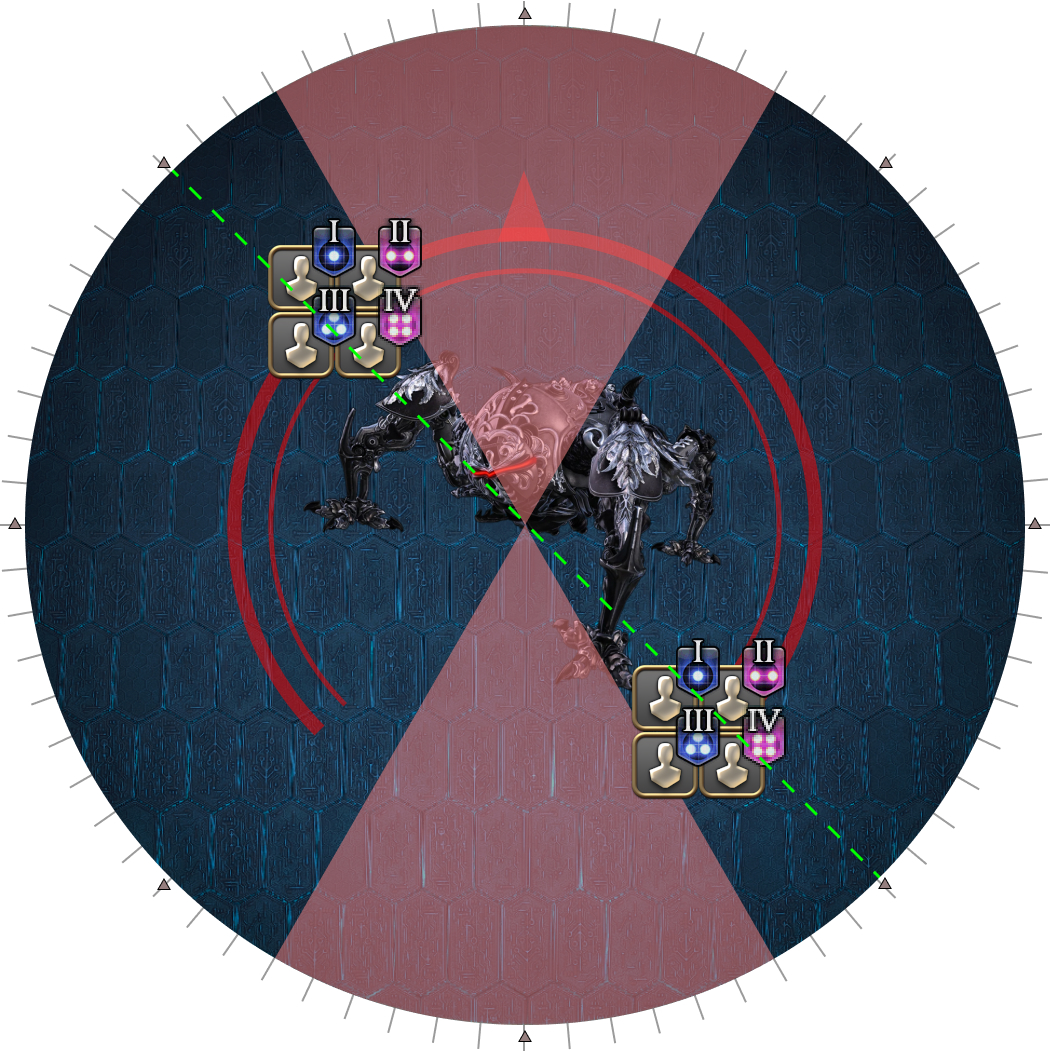
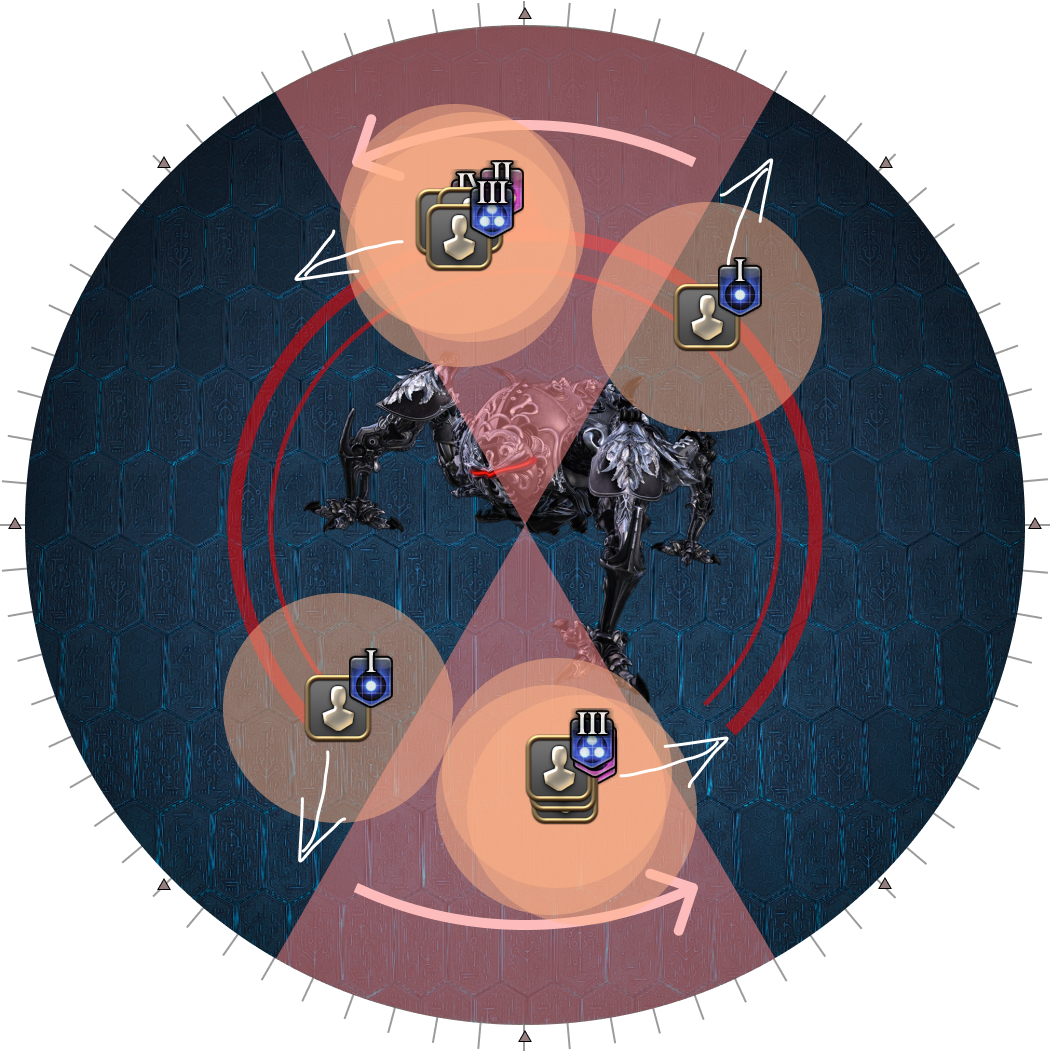
| There are eight possible tower spawn points. Two towers will always spawn at a time, and they will always be either 90 degrees, or 180 degrees from one another. Towers will not spawn in the same position twice in a row. We establish a priority to determine who takes which tower/tether:
|  |
| 1. First set of towers spawn
| 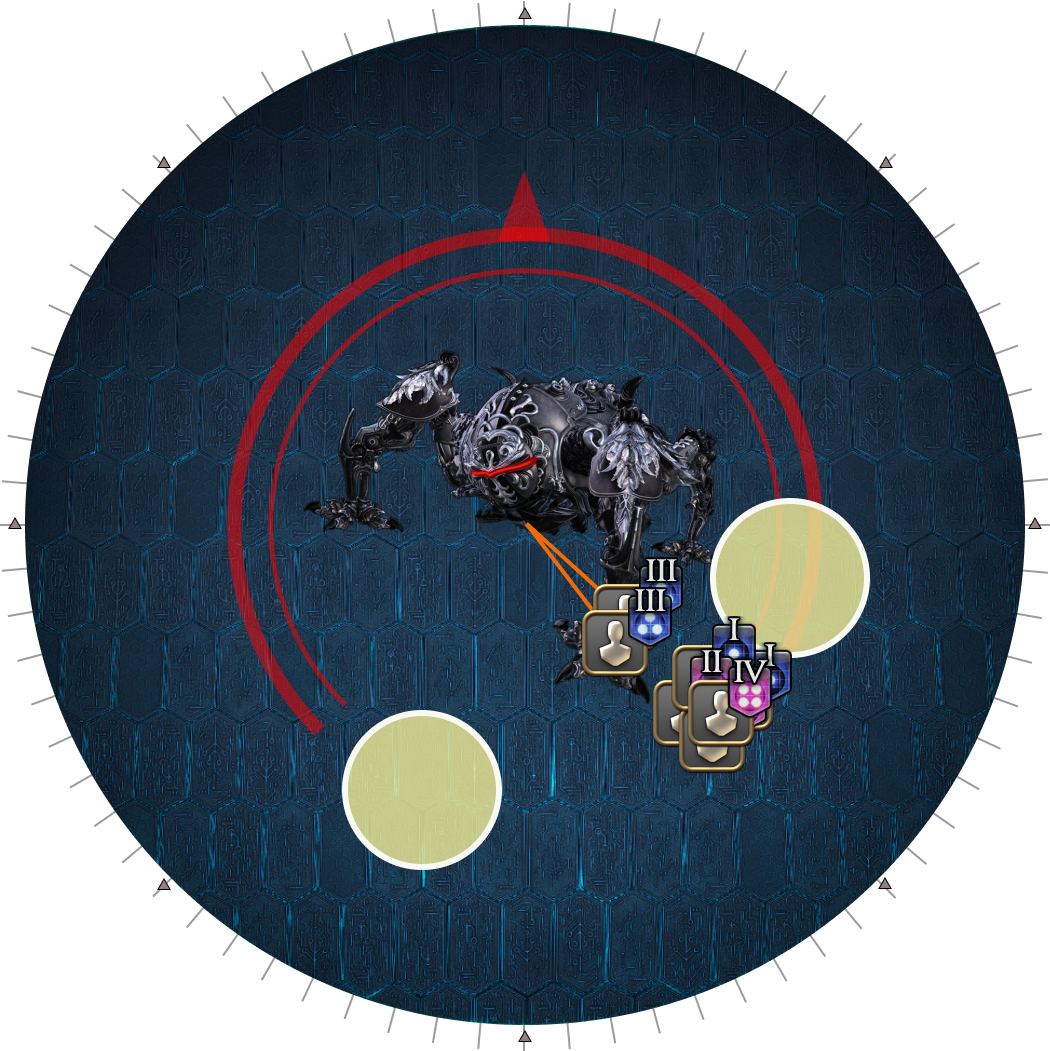 |
| 1. First set of towers/tethers
| 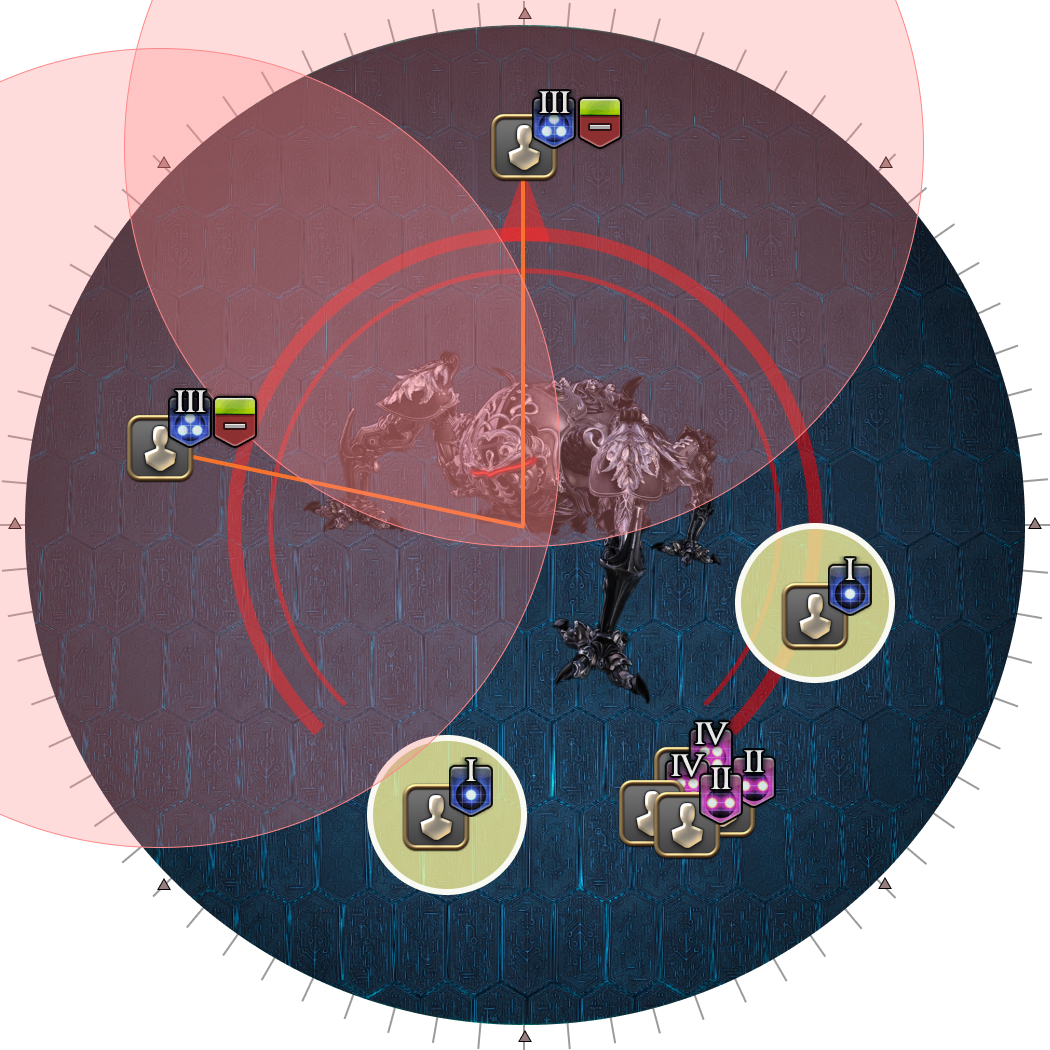 |
| 2. Second set of towers/tethers
|  |
| 3. Third set of towers/tethers
The max-HP down debuff will wear off on the number 3 players when the previous set of towers resolve. They will need to be healed up to take their towers. | 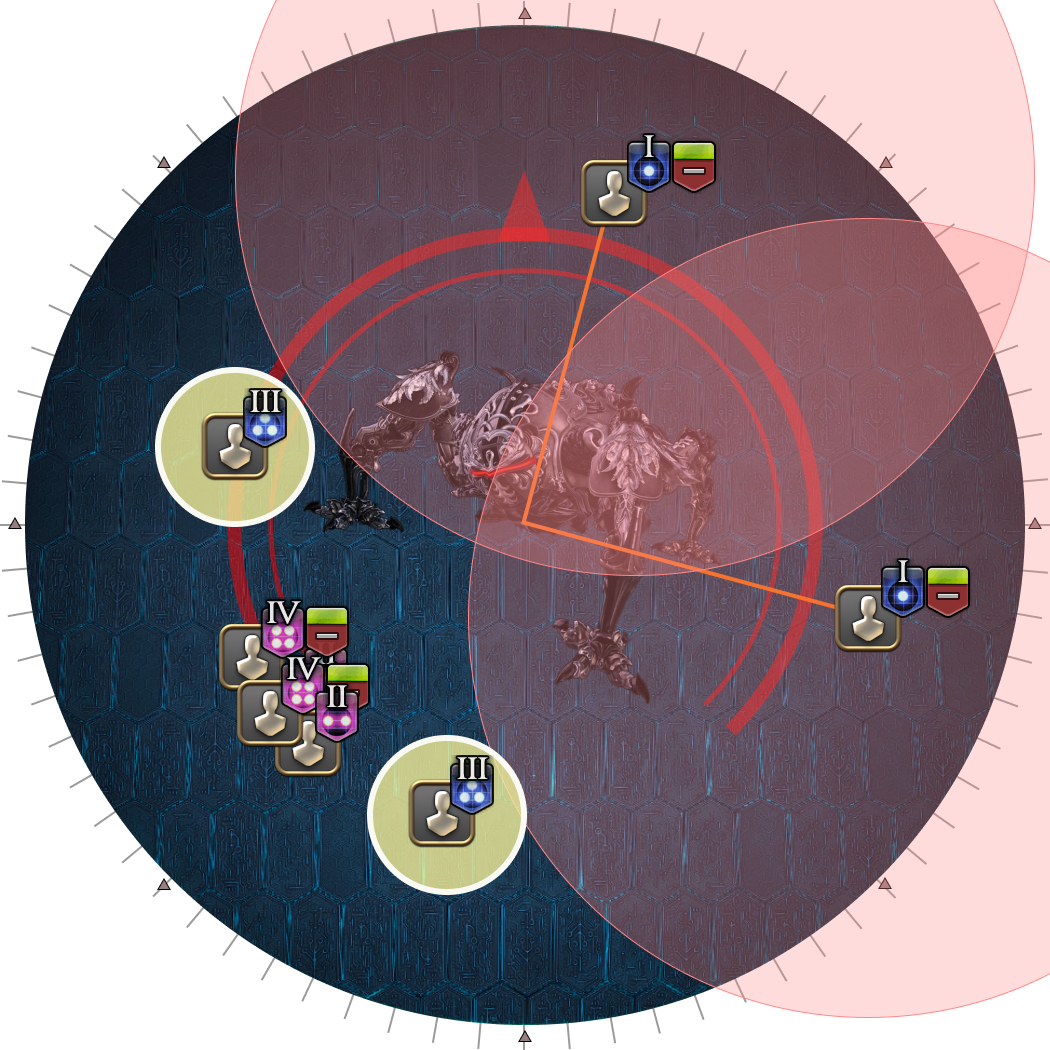 |
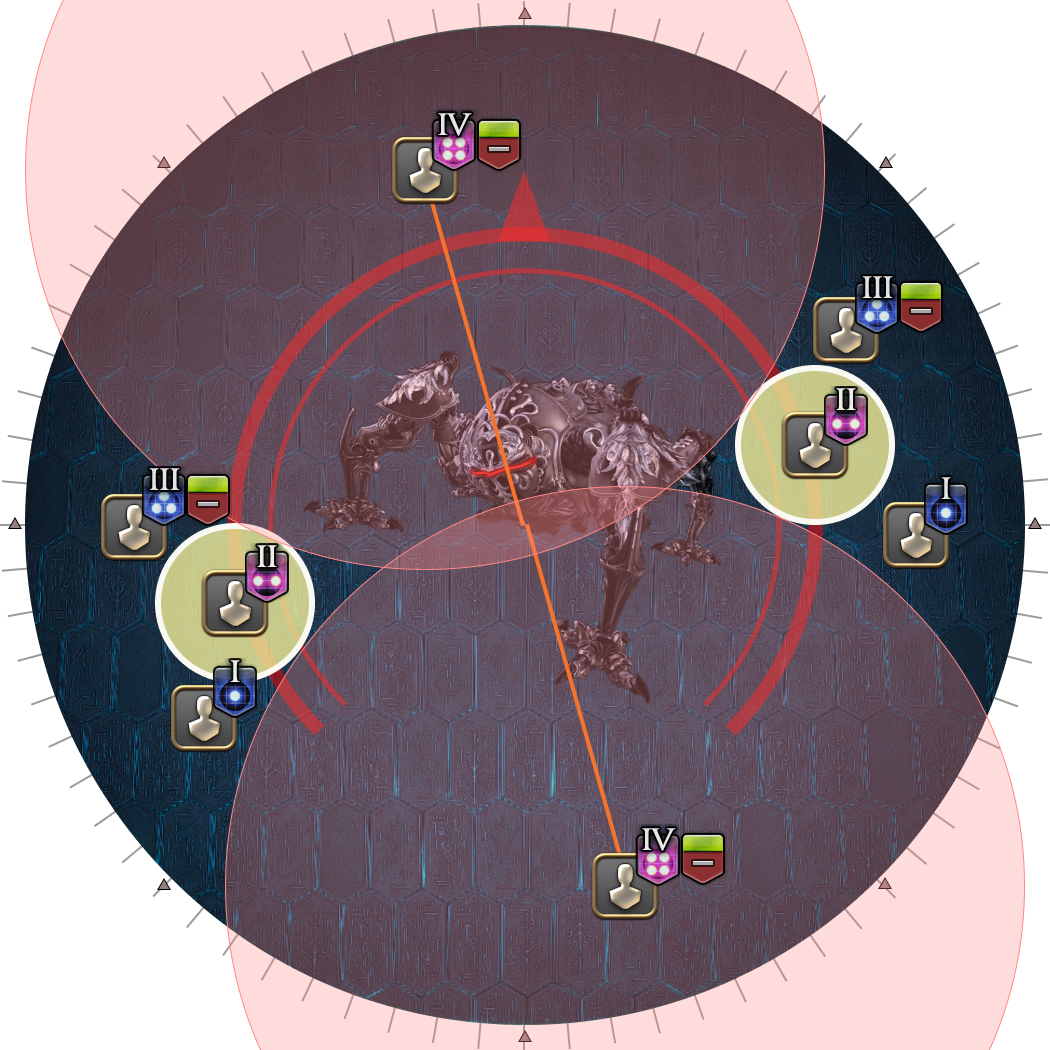
| 4. Fourth set of towers/tethers
The max-HP down debuff will wear off on the number 4 players when the previous set of towers resolve. They will need to be healed up to take their towers. | 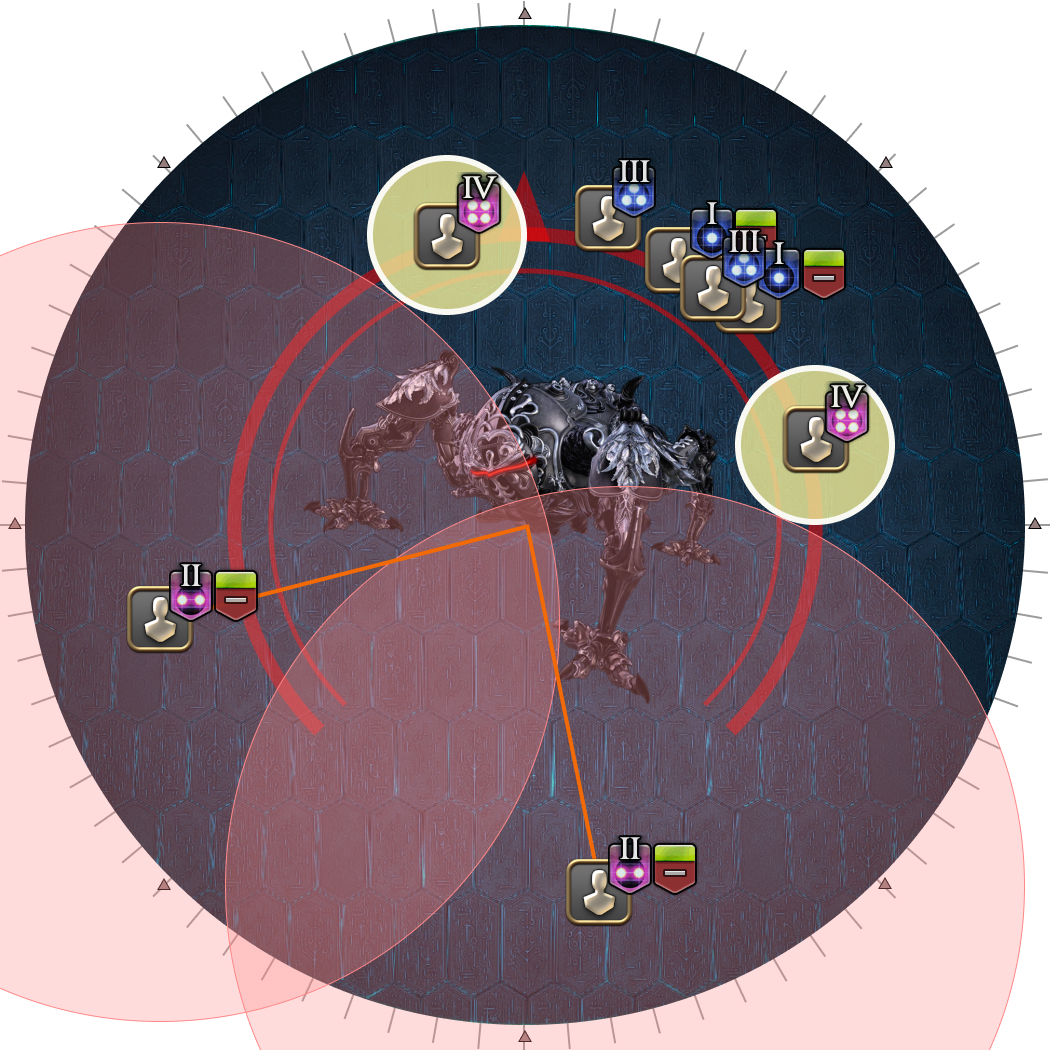 |
After the fourth set of towers, top up the party when the last sets of HP Penalties wear off, and prepare for Omega’s next mechanic.
Pantokrator
We decided to go with HaruGlory’s Pantokrator strat, which puts the beam at the back, and the missile in front.
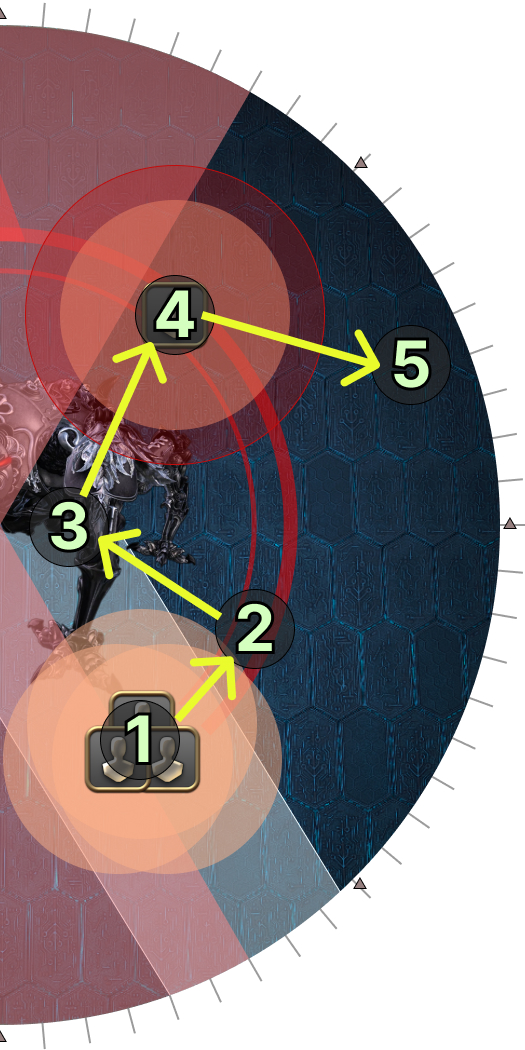
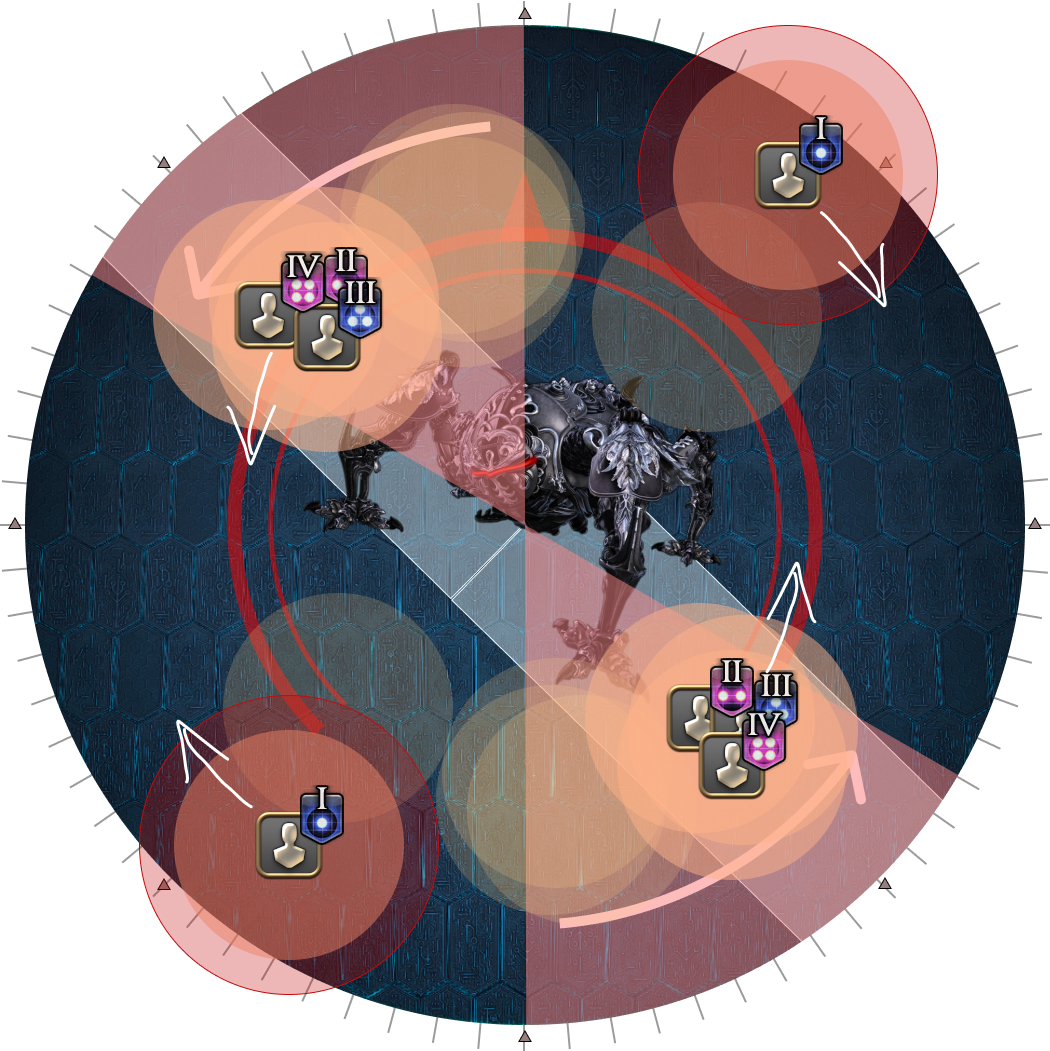
| 1. Tank Omega facing North. The rest of the party can stay near the center of the arena, ready to adjust if needed. |  |
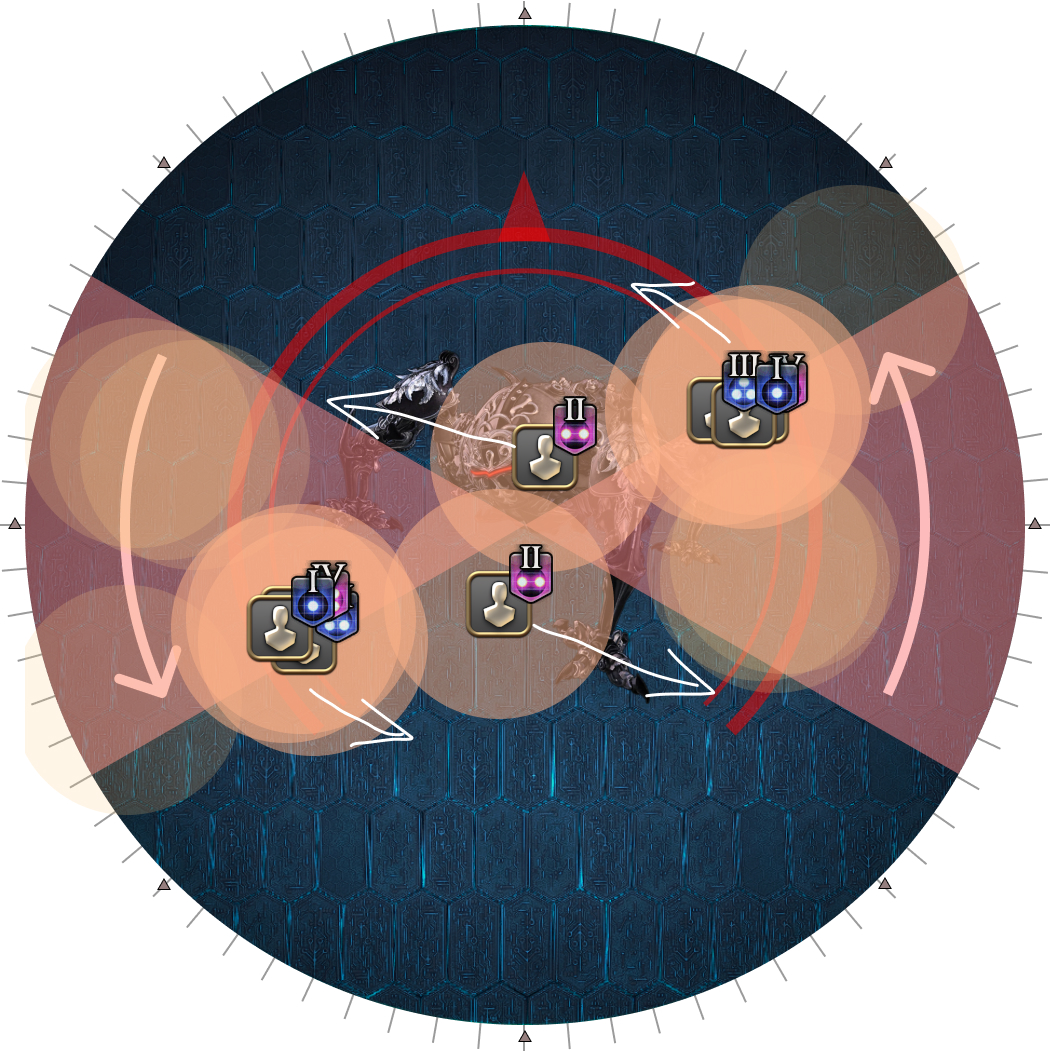
| 2. The party will be numbered again in pairs of 1-4. Split the party into two groups, one referencing NW, and the other referencing SE: We need to split the party into two groups of four such that:
To do so, we use the following priority order:
| 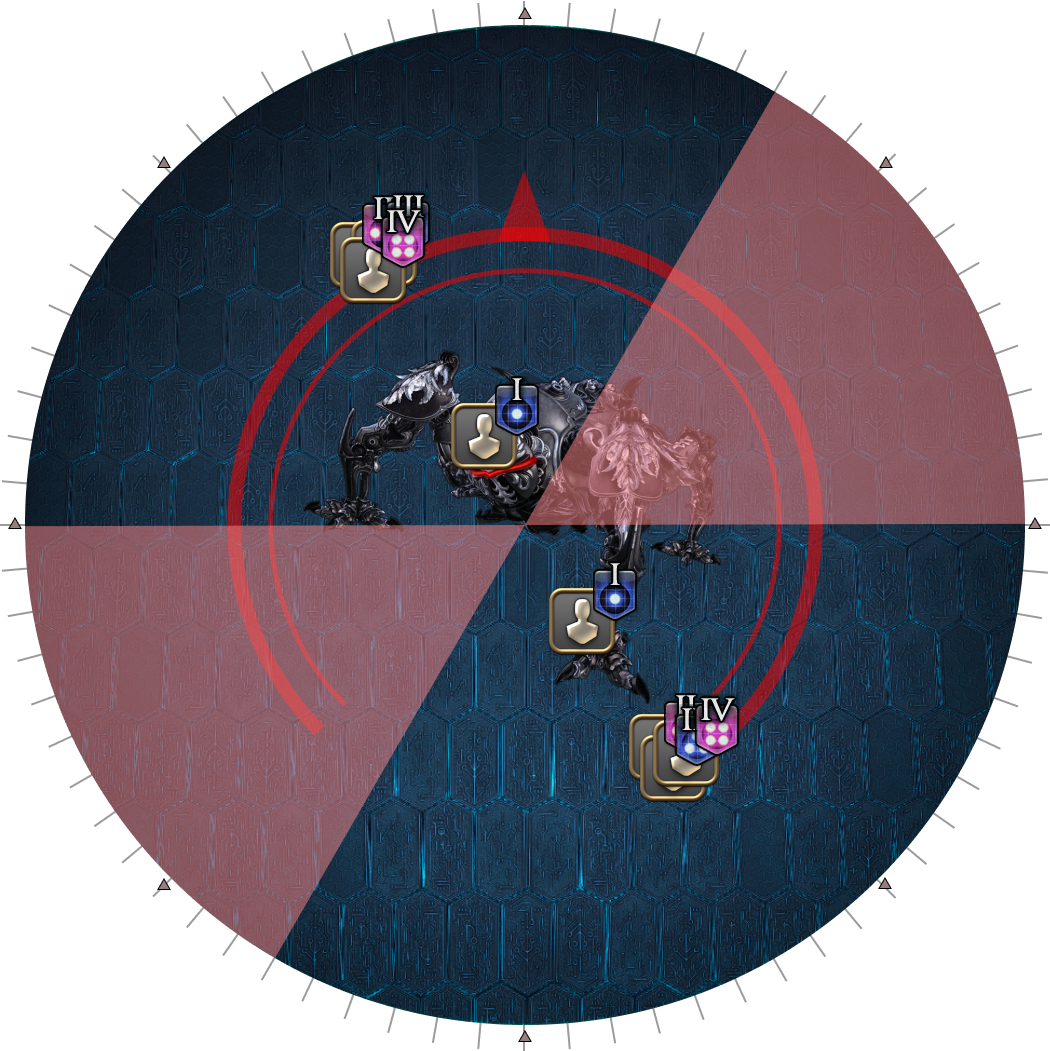 |
The first set of Flamethrower telegraphs will appear. If the Flamethrowers hit the NW and SE points, rotate clockwise to the next safe sector.
These will be your starting sectors.
 |  |  |  |
| The movement for Pantokrator goes like this:
Everybody continues to stagger-step forward, while the next player to bait the missile then breaks away from the party:
|  |
Put together, it will look something like this: 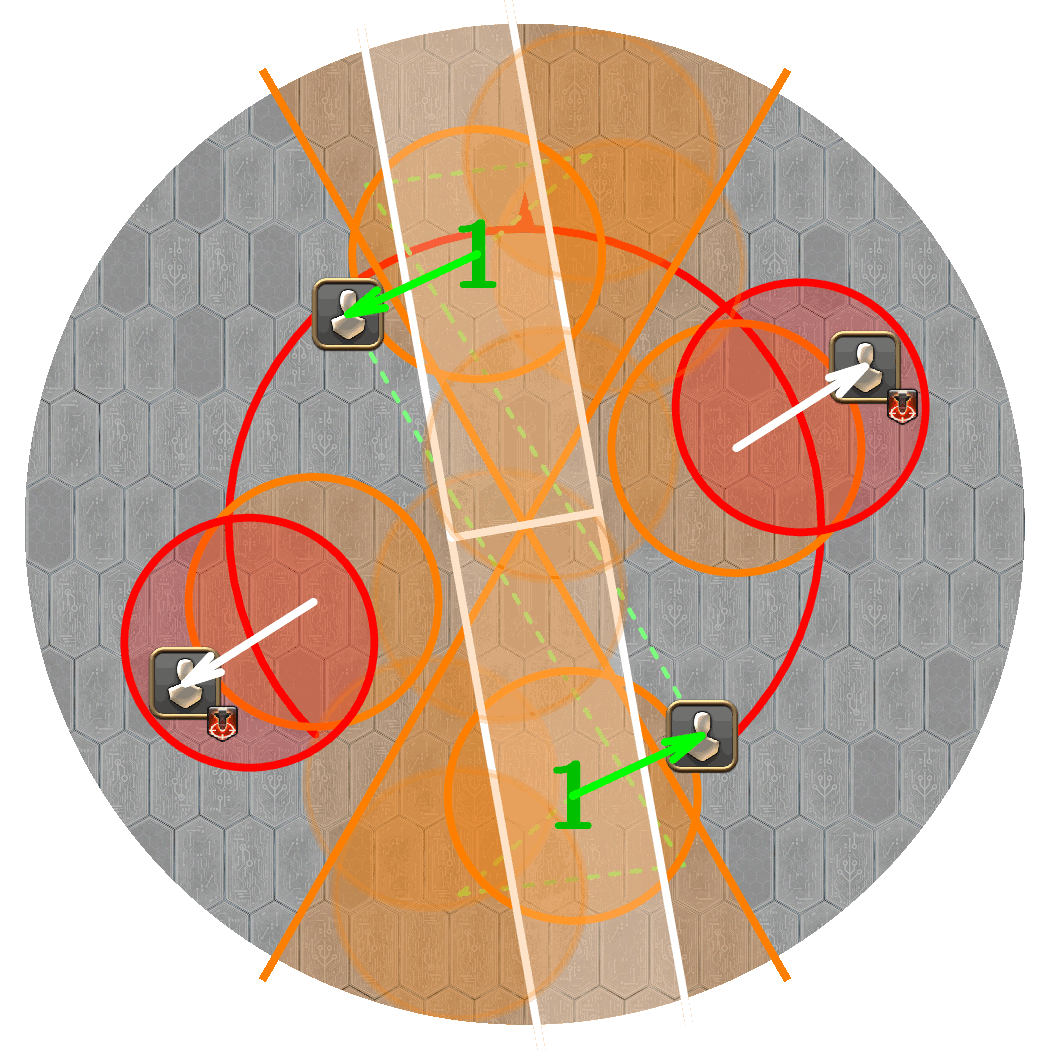 (Credit: Aqua Glacies)
Condensed Waves and Guided Missiles
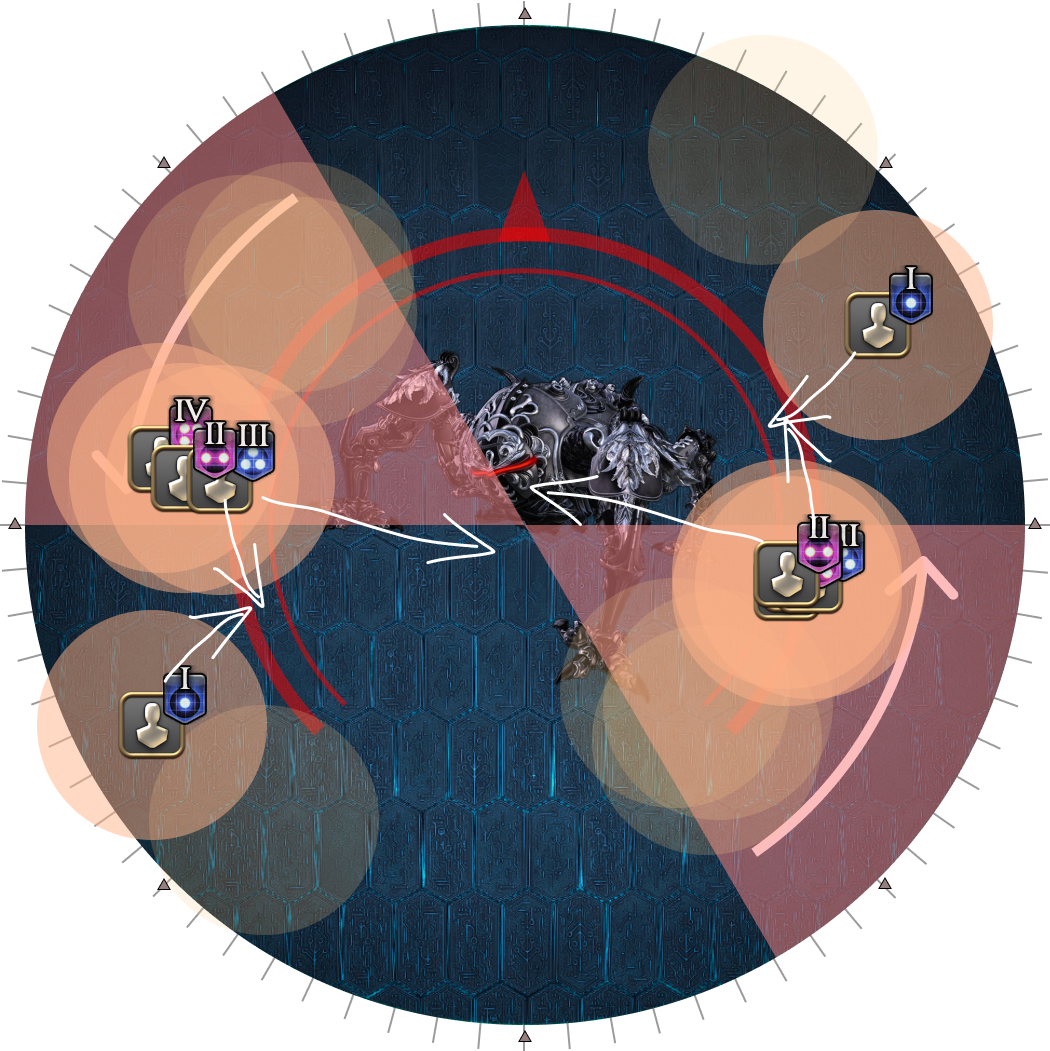
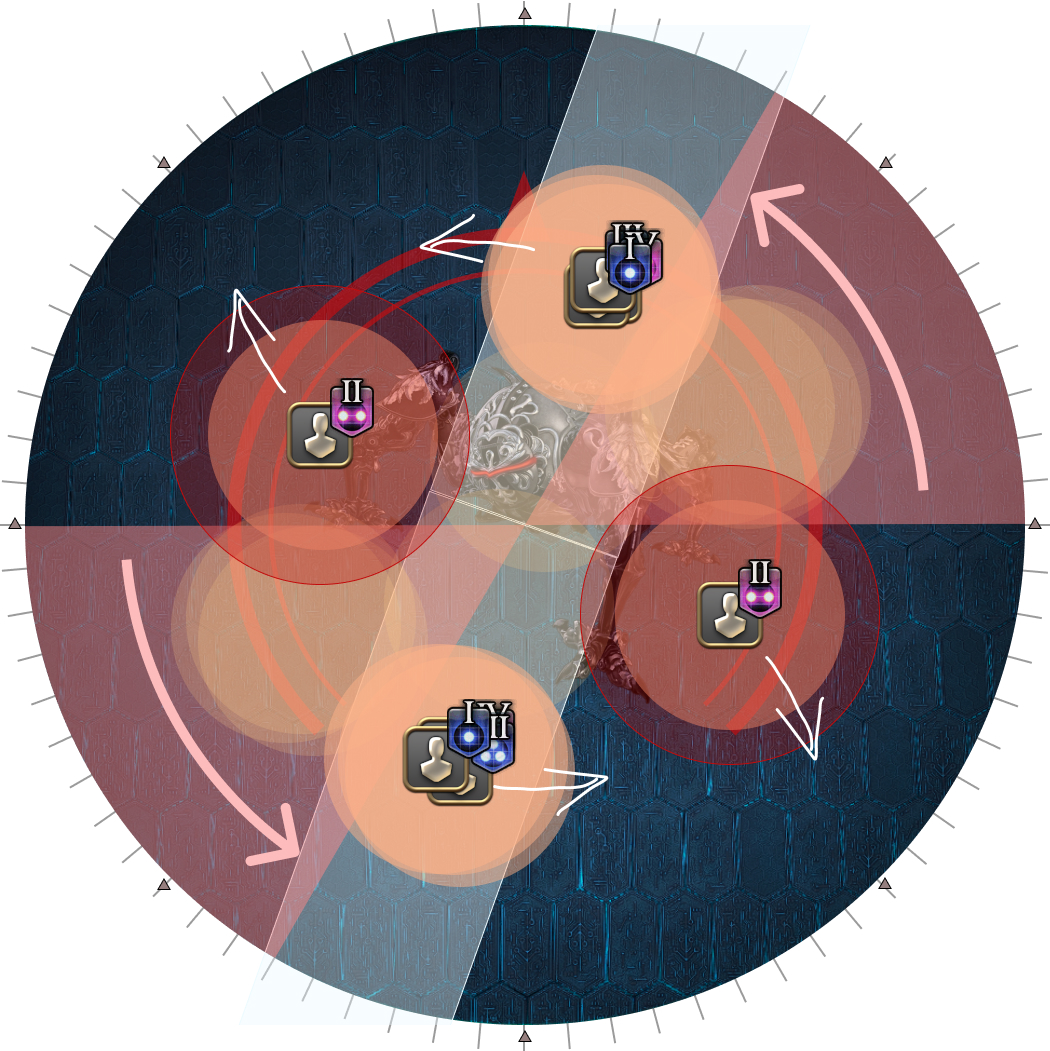
| 6. Numbers appear and the first set of flame telegraphs appear. Split the party into the two groups, and move to the middle of the safe sectors.
| |
| 7. The flame telegraphs start rotating. The players numbered 1 move to the front of the sector (behind the front AoE). The other players adjust in the other direction so they stand just in front of the Flamethrower telegraph. | 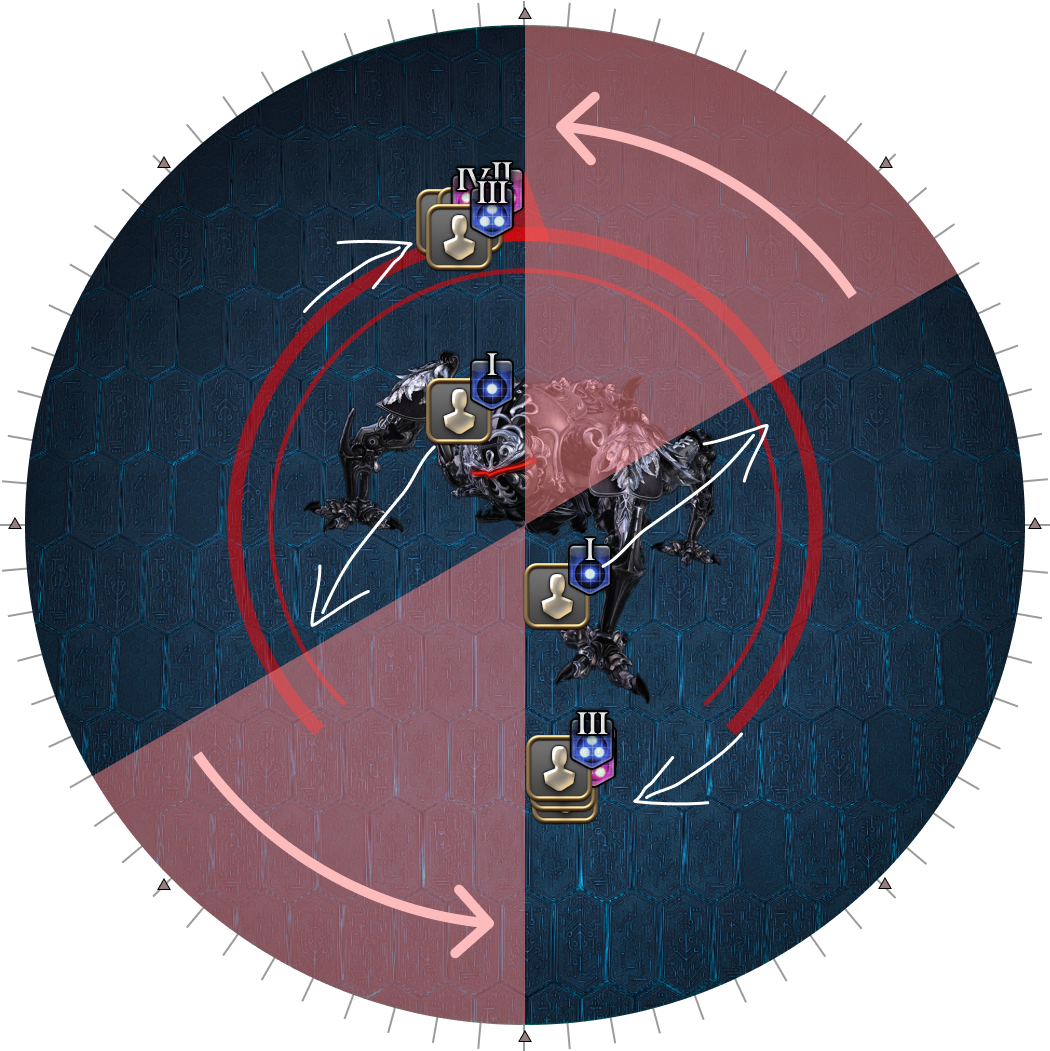 |
| 8. Third set of flame telegraphs. The first set of AoEs appear under each player.
|  |
| 9. The first set of debuffs expire.
|  |
| 10. First set of AoEs (after beam + missile).
|  |
| 11. Second set of AoEs (after beam + missile).
|  |
| 12. Third set of baited AoEs. The next set of beams and missiles resolve.
|  |
The loop repeats two more times (with players numbered 3 and 4 taking their turns to leave the stack to bait missiles).
Wave Cannons
Omega will target the two furthest players for 120-degree tankbuster cleaves (Diffuse Wave Cannon Kyrios). These should be taken by the tanks.
Omega will then target the three random non-tank players with a red marker for Wave Cannon Kyrios.
| 16. Both tanks stack north, outside Omega's targeting circle and use their invulnerabilities. This gives enough space for the rest of the party spreads around the south half of the arena inside of Omega's targeting circle. Three random (non-tank) players will be selected for the first set of Wave Cannons. | 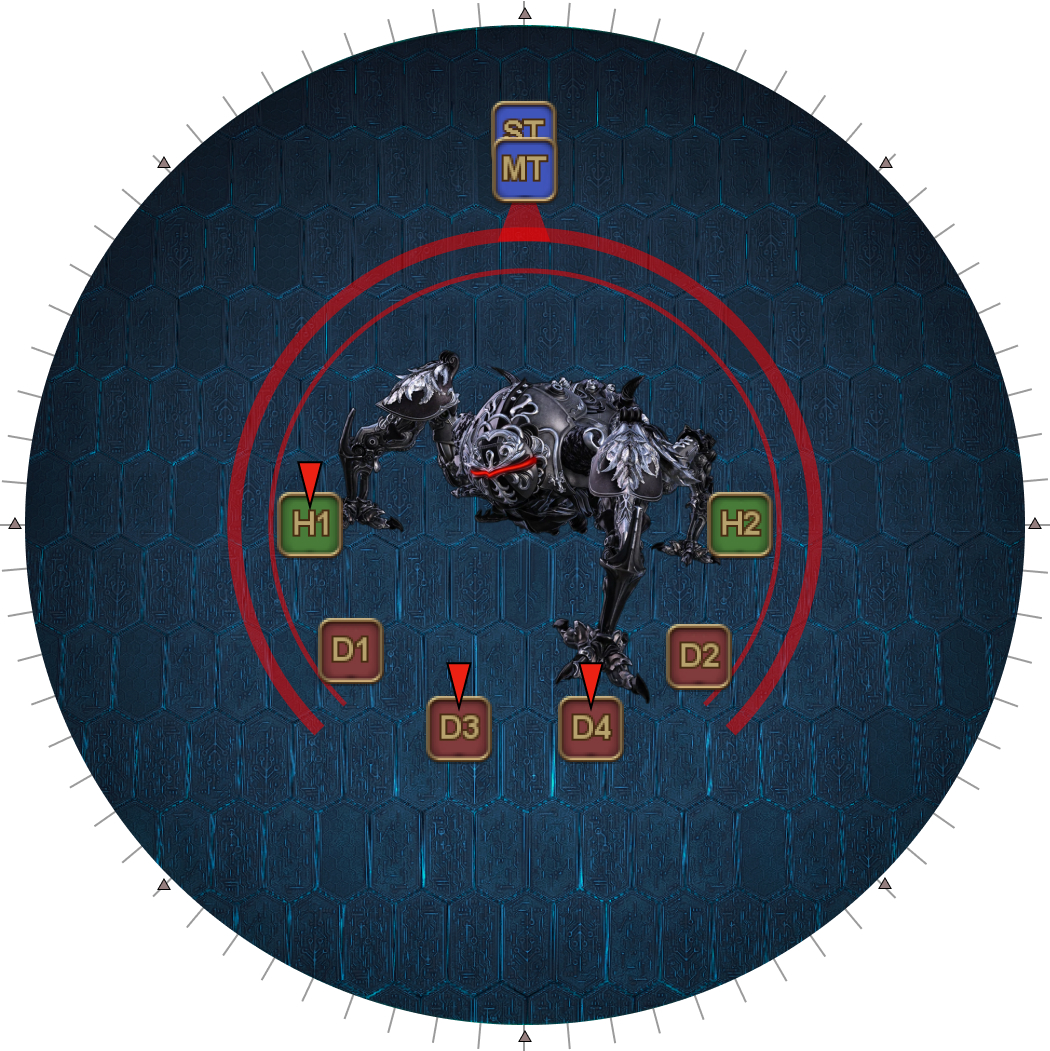 |
| 17. First set of Wave Cannons resolve. The other three players get marked for the second set of Wave Cannons. | 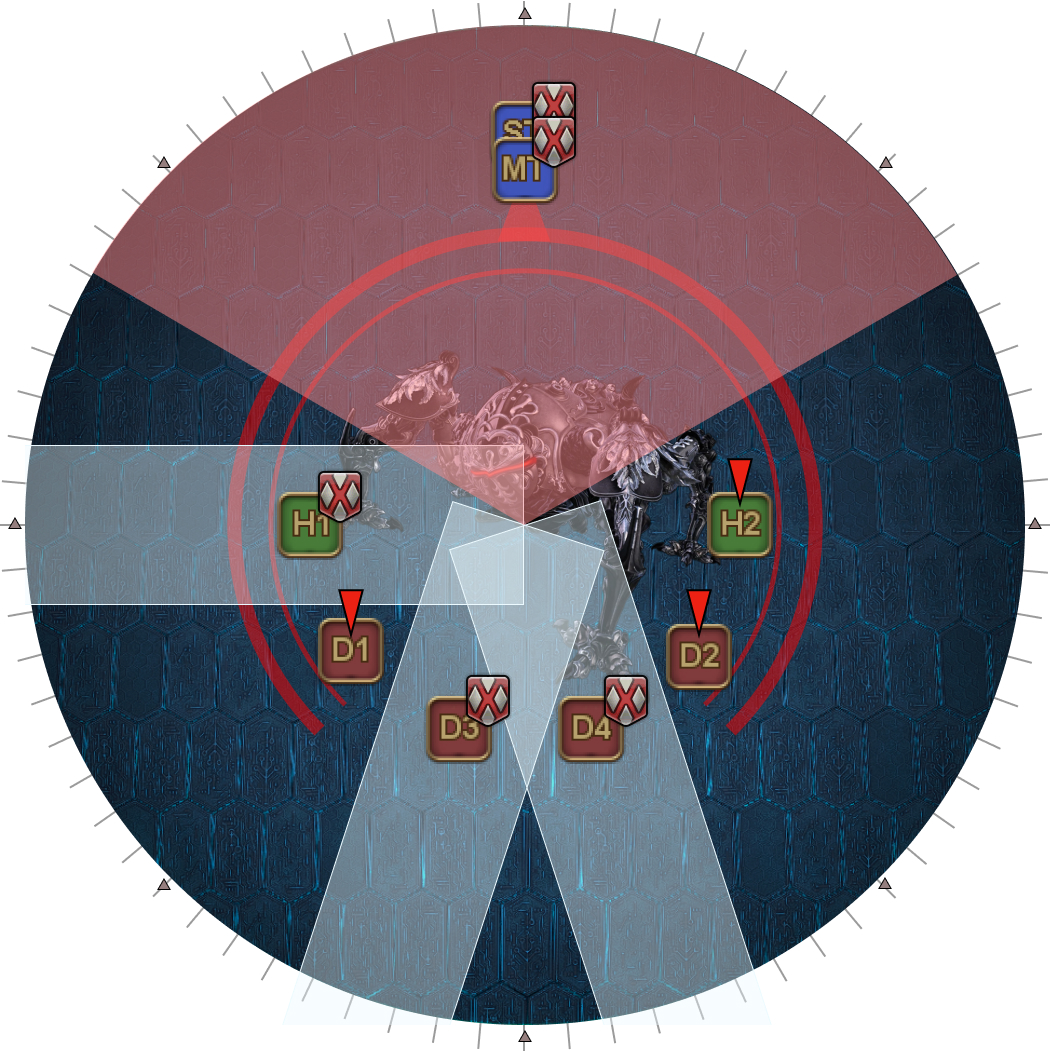 |
| 17. Second set of Wave Cannons resolve. After this, Omega casts Atomic Ray, serving as the hard enrage. | 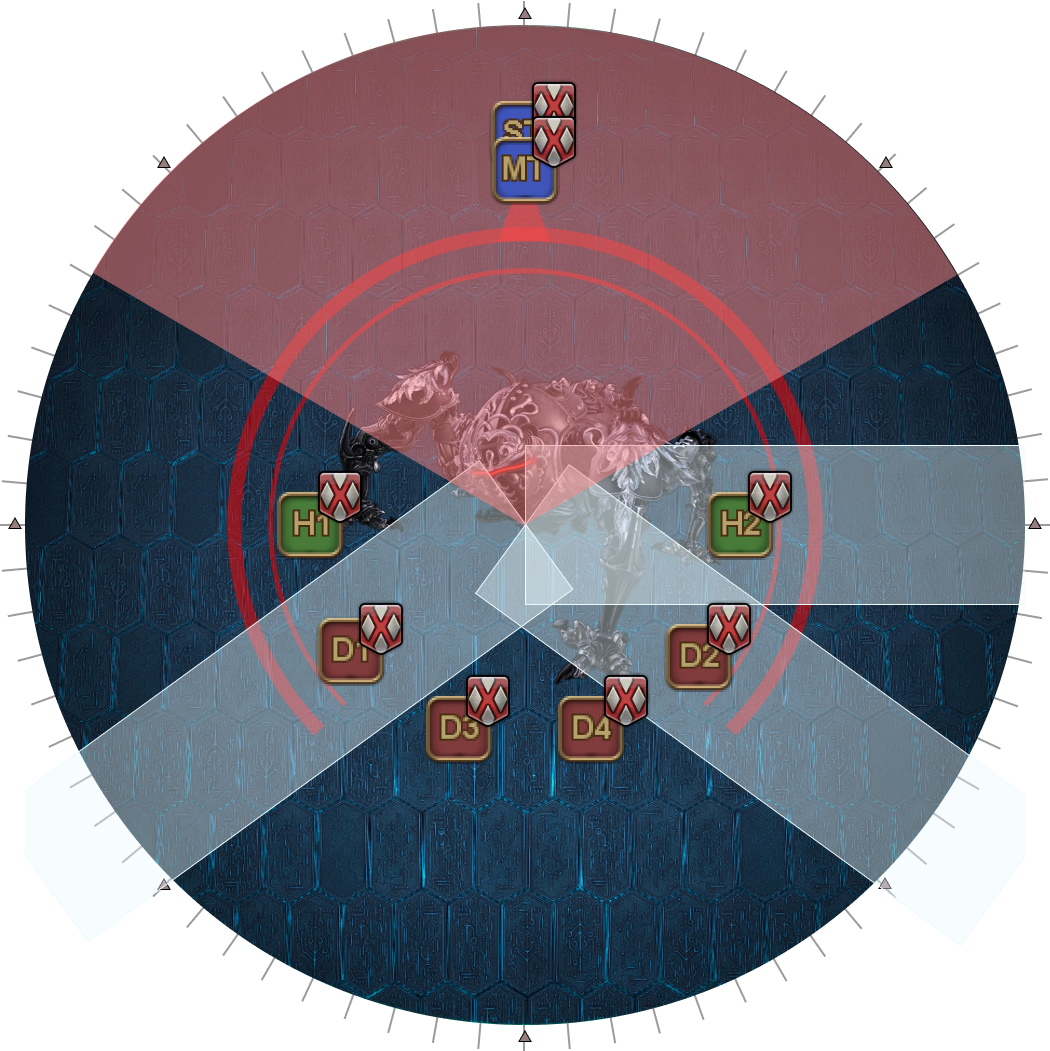 |
Frequently Asked Questions
[Pantokrator] Why does the party group up NW and SE instead of N and S?
| This is done because the Flamethrowers are based on Omega's orientation. The problem with facing Omega directly at the party (if they were to start N/S) is that the Flamethrowers are 60-degree cones that move in multiples of 30 degrees. This means that you can have a scenario like the following, where it's now ambiguous whether the N/S parties count as getting hit. This is especially problematic when the agreed movement is "always rotate clockwise to the safe sector", which is clearly not ideal in this scenario. By pointing Omega at a 45 degree angle from the two assigned points, you guarantee that Omega's Flamethrower will never end up in this scenario, removing said ambiguity altogether. |  |
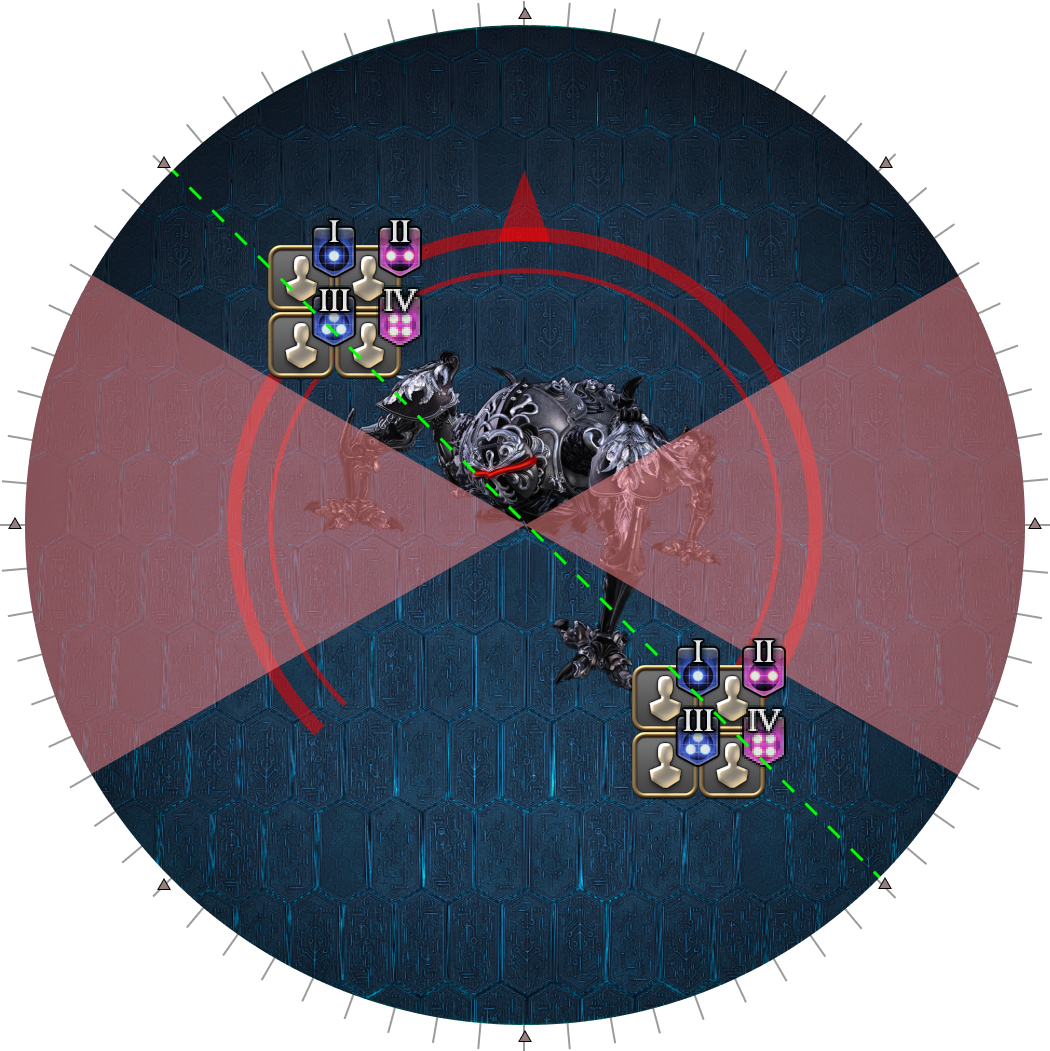
[Pantokrator] Why do we resolve the stack at the back instead of the front?
| There are a few advantages to stacking at the back:
In addition, putting the stack in front (missile at the back) has the following disadvantages:
|
Troubleshooting
[Pantokrator] Why does someone keep getting an AoE dropped in front of them?
| Check that all players move the same way. There are actually two ways to drop AoEs during Pantokrator. We have the next missile player stay with the group for one more AoE after the Wave Cannon, before breaking away to the front (the yellow path). There is a faster path that Haru Glory used at the beginning of their prog that has the next missile player break away immediately when the Wave Cannon hits (the green path). There will be a problem when one player does the slow, yellow path, and the next player does the faster, green path. The front player's AoEs won't have gone off by the time the next player wants to move into that spot. Haru Glory's group also swapped to the slower path later on. | | 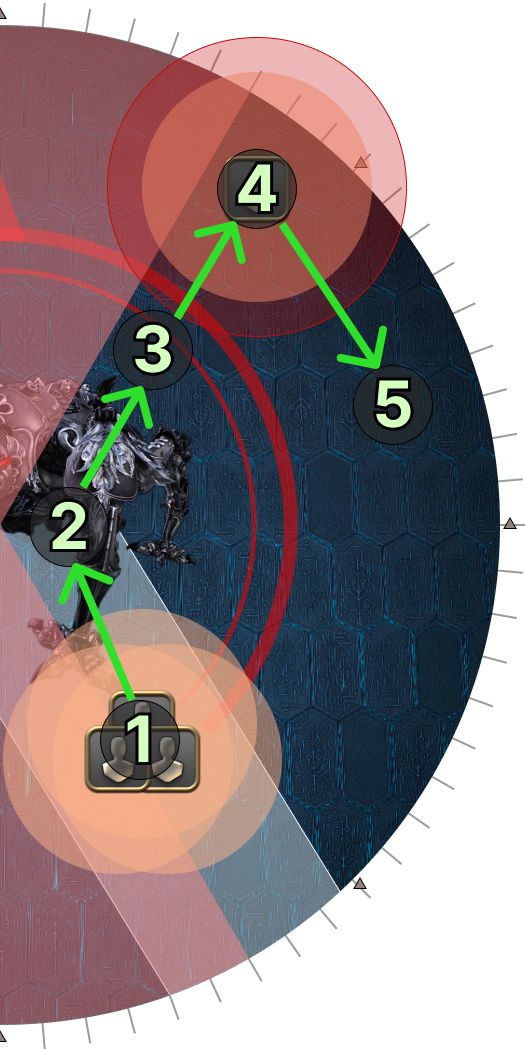 |