The Minstrel’s Ballad: The Endsinger’s Aria
PF largely follows Nukemaru’s guide:
Japanese
This is the game8 macro that’s being used:
【絶望の鎖・カタステリスモイ(塔)】
鎖はTHが西、DPSが東に切りにいく
 MT  D1
  ST D2
 H1  D3
 H2  D4
【絶望侵食AoE散開/頭割り】
 D1 MT D2  |MTH1D1D2 西/北
 H1 ST H2   |STH2D3D4 東/南
 D3  D4  |
【絶望侵食:フレア散開/セオロジカル散開】
 ※フレアX字   |※フレア・AOE十字捨て
D1/MT D2/ST |    Tフレア
        | AOE  頭/他 Dフレア
D3/H1 D4/H2|    Hフレア
English
【Grip of Despair + Katasterismoi (Towers)】
Chains:TH→West、DPS→East
 MT  D1
  ST D2
 H1  D3
 H2  D4
【Despair Unforgotten Spread/Stacks】
 D1 MT D2  |MTH1D1D2 West/North
 H1 ST H2   |STH2D3D4 East/South
 D3  D4  |
【Despair Unforgotten: Flares/Theo. Fatalism】
※Flares X-form|※Flares/AoE 十-formation
D1/MT D2/ST |    T-Flare
        | AOE  stack D-Flare
D3/H1 D4/H2|    H-Flare
Markers
The intercardinal 1234 markers are the impact points for all the planetary collisions.
All markers are the player positions for Flare/AoEs during Theological Fatalism (player debuffs). The center C marker is for the Donuts + stack (people tend to stack too far south otherwise).
You also want to mark the two healers for stacks. 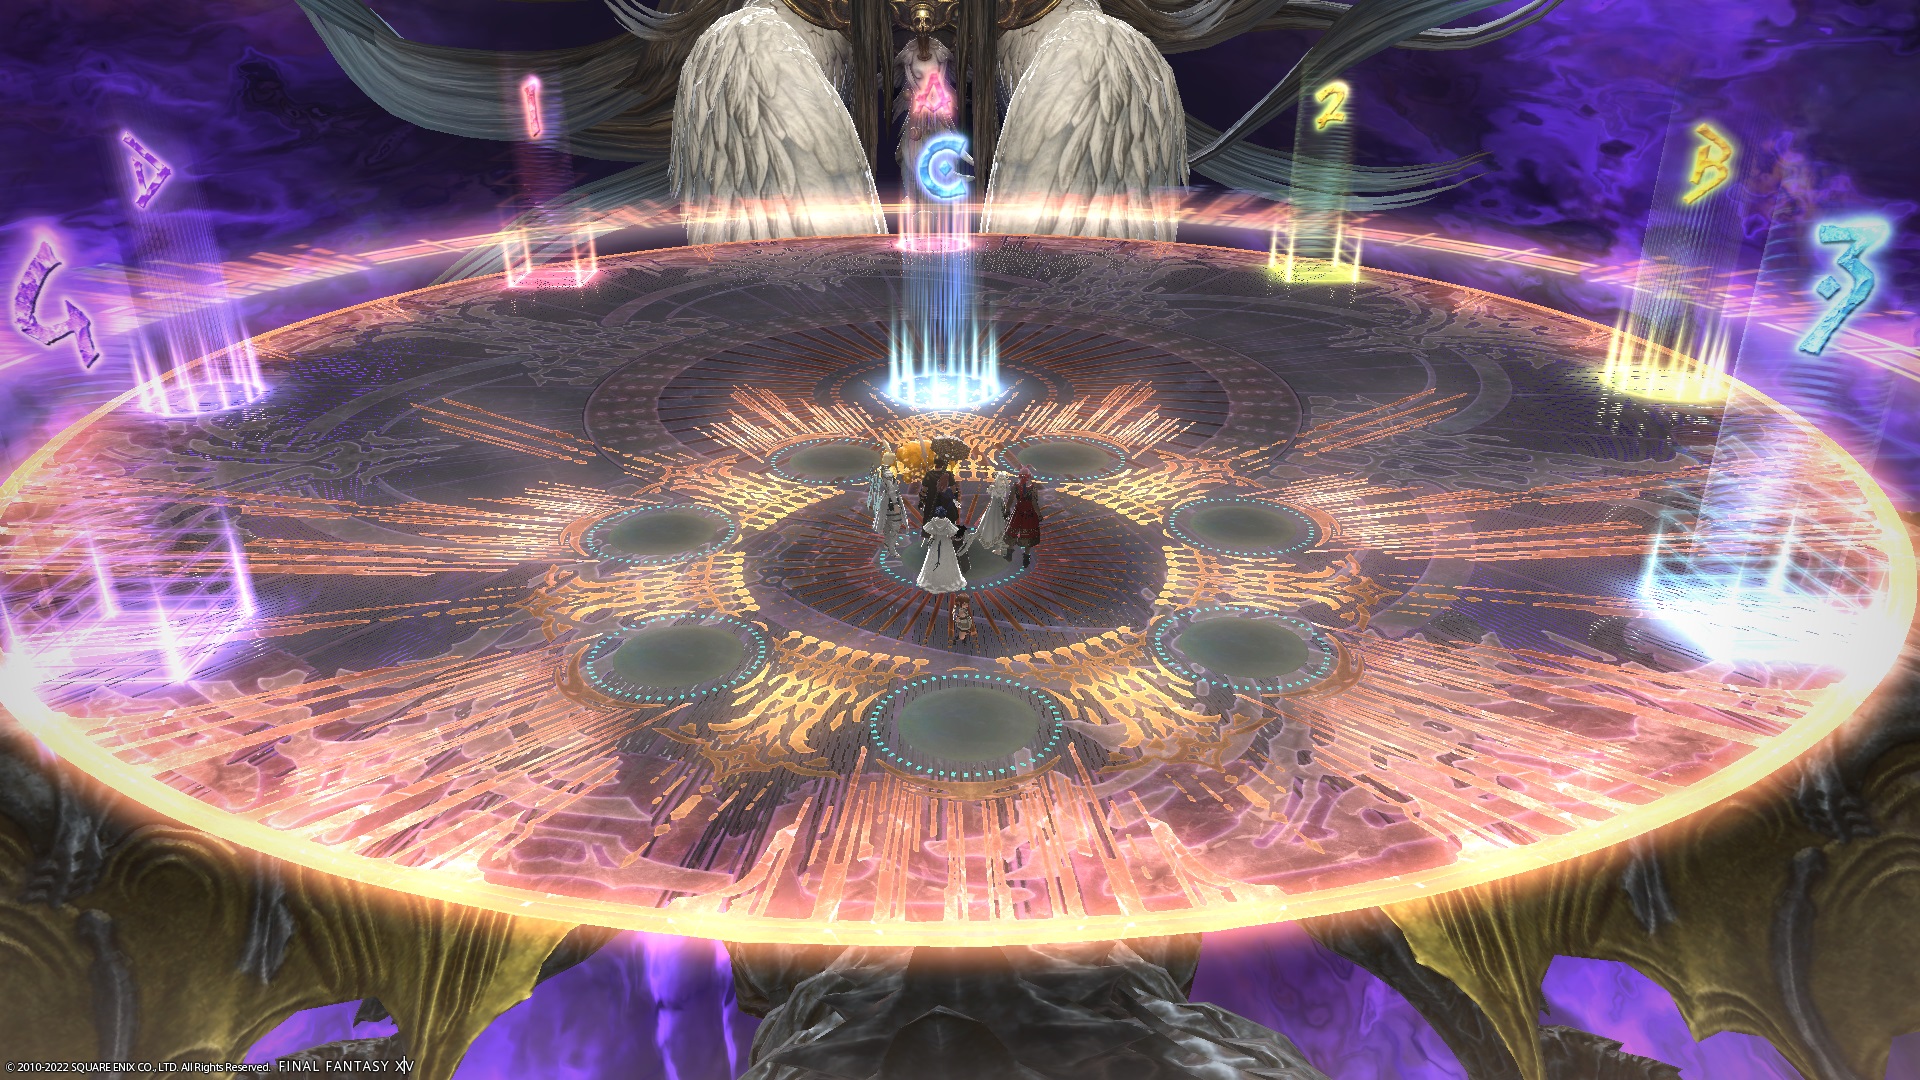
XIVLauncher WaymarkPresetPlugin positions
{
  "Name":"Endsinger EX",
  "MapID":846,
  "A":{"X":100.0,"Y":0.0,"Z":82.0,"ID":0,"Active":true},
  "B":{"X":118.0,"Y":0.0,"Z":100.0,"ID":1,"Active":true},
  "C":{"X":100.0,"Y":0.0,"Z":100.0,"ID":2,"Active":true},
  "D":{"X":82.0,"Y":0.0,"Z":100.0,"ID":3,"Active":true},
  "One":{"X":87.272,"Y":0.0,"Z":87.272,"ID":4,"Active":true},
  "Two":{"X":112.728,"Y":0.0,"Z":87.272,"ID":5,"Active":true},
  "Three":{"X":112.728,"Y":0.0,"Z":112.728,"ID":6,"Active":true},
  "Four":{"X":87.272,"Y":0.0,"Z":112.728,"ID":7,"Active":true}
}
Theological Fatalism (5-heads)
An easy way to resolve the 5-heads mechanic is:
- From the third donut, determine whether your current quadrant will be cleaved by the center head:
- If it will get cleaved, cross over diagonally to the opposite quadrant.
- If it won’t get cleaved, stay in your current quadrant.
- Check the number of rings in your current quadrant:
- If it is odd, stay in your current quadrant.
- If it is even, move to the other quadrant that won’t get cleaved by the center head.
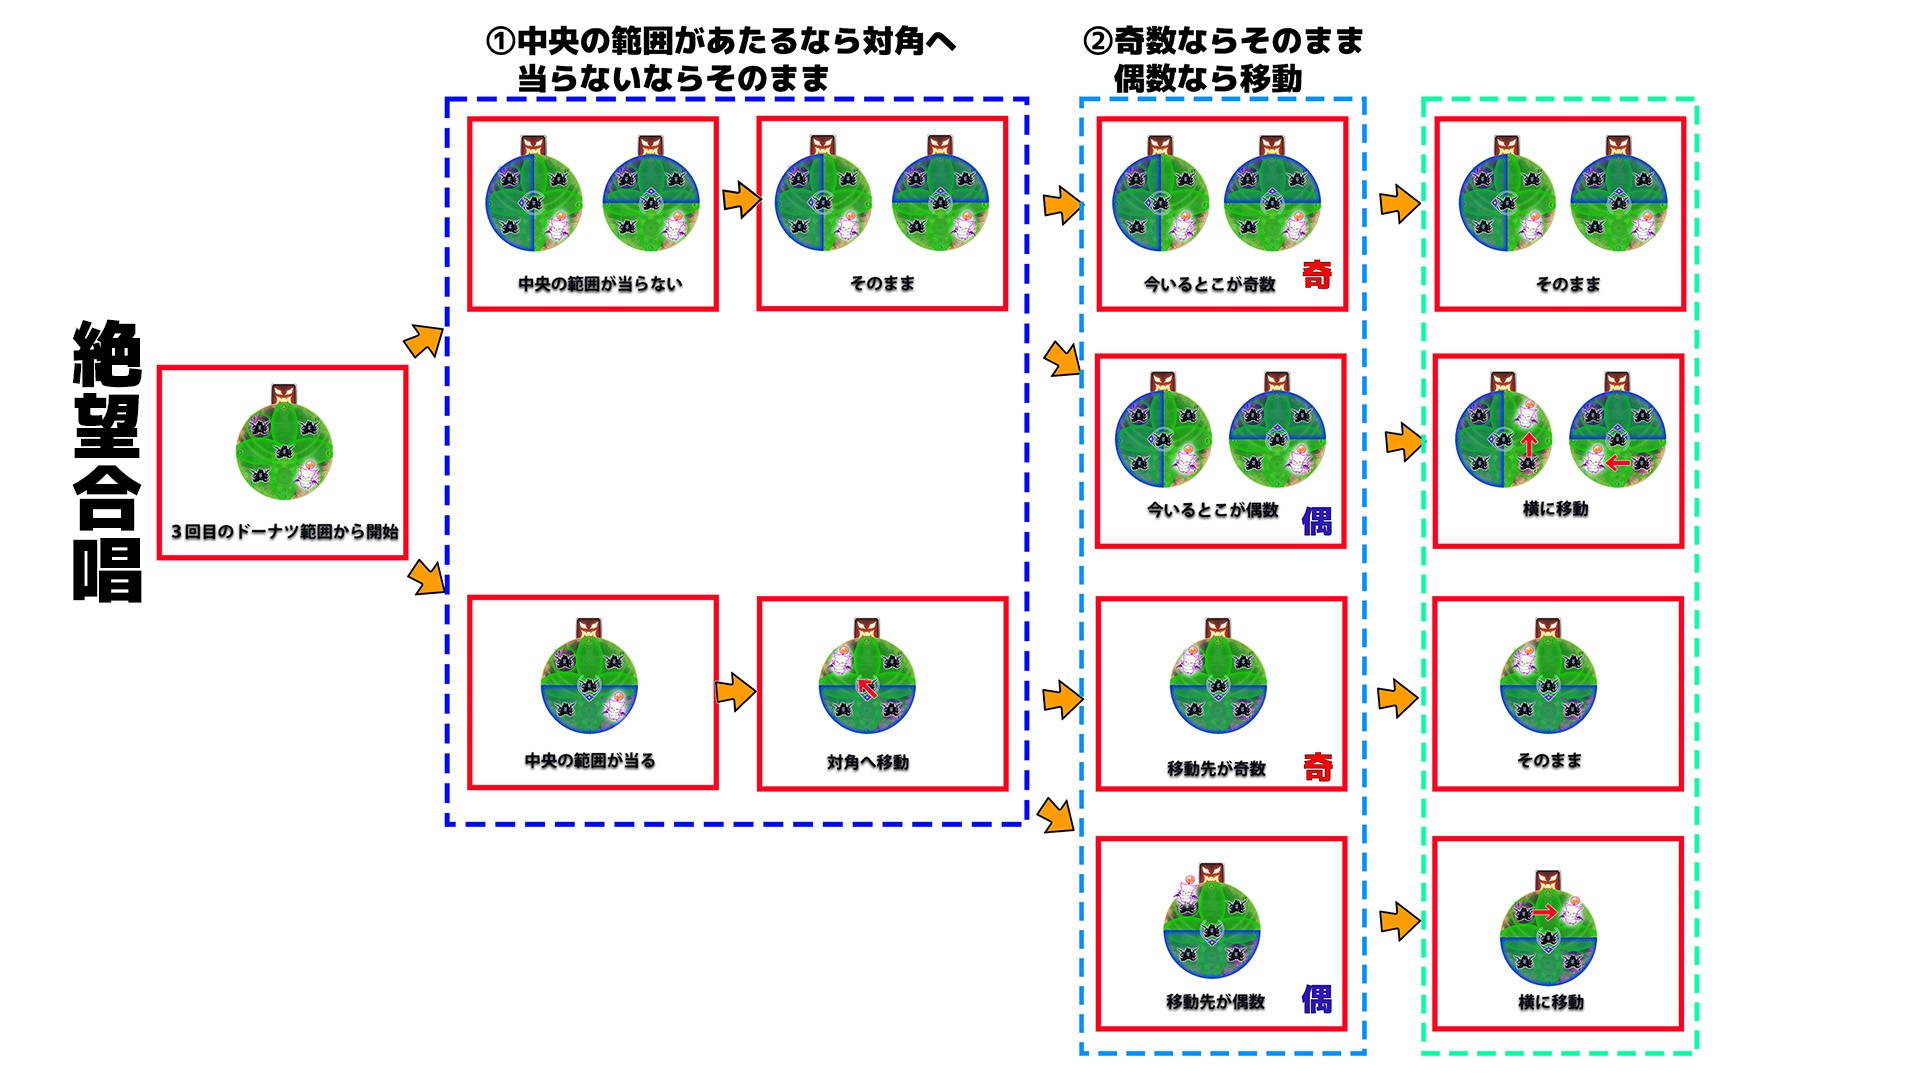 (Credit: Nukemaru)
2x Fatalism
If you have LB3 available during the 2x Fatalism (quadruple planets), a Tank LB3 right after the second planet collision will allow players to survive red planet hits during the harder “blue-to-red” planet sequence.
To get the LB3 by this time, you will need a standard party setup with no duplicate jobs.