Nael deus Darnus
One thing that makes Nael tricky is that although there are three lines leading up to Cauterize, there are four Fire/Ice/Lightning cycles so the two loops do not move in sync with one another.
The other difficulty is that the tempo in Nael’s phase is noticeably faster compared to Twintania, or most other encounters in general. Keep that in mind when reading the diagrams below- the mechanics resolve in sequence one after the other quickly.
Quotes
Nael telegraphs her upcoming attacks by saying a line- key words in that line indicate what attacks she is about to do, and in what order.
The quotes that Nael will use in this phase are:
| O hallowed moon, take fire and scorch my foes! | Lunar Dynamo → Thermionic Beam In → Stack |
| O hallowed moon, shine you the iron path! | Lunar Dynamo → Iron Chariot In → Out |
| Take fire, O hallowed moon! | Thermionic Beam → Lunar Dynamo Stack → In |
| Blazing path, lead me to iron rule! | Thermionic Beam → Iron Chariot Stack → Out |
| From on high I descend, the hallowed moon to call! | Raven's Dive → Lunar Dynamo Spread → In |
| From on high I descend, the iron path to call! From on high I descend, the iron path to walk! | Raven's Dive → Iron Chariot Spread → Out |
| Fleeting light! 'Neath the red moon, scorch you the earth! | Dalamud Dive → Thermionic Beam Tankbuster → Stack |
| Fleeting light! Amid a rain of stars, exalt you the red moon! | Meteor Stream → Dalamud Dive Spread → Tankbuster |
Bahamut’s Favor
| 1. Have the MT Provoke Nael after the Bahamut's Claw is over, and center Nael, facing North. | 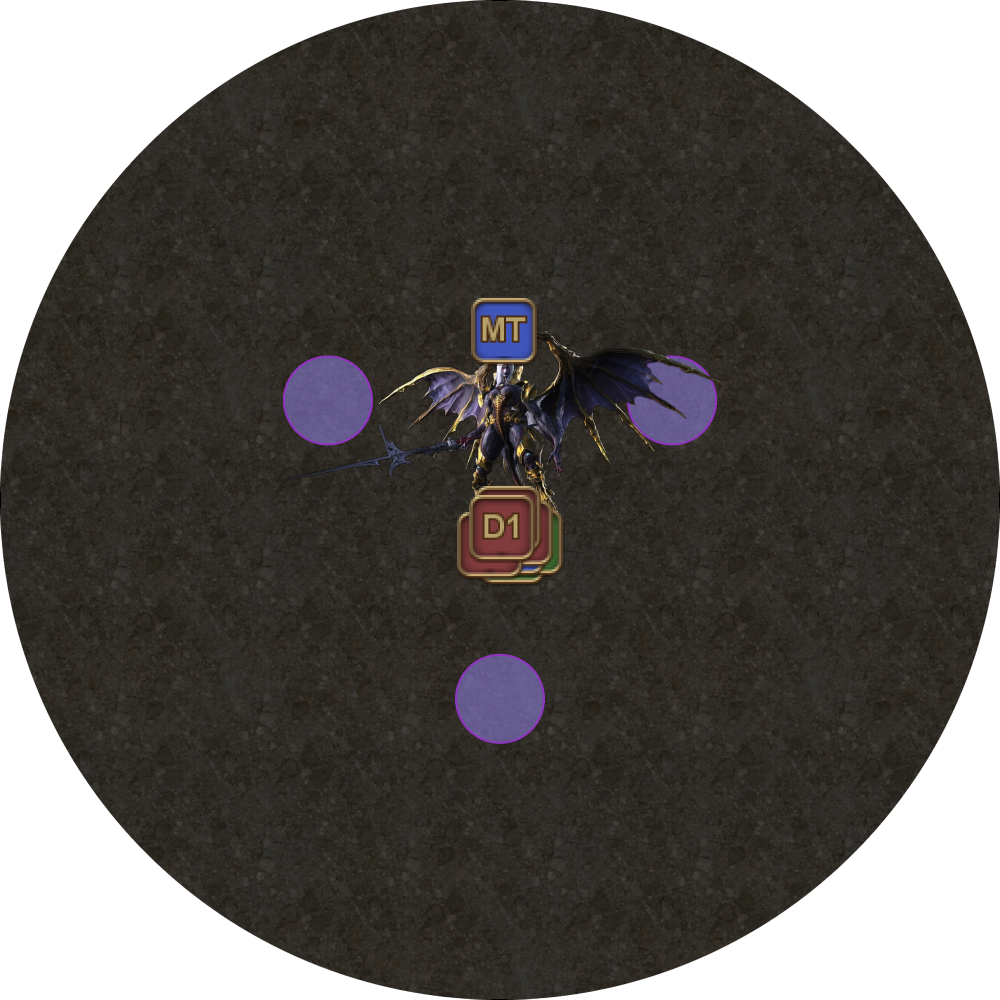 |
| 2. Nael casts Bahamut's Favor, which summons five dragons around the room. These dragons are responsible for much of the upcoming mechanics. | 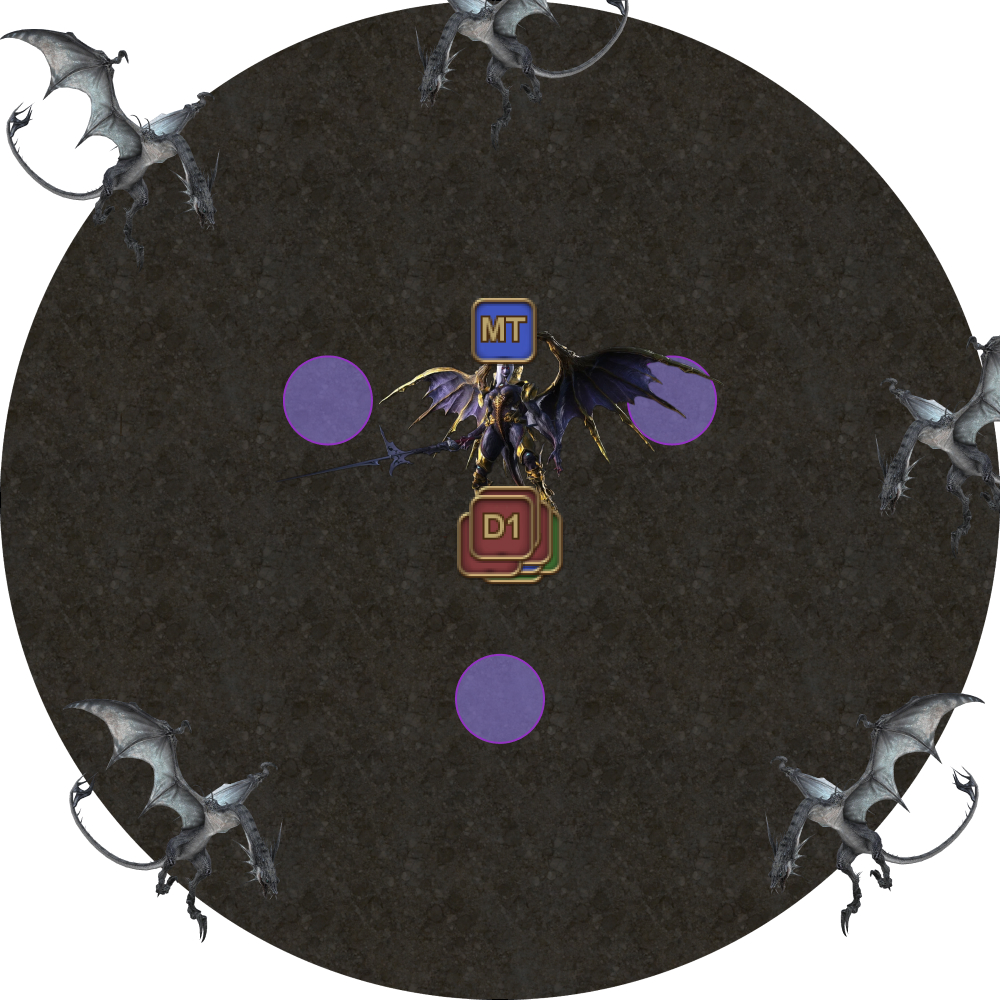 |
[Click to Expand] Dragon mechanics breakdown
  | Firescorched and Icebitten
|
 | Dooms and Wings of Salvation One dragon will Doom 2-3 players that will kill the players when the timer expires. The Dooms are staggered and will expire one-by-one, after 6 seconds, 11 seconds and 16 seconds. Another dragon will target a random player once for each Doom debuff with a white Wings of Salvation AoE that leaves behind a small puddle. The only way to remove the Doom is to step into a small white puddle left behind when the Wings of Salvation explodes. Because the Dooms are staggered, they must be cleaned in the right order. |
 | Thunderstruck The final dragon will periodically target two random party members with Thunder- a debuff that will go off in an AoE centered on that player that deals damage and paralyzes any other players that get hit. |
First line
To summarize the mechanics sequence for Nael’s first line:
- Lunar Dynamo + Thunders
- Iron Chariot or Thermionic Beam
- Wings of Salvation #1 + Fire (in)
- Wings of Salvation #2
- Bahamut’s Claw
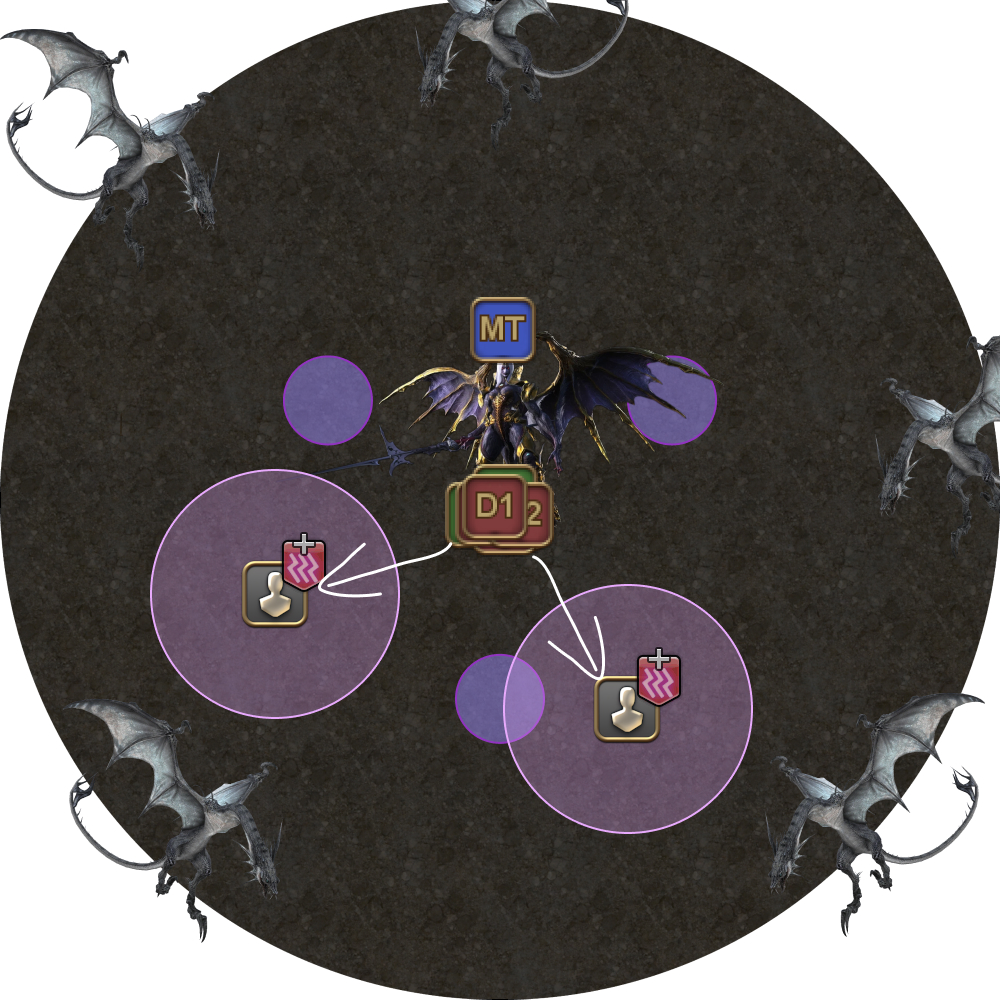
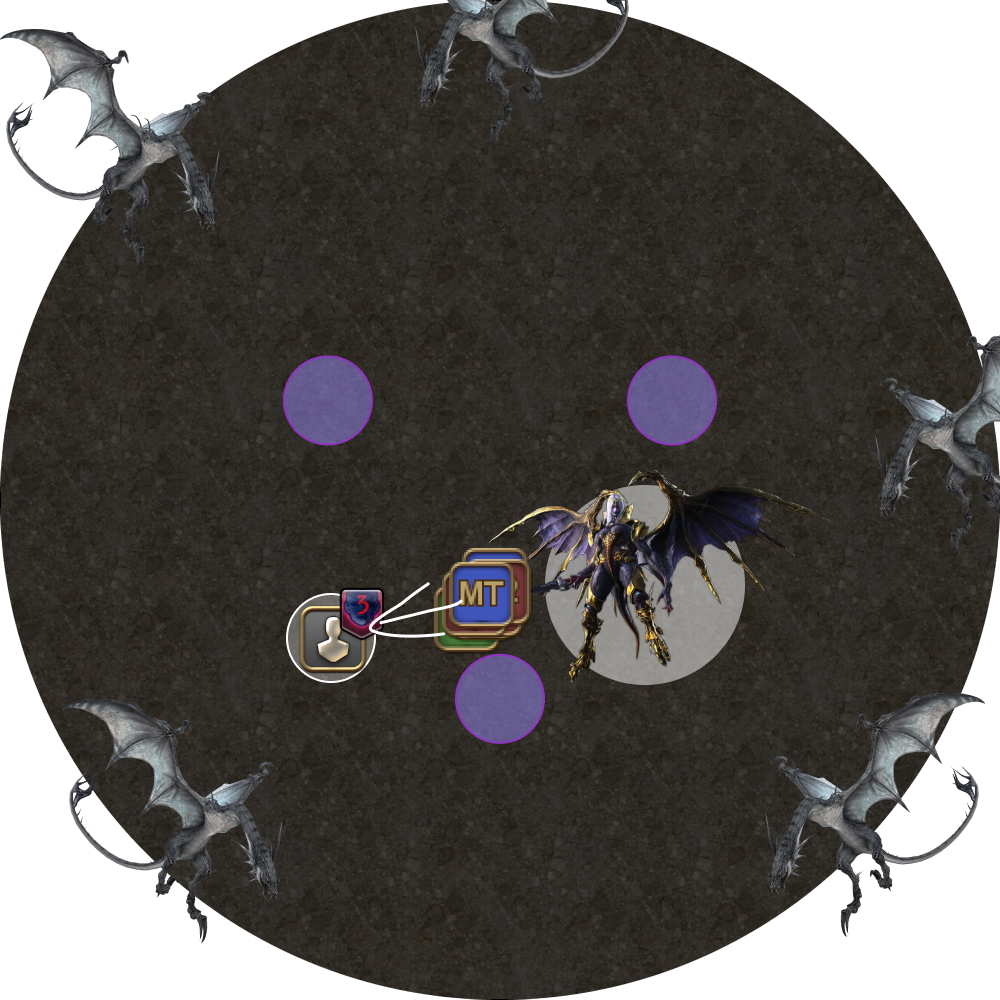
| 3. Nael will say her first line, which will lead to either:
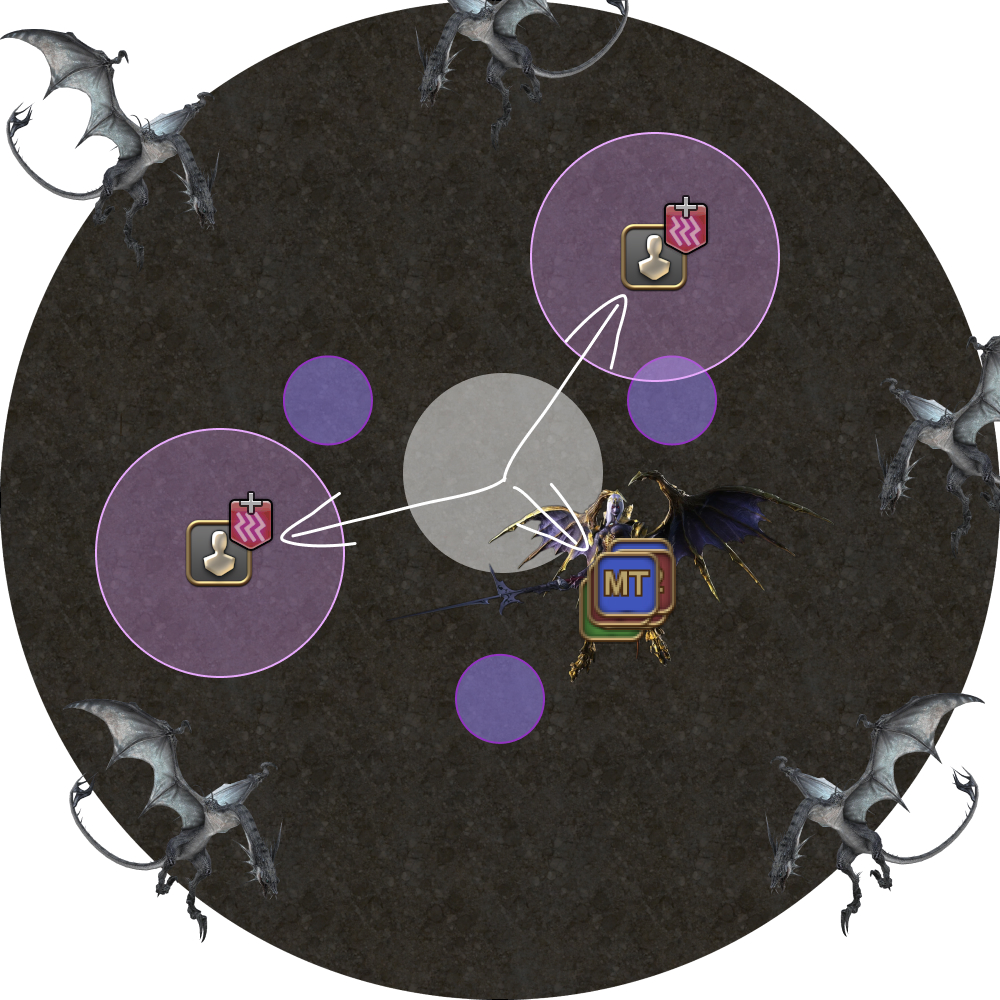
Two random players will be randomly targeted with a Thunder debuff- these two players must separate from the party while still being within Lunar Dynamo's safe zone. The priority goes:
| 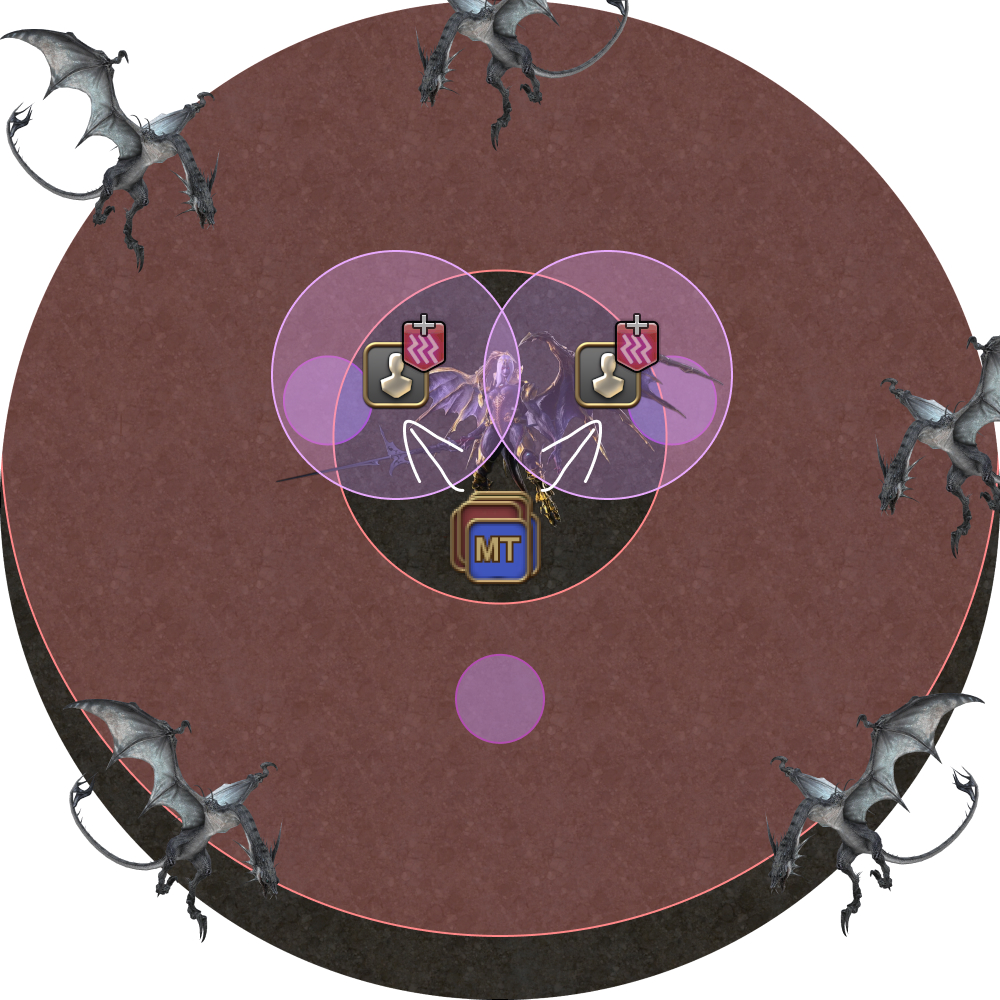 |
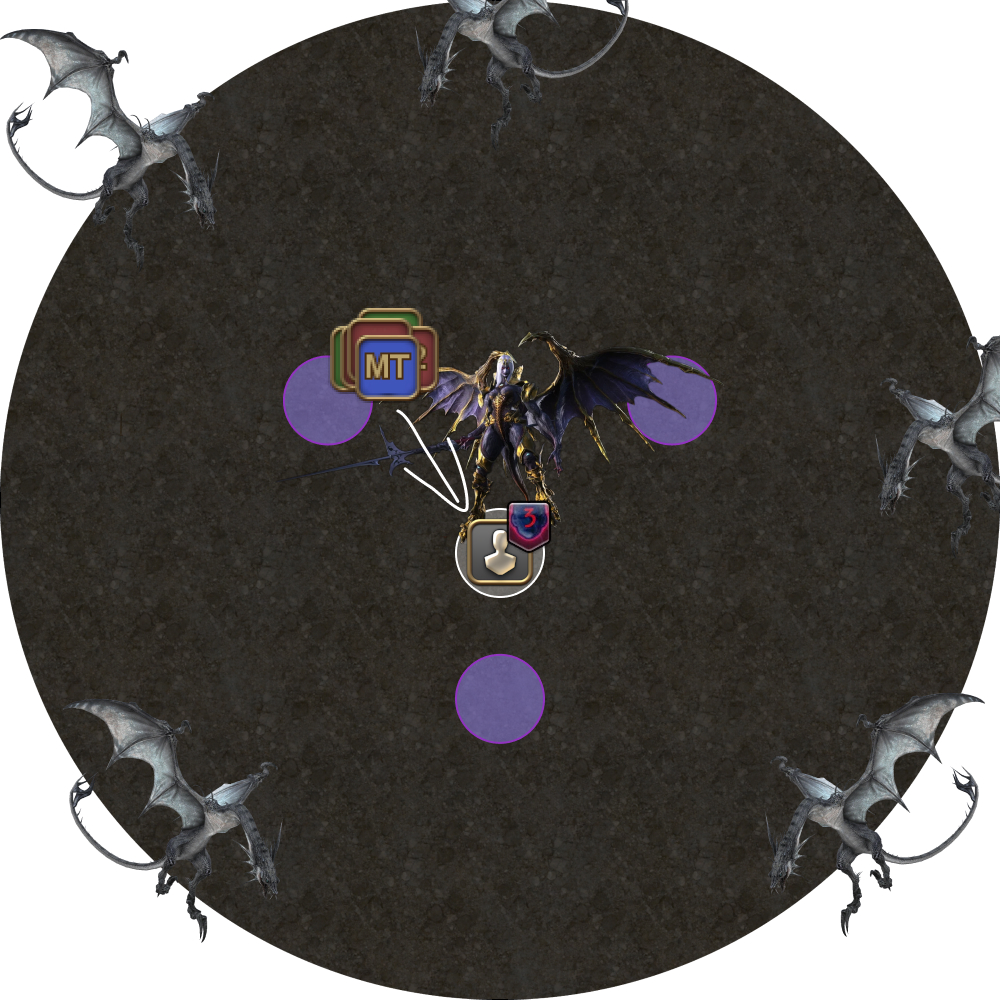
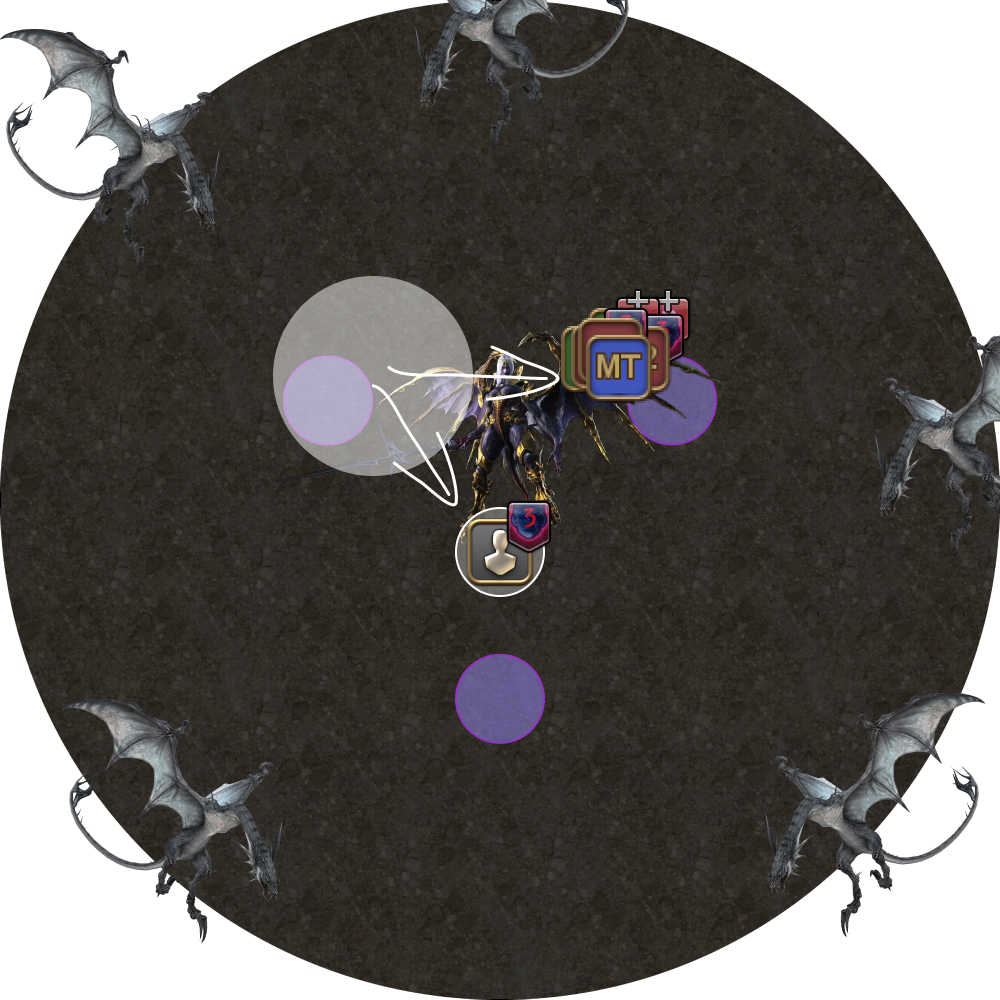
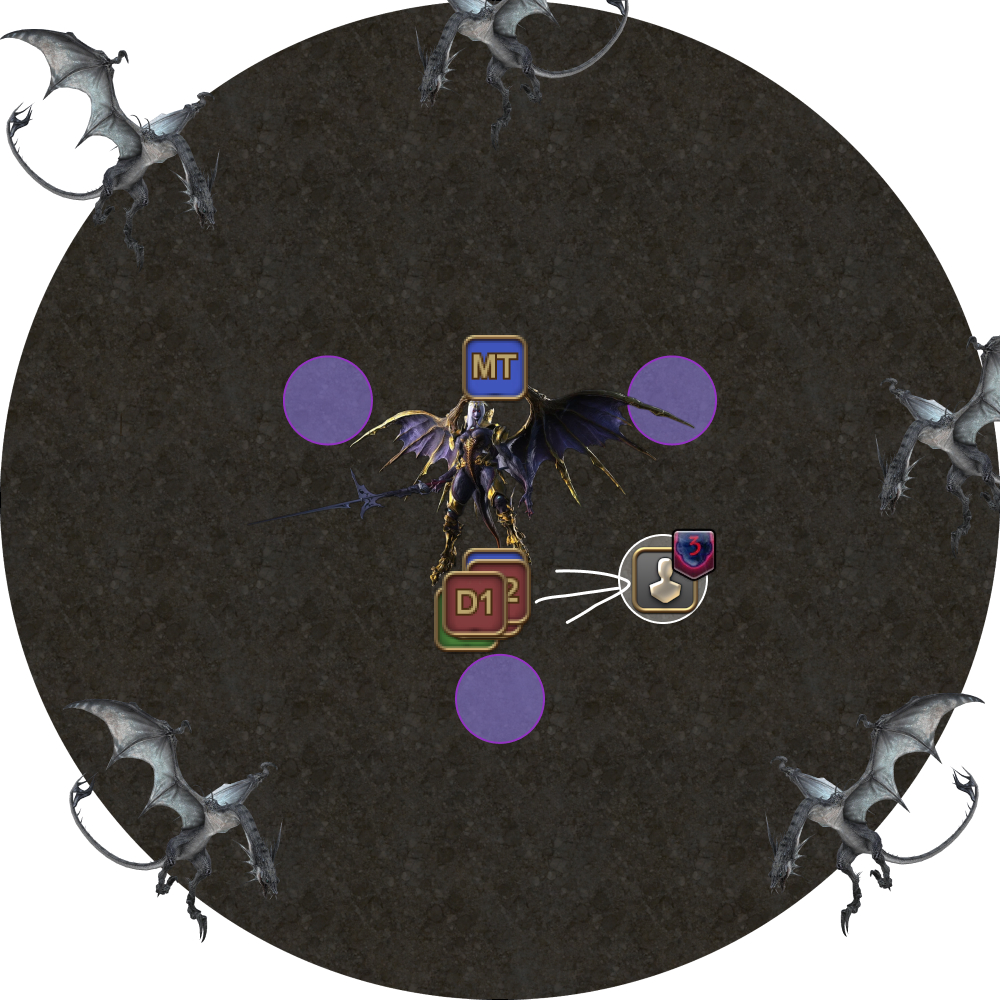
| 4. After the Lunar Dynamo, either stack for Thermionic Beam, or move away from Nael to dodge Iron Chariot. | 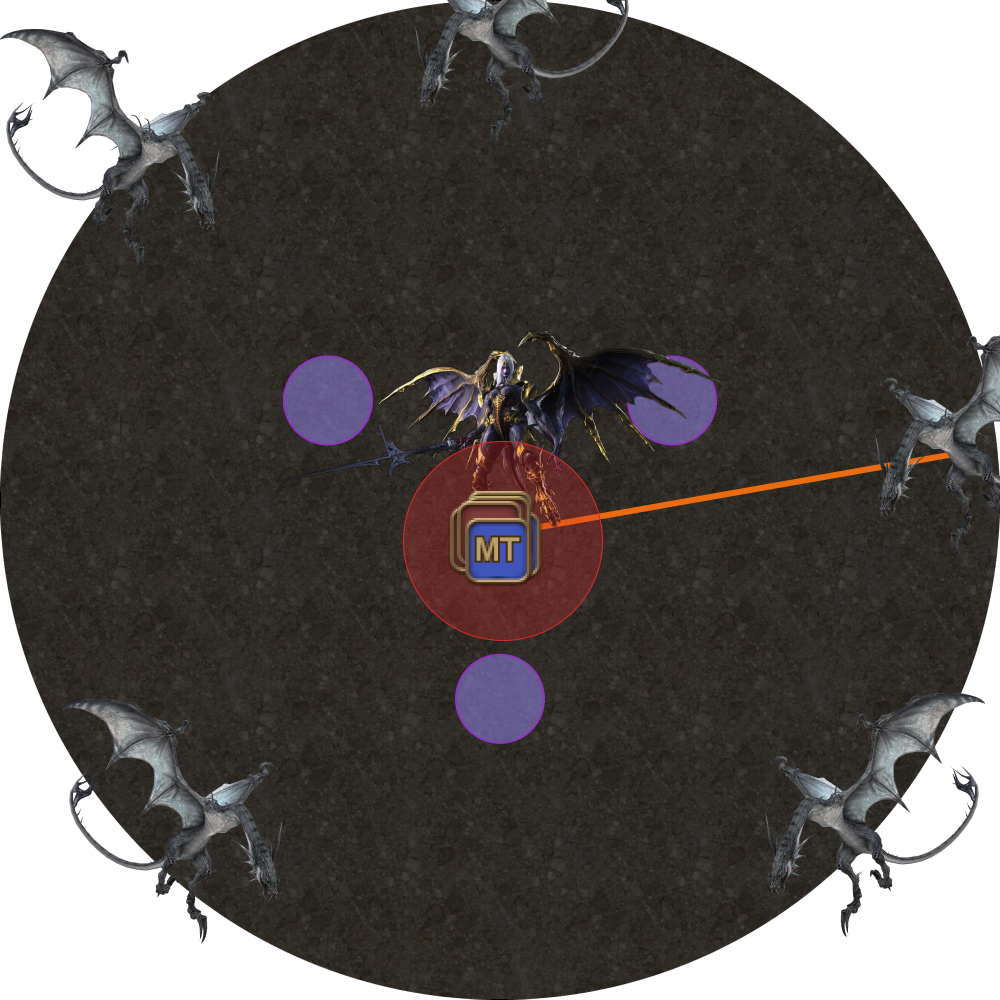 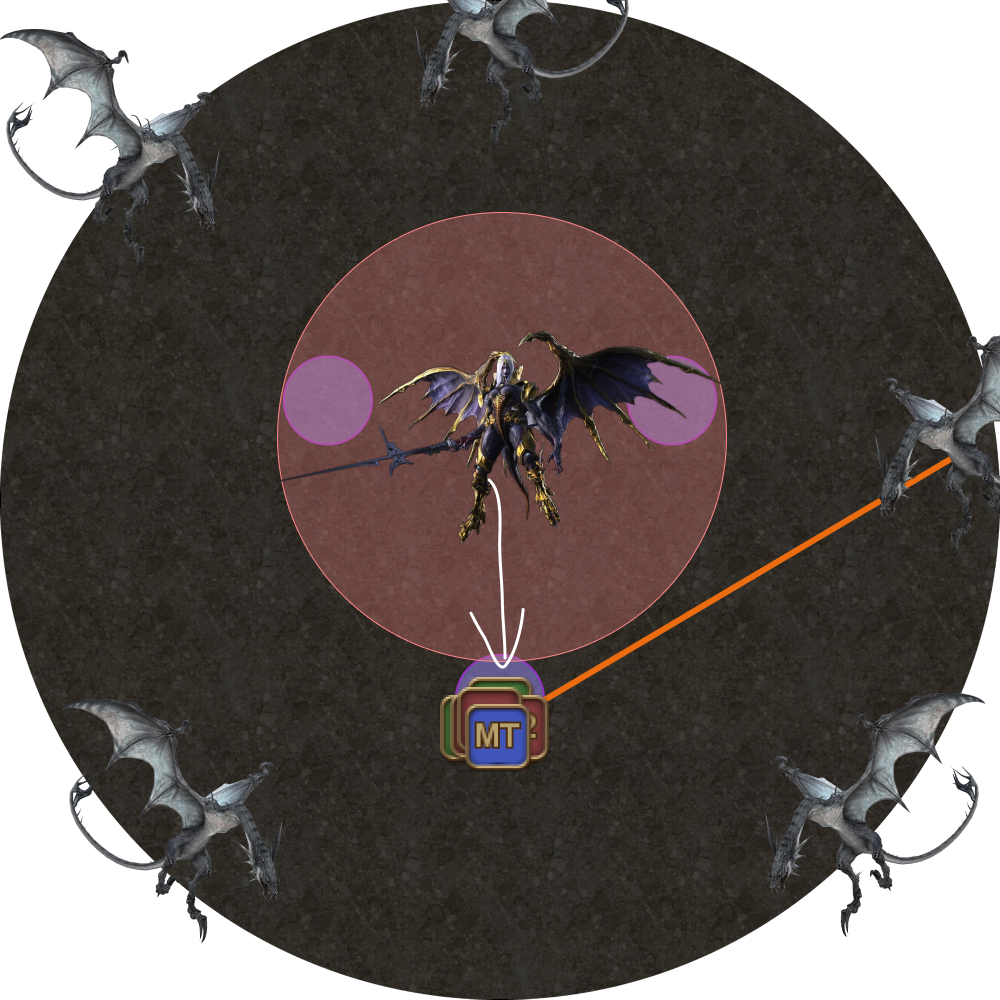 |
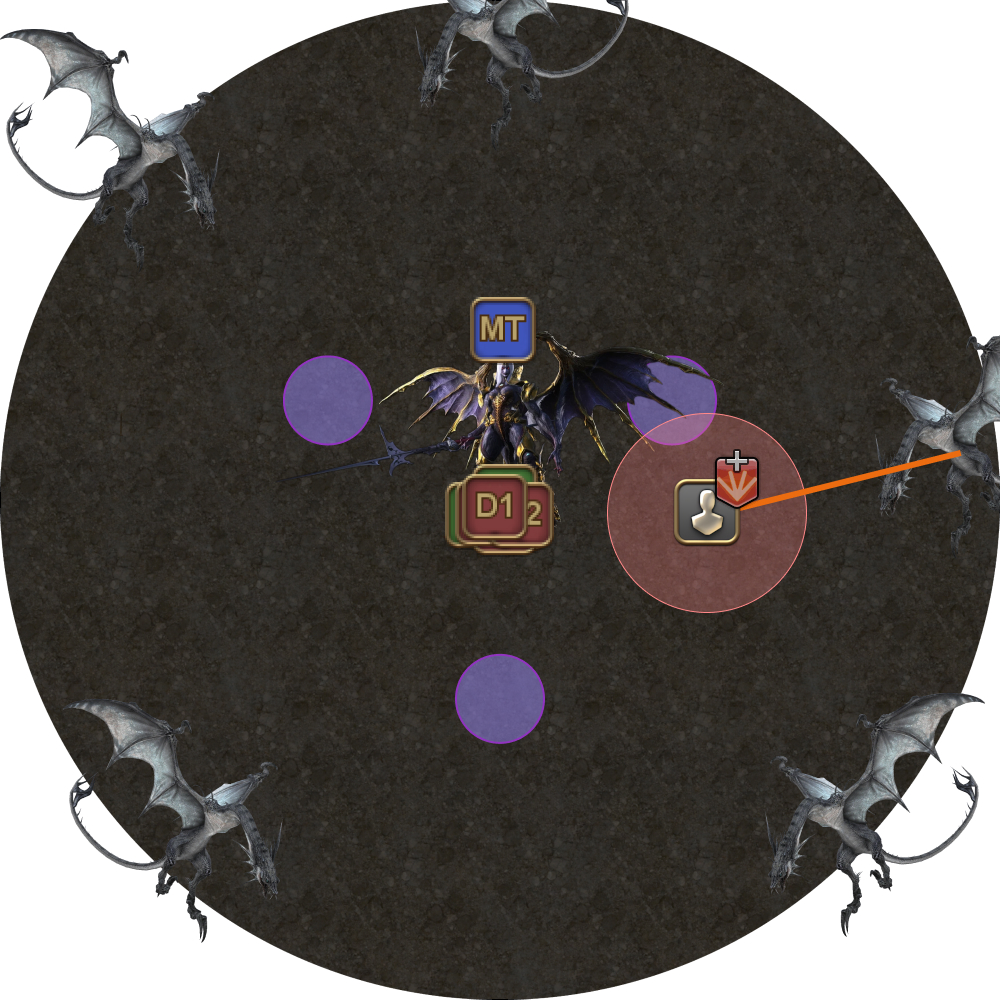
| 5. Dodge the white AoE together in the same movement so the party gets hit by the Fireball. | 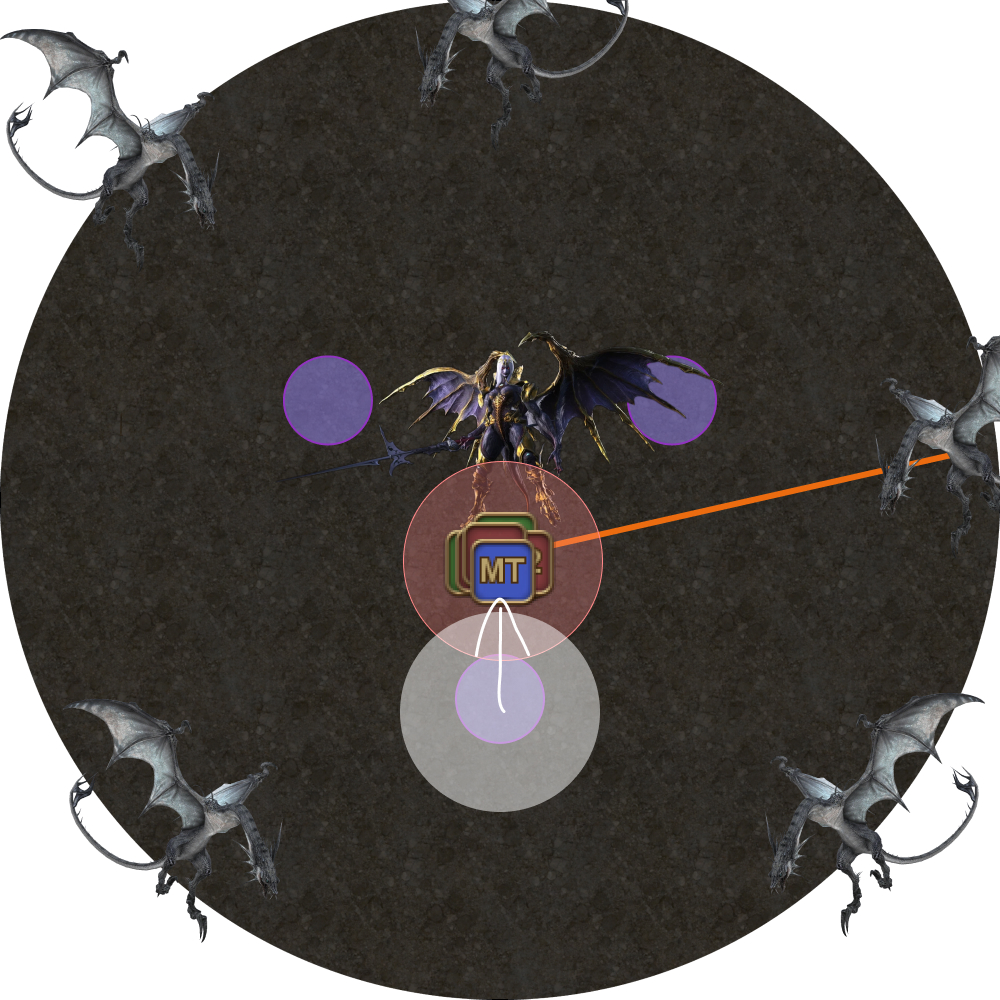 |
| 6. Dodge the second white AoE.
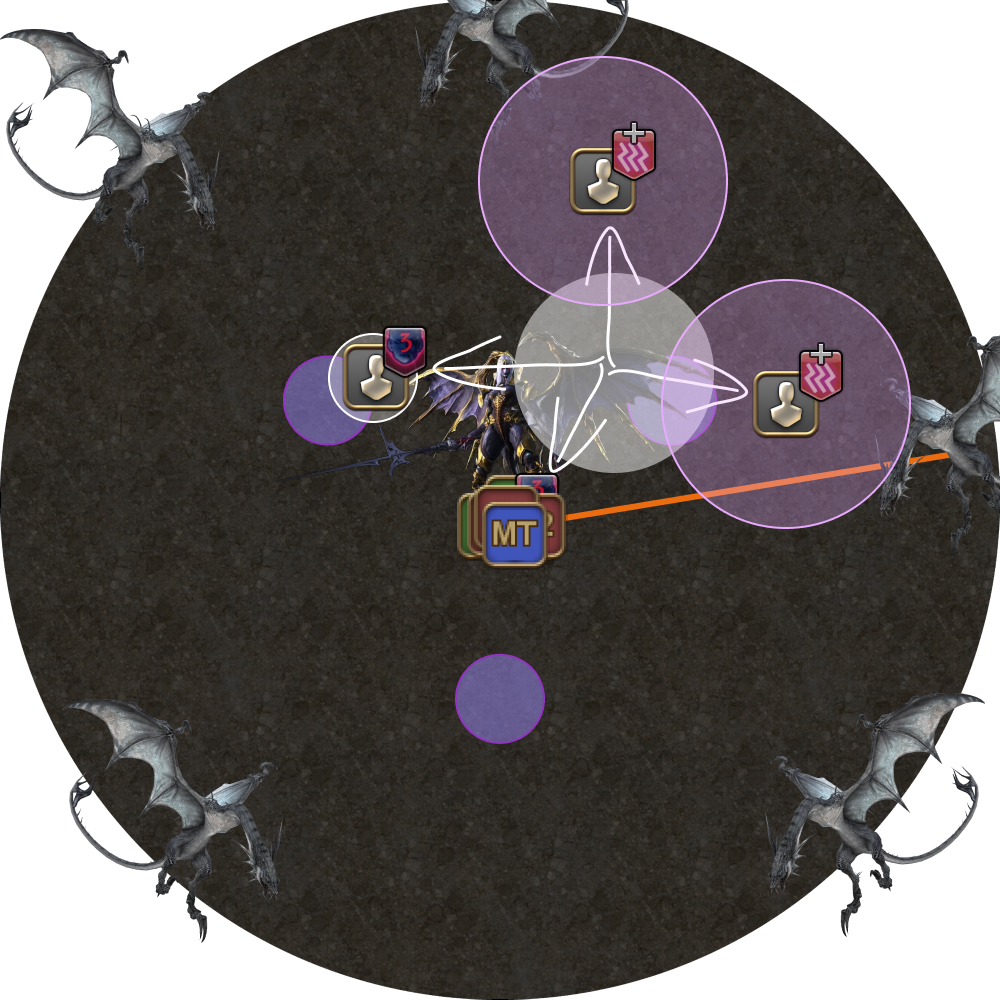
|  |
| 7. The second Wings of Salvation resolves, leaving behind a second white circle.
|  |
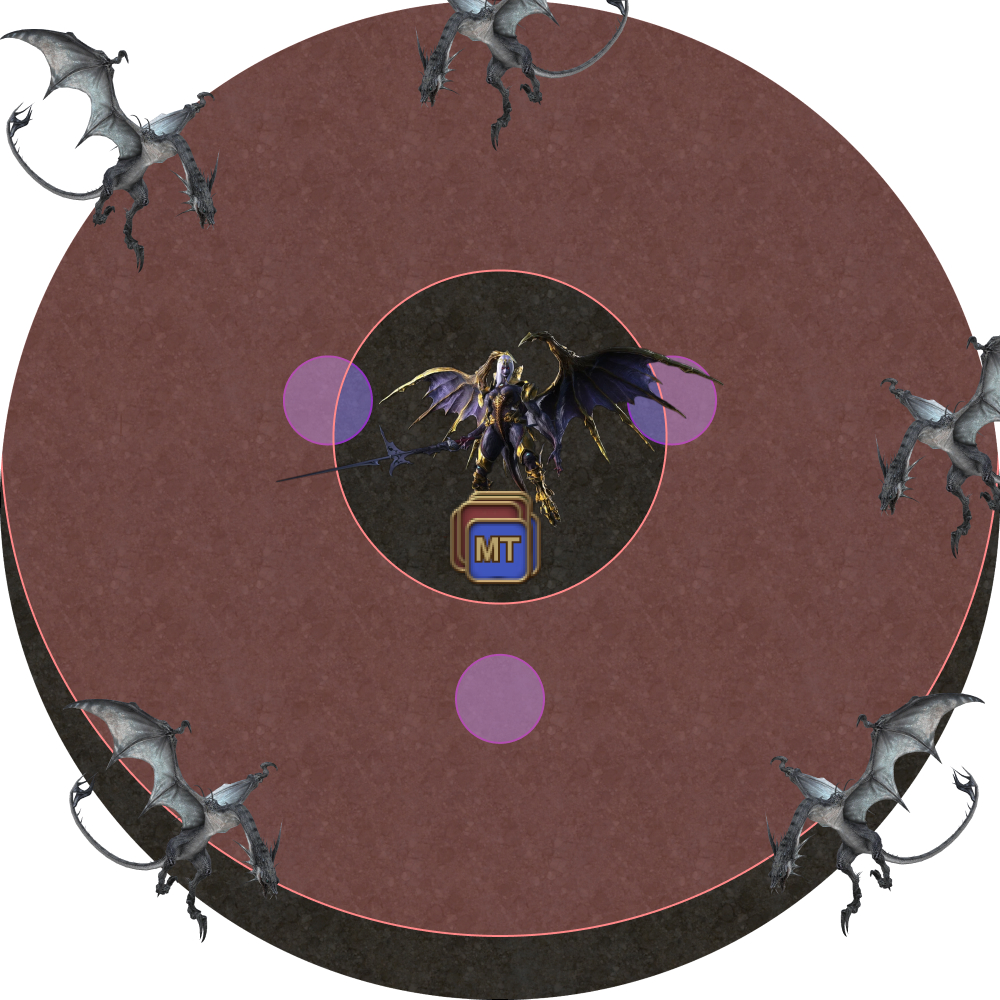
| 8. Nael does a 5-hit Bahamut's Claw on the MT. |  |
Second line
This is potentially the most hectic sequence in this phase:
- Fire (out)
- Thunder
- Thermionic Beam
- Lunar Dynamo or Iron Chariot
- Wings of Salvation #1
- Wings of Salvation #2
- Wings of Salvation #3 + Thunder
- Fire (in)
- Bahamut’s Claw
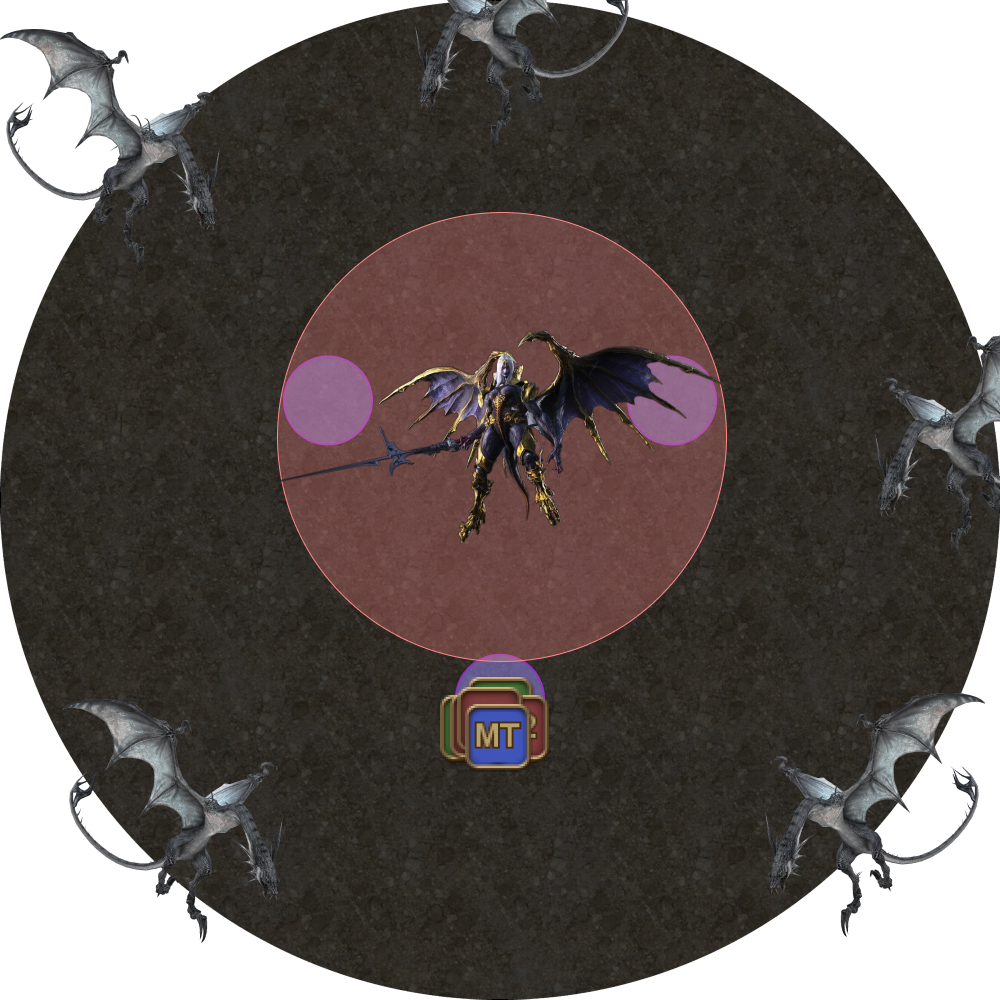
| 9. The second Fire tether appears.
|  |
| 10. Nael will say her second line, which will lead to either:
At the same time, the two Thunderstruck debuffs will resolve.
|  |
| 11. First part of Nael's second line. Stack in the middle for Thermionic Beam. | 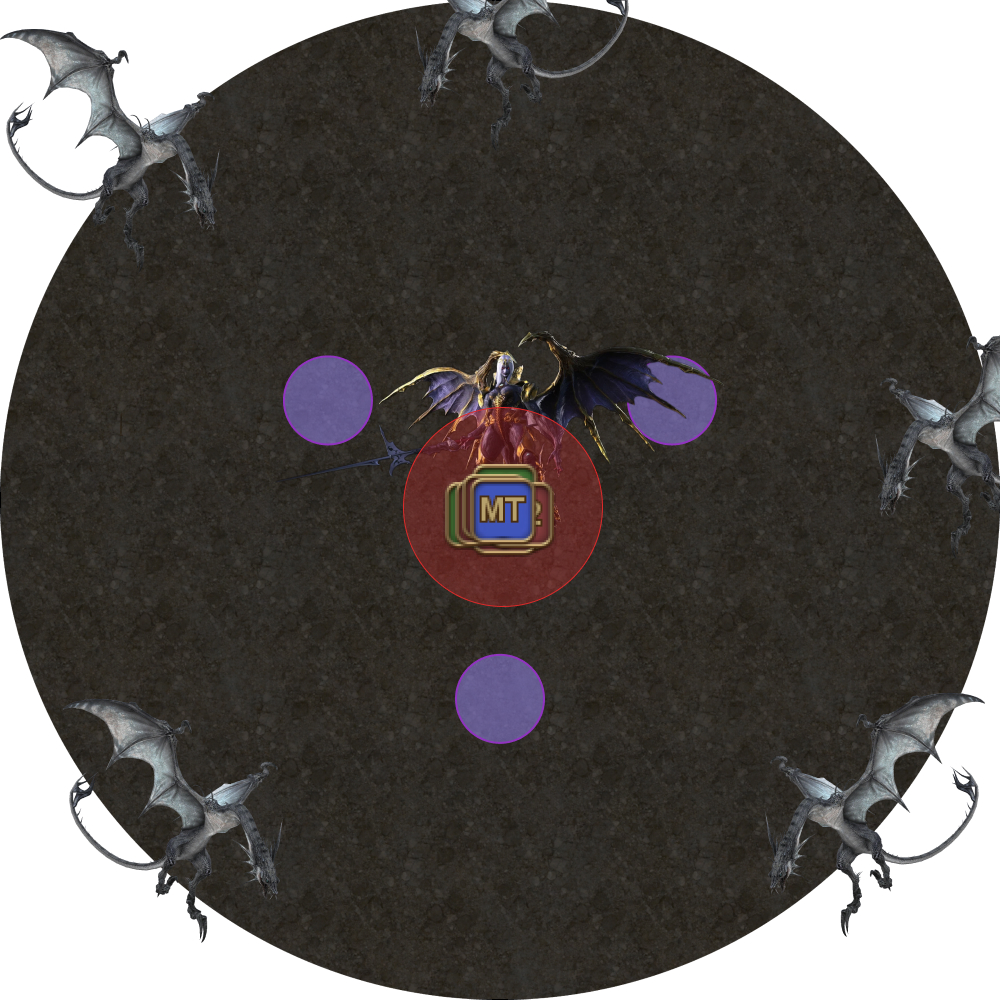 |
| 12. Second part of Nael's second line.
|   |
| 13. The first Wings of Salvation resolves, along with three Dooms at 6s, 10s, and 14s. | 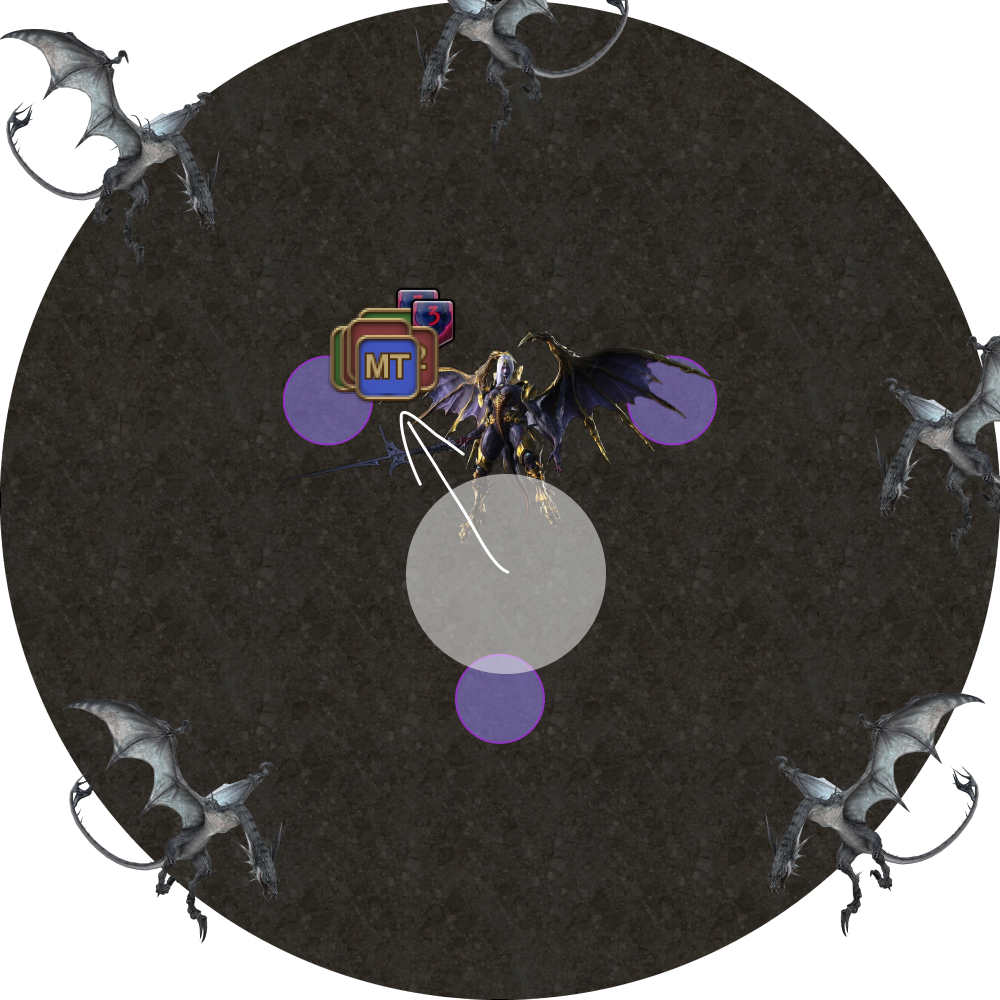 |
| 14. The second Wings of Salvation resolves. Two random players get targeted with Thunderstruck.
|  |
| 15. The third Wings of Salvation resolves together with the two Thunderstruck debuffs. The Fire dragon targets a random player with the Fireball tether.
|  |
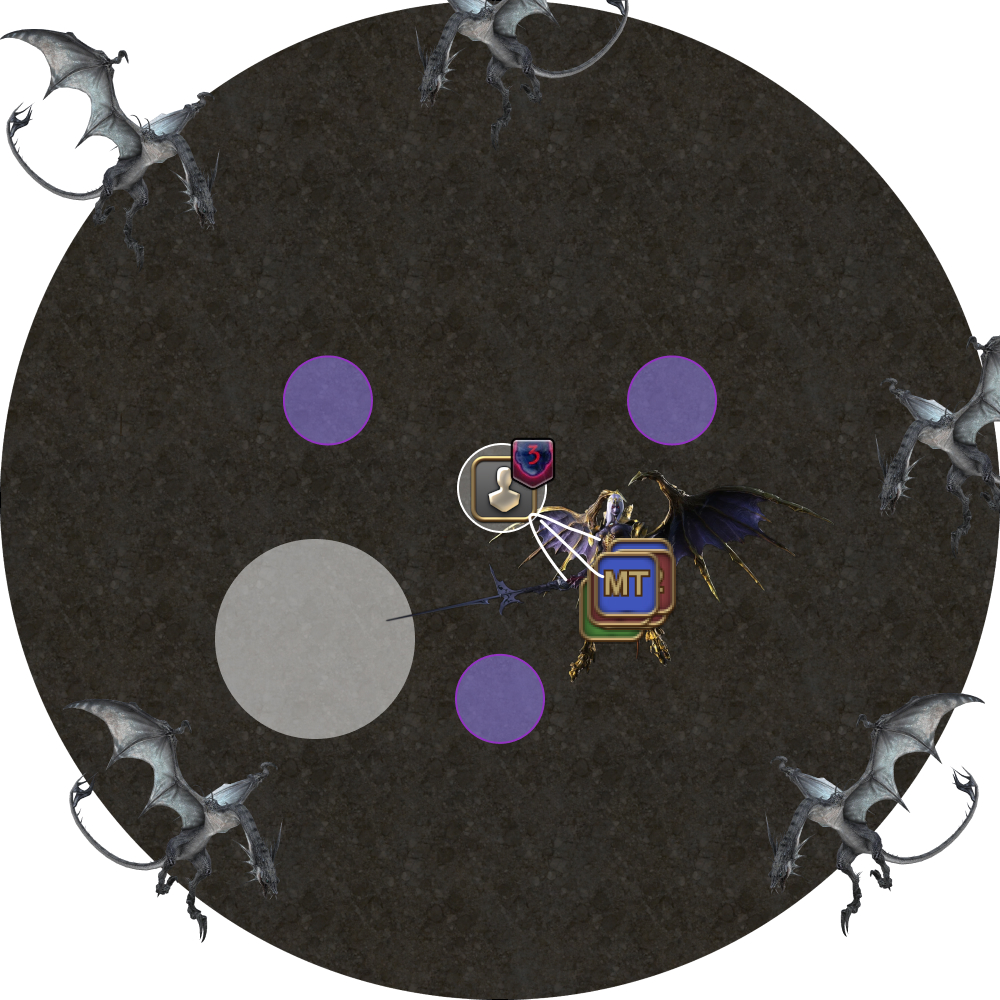
| 16. 14s Doom: Cleanse your Doom debuff. | 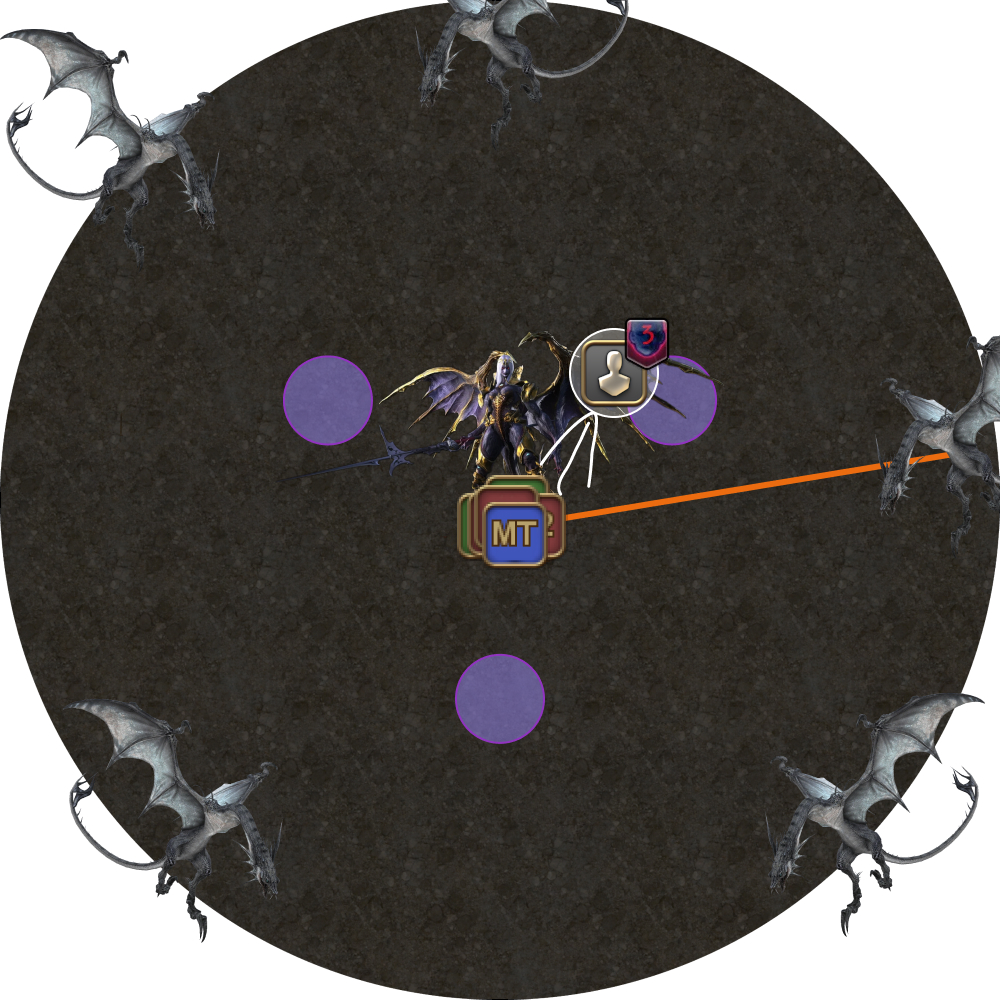 |
| 17. The third Fireball resolves. Everyone stacks together to get the Firescorched debuff except the player that was 2nd Fire. | 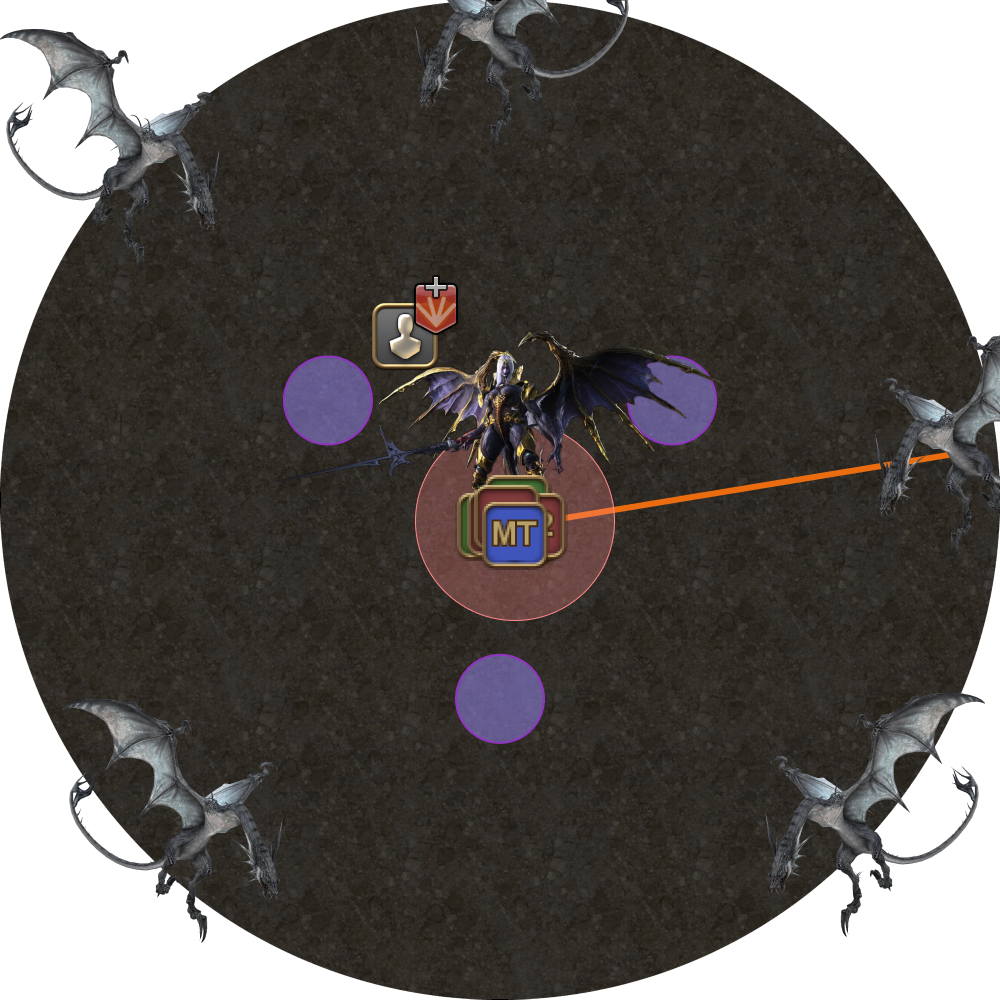 |
| 18. Spread out to prepare for Nael's third line. Nael will Bahamut's Claw the MT. | 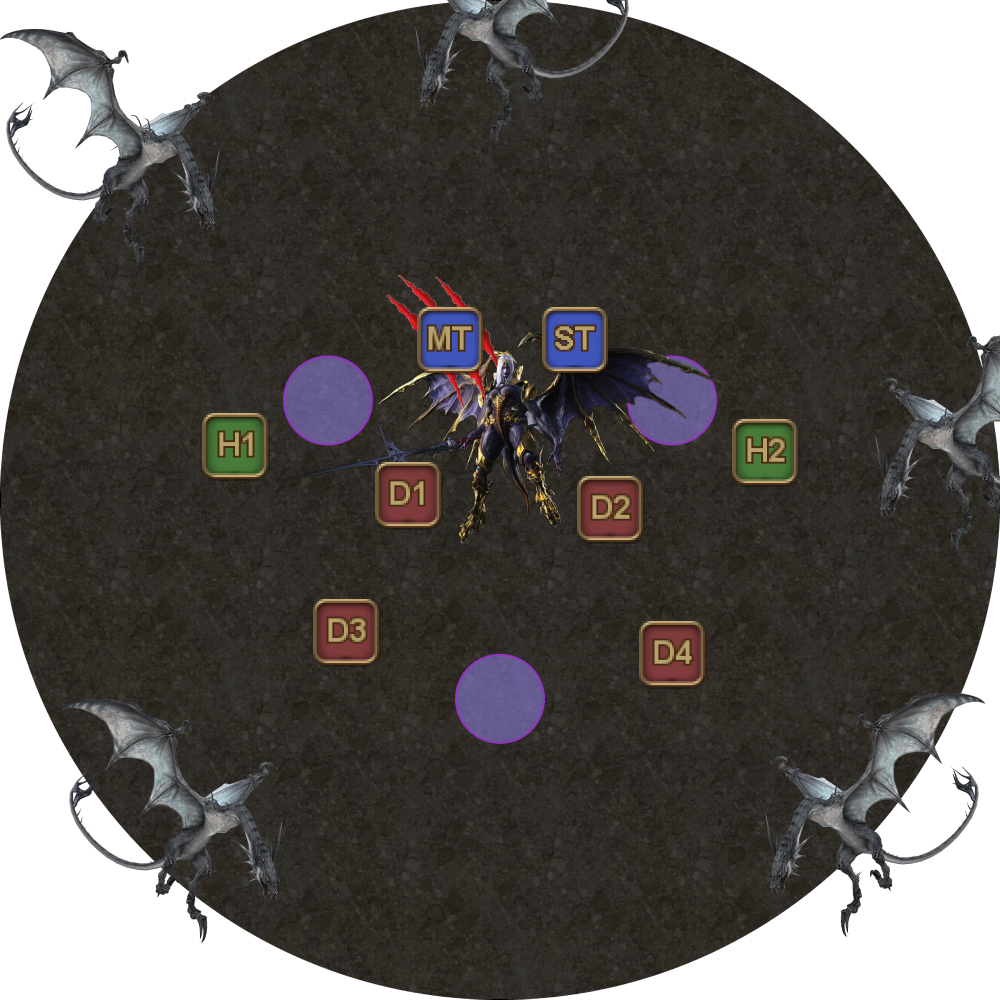 |
Be careful, as all the mechanics can target a single player:
Third line
The mechanics for Nael’s third line will go:
- Spread
- Lunar Dynamo or Iron Chariot
- Wings of Salvation #1 + Fire → Thunder
- Wings of Salvation #2
- Wings of Salvation #3
- Ravensbeak
| 19. Nael will say her third line, which will lead to either:
The first part of Nael's third line resolves. Nael will dive on a random player, hitting them with an AoE that will knock any other player hit out of the arena. The Fire Dragon will also tether to a random player. | 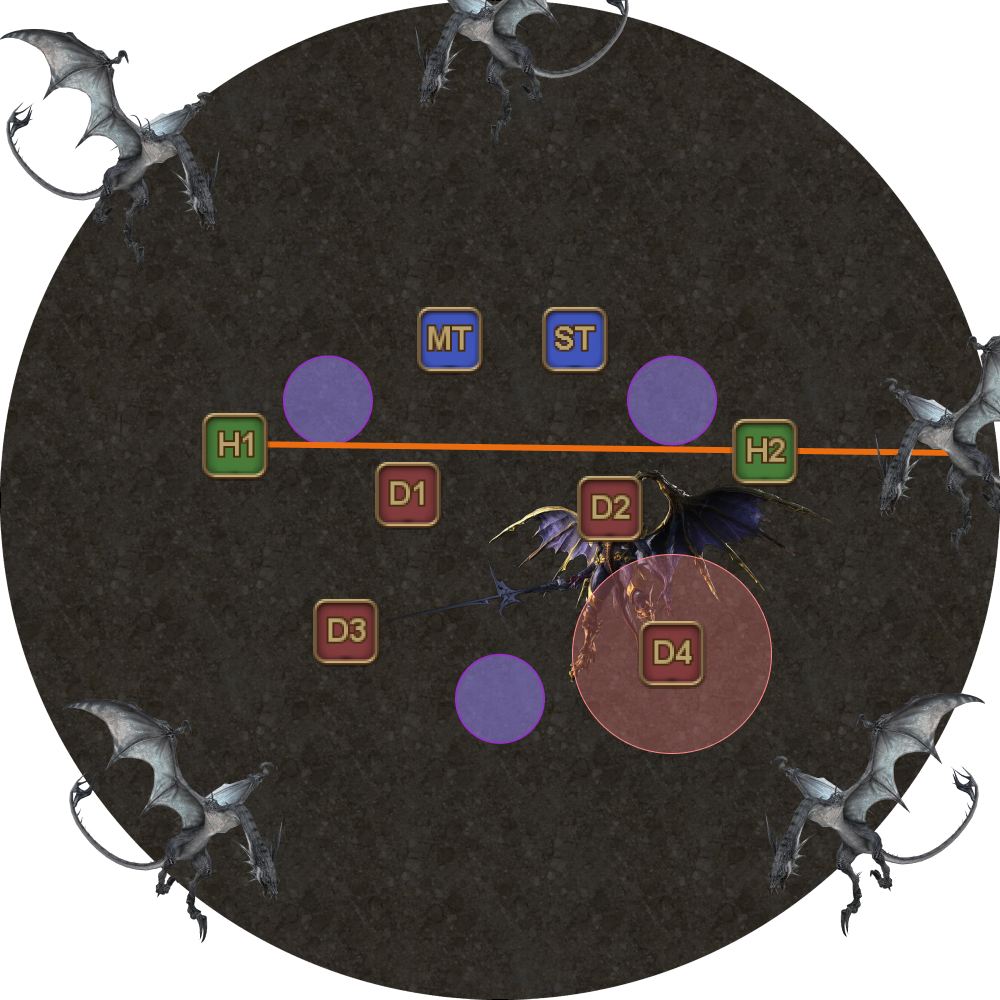 |
| 20. The second part of Nael's third line resolves. Either:
Two random players will be targeted for Thunderstruck. | 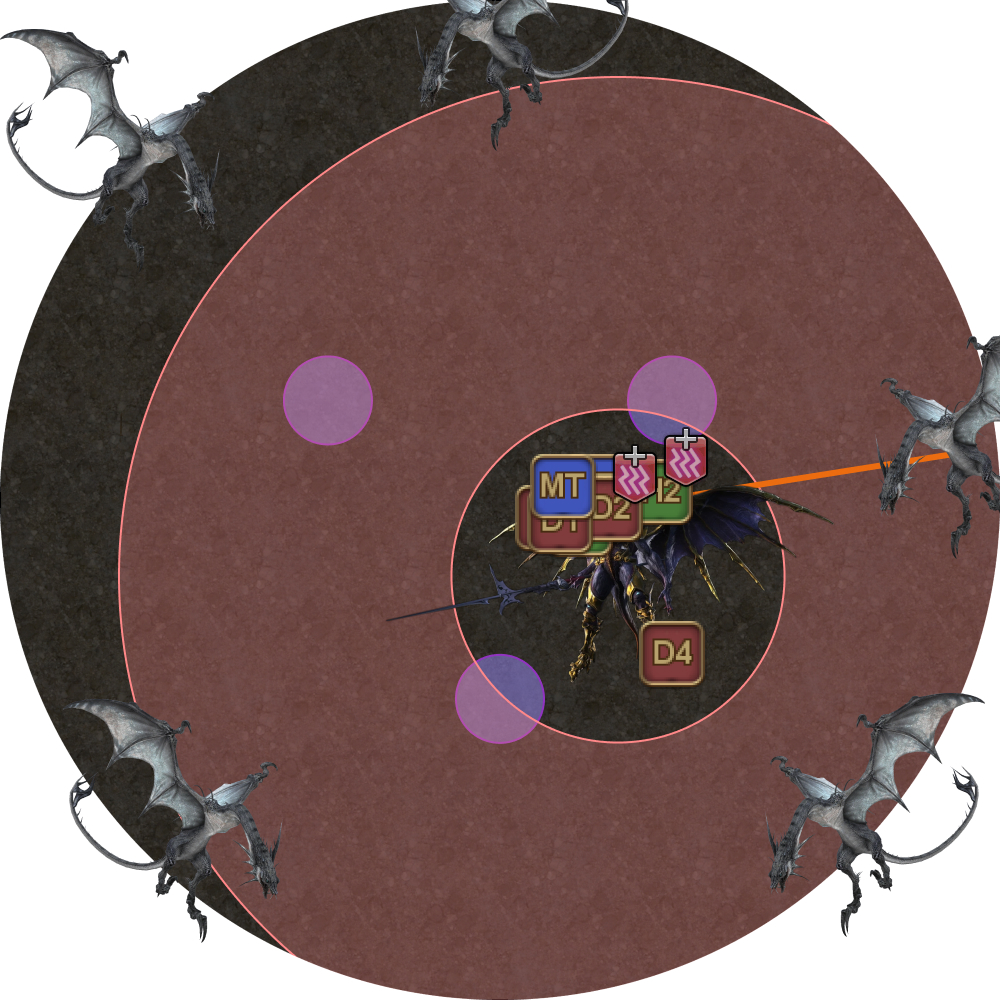 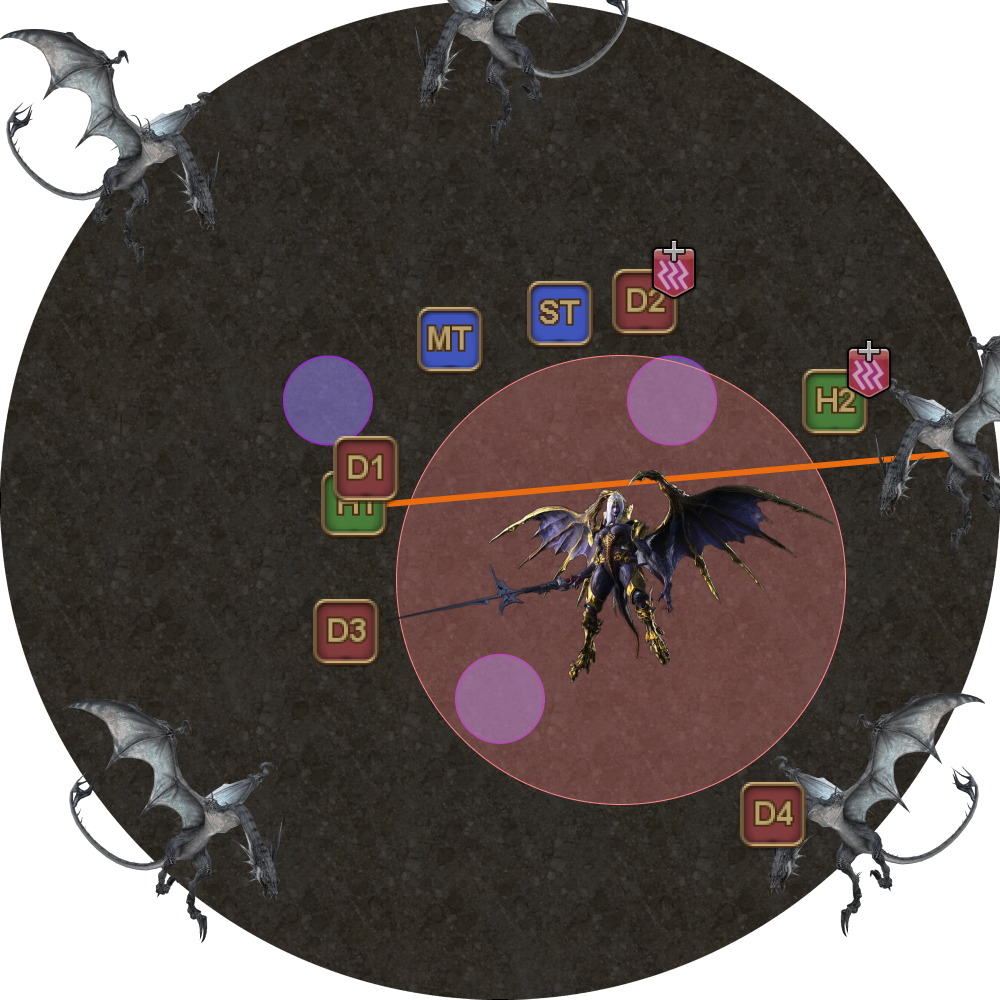 |
| 21. The fourth Fire resolves as the first Wings of Salvation AoE appears. | 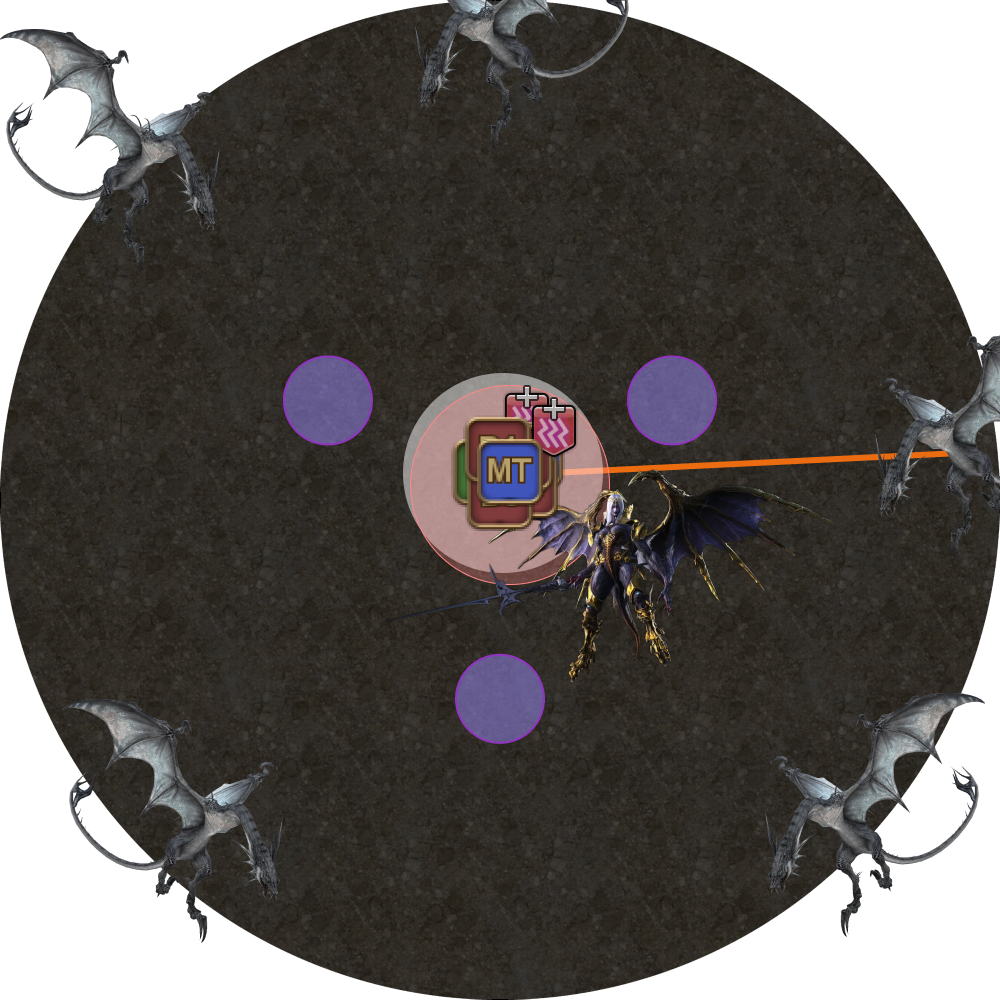 |
| 22. Stay stacked just long enough to get the Fire debuff before dodging the Wings of Salvation AoE.
|  |
| 23. The second Wings of Salvation appears.
|  |
| 24. The third Wings of Salvation appears.
|  |
| 25. Have the MT recenter Nael, and face North.
|  |
| 26. Nael will then target the MT with Ravensbeak, a single-target tankbuster that also applies a Piercing Resistance Down II debuff, forcing a tank swap. |  |
Fourth line (Cauterize)
The party will have to resolve Nael’s fourth line in conjunction with divebombs.
- Three random players (other than the tank currently holding hate) will get marked with a green marker.
- When the marker disappears, the dragons that will dive will lock onto where that player was standing at the time, and then dive at that position.
- There are three dives in total in a 2-1-2 configuration:
- The first two dragons clockwise from north (including north).
- The third dragon clockwise from north.
- The last two dragons clockwise from north.
- The goal is to direct these divebombs away from the center of the arena where the rest of the party is.
- Nael will also drop Hypernova AoEs on the first two baiters.
You can use this site to practice divebomb placement:
https://freehaha.github.io/nael-dive/
| 27. Nael will say her fourth line, which will lead to either:
(Note this is the first line whose first mechanic is not fixed.) At the same time, the first divebomb marker will appear above a player that's not the ST (who currently holds hate). | 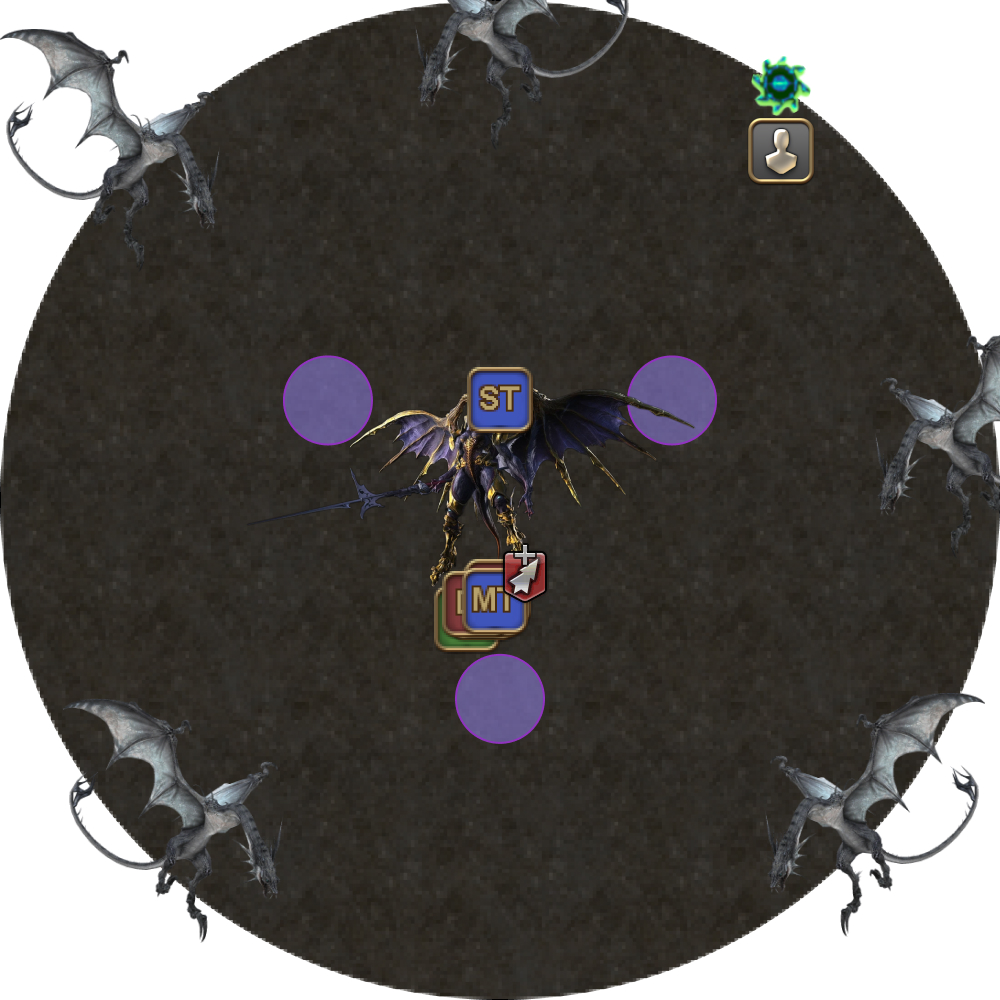 |
| 28. The first divebomb marker disappears, locking the first divebomb location as Nael targets that player with two Supernova AoEs. The second divebomb marker appears above another player. | 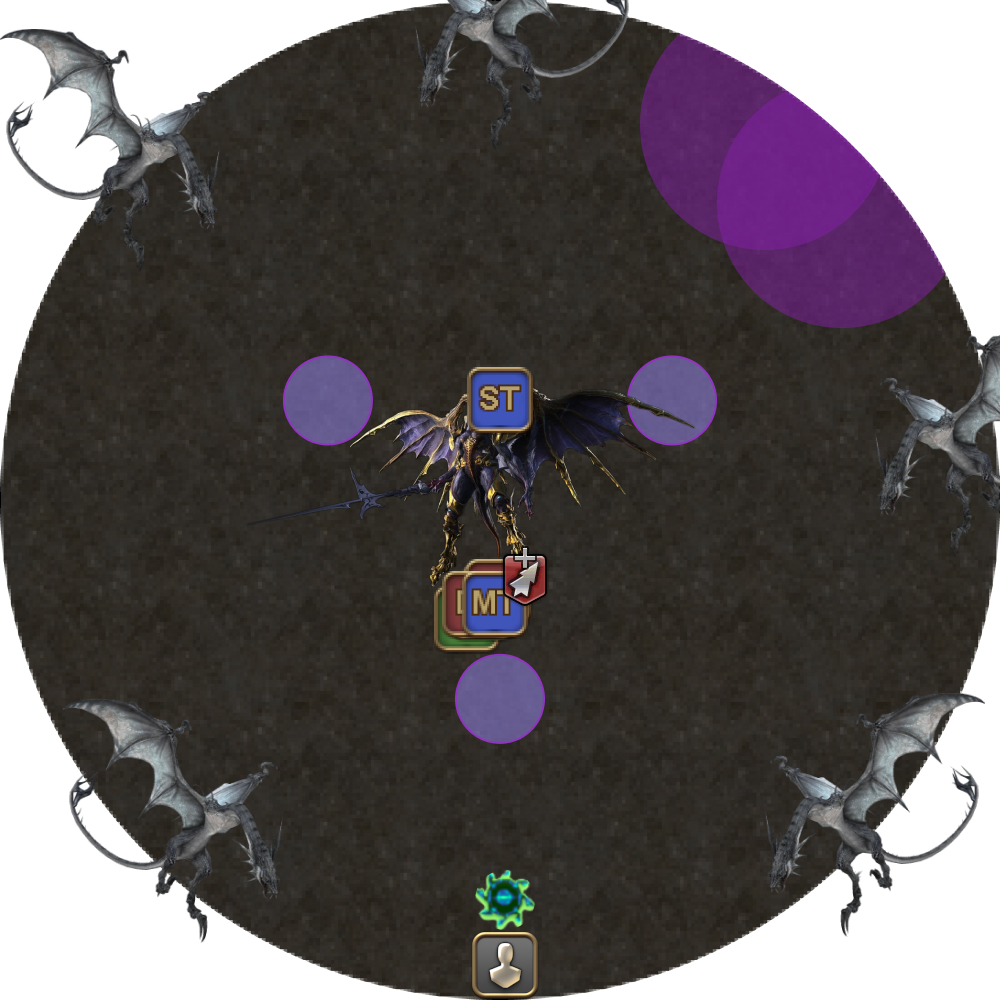 |
| 29. The second divebomb marker disappears, locking the second divebomb location as Nael targets that player with two Supernova AoEs. The third divebomb marker appears above another player. | 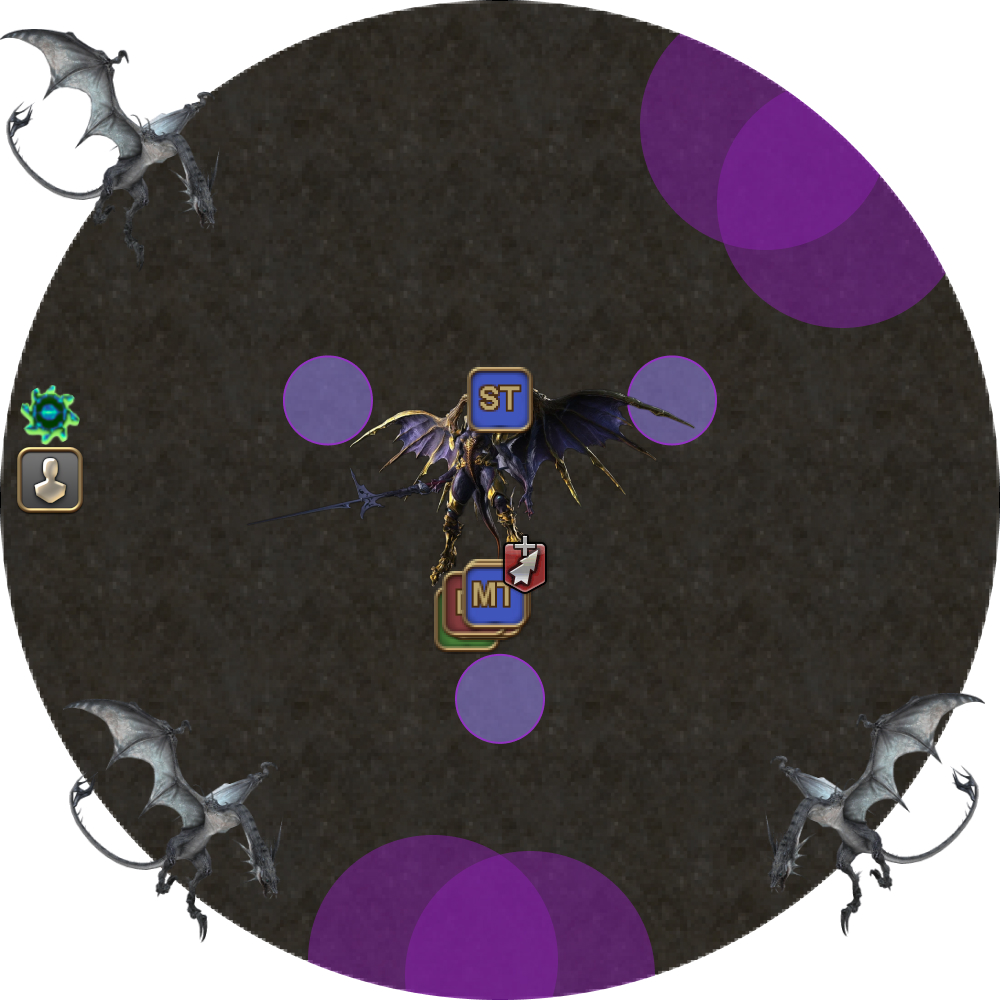 |
| 30. Nael disappears, and the first divebombs resolve. The third divebomb markers disappears, locking in the third divebomb location. | 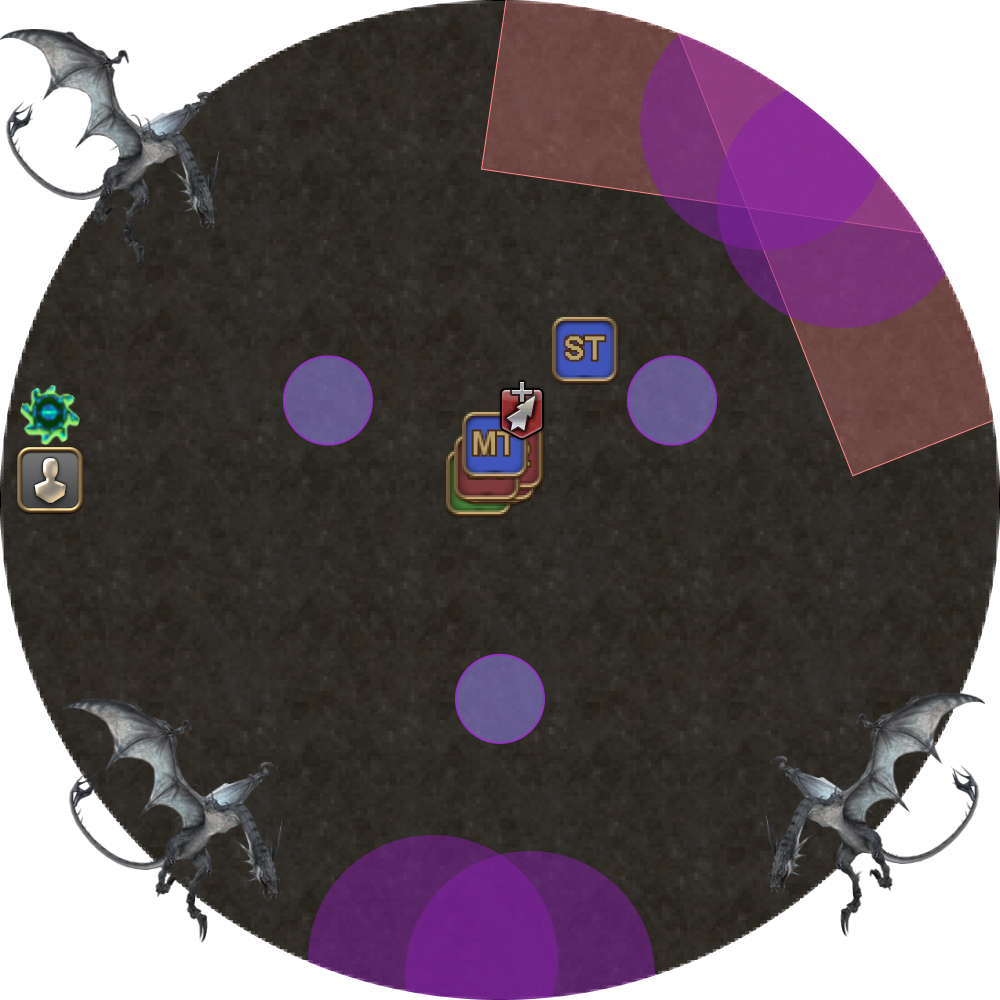 |
| 31. The first part of Nael's fourth line resolves. Either:
Because the first divebomb has already resolved, the first divebomb area is generally safe to spread around. The party should also avoid the ST. | 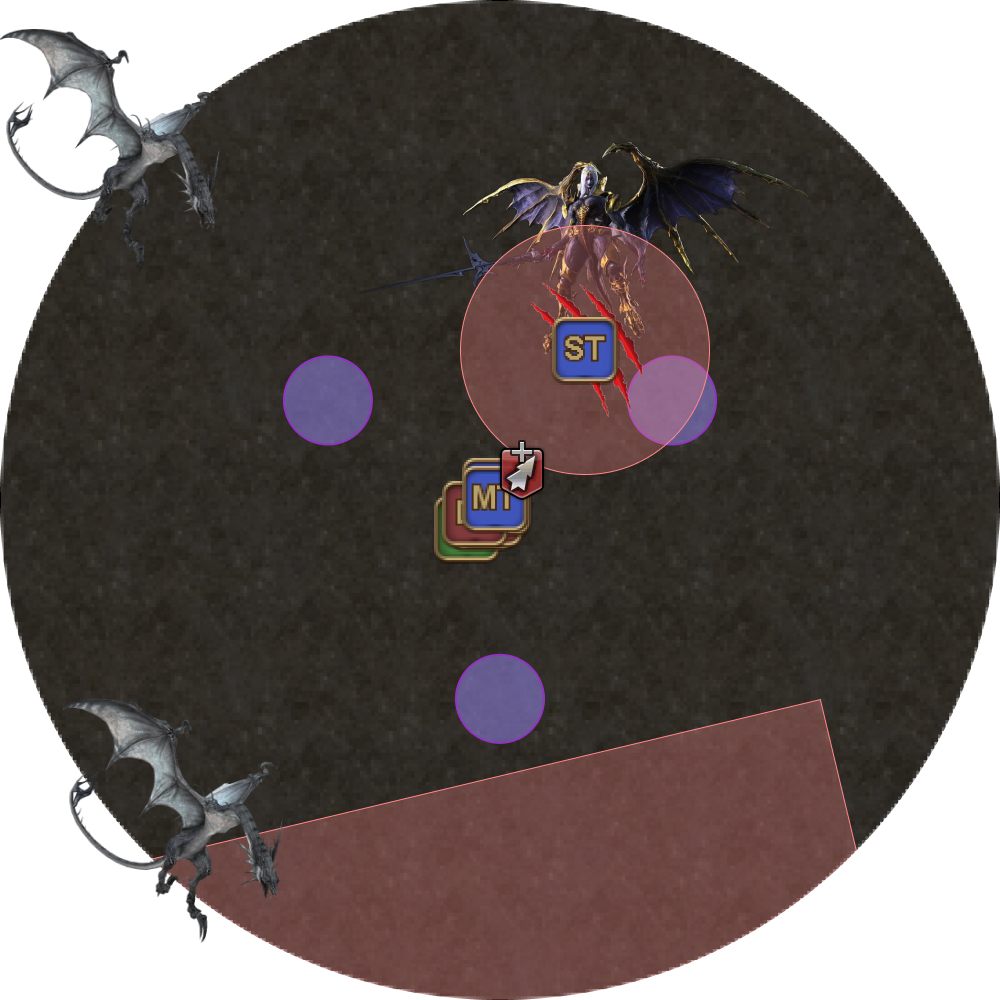 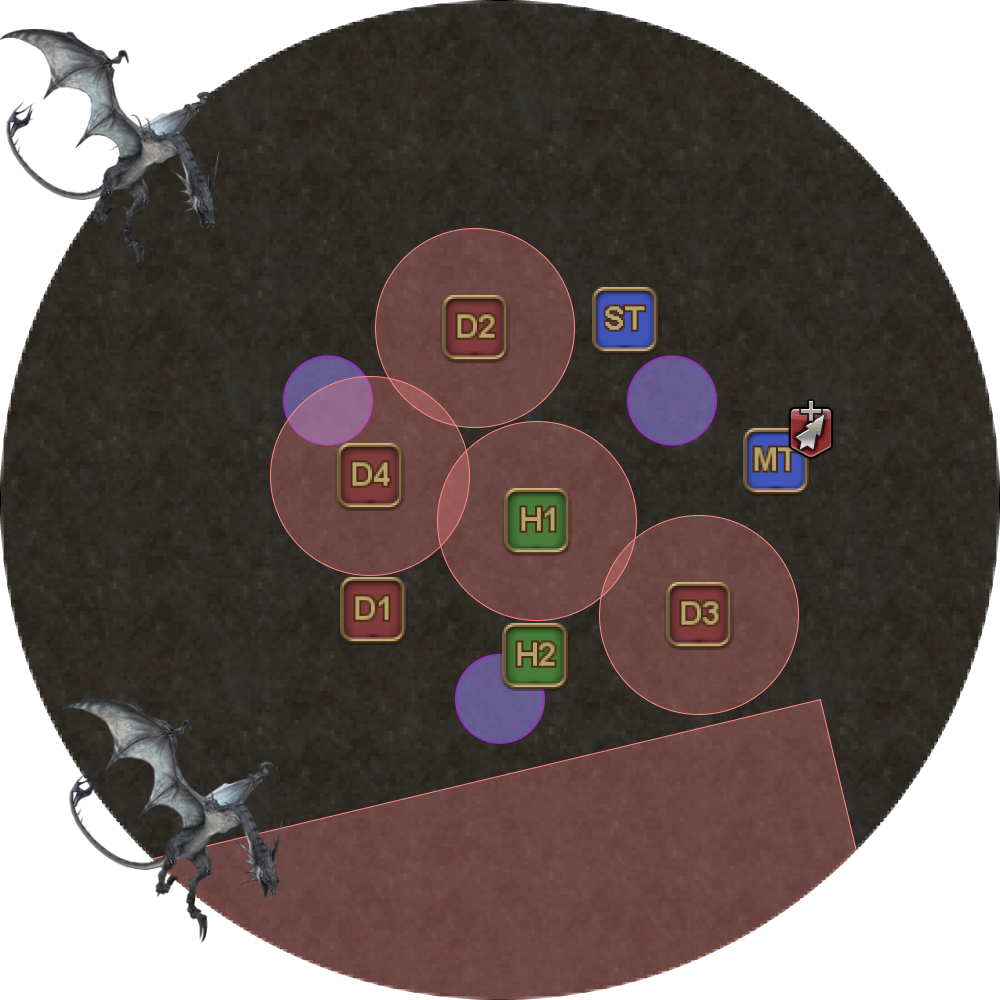 |
| 32. The second part of Nael's fourth line resolves. The party should stack in the middle as it will dodge both cases, which are either:
If Nael does the Thermionic Beam second, the ST can also join the stack to help share in the damage. The third set of divebombs will also resolve. | 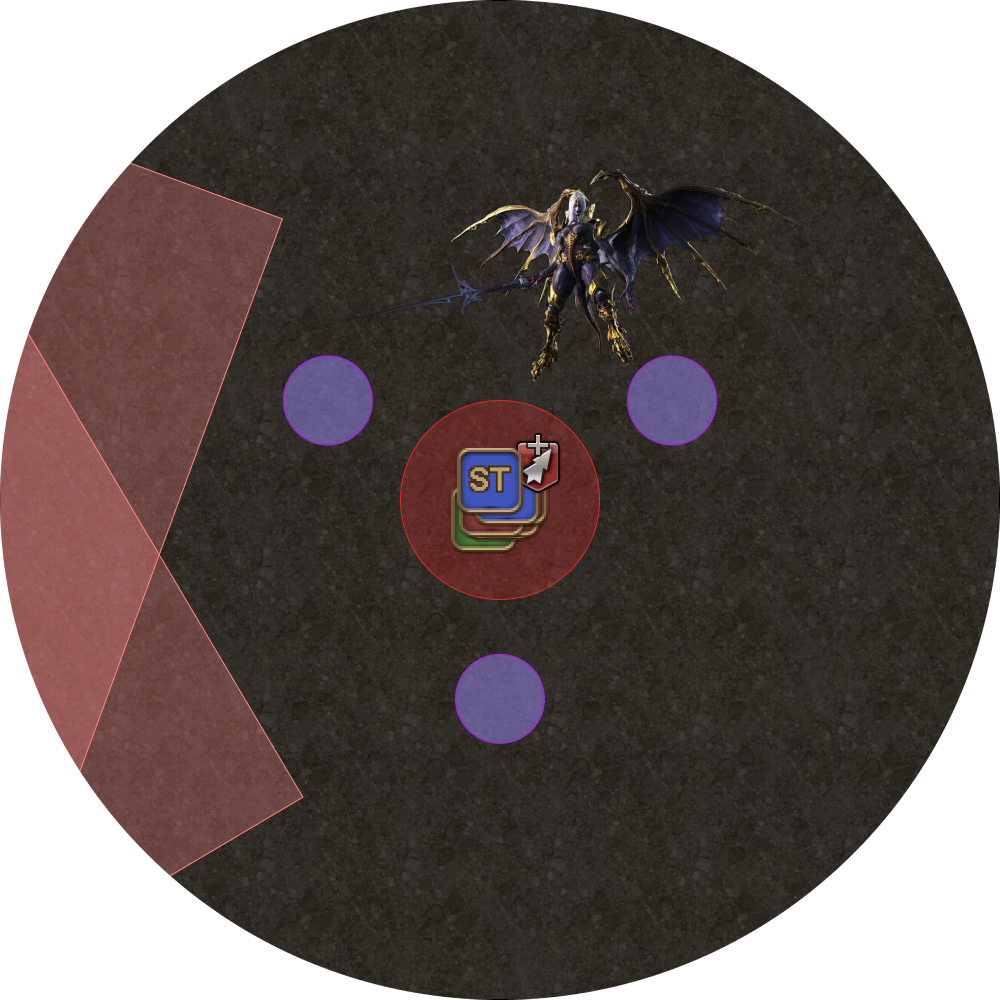 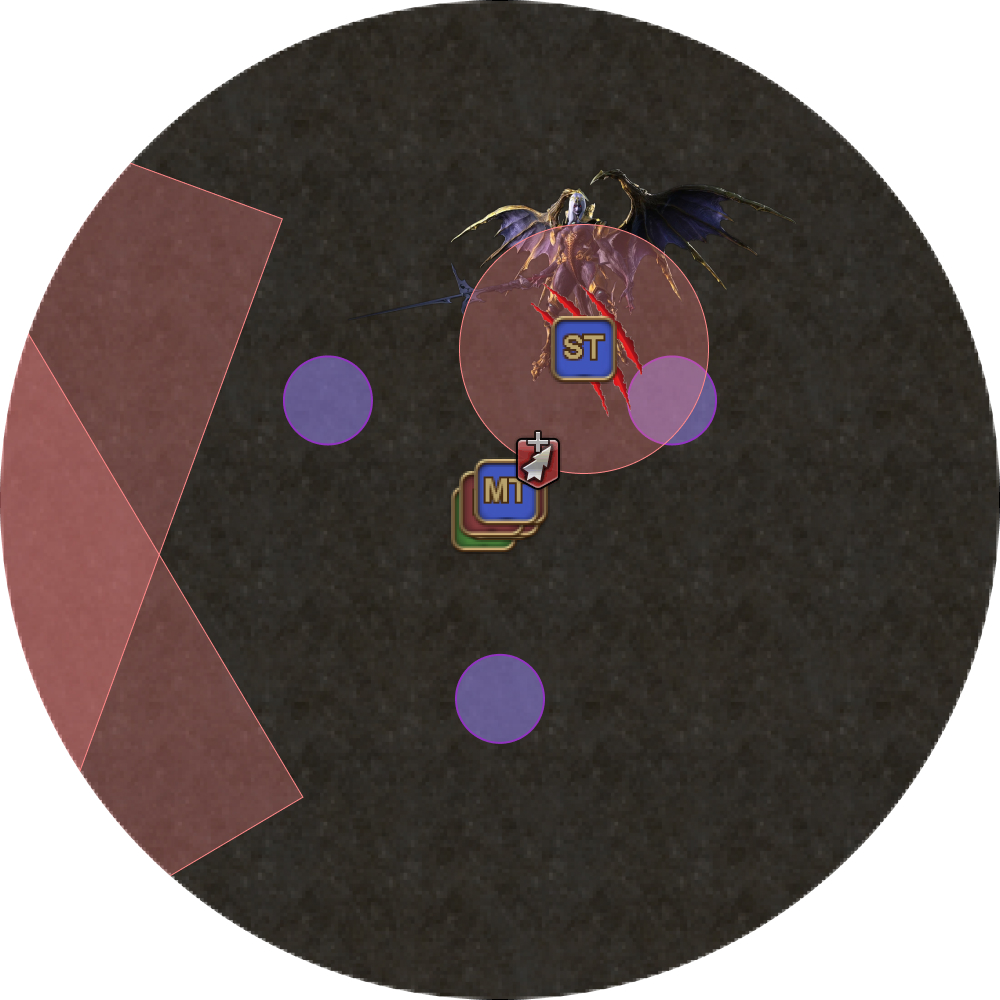 |
| 33. Nael then does the 5-hit Bahamut's Claw on the ST, just like the sequence at the start of the phase. | 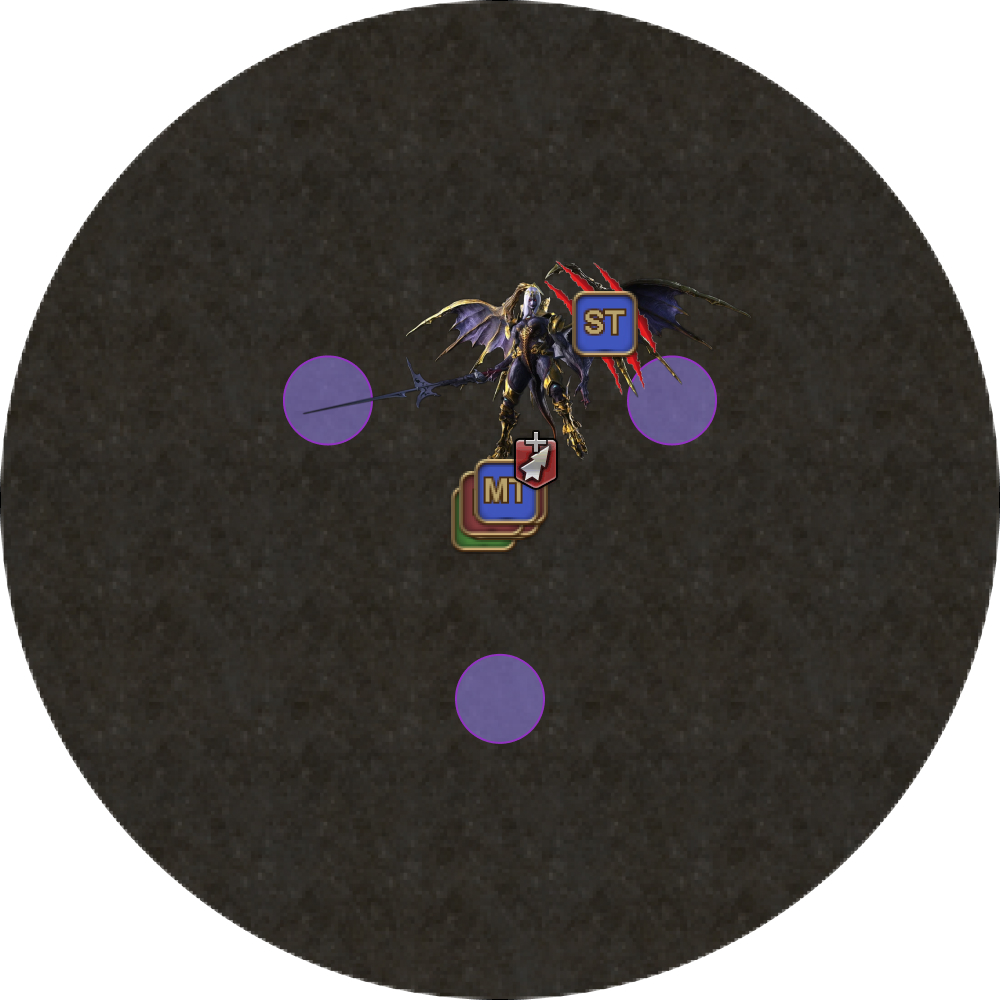 |
Fifth and Sixth lines
The sequence of mechanics after this point are:
- Nael’s fifth line
- Nael’s sixth line
- Ravensbeak (tank swap)
- Bahamut’s Claw (5-hit tankbuster)
- Megaflare (enrage)
The fifth and sixth lines are a random selection of any combination from Nael’s first three lines.
This is much simpler now that the dragons are gone, so the party will no longer need to contend with Fire/Ice, Thunder, or Doom.
Seventh Umbral Era (Transition to Bahamut)
Depending on how the party did with Twintania and Nael, you should have either a Tank LB2 or LB3 available at this point.
Stack together at the south Neurolink (same place where you stacked for the transition to Nael) to prepare for a knockback.
- If you have LB2: Tank LB before the knockback.
- If you have LB3: Tank LB at the knockback.
The giant fireball will then pulse four times for raidwide damage- three weak pulses (Calamitous Flame), followed by one strong pulse at the end (Calamitous Blaze).
Recovering LB3
If you have an LB3 at the end of Nael, it may be useful to learn how to cheese Seventh Umbral Era so that you begin Quickmarch Trio with an LB3 (or at least very close to it), especially while progging Bahamut.
This will let you save runs with a healer LB3 that would otherwise result in a wipe, allowing the group to get some more practice in.
LB is built if someone in the party takes lethal damage, but is saved by shields or in this case, mitigation from the tank LB3. This is how we build the LB gauge at Twintania by doing a 5-man Fireball stack (increase damage to lethal by removing players, who are then saved by the shields).
The knockback damage from Seventh Umbral Era is based on proximity to the center.
The goal is to go down to around 6k HP, at which point Calamitous Flame would have killed the party in the absence of tank LB3. If players are taking too little damage, consider removing shields, or standing closer. If someone’s HP goes below 3k at the knockback, they are too close.
With a tank LB3 (80% mitigation), each weak damage pulse hits for a little under 1.4k damage, and the strong one for around 5.5k.
The healers should start casting a heal to make it in time for Calamitous Blaze, but watch out in case some party members are too low HP after the knockback (under 2.8k HP).