Twintania + Nael deus Darnus
Commonly referred to as the “adds phase”, this phase can be intimidating at first, but it’s actually less chaotic compared to Nael’s phase near the start of the fight.
This phase is essentially a loop repeated twice:
- Plummet/Bahamut’s Claw
- Liquid Hell
- Hatches → Twisters
- Nael’s line → Twisters
- Megaflare → Death Sentence/Ravensbeak (this swaps order on the second loop)
An Aethertrial Attunement gauge will appear as an enrage timer, although this can be ignored- it will naturally fill a few seconds after the second loop has completed.
Quotes
There are four possible quotes Nael will use in this phase. Note that the first mechanic will always be either Lunar Dynamo, or Iron Chariot.
This is important, because Nael will always start with the opposite mechanic in the second loop.
| From hallowed moon I descend, upon burning earth to tread! | Lunar Dynamo → Raven's Dive → Thermionic Beam In → Spread → Stack |
| From hallowed moon I bare iron, in my descent to wield! | Lunar Dynamo → Iron Chariot → Raven's Dive In → Out → Spread |
| Unbending iron, take fire and descend! | Iron Chariot → Thermionic Beam → Raven's Dive Out → Stack → Spread |
| Unbending iron, descend with fiery edge! | Iron Chariot → Raven's Dive → Thermionic Beam Out → Spread → Stack |
| 1. The two bosses spawn north. Bring the bosses down, keeping Twintania near the two front Neurolinks.
The two bosses will open with their mini-tankbusters, Plummet and Bahamut's Claw. Make sure to point Twintania's Plummet away from the party. | 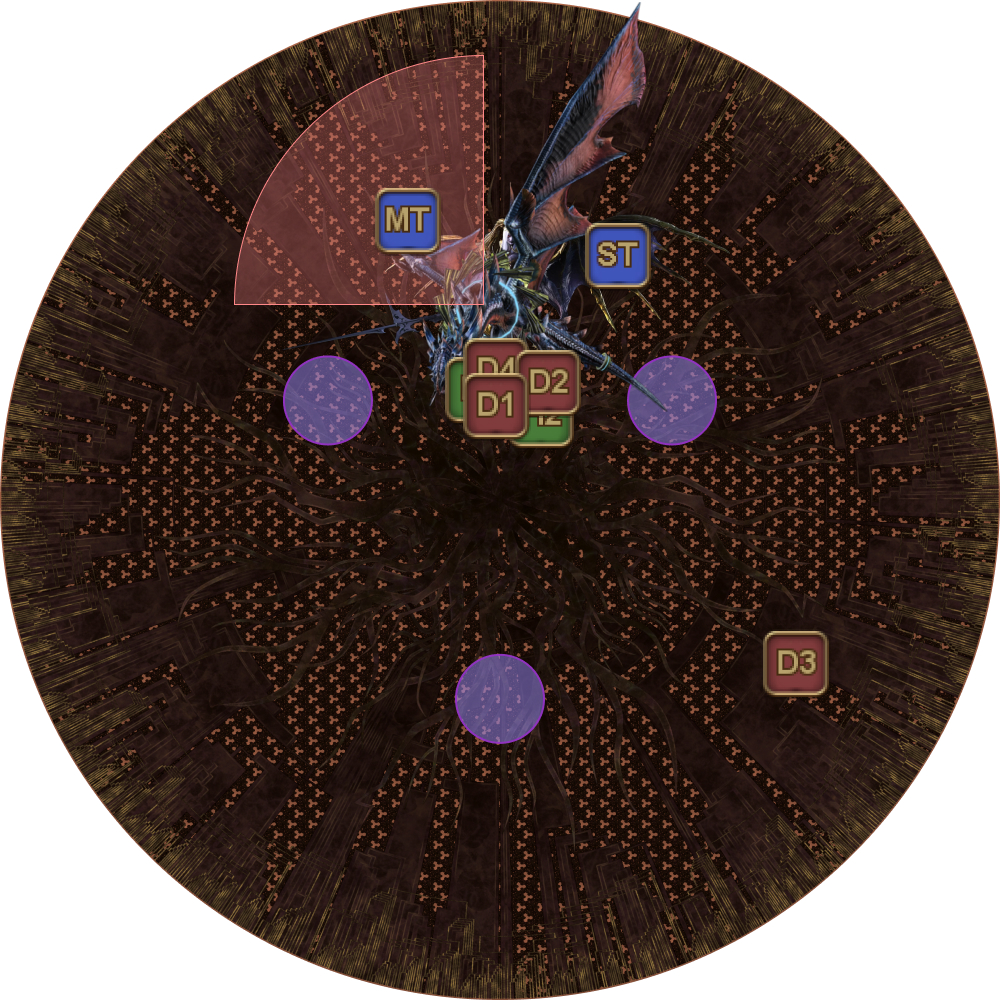 |
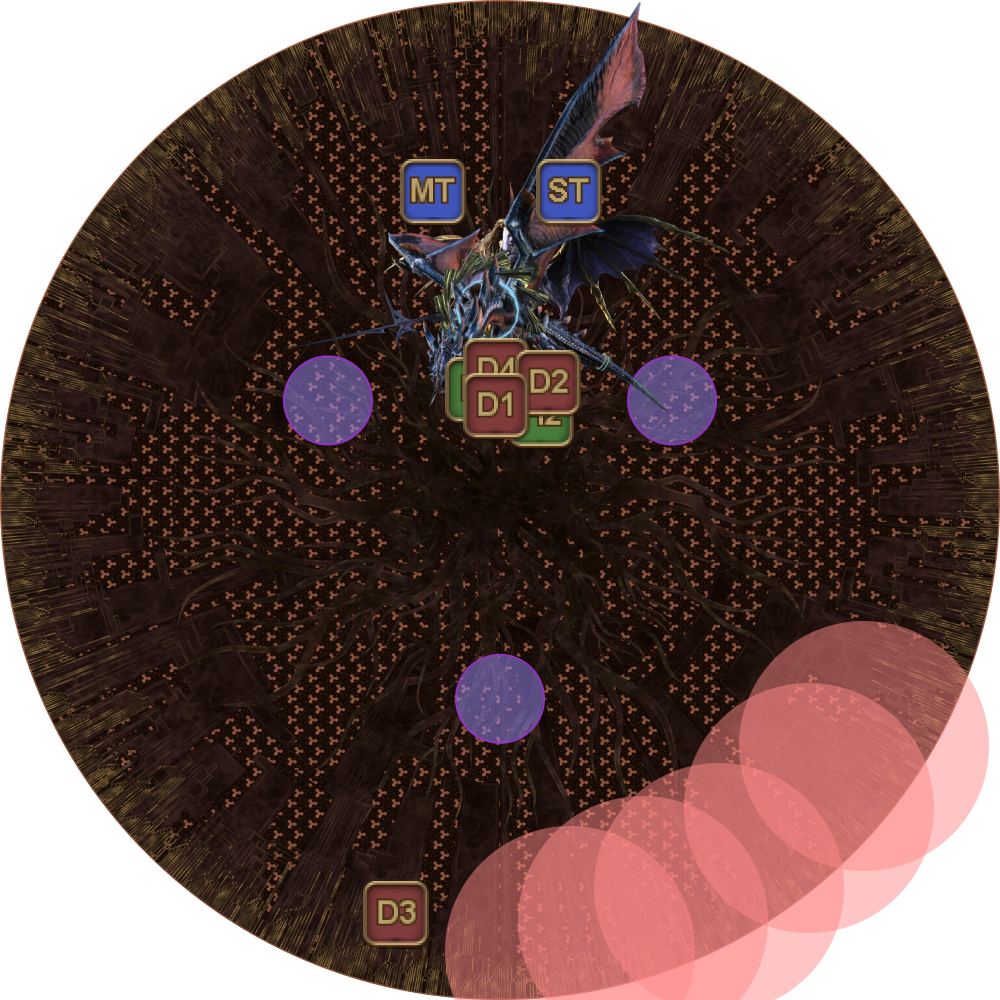
| 2. Twintania will then cast five rounds of Liquid Hell that is baited by a random player past a certain distance.
|  |
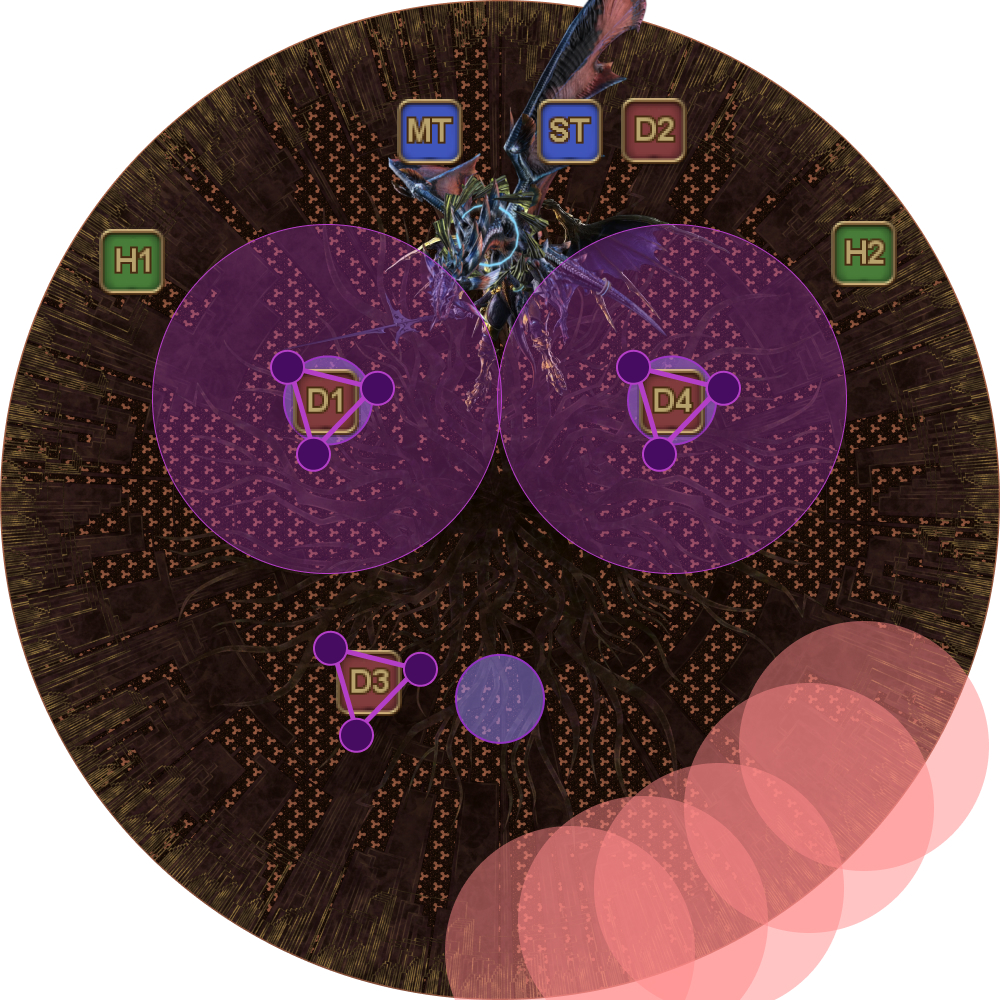
| 3. Twintania targets three random DPS with Hatches. The base positions are as follows:
Since one random DPS will not be targeted for Hatch, D4 will adjust to accommodate for that player.
(In this example, D2 is not targeted for Hatch, so D4 will go to the top-right Neurolink.) |  |
| 4. Hatches move to players and Twintania starts casting Twister.
|  |
| 5. Twisters resolve. The player at the back then enters their Neurolink to resolve Hatch. | 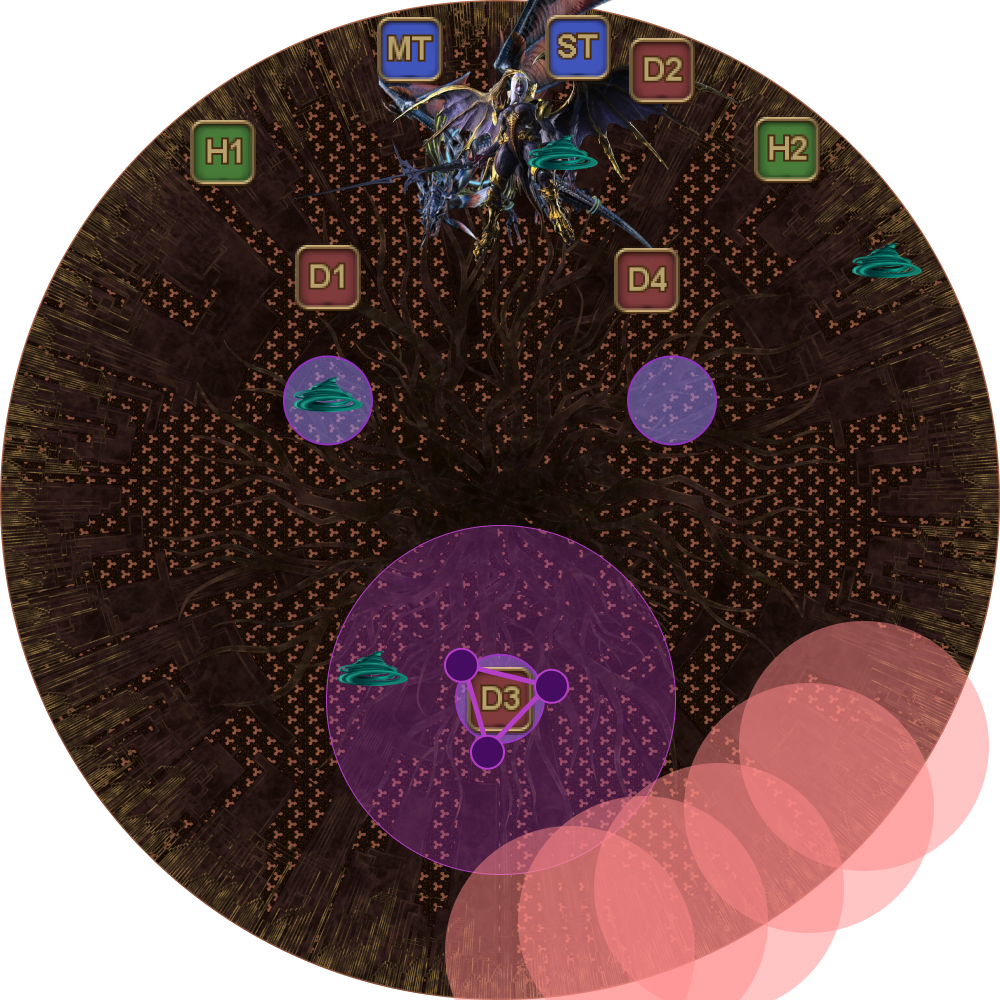 |
| 6. Nael then does a random line. The first mechanic will always be either Lunar Dynamo or Iron Chariot. | 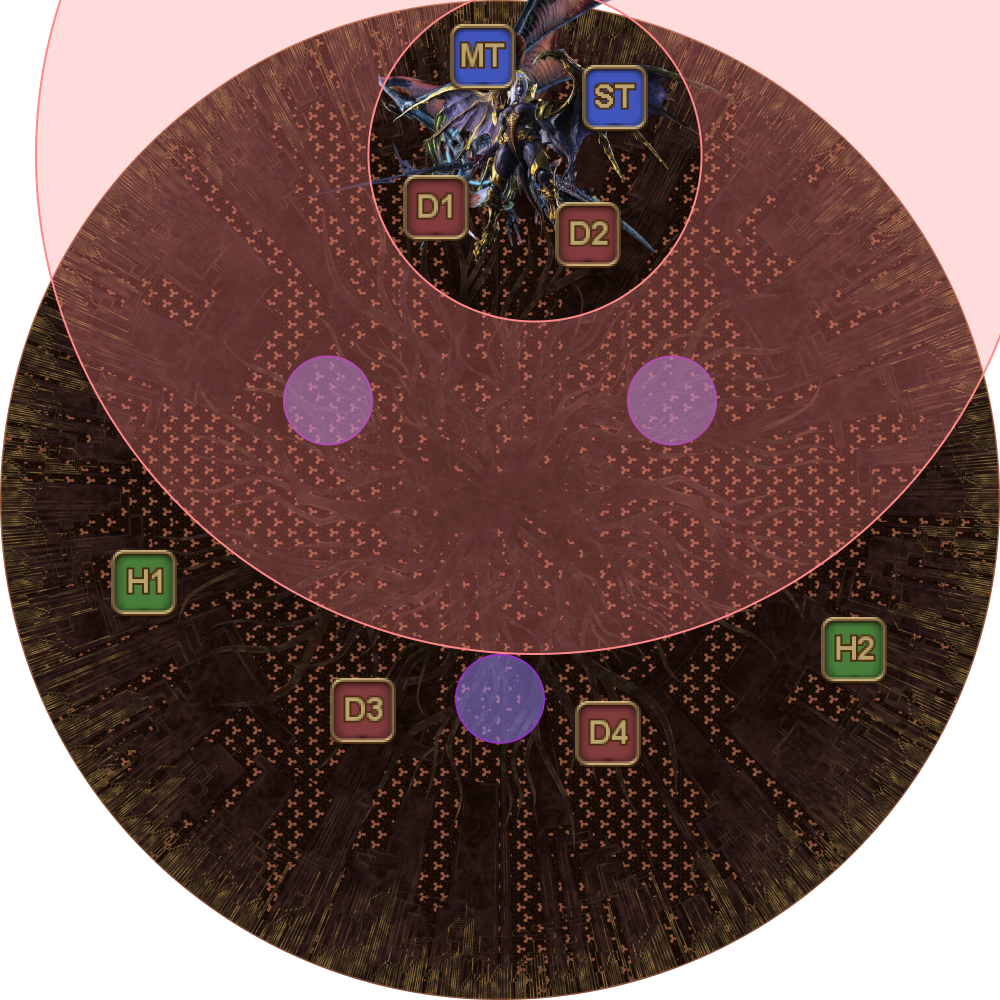 |
Nael’s lines will include a combination of Lunar Dynamo, Iron Chariot, Raven’s Dive, and Thermionic Beam.
Note that because Nael is at the edge of the arena, ranged players can outrange the Lunar Dynamo.
| Lunar Dynamo (In or outrange) | Iron Chariot (Out) 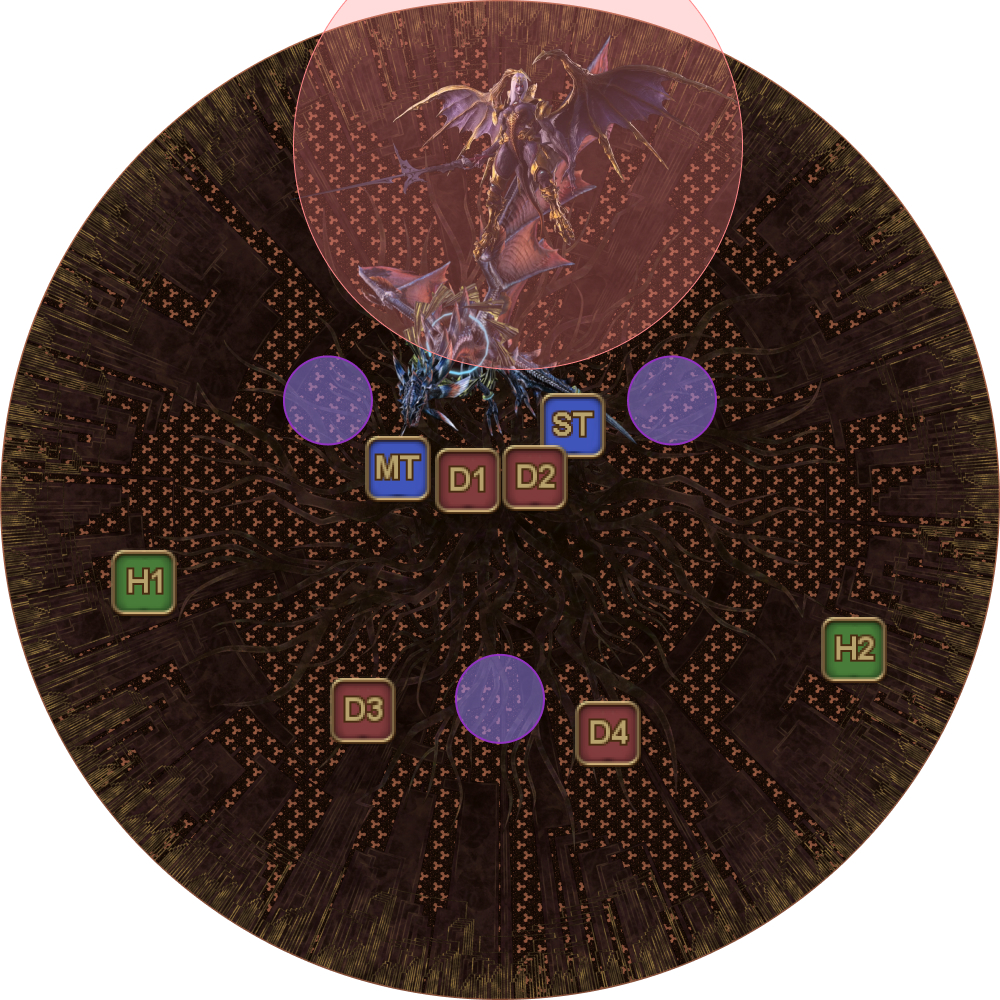 |
| Raven's Dive (Spread) 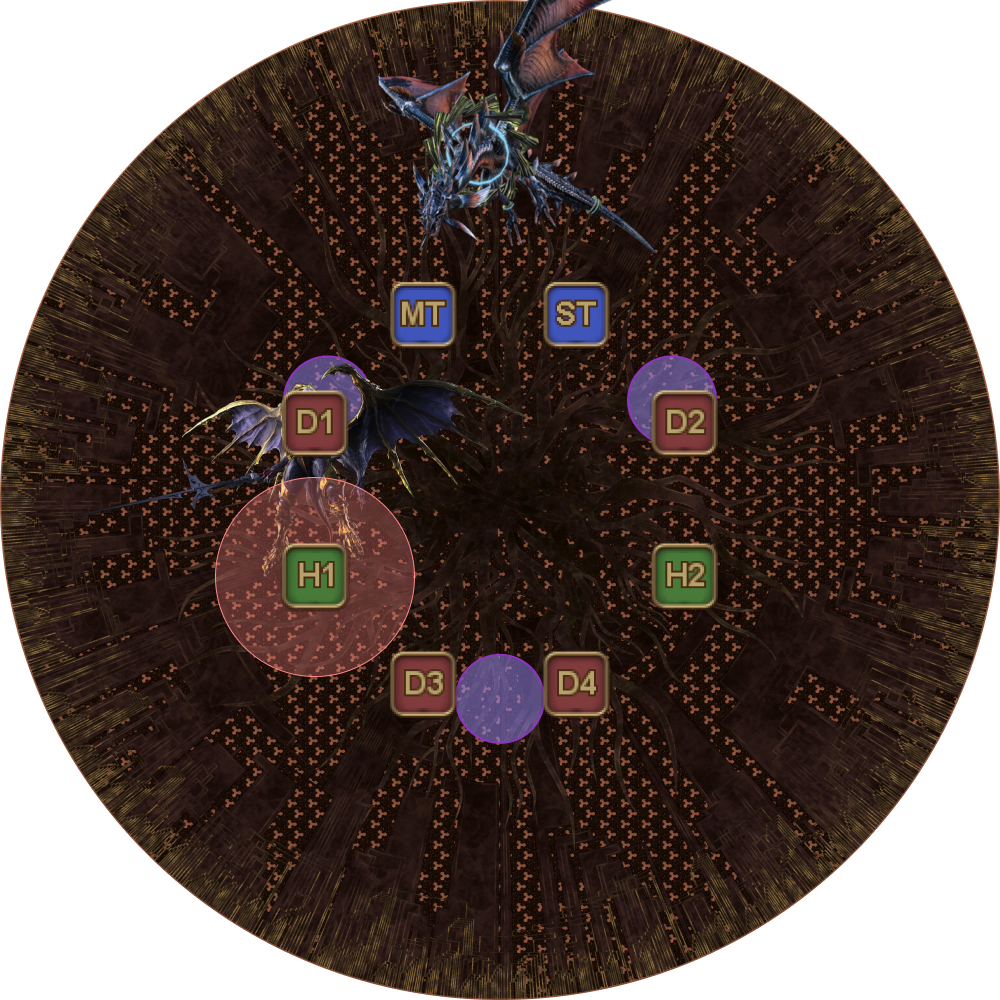 | Thermionic Beam (Stack) 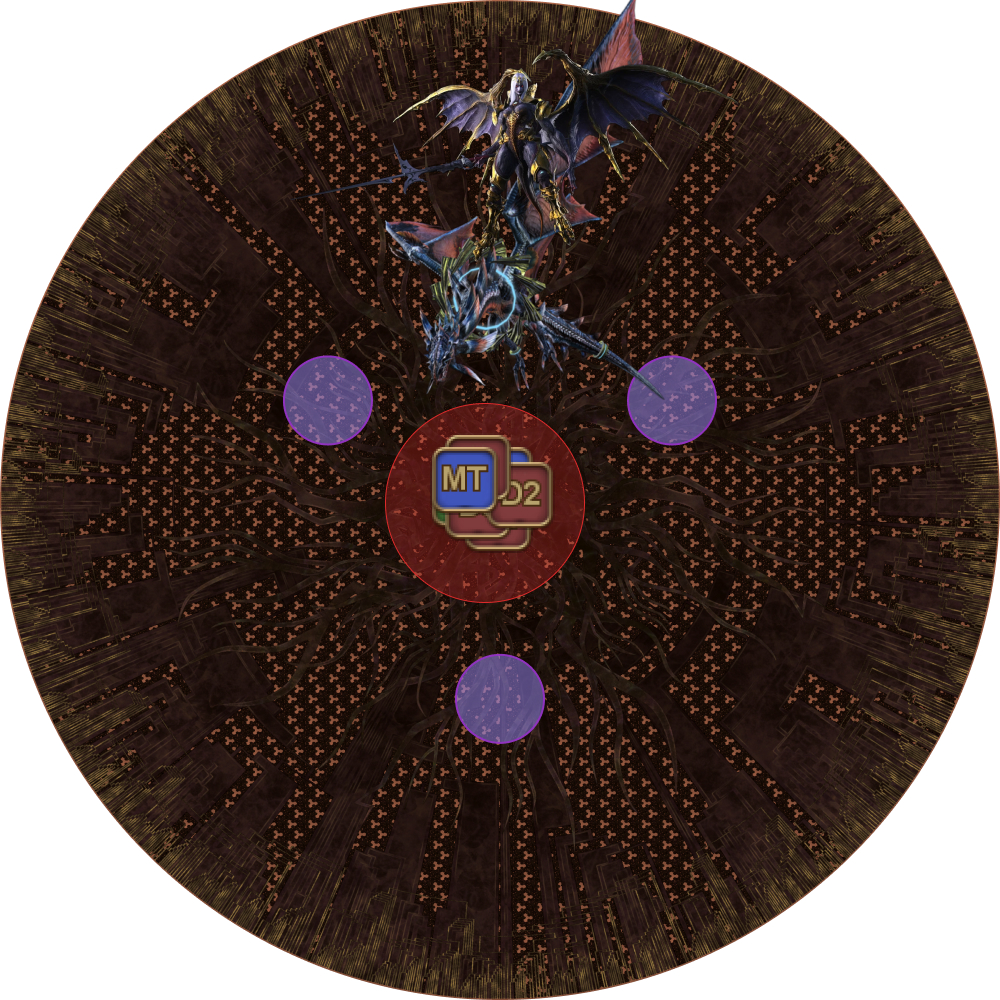 |
Note: Be careful of lines that involve Raven's Dive into Thermionic Beam. A very common cause of wipes here is not having everyone stack together in time.
| 7. Finally, after Nael's lines are finished, Twintania casts Twister. Spread out in the same directions as the Raven's Dive spread. | 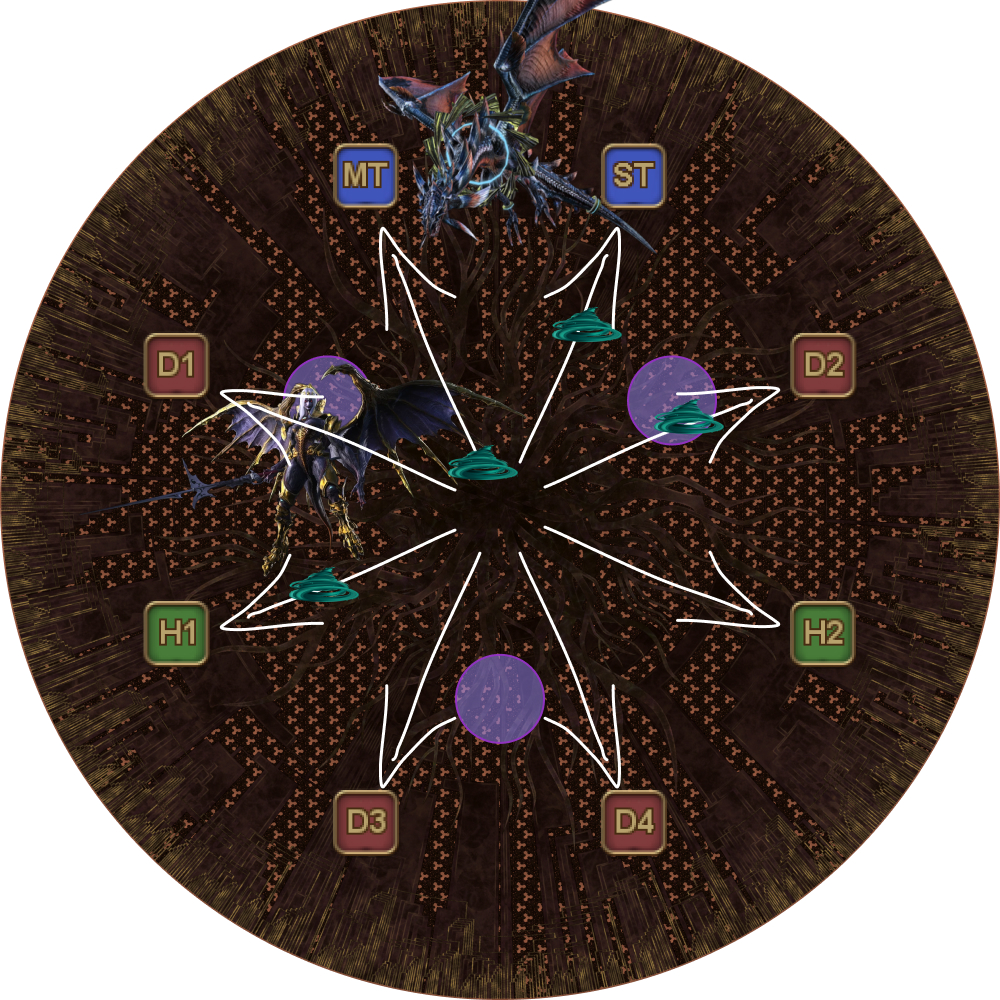 |
| 8. Carefully gather together back in the center of the arena, watching for Twisters (especially on Neurolinks!). Nael will cast Megaflare, followed by the two bosses's major tankbusters (Death Sentence and Ravensclaw). The vulnerabilities inflicted by these tankbusters enforce a tank swap; Provoke but do not Shirk. The tanks will swap positions from here instead of the bosses (i.e: Twintania stays "west" and Nael stays "east") | 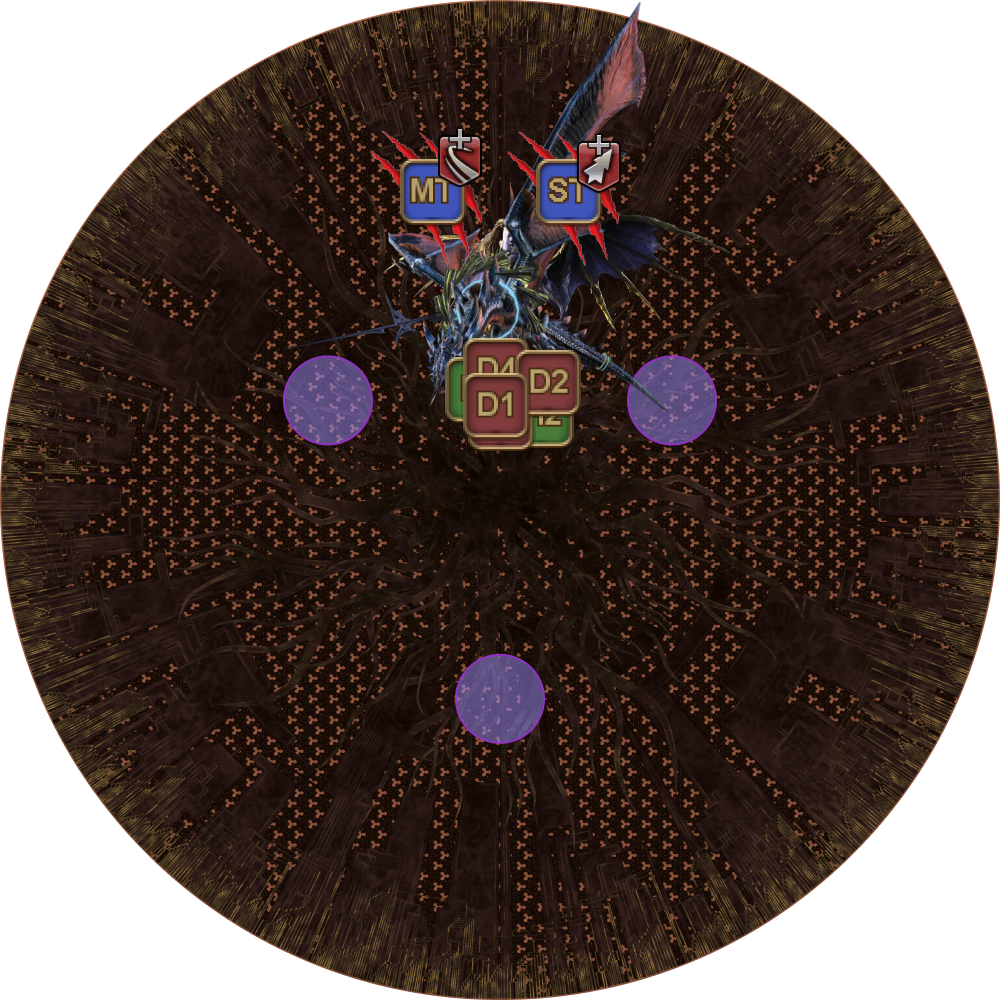 |
The loop then repeats from Plummet/Bahamut’s Claw.
The second loop has the following differences from the first:
- If Nael started with Lunar Dynamo the first time around, she will start with Iron Chariot in the second iteration (and vice-versa).
- Megaflare comes before the tank swap in the first loop, but the tank swap comes first in the second loop.
Twintania and Nael must be killed at the same time. If either one of them dies, the other immediately starts casting Twin Fury/White Fury, which is a 3-second enrage cast that refills their HP to full.
To help with this, caster LB or ranged LB when both their HP is at 1%.
If successful, Bahamut’s Teraflare will wipe the party, but Phoenix will revive the party with full HP/MP (just like a healer LB3), and refill the limit break gauge with an LB3.
Frequently Asked Questions
[Twintania + Nael] The starting HP% are different- should one boss be prioritized over the other?
| Not really. Twintania has more max HP than Nael, but the two bosses start the phase with roughly the same HP (Nael starts with negligibly more HP than Twintania), which is why Nael's starting HP% is higher |