Ultimate Annihilation
This is the second of the four blocks in in Ultima Weapon’s timeline.
Pre-Annihilation
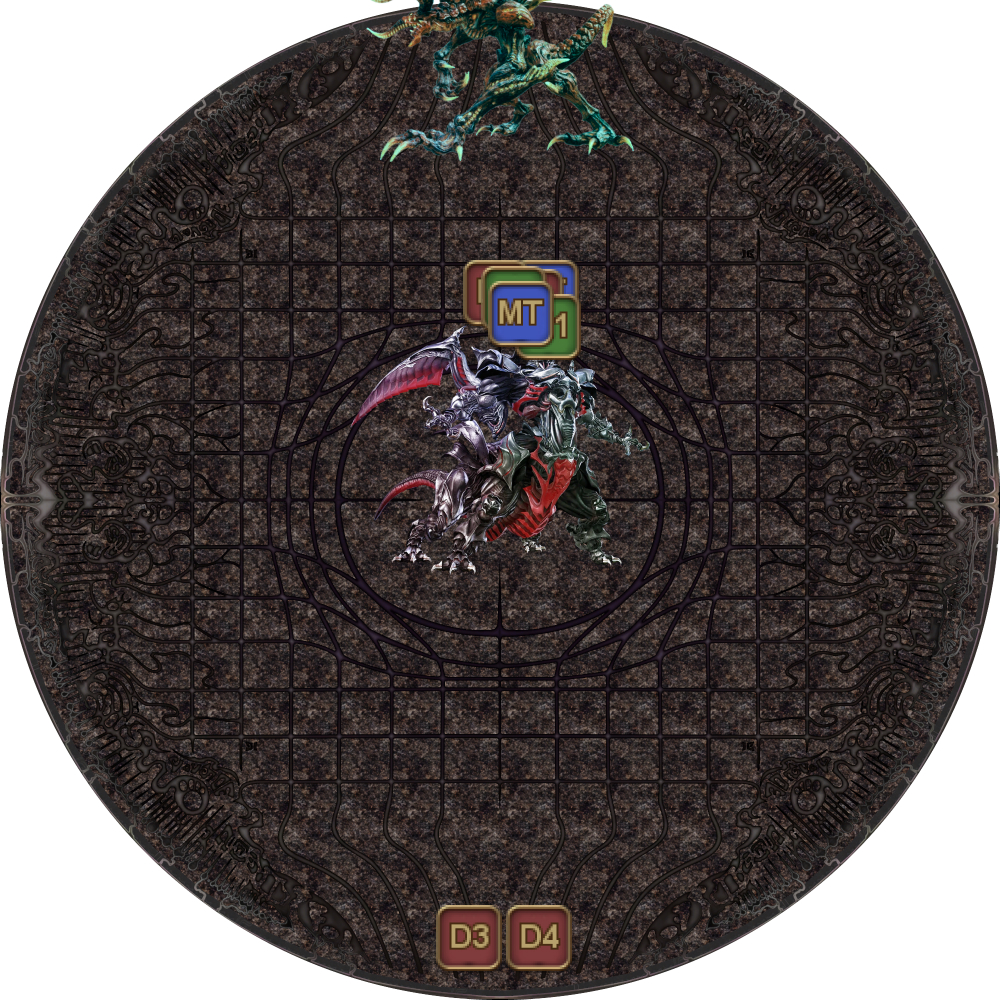
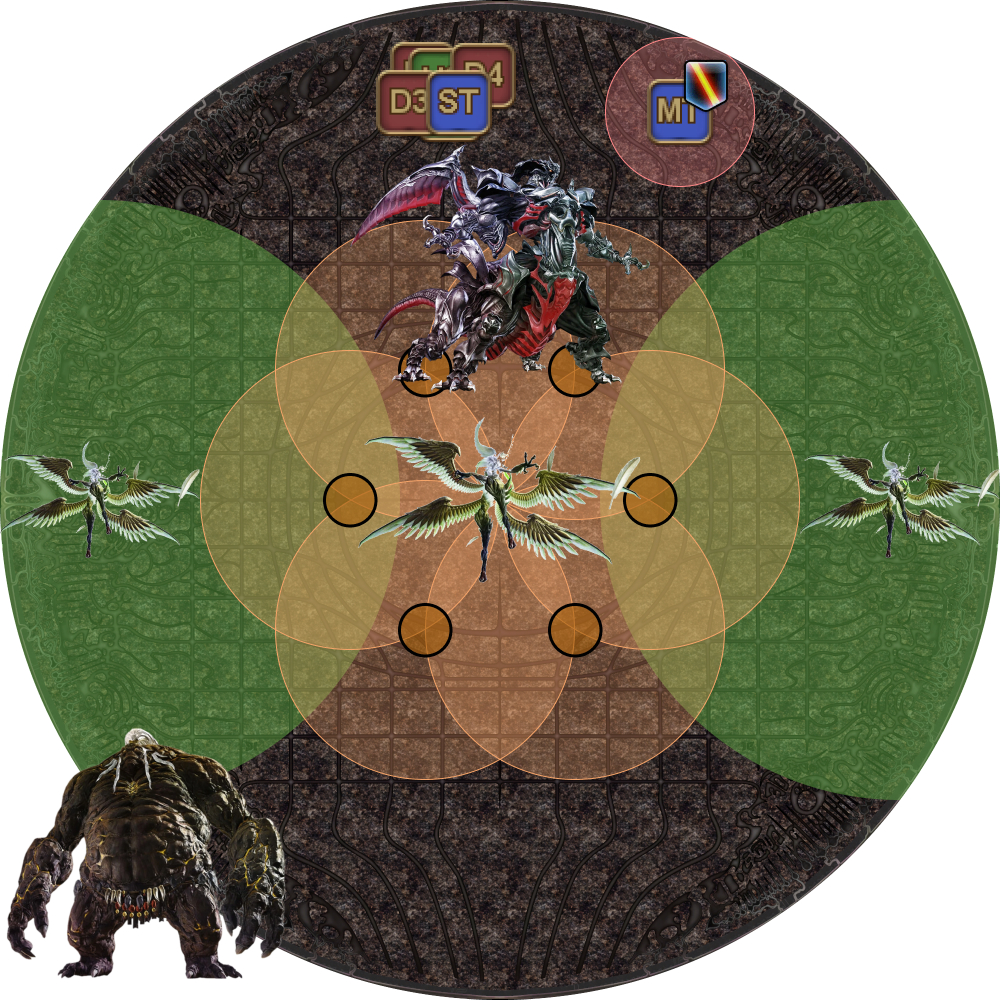
1. Ultima Weapon respawns in the center of the arena, while Ifrit spawns outside the arena at the north.
|  |
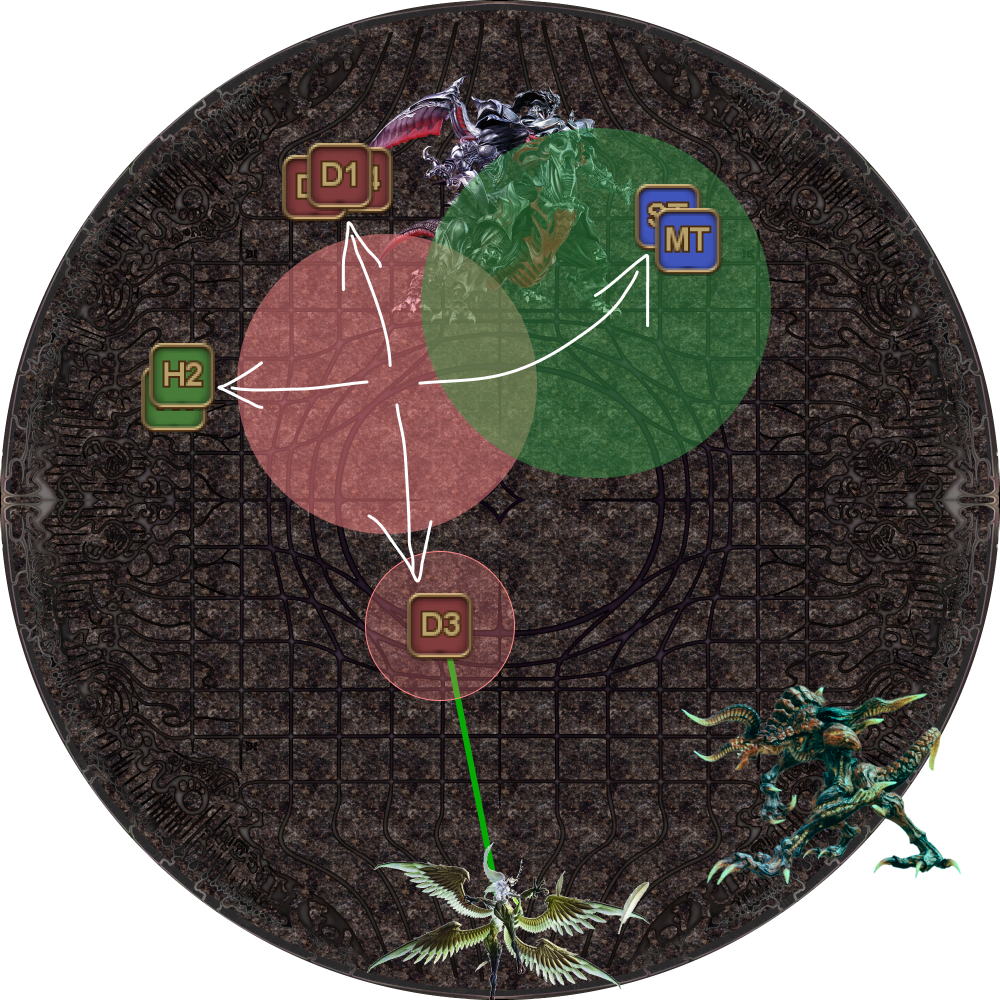
2. The two furthest players from Ifrit (who should be D3 and D4) bait four sets of Violent Eruptions. (They can split up as shown in the diagram, or stack together and bait in pairs.) | 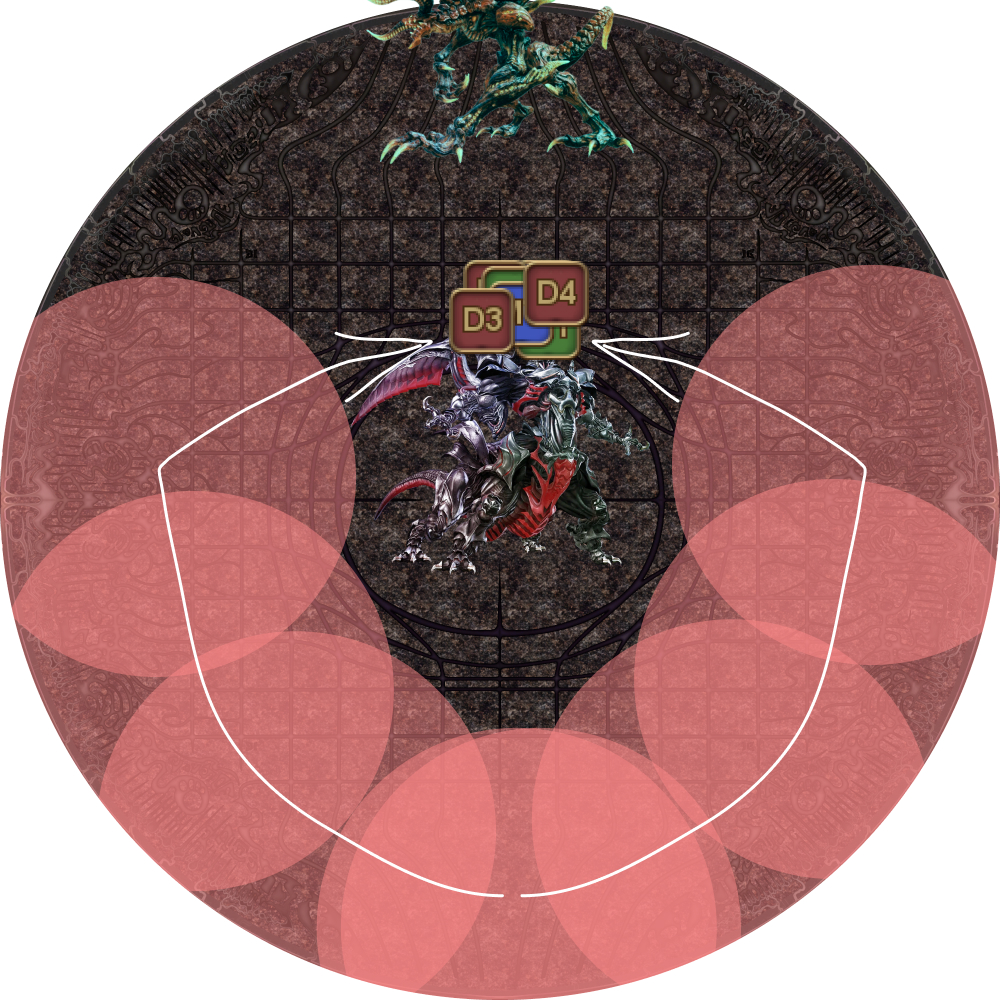 |
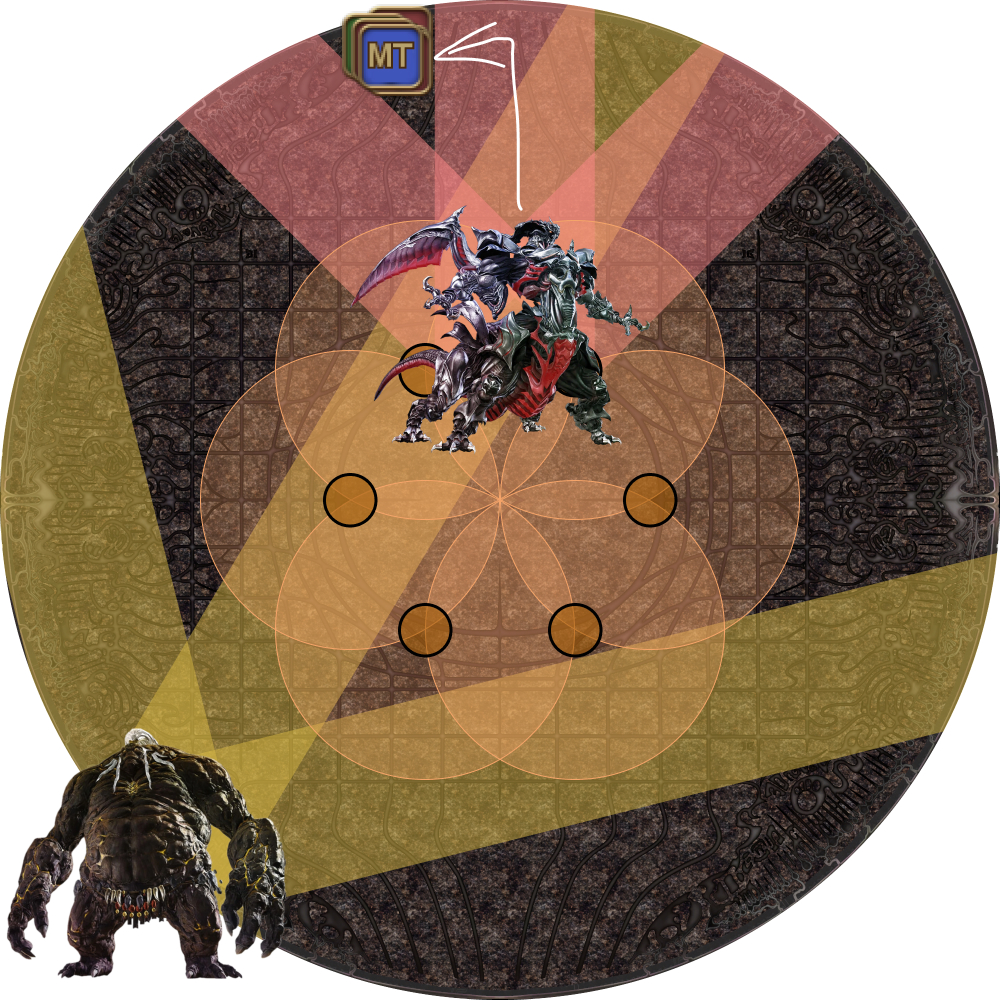
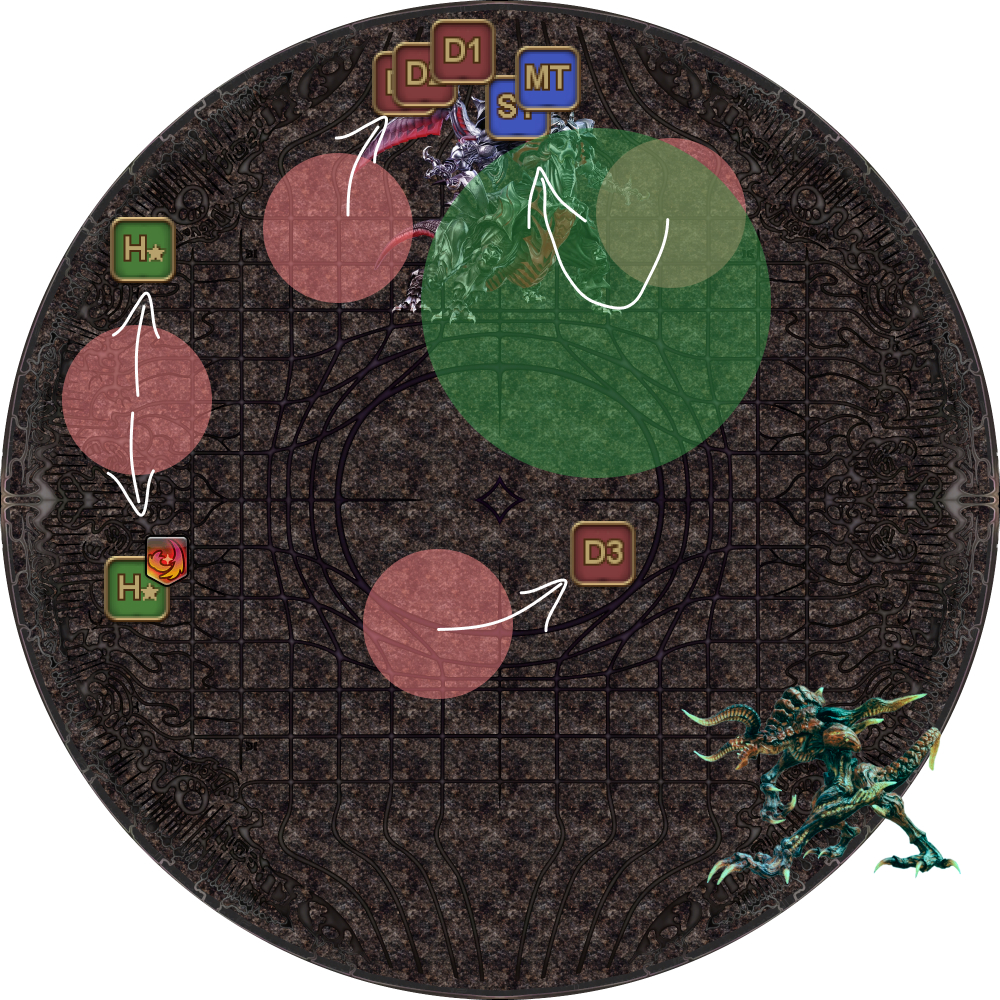
3. Ultima Weapon places Radiant Plumes on the outside of the arena. Stay close to the north edge as boulders will drop in the center of the arena. Titan will also spawn on an intercardinal position away from Ultima. You can take note of where Titan is to prepare for the next movement. |  |
4. Boulders start dropping one by one in the center of the arena, while both Titan and Ultima ready Landslides at random party members, one at a time. A couple things to note:
|  |
5. Dodge into Titan's first set of Landslides to avoid the second set (Only Titan will have a second set of Landslides). | 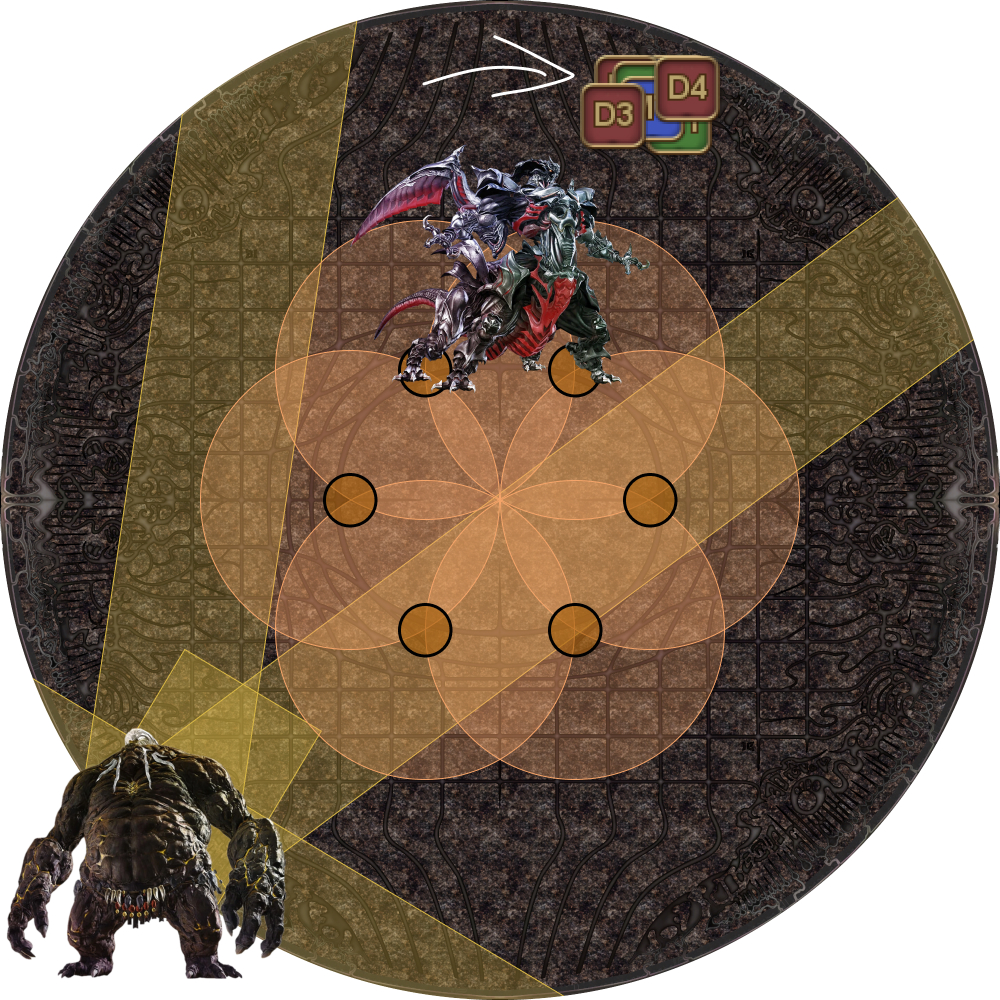 |
6. Titan begins a series of seven Tumults, during which Ultima Weapon will target the player with the highest hate with Viscous Aetheroplasm (which should be the MT). The two sisters will also spawn East and West and do a Wicked Wheel, but these can be ignored.
|  |
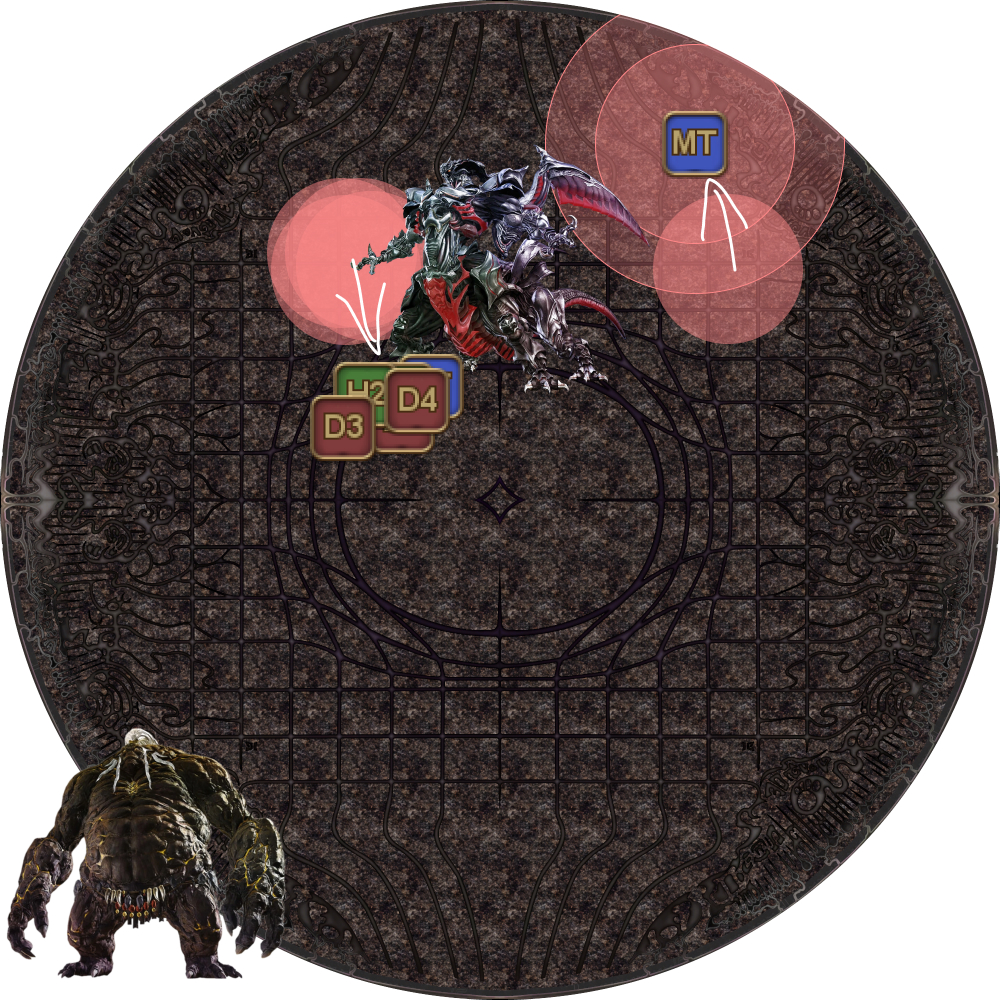
7. The two sisters will jump, baiting Feather Rain on random players.
|  |
8. Garuda then jumps, baiting a second set of Feather Rains on random players. The Viscous Aetheroplasm will also expire and Ultima Weapon casts Homing Lasers on the player second in hate (which should be the MT).
|  |
Ultima Weapon will then disappear and then reappear where it stands (arena North), and begin Ultimate Annihilation.
Ultimate Annihilation (2211)
This phase is unique among all the “Trio”-like mechanics in all Ultimate fights as Ultima Weapon will actually be targetable during this sequence.
In this section, there will be four green Aetheroplasm orbs for the party to take- how you resolve these orbs affects the Aetheric Boom mechanic towards the end of the fight.
Of note, these orbs will always spawn on Ultima Weapon’s left leg (the south-east corner).
9. Start stacked together on the South-West corner of Ultima Weapon. There will be three Weight of the Lands, accompanied with a Flaming Crush stack. | 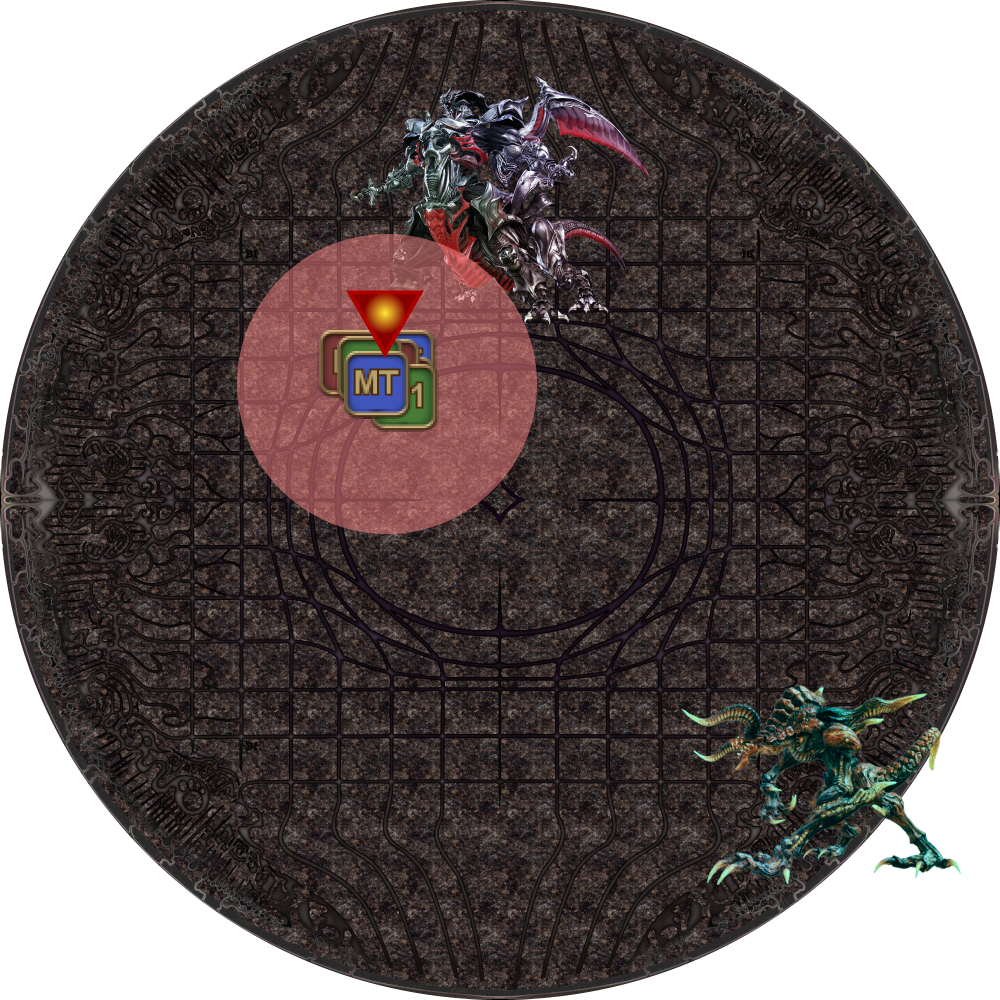 |
10. Second set of Weight of the Land. Garuda will spawn south and tether onto a random player. | 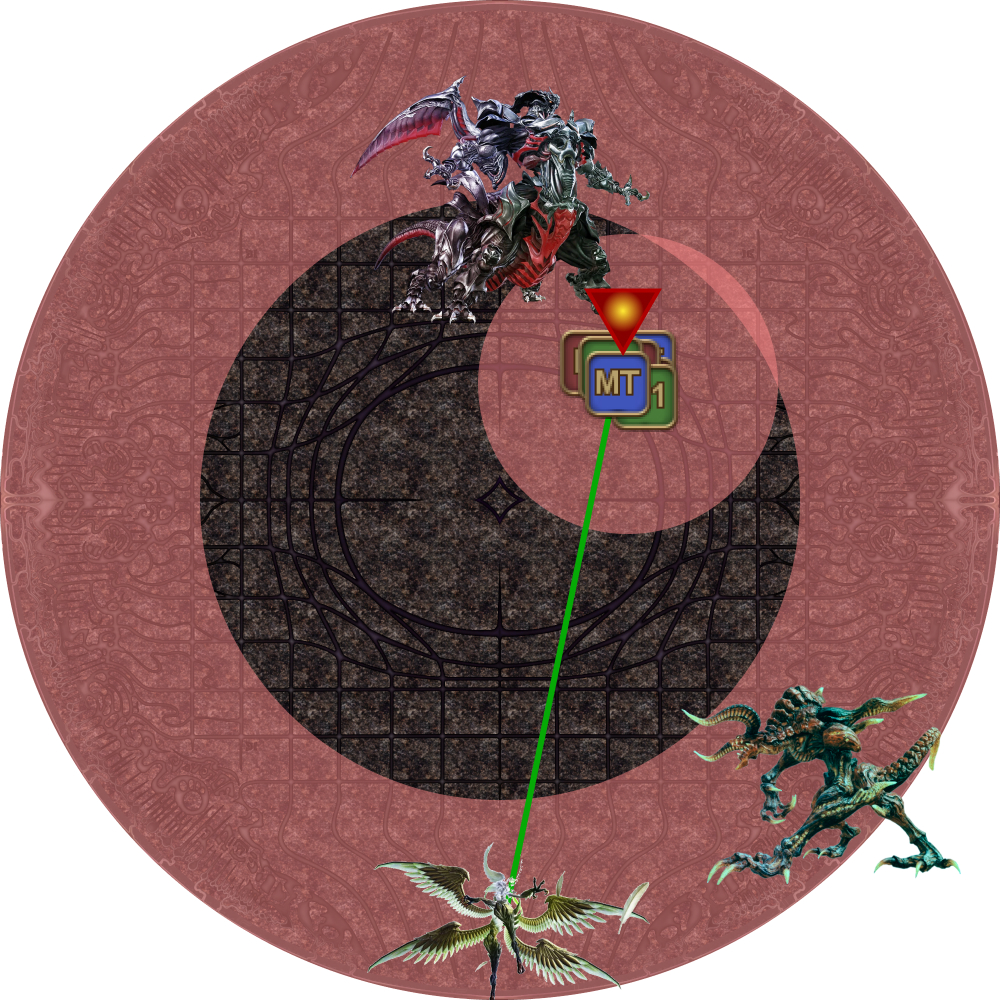 |
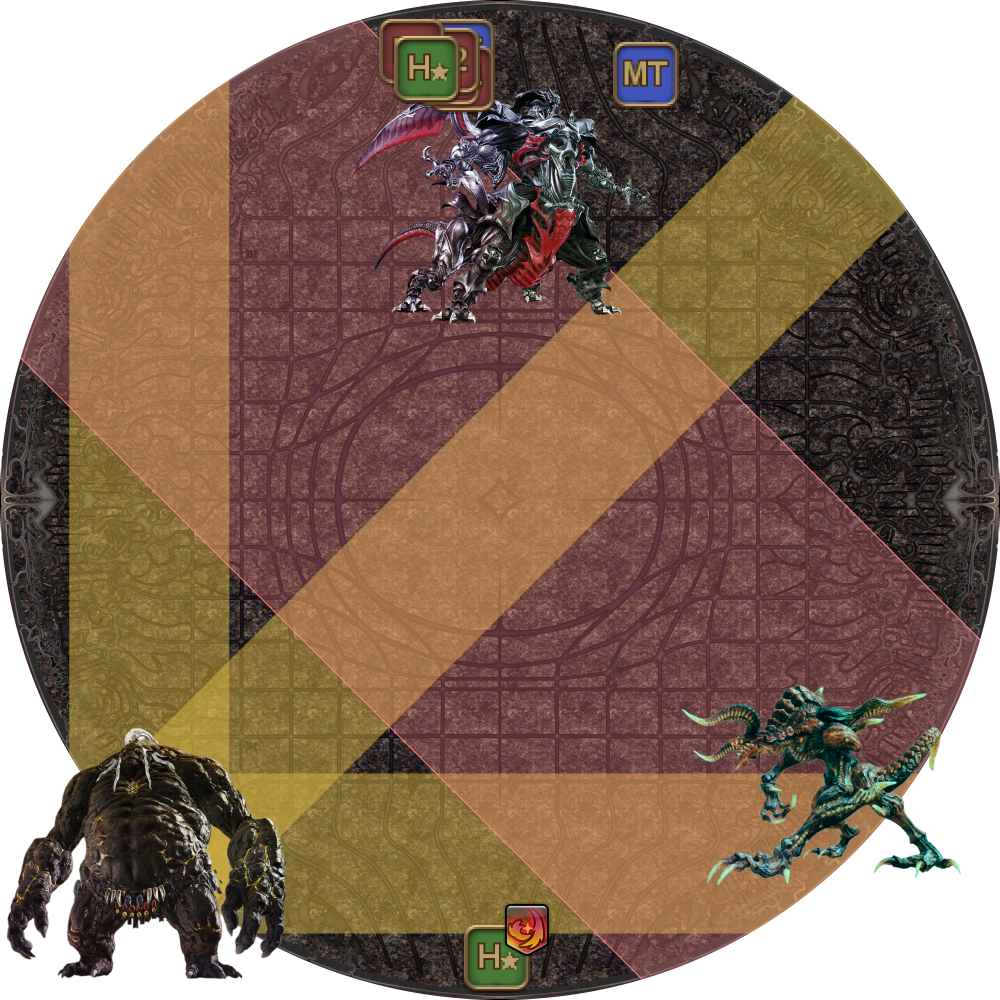
11. Third set of Weight of the Land, which is also when the Flaming Crush resolves. The party will need to split up as follows:
|  |
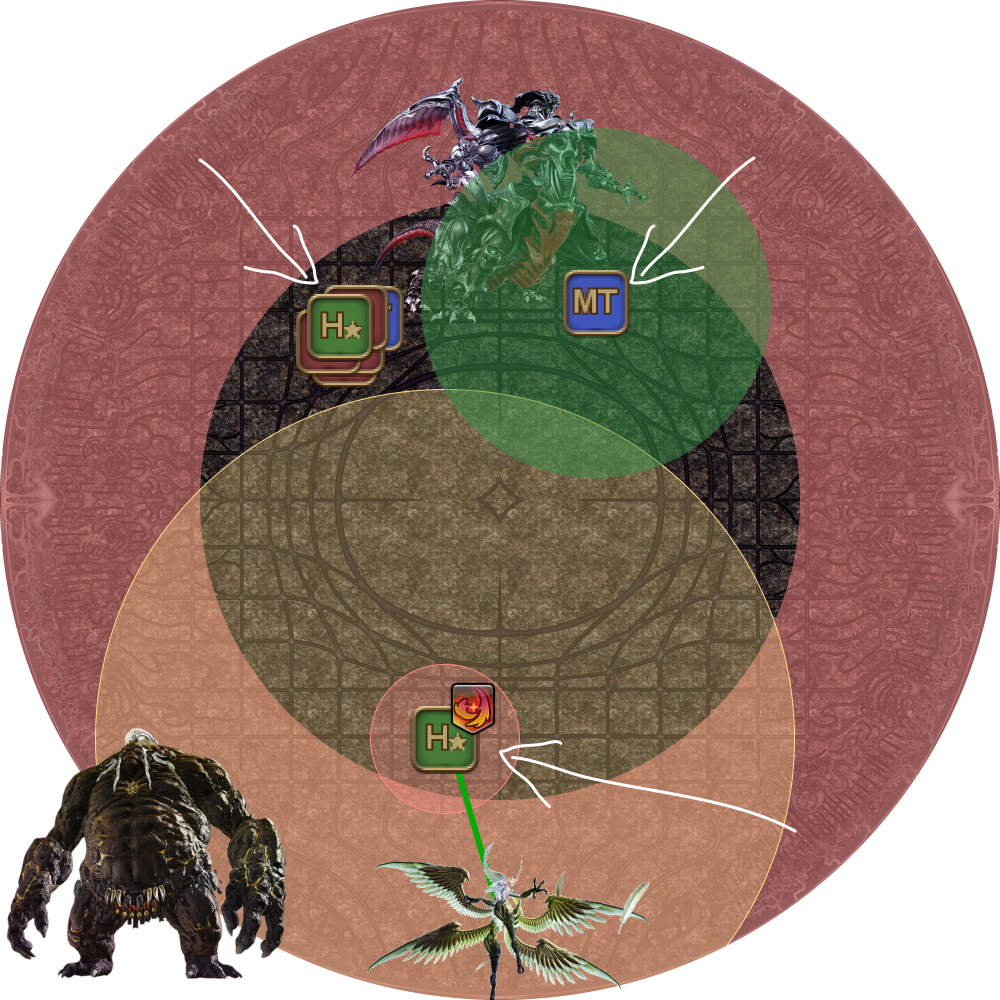
12. Ifrit applies Searing Wind onto a random healer, then Garuda will jump (Dodge Feather Rains).
|  |
13. Ifrit prepares a Crimson Cyclone while Titan readies a Landslide.
|  |
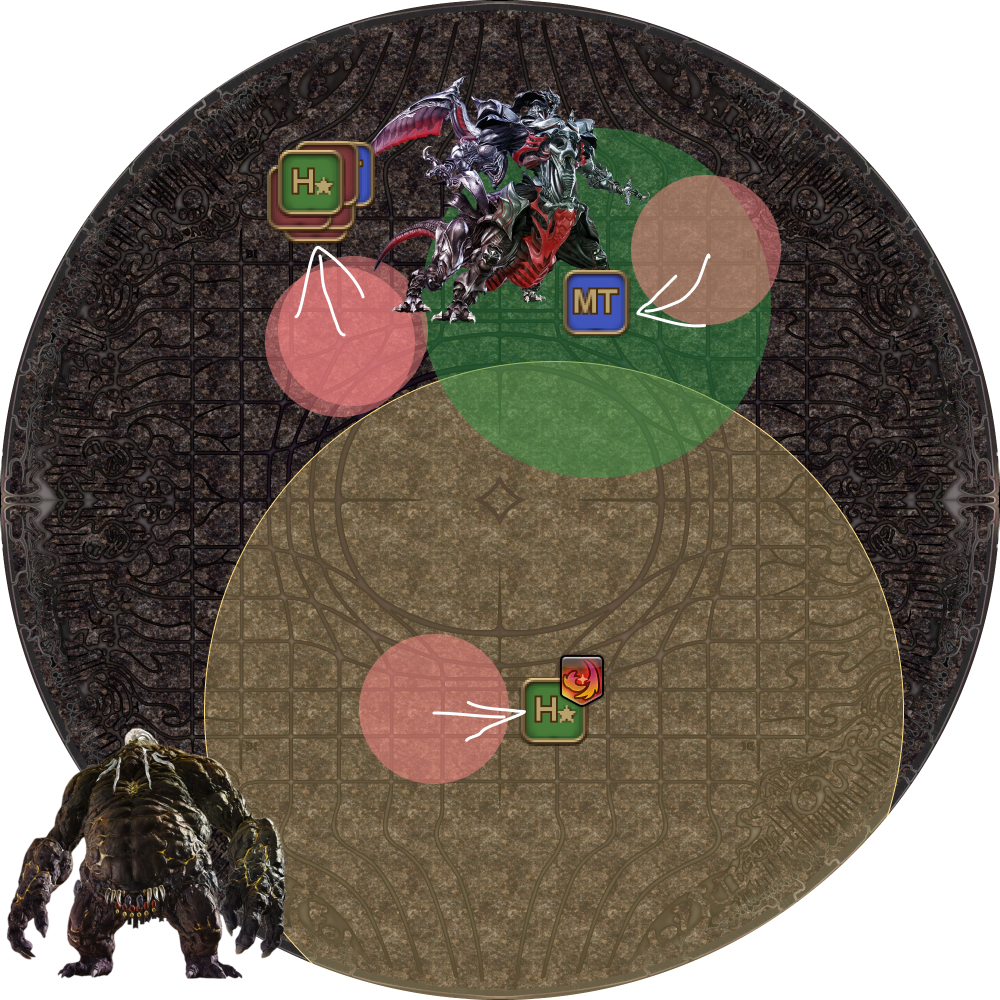
14. Second set of Landslides. Wait for these to resolve before moving towards the center of the arena. | 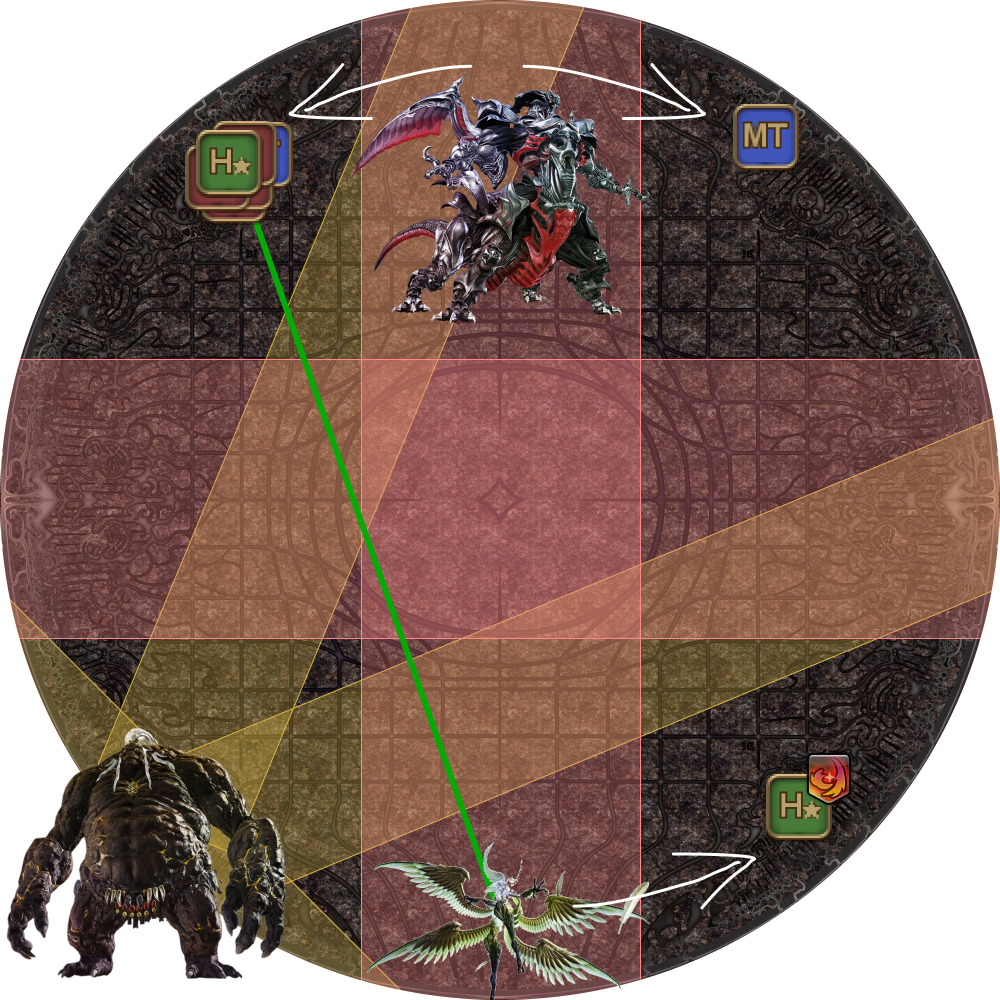 |
15. An Eye of the Storm cuts off the outer region of the arena, while the third Aetheroplasm orb spawns on the South-East side of Ultima Weapon.
|  |
16. Ultima Weapon casts a Tank Purge while the Mesohigh tether resolves. Note this is a lot of outgoing damage and should be mitigated, as the healer taking the Mesohigh tether will also trigger additional raid-wide damage. Finally, Garuda jumps (Dodge Feather Rains).
|  |
After the Feather Rains, Ultima Weapon momentarily disappears, marking the end of this phase.
Aetheroplasm Orbs
The number of people that are hit by the Aetheroplasm Orbs determine the time the party has to take the four pairs of orbs later on in Aetheric Boom.
- 1st: NW orb
- 2nd: NE orb
- 3rd: SE orb
- 4th: SW orb
The more players that are hit increases the distance between the two orbs, giving the party more time to resolve them.
However, each person hit also increases the Ultima Aether gauge by 1.