Double Dragons
The structure of this phase can be broken down as follows:
- First half
- Wroth Flames
- Second half
- Cauterize
- Alternative End
In addition, each dragon also has their own enrage condition. Causing either dragon to break their vow will result in their attacks one-shotting anyone hit (including tanks), and lower their damage taken.
Solemn Vow
This one is simple. Hraesvelgr will enrage if he kills any player.
Mortal Vow
Nidhogg will enrage if Mortal Vow is not passed.
[Click to Expand] Mortal Vow breakdown
| After Wyrmsbreath #1, Nidhogg will give a random DPS a Mortal Vow debuff. This debuff:
When the debuff expires, it explodes in a small AoE, and the player that had Mortal Vow will now get a Mortal Atonement debuff that prevents them from getting Mortal Vow again. Mortal Vow transfers onto a random player that was hit by the AoE that does not have Mortal Atonement. (If additional players are hit, they get a Suppuration debuff that halves their max HP. Thus, when passing Mortal Vow, we need exactly two players to stack- the player that has the debuff, and the player that is about to receive it. |  |
There are four passes in this phase.
- After Hallowed Wings #1
- After Wroth Flames (this pass is quick)
- After Hallowed Wings #2
- After Cauterize → Touchdown
We pass “DTTMR”, or in other words:
DPS → MT → ST → D1/D2 → D3
All passes happen in the center of the arena, except for the final pass after Touchdown (which is just done at the edge).
First half
This first part cycles through the three main mechanics of the fight.
Wyrmsbreath #1
[Click to Expand] Wyrmsbreath debuffs
| Fire-aspected debuffs Getting hit by Nidhogg's Flame Breath during Wyrmsbreath will apply the Boiling debuff. The fire-aspected debuffs:
| |
 | Boiling Body is slowly heating up. Will become Pyretic when this effect expires.
|
 | Pyretic Fire-aspected damage is taken with every action.
|
| Ice-aspected debuffs Getting hit by Hraesvelgr's Ice Breath during Wyrmsbreath will apply the Freezing debuff. The ice-aspected debuffs:
| |
 | Freezing Body is slowly turning to ice. Will become Deep Freeze when this effect expires.
|
 | Deep Freeze Frozen solid and unable to execute actions.
|
| 1. Have everyone preposition to prepare for the upcoming mechanic.
This will also be your second pot window. | 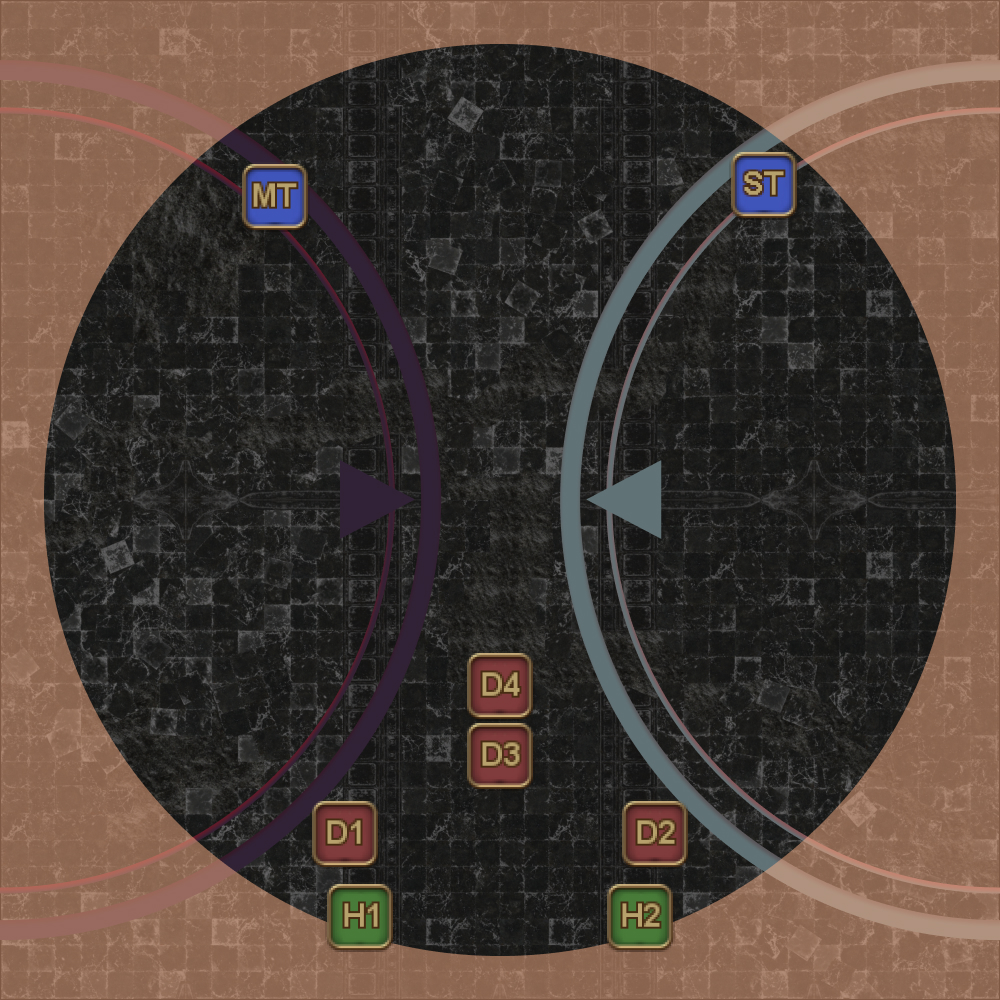 |
| 2. More precisely, these are the anchor (H1, H2, D4) positions. None of these positions are in melee range. (Note the white tile that can be used as reference for the center position.) | 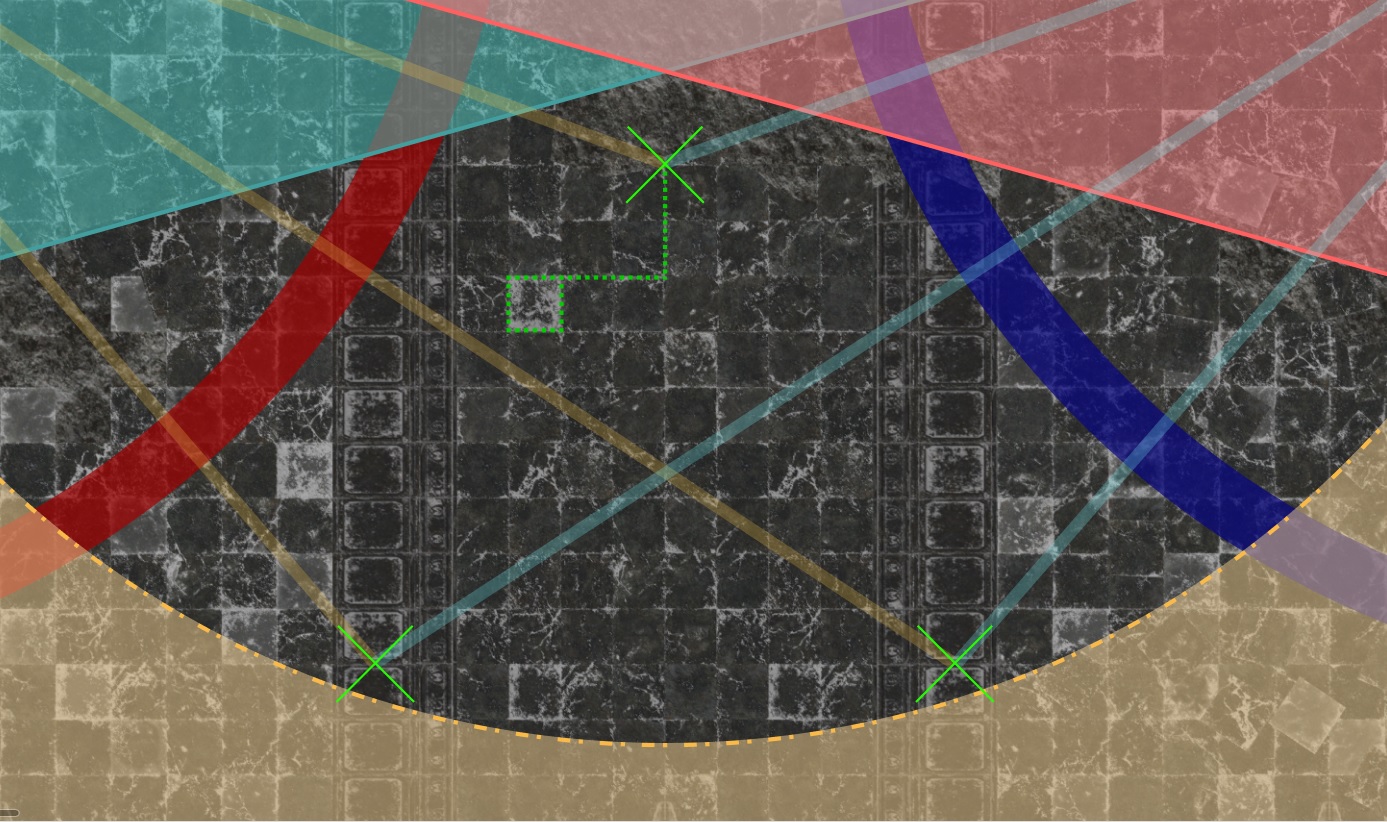 |
| 3. Fire and Ice-aspected tethers appear. The goal is to get hit by one tether of each, canceling their associated debuffs.
(In this example, D1 and D3 will swap positions.) | 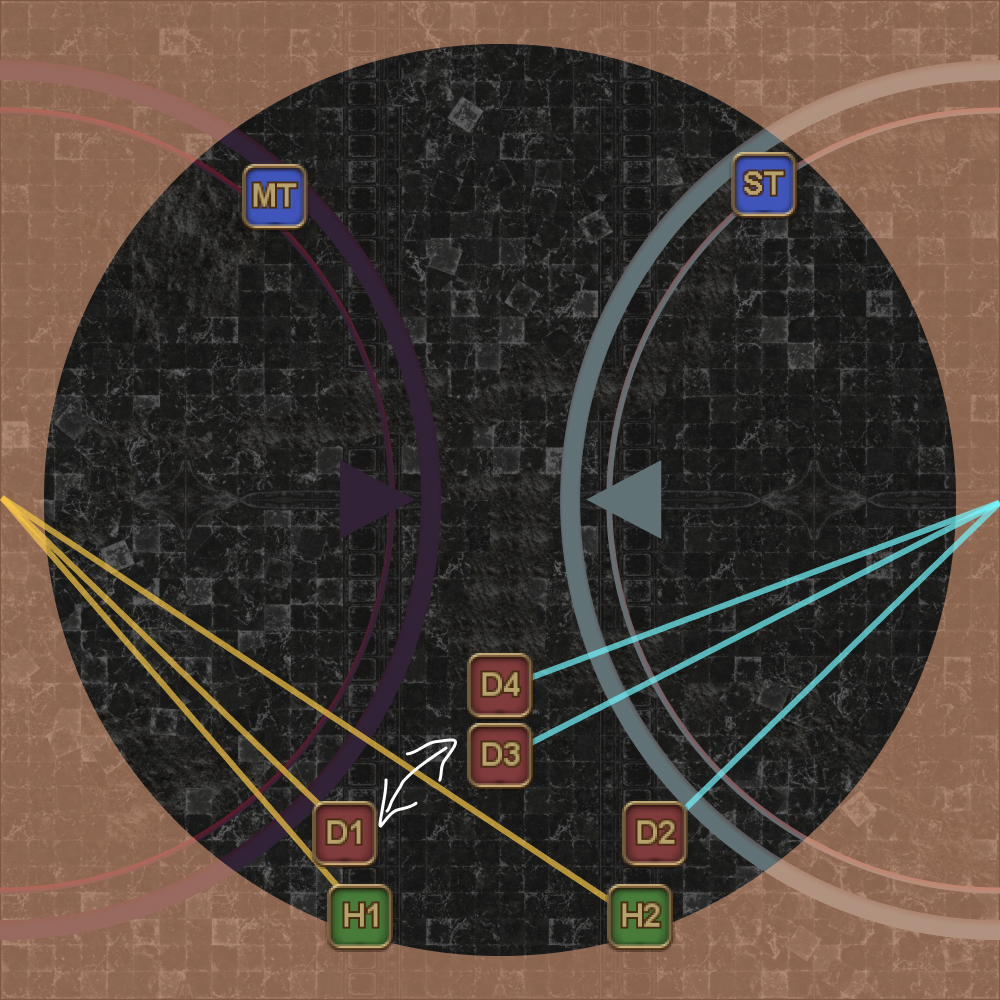 |
| 4. Mechanics resolve.
In the first example, Nidhogg's mouth is glowing, while Hraesvelgr's is not, so the ST has a single-target tankbuster. In the second example, both mouths are glowing, so the tanks stack together for a shared tankbuster. | 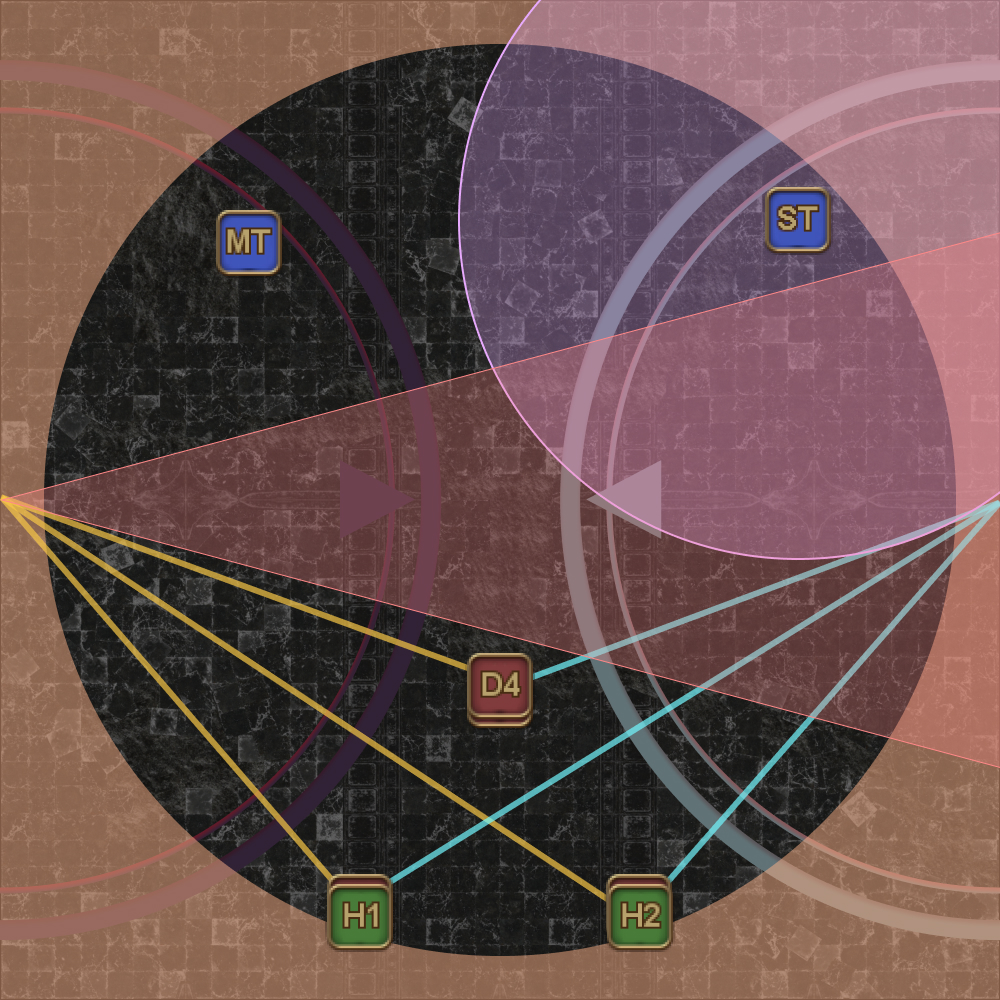 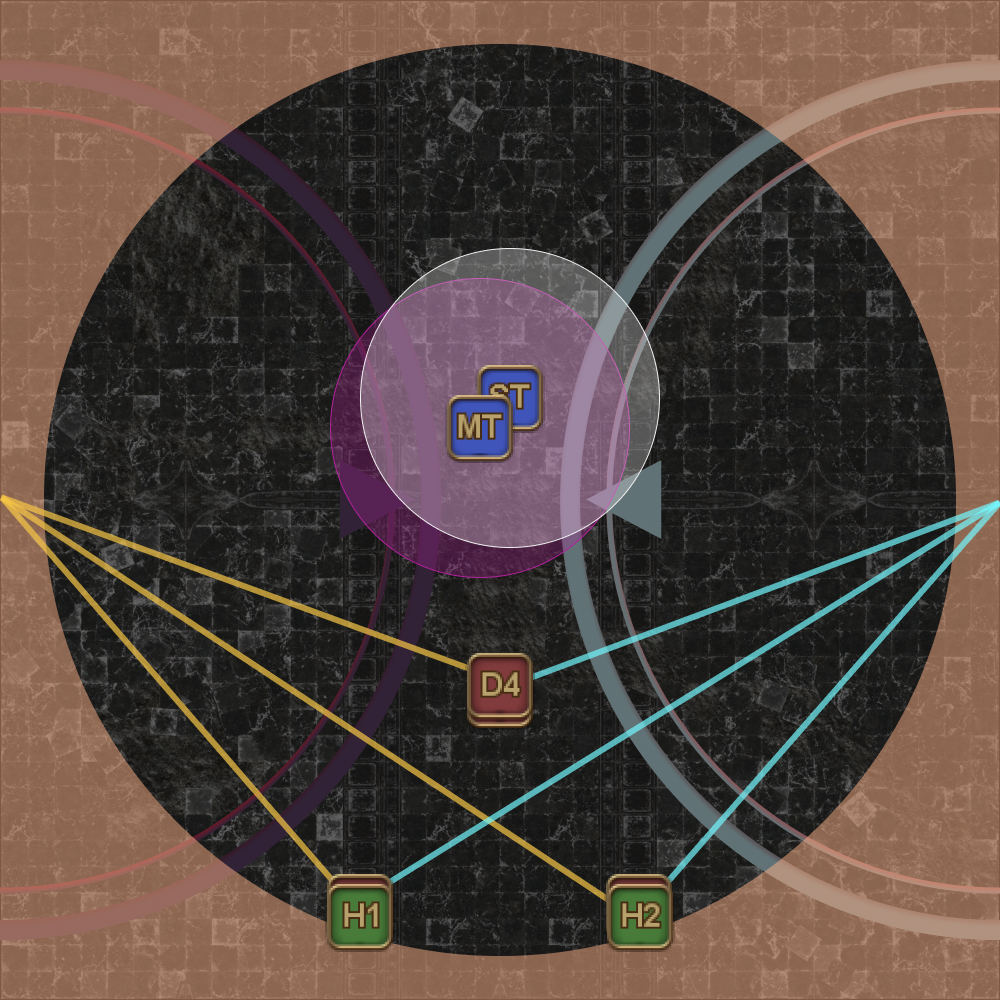 |
| 5. Mortal Vow DPS spread out- Nidhogg will target a random DPS for the first Mortal Vow (in an AoE around that player). | 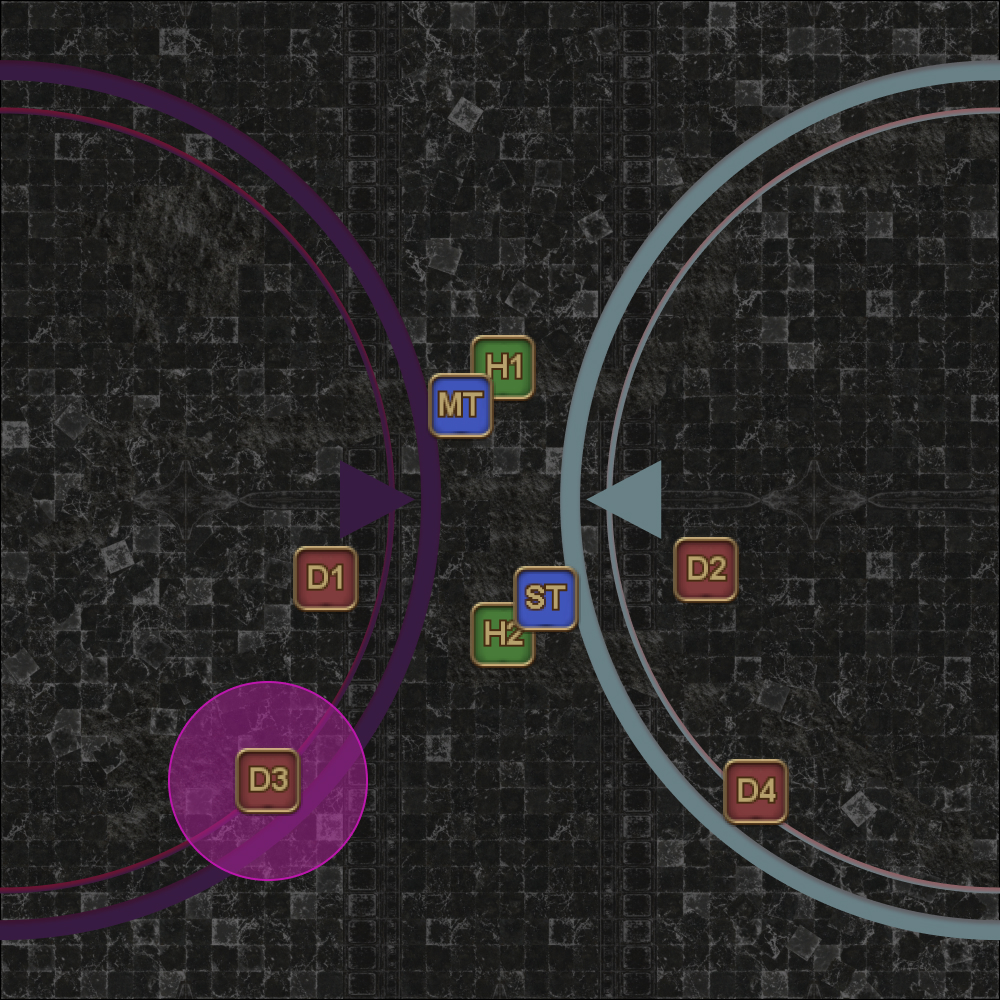 |
Akh Afah #1
| 6. 4-man shared AoEs on the two healers. Nidhogg and Hraesvelgr's HP must be within 3% or their Akh Afah will kill all players in the stack. If the HP difference is too large, a tether will appear connecting both bosses:
|  |
Hallowed Wings #1
| 7. Turn to face Hraesvelgr. Avoid Hraesvelgr's Hallowed Wings and Nidhogg's Cauterize, and then position yourselves based on whether Hraesvelgr's head is up or down.
(In this example, Hraesvelgr's head is down.) | 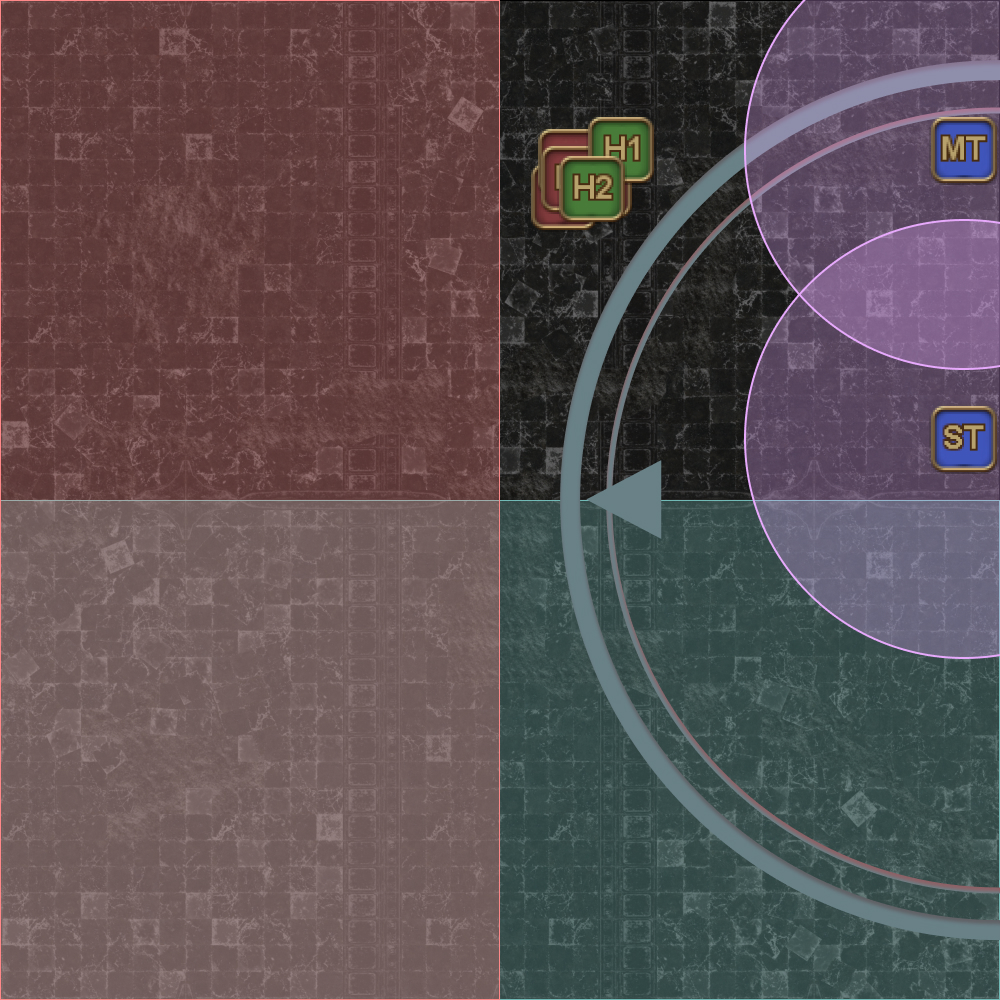 |
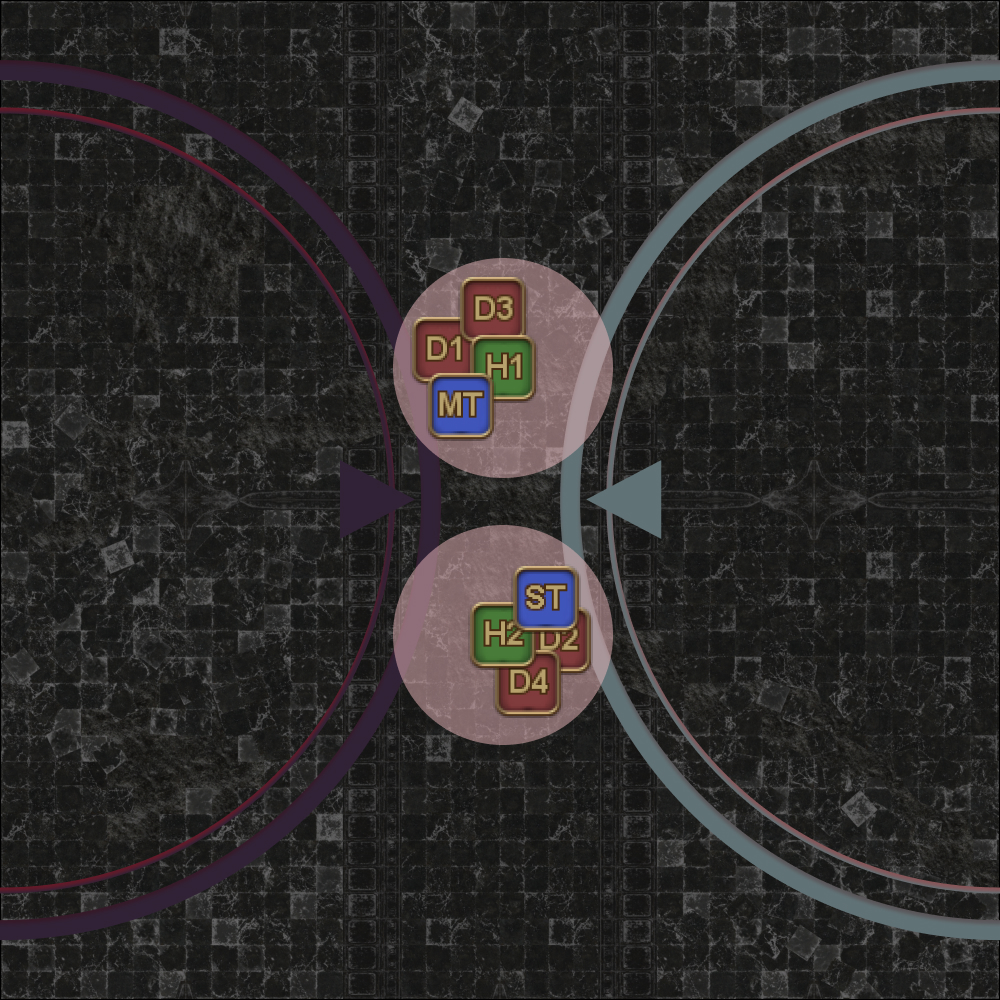
| 8. Mortal Vow pass #1 The DPS that Nidhogg targeted with Mortal Vow passes it to the MT in the middle of the arena. | 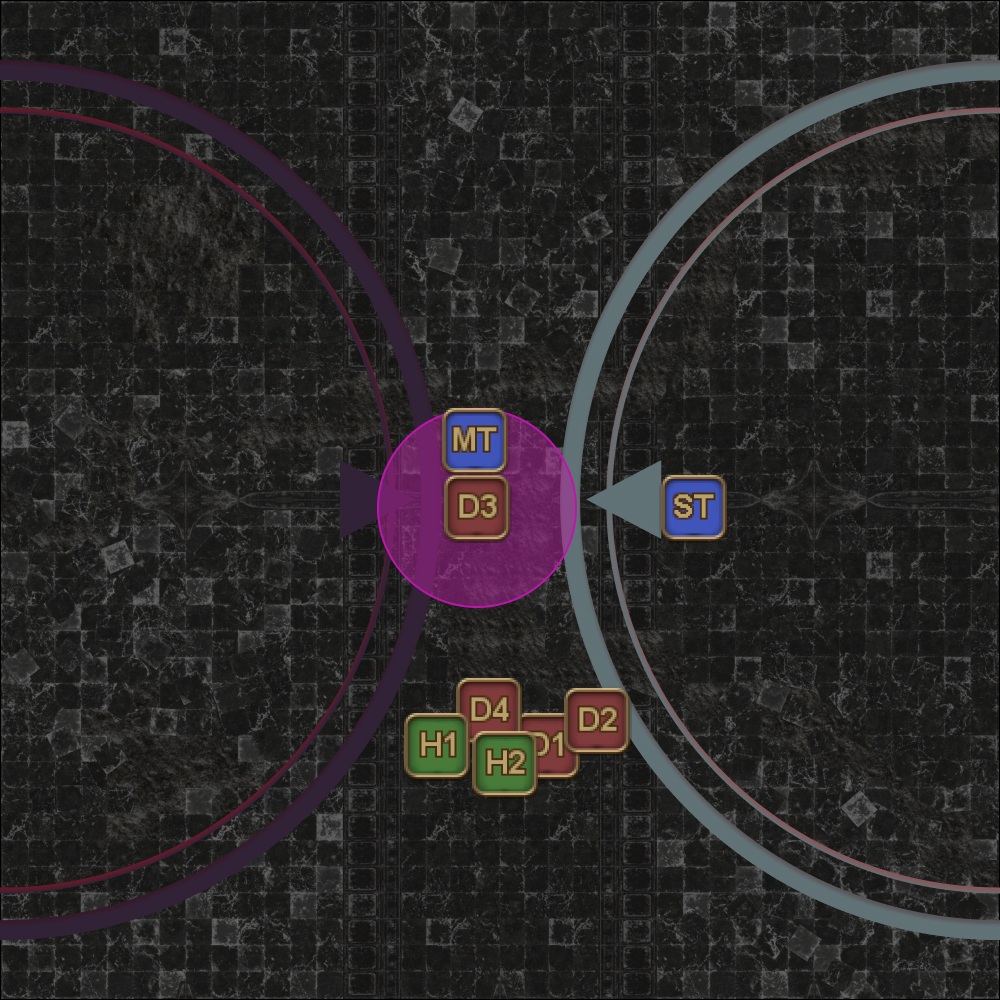 |
Here are some other potential configurations to consider:
[Hallowed Wings #1] NE quadrant safe, head up
| Heads up means tanks far, party near. The MT takes the northern-most position. | 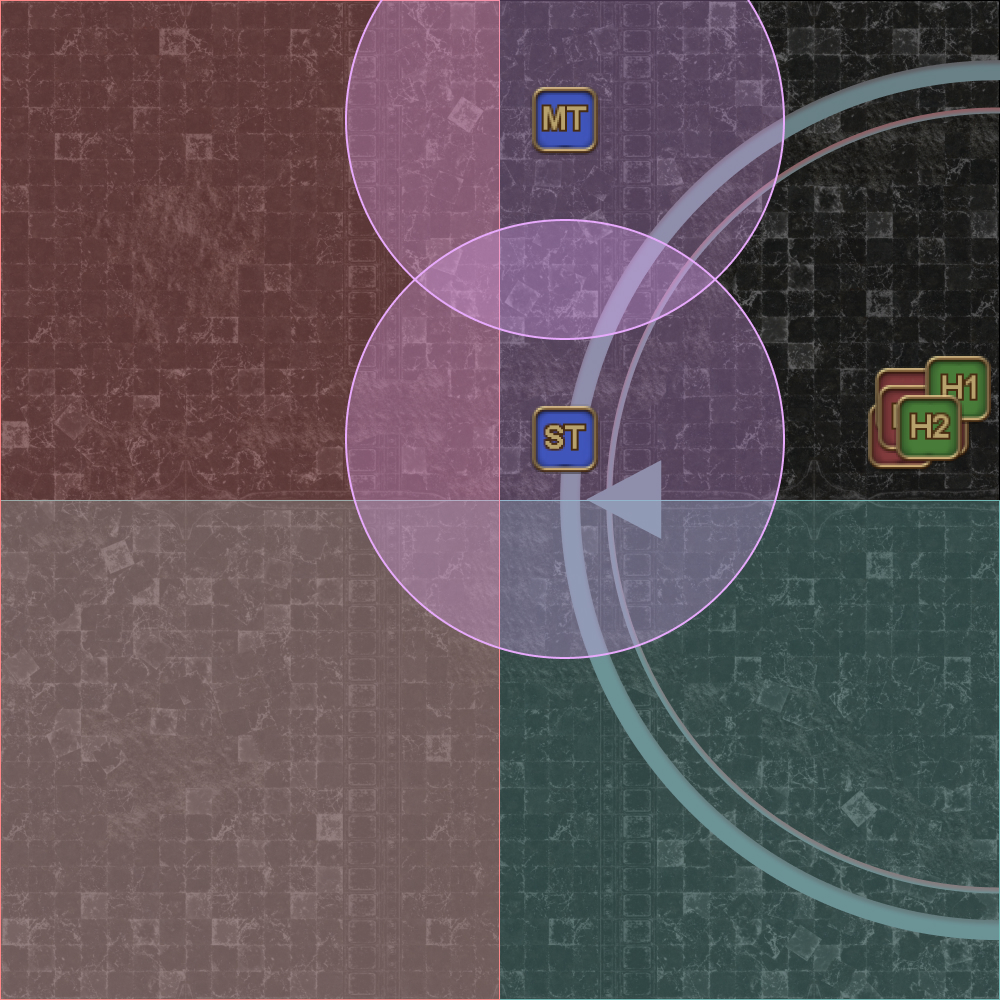 |
[Hallowed Wings #1] SW quadrant safe, head down
| Heads down means tanks near, party far. The MT takes the northern-most position. |  |
[Hallowed Wings #1] SW quadrant safe, head up
| Heads up means tanks far, party near. The MT takes the northern-most position. | 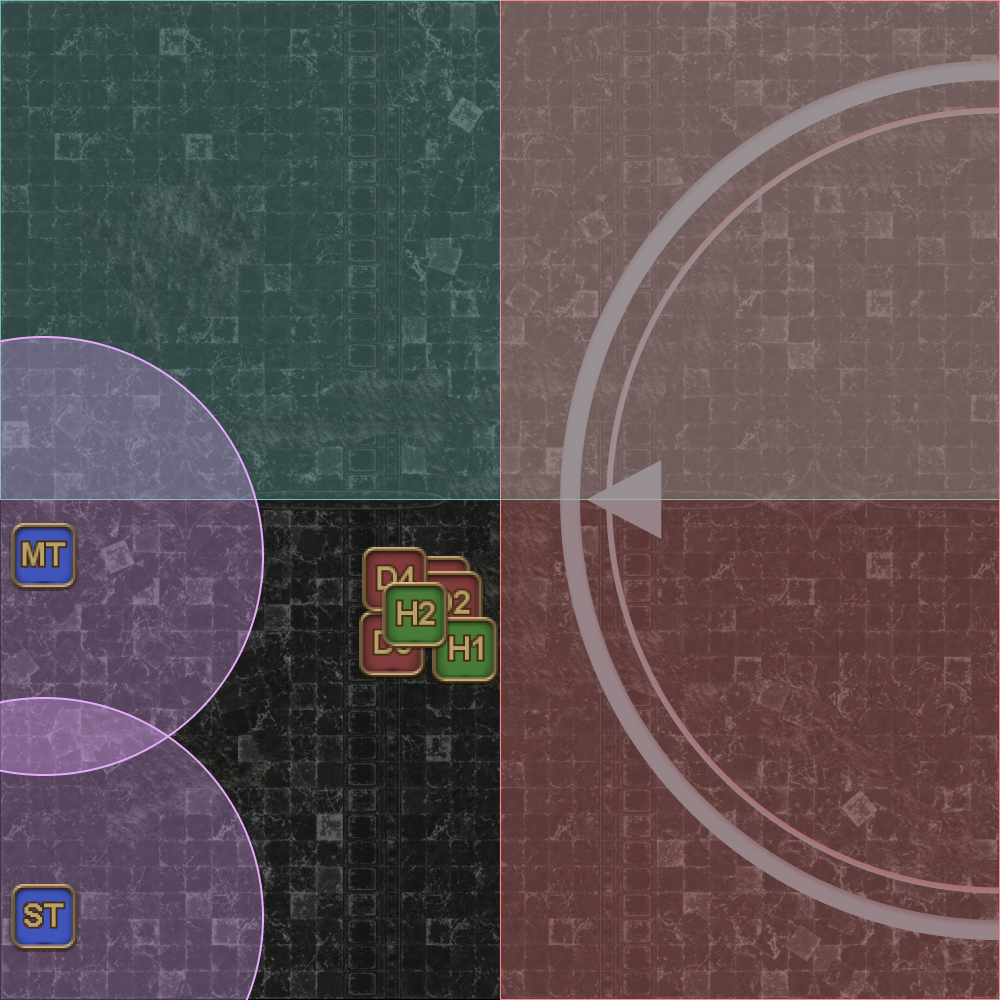 |
The party should continue to attack Hraesvelgr during this whole sequence, even after Nidhogg returns.
After the Mortal Vow pass, Nidhogg will cast Wroth Flames, and Hraesvelgr will leave the arena.
Wroth Flames
Wroth Flames is the half-way point of this phase, separating the first and second iteration of each of the looped mechanics.
The party will be affected by a variety of spread and stack debuffs that will resolve at the end of the mechanic.
[Click to Expand] Wroth Flames debuffs
 | Spreading Flames Powerless against Nidhogg's desire for vengeance. Four players will be targeted with this debuff.
|
 | Entangled Flames Powerless against Nidhogg's desire that another share his suffering. Two players will be targeted with this debuff (which leaves two players without any debuffs).
|
In addition:
- Hraesvelgr will spawn along on of three columns and Cauterize half the arena. (this gives a 2/3 chance that the party will have melee uptime on Nidhogg during this mechanic.)
- Nidhogg will cast Akh Morn, which is a party stack that hits four times. Each hit also leaves behind a puddle that will inflict a bleed on any player that stays inside for too long, killing that player.
- Three sets of Sable Price eyes will spawn one after the other. Each set will explode in order, dealing damage along their row and column. The center set will always spawn first, followed by two more sets on opposite corners.
- Finally, Nidhogg will cast either Hot Wing or Hot Tail, which resolves together with the debuffs.
When dropping Akh Morns, the most efficient movement (geometrically) is to move perpendicular from the wall in a straight line, and then curve in after the third Akh Morn.
1. Identify the starting location.
(In this example, Hraesvelgr's Cauterize will hit the east half.) | 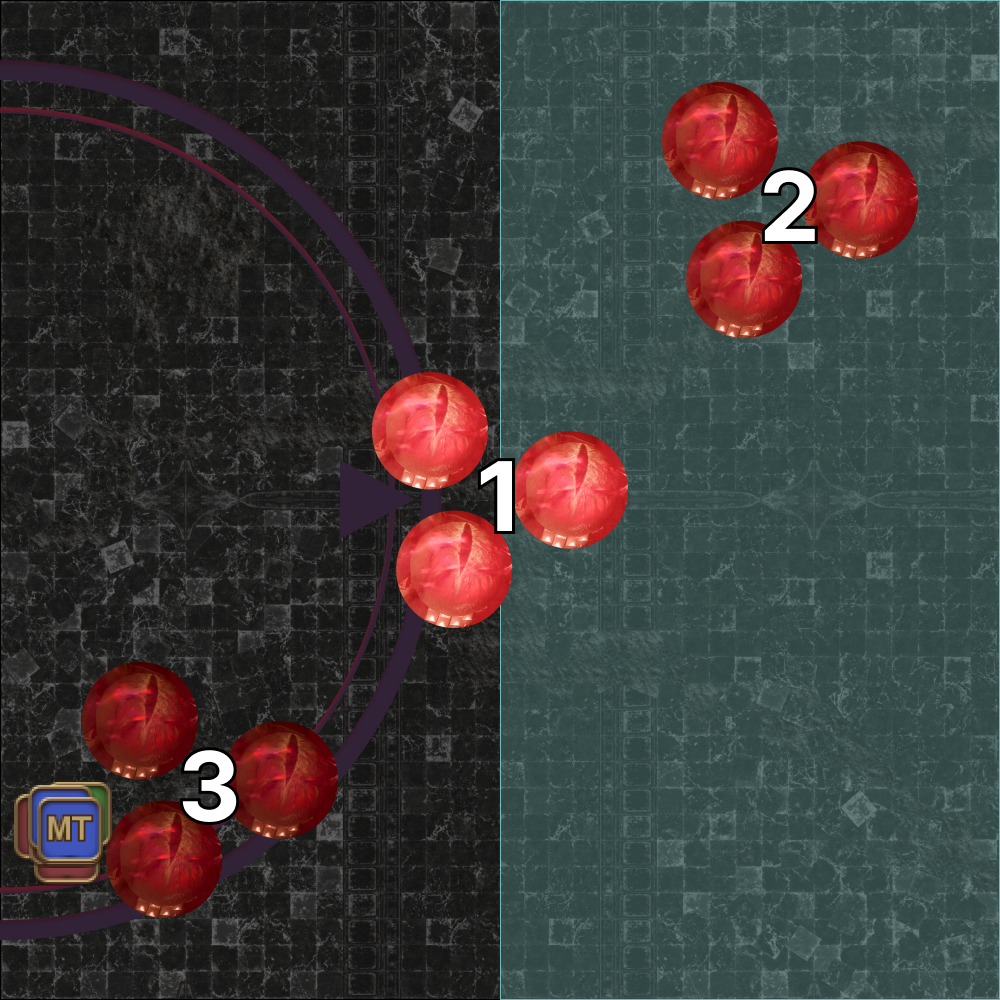 |
| 2. Hraesvelgr's Cauterize resolves. Drop first Akh Morn puddle. The initial Akh Morn movement will always go east-to-west or vice versa. | 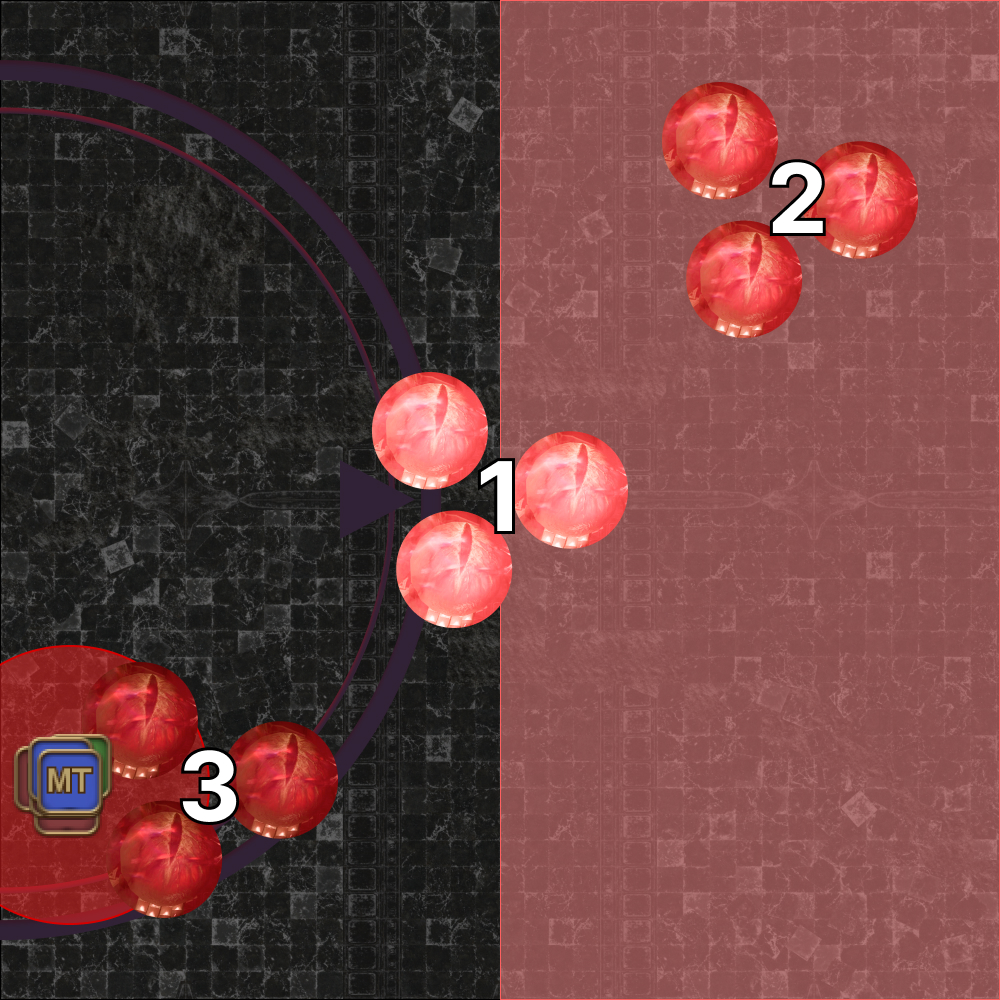 |
| 3. First set of eye AoEs resolve. Drop the second Akh Morn puddle without getting hit by the eye AoE. |  |
| 4. Drop third and fourth Akh Morn puddles. | 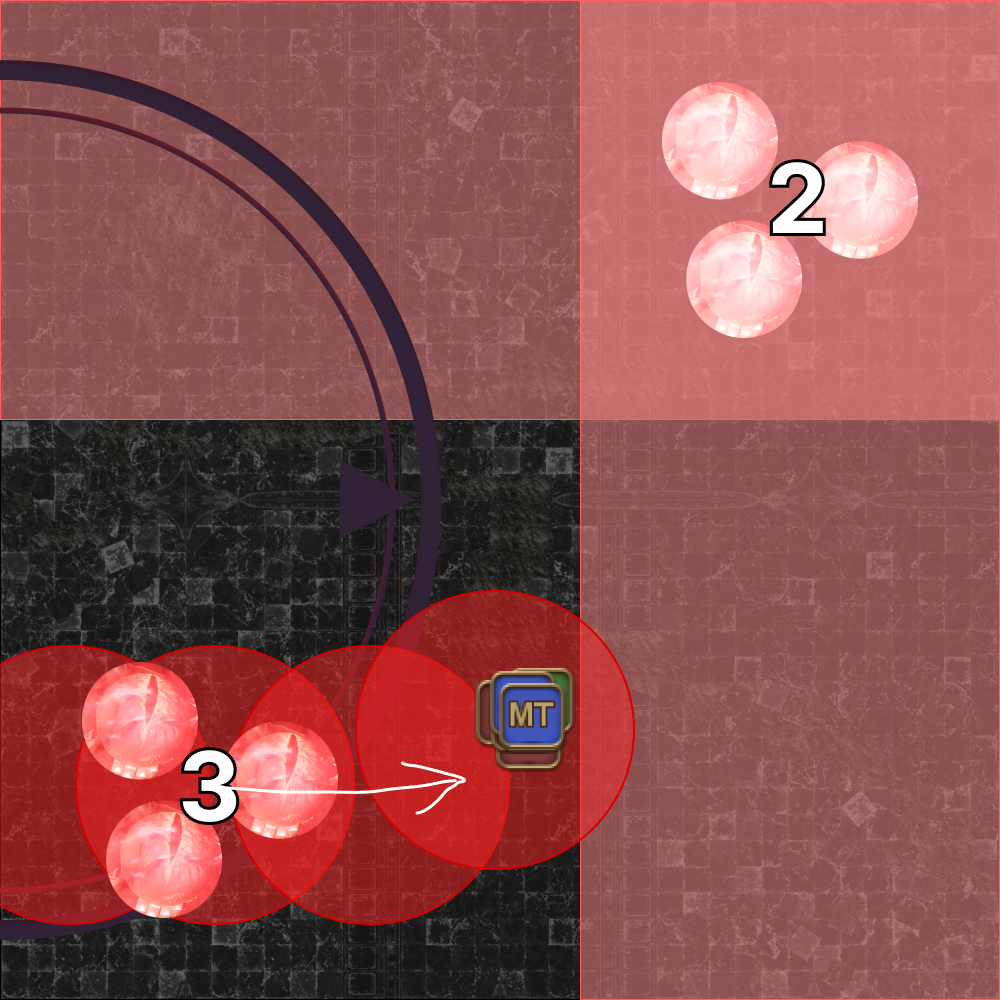 |
| 5. Move to the middle and identify whether Nidhogg is casting Hot Wing or Hot Tail. | 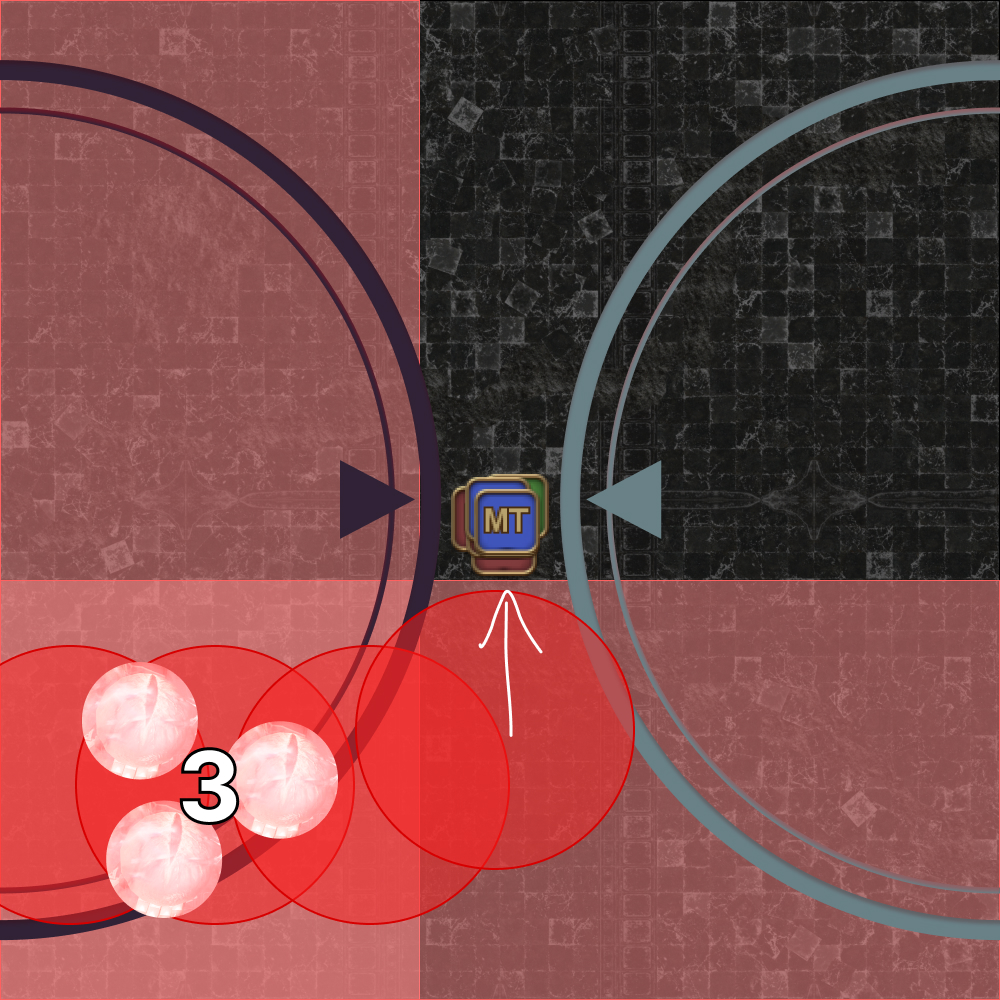 |
| 6. Spreads will go towards Nidhogg (west), stacks will go towards Hraesvelgr (east). A general priority order would resemble: (Center) MT ST H1 H2 D1 D2 D3 D4 (Edge) There is enough space for two "spreads" to stand side-by-side if they are on the sides of the safe zone. | 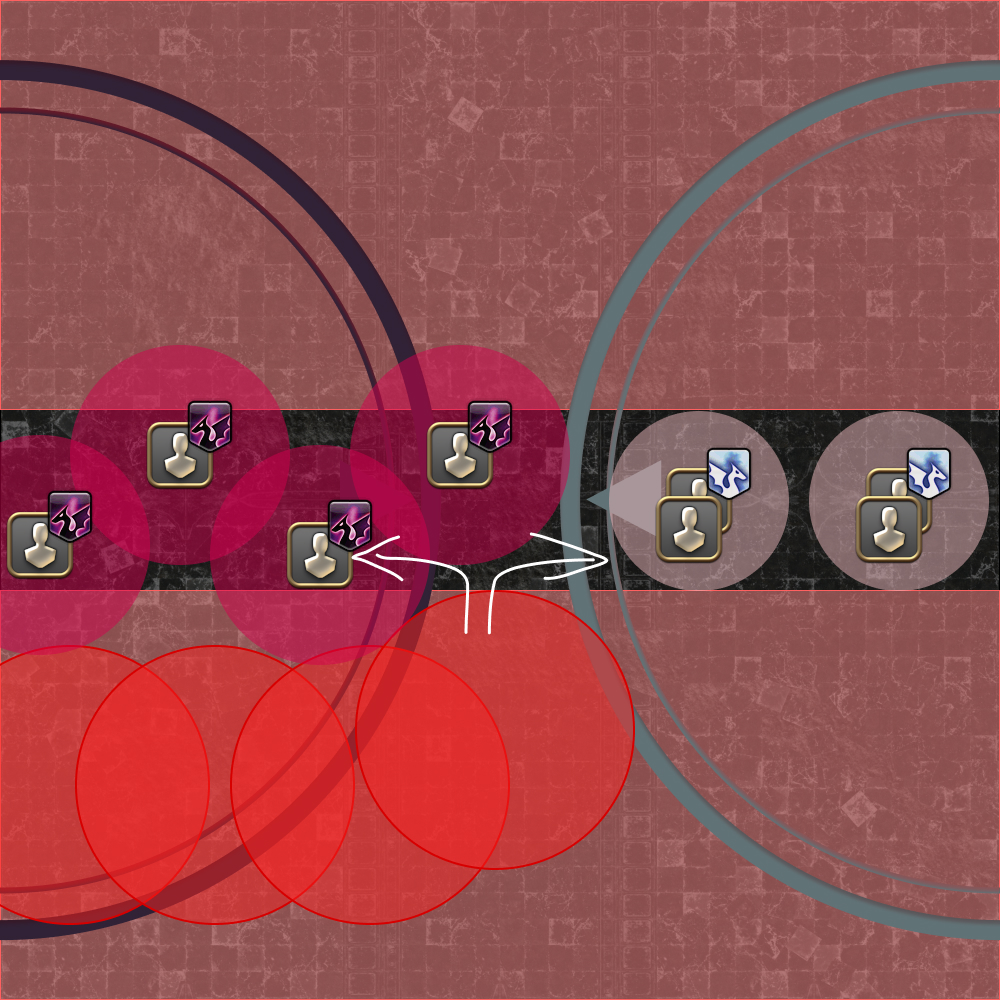 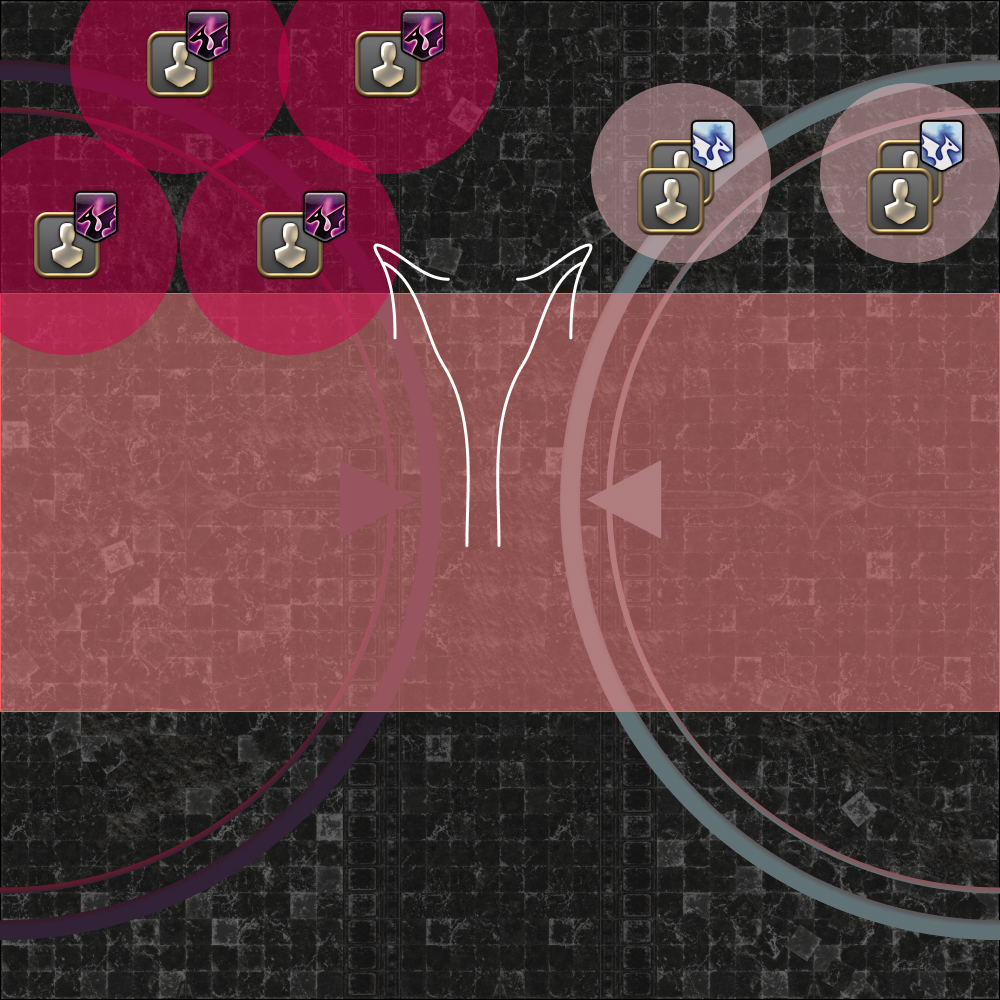 |
Wroth Flames markers
To help assign player positions for the final spread and stack, it is common practice to mark the players. However, there are two different marking schemes.
Automarked Wroth Flames
| By far the more popular approach is to just use third-party tools (i.e: use at your own risk) to automatically mark all players. With this configuration, the player with the same-type of markers will pair together (with the red "ignore" markers against the east wall). | 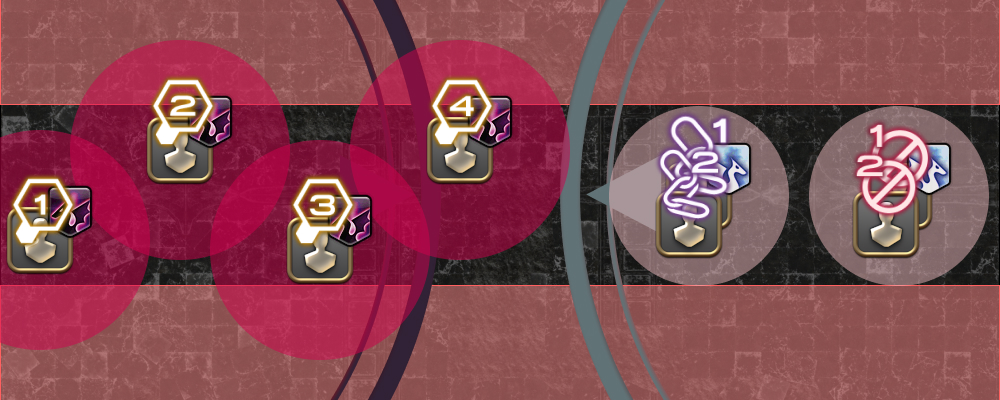 |
Manually marked Wroth Flames
| If you are not using automarkers, then there are two methods to mark players.
With this configuration, the same-numbered players will pair together, with the "2s" against the east wall. | 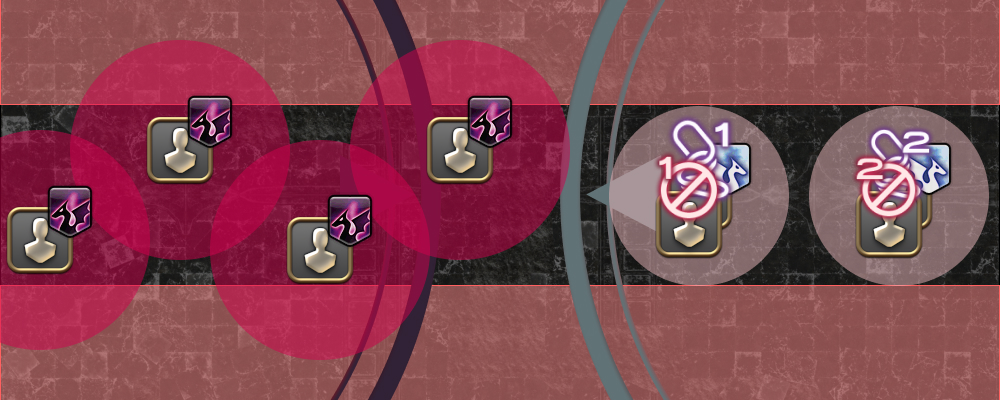 |
| 7. Finally, pass Mortal Vow from the MT to the ST. Note that this Mortal Vow pass is *fast*, hence why we want to try to keep the tanks near the center if possible. | 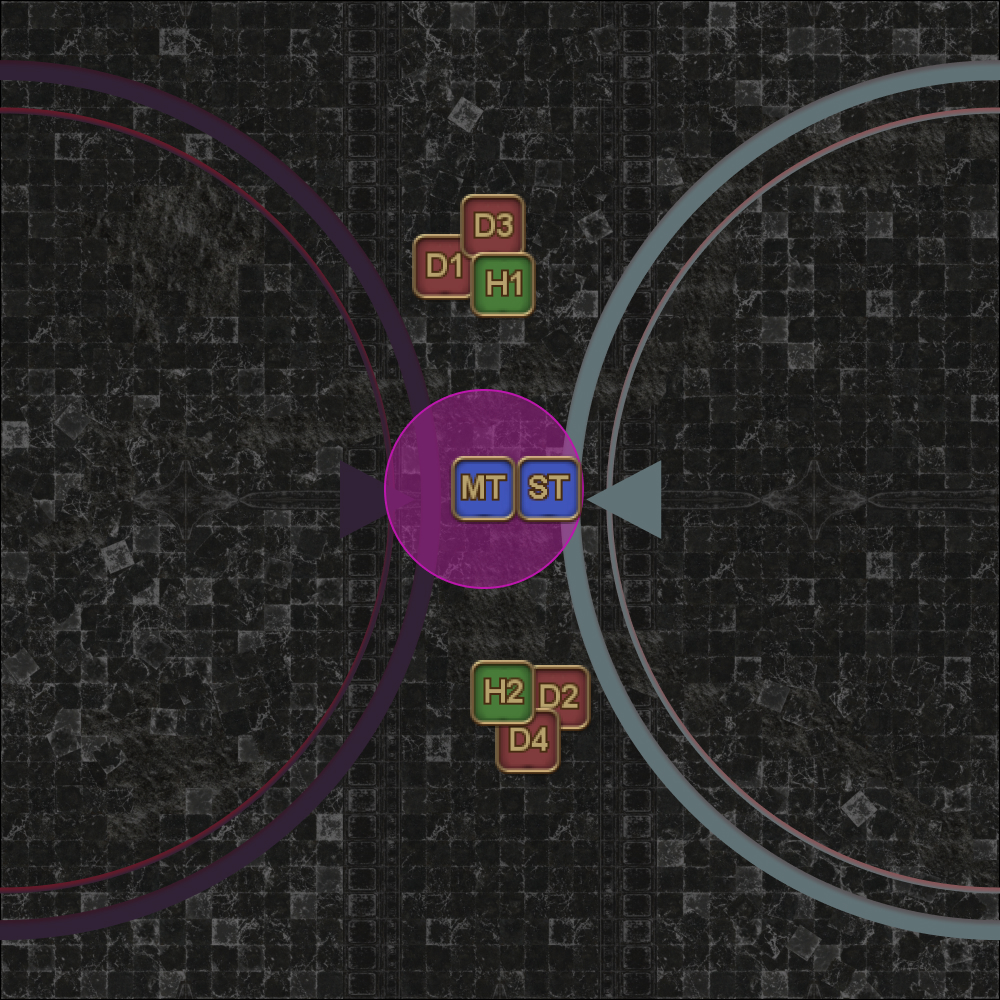 |
Here are some additional examples to consider:
[Wroth Flames] Hraesvelgr middle (uptime available), 2-to-1 dodge
| 1. Identify the starting location.
|  |
| 2. Hraesvelgr's Cauterize resolves. Drop first Akh Morn puddle. | 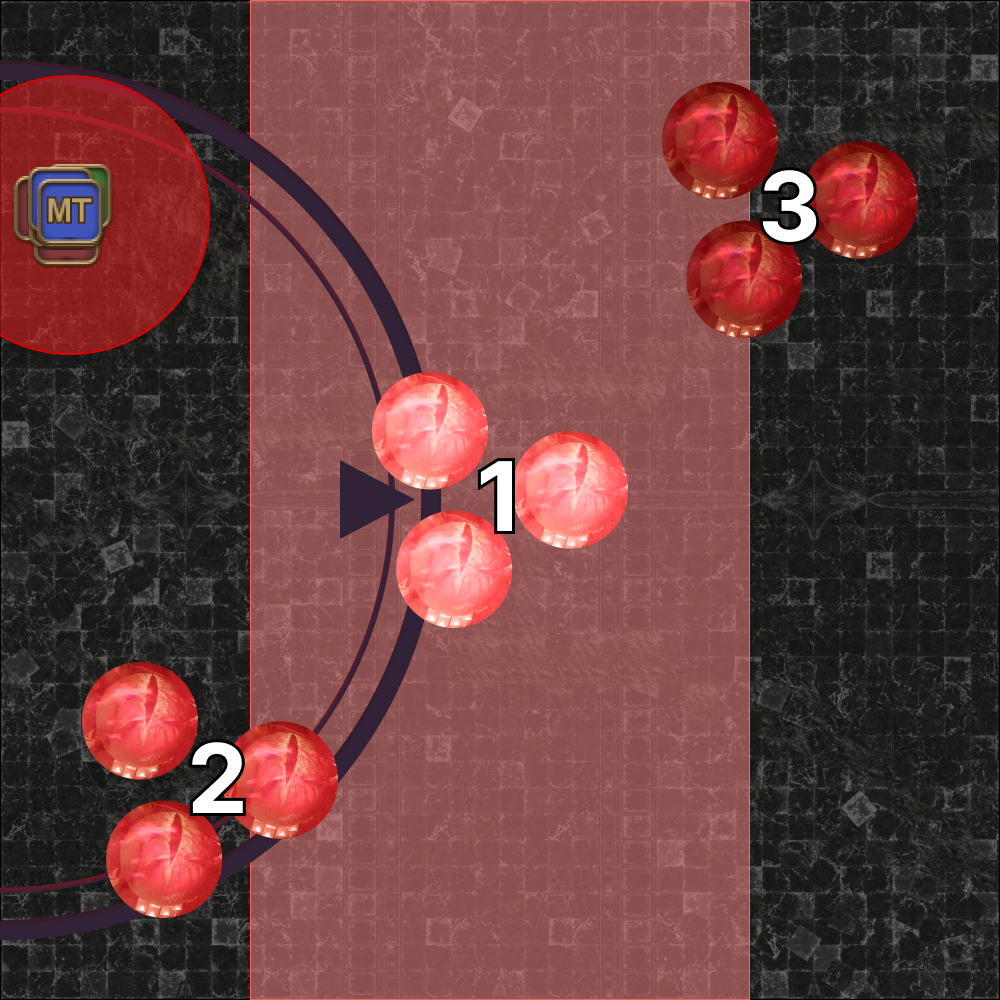 |
| 3. First set of eye AoEs resolve. Drop the second Akh Morn puddle without getting hit. | 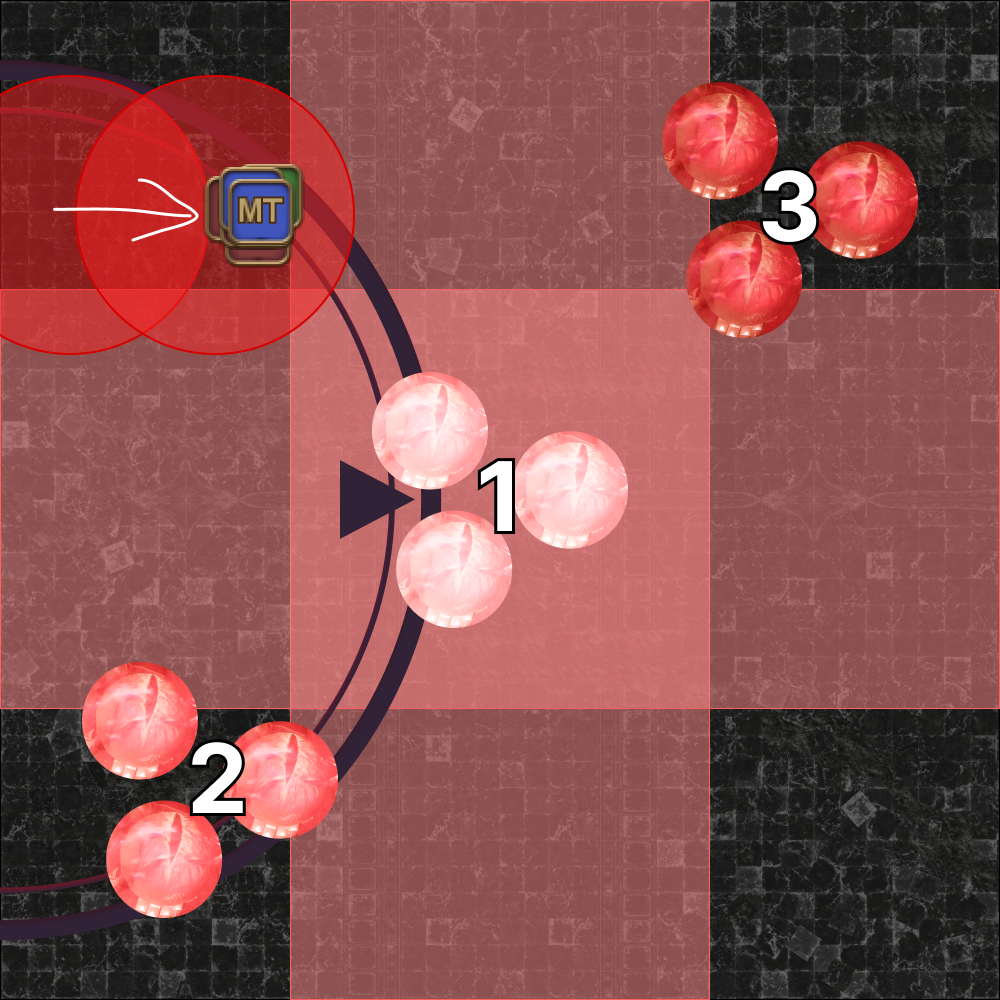 |
| 4. Drop third and fourth Akh Morn puddles. | 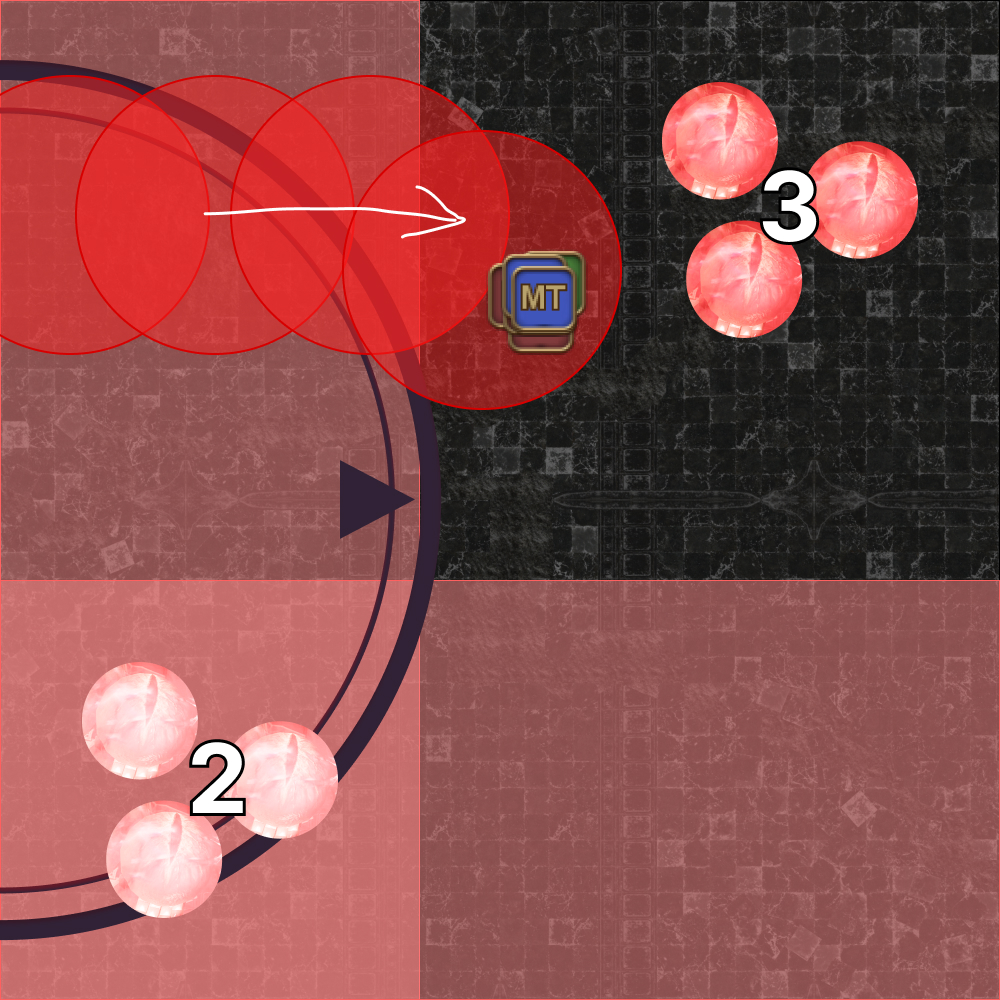 |
| 5. Move to the middle, identify whether Nidhogg is casting Hot Wing or Hot Tail. |  |
[Wroth Flames] Hraesvelgr west (forced downtime), 2-to-1 dodge
| 1. Identify the starting location.
|  |
| 2. Hraesvelgr's Cauterize resolves. Drop first Akh Morn puddle. | 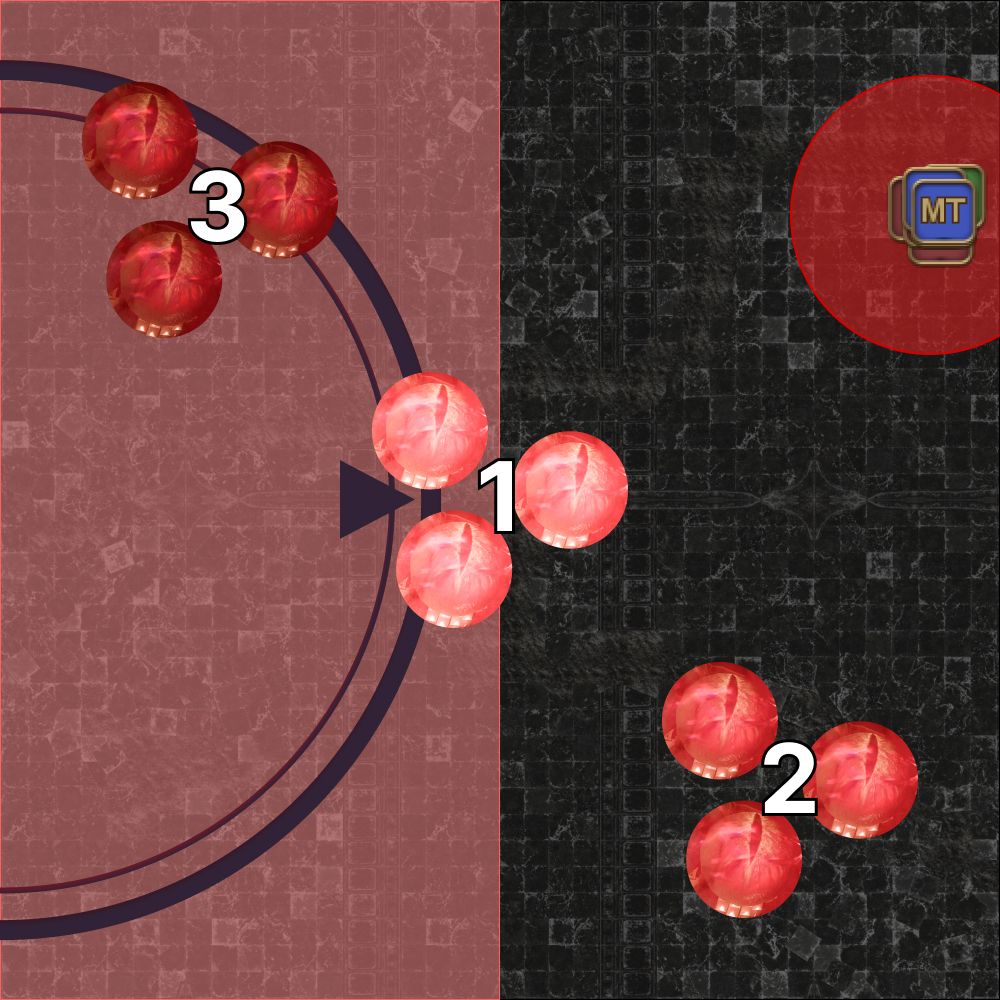 |
| 3. First set of eye AoEs resolve. Drop the second Akh Morn puddle without getting hit. | 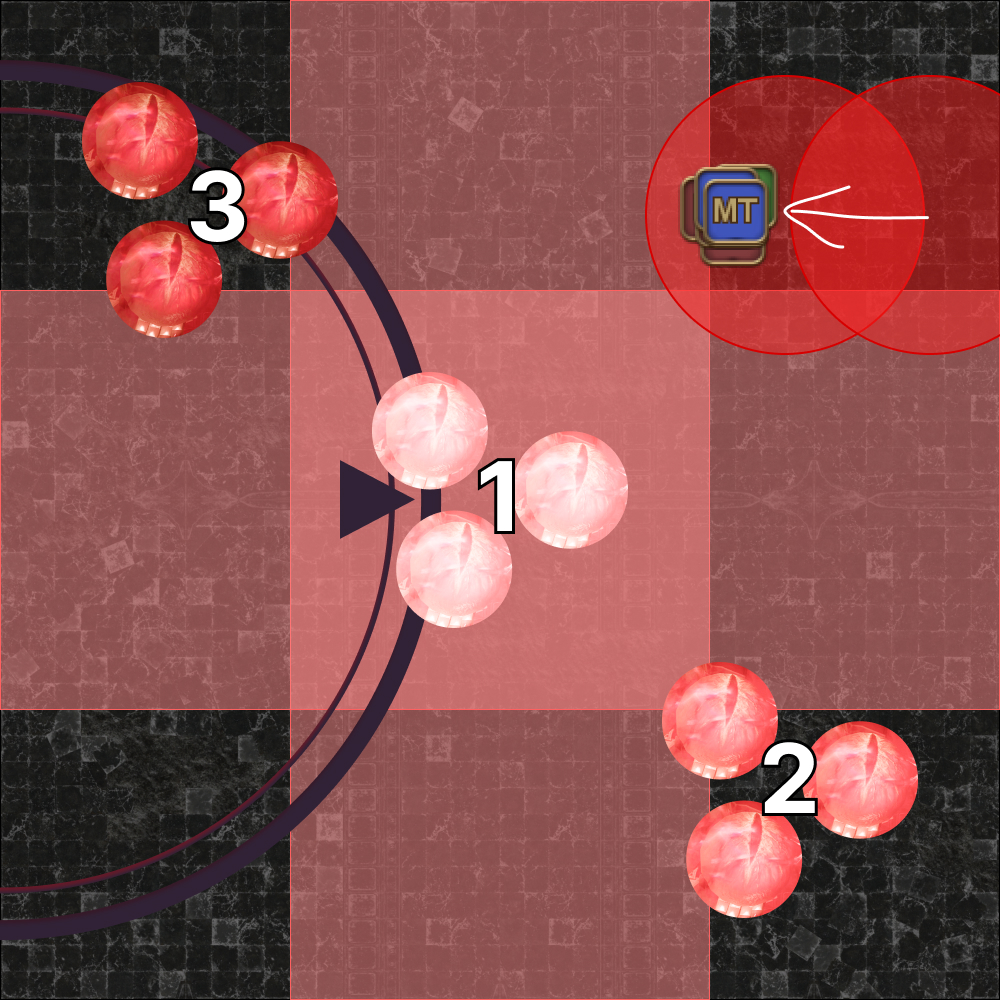 |
| 4. Drop third and fourth Akh Morn puddles. | 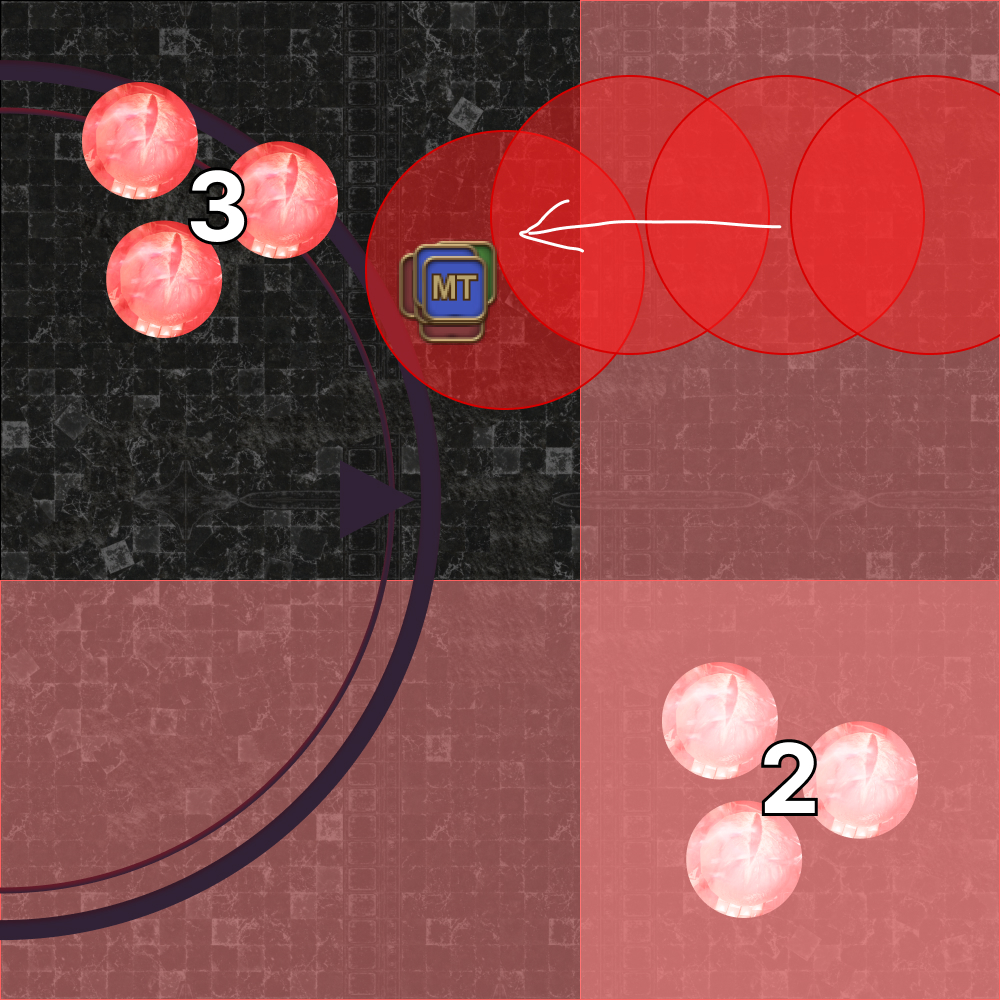 |
| 5. Move to the middle, identify whether Nidhogg is casting Hot Wing or Hot Tail. | 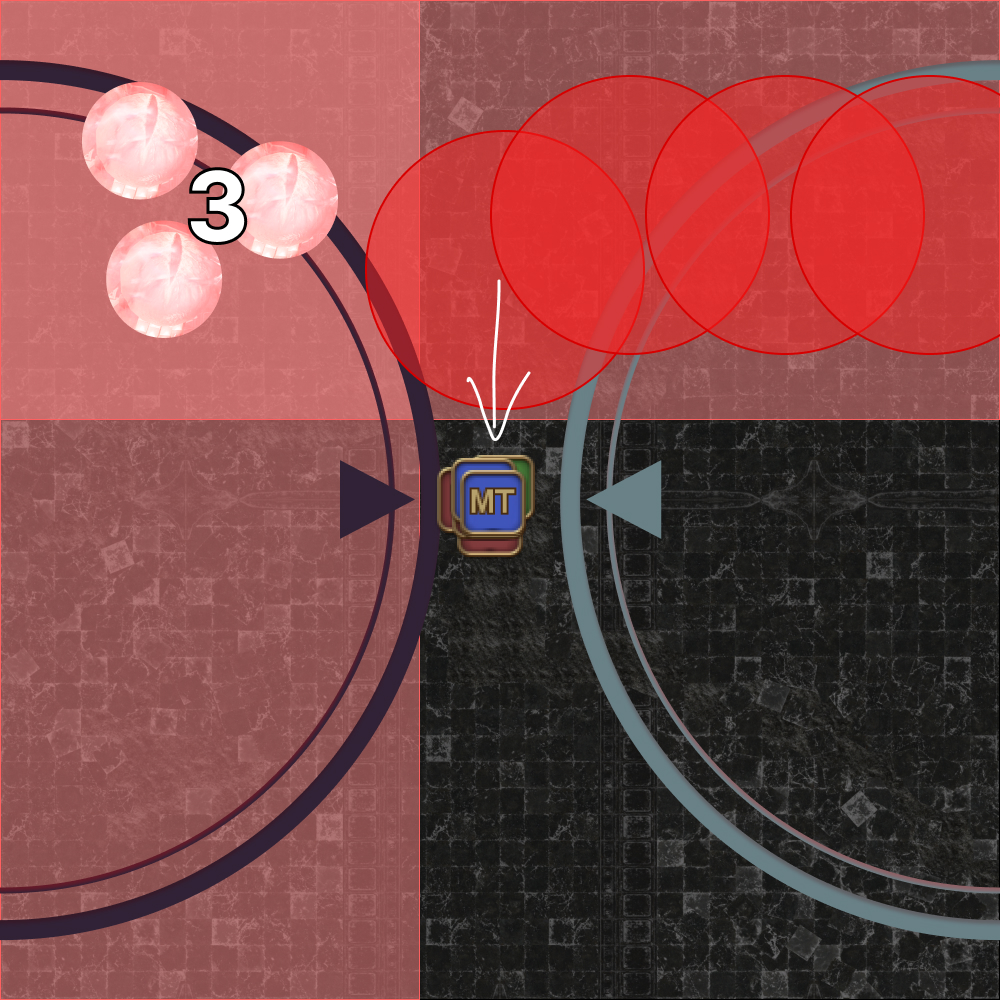 |
Second half
The second half is a rehash of the first, with slightly different twists on the same mechanics from earlier.
Akh Afah #2
| 1. This works exactly the same as the first- both dragon's HP must be brought to within 3% of one another for their stack to survive. However, the catch is that depending on whether the party had uptime/downtime earlier on Hraesvelgr or Nidhogg during the previous mechanics, one of the two dragons' HP may be skewed to one side. | |
Hallowed Wings #2
| 2. This time, Hallowed Wings will happen in combination with Hot Wing or Hot Tail from Nidhogg.
(This example has Hot Wing with Hraesvelgr's head up.) | 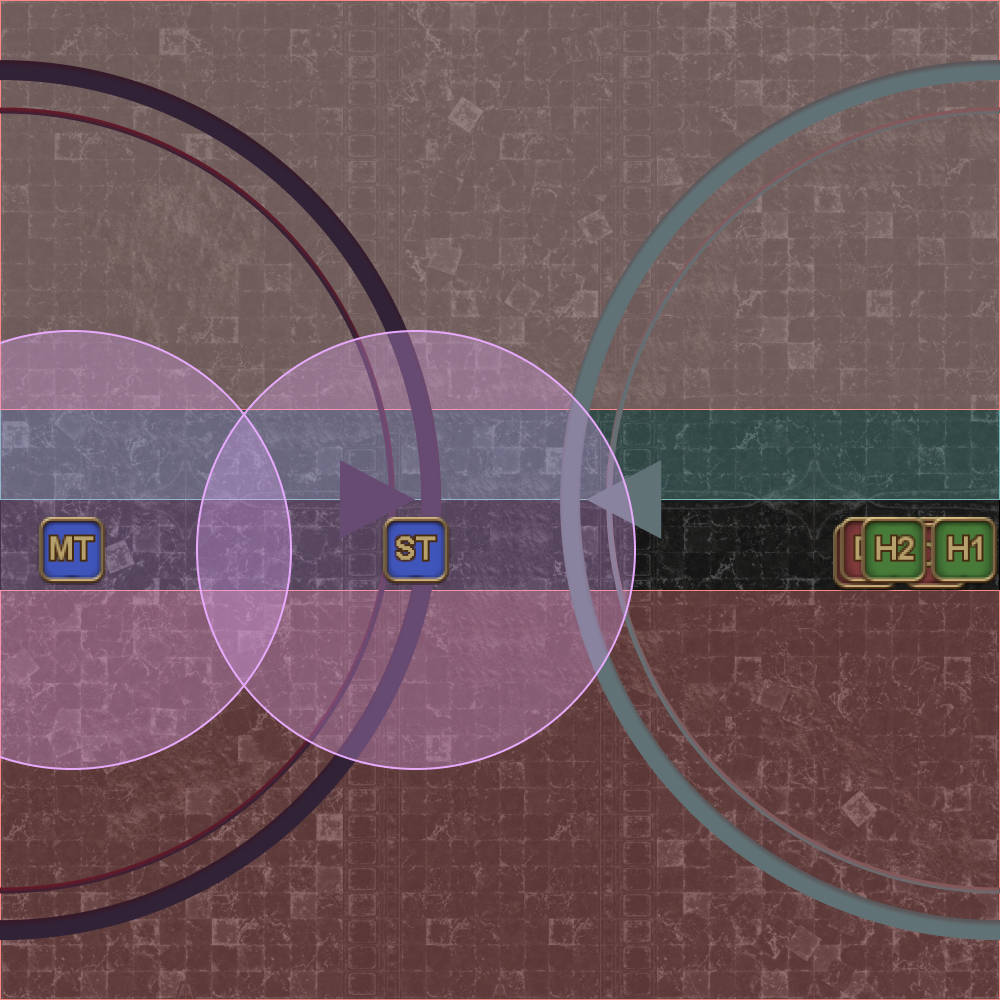 |
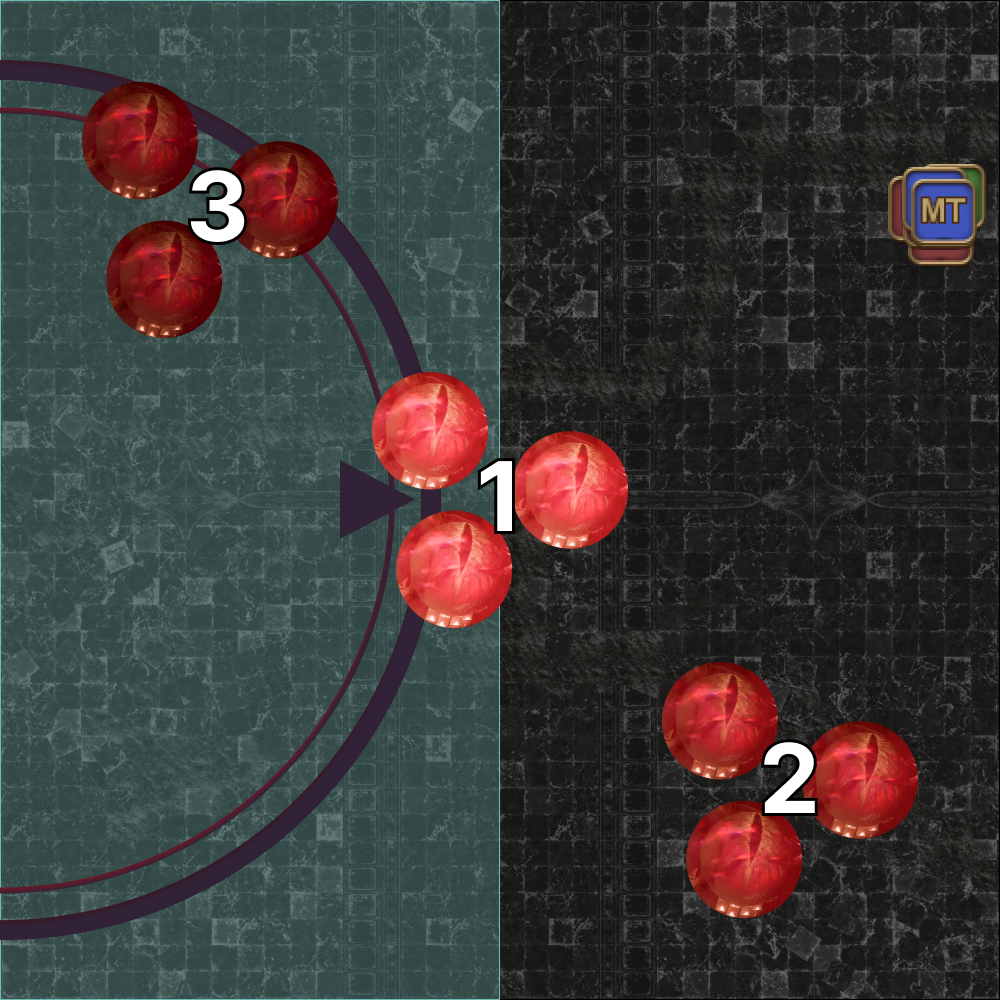
| 3. Mortal Vow pass #3 This pass goes from the ST to D1, unless D1 started with the first Mortal Vow, in which case ST passes to D2 instead. | 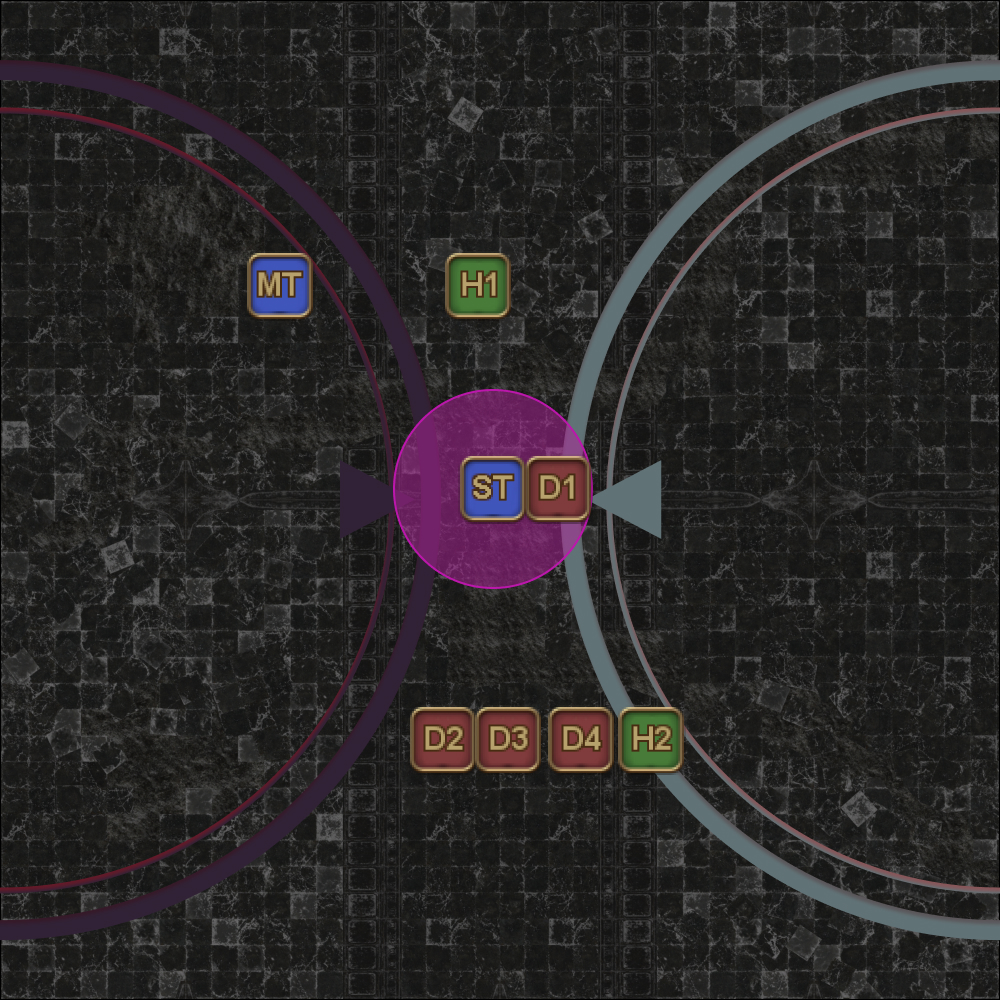 |
Here are some other potential configurations to consider:
[Hallowed Wings #2] Hot Wing, head up
| Hot Wing means all party members must stay near the E/W line. Heads up means the tanks are away from Hraesvelgr, and the rest of the party is towards Hraesvelgr. The MT takes the western-most position. | |
[Hallowed Wings #2] Hot Tail, head down
| Hot Tail means all party members must go to north or south without getting hit by Hallowed Wings' AoE. Heads down means the tanks are towards Hraesvelgr, and the rest of the party is away from Hraesvelgr. The ST takes the eastern-most position. | 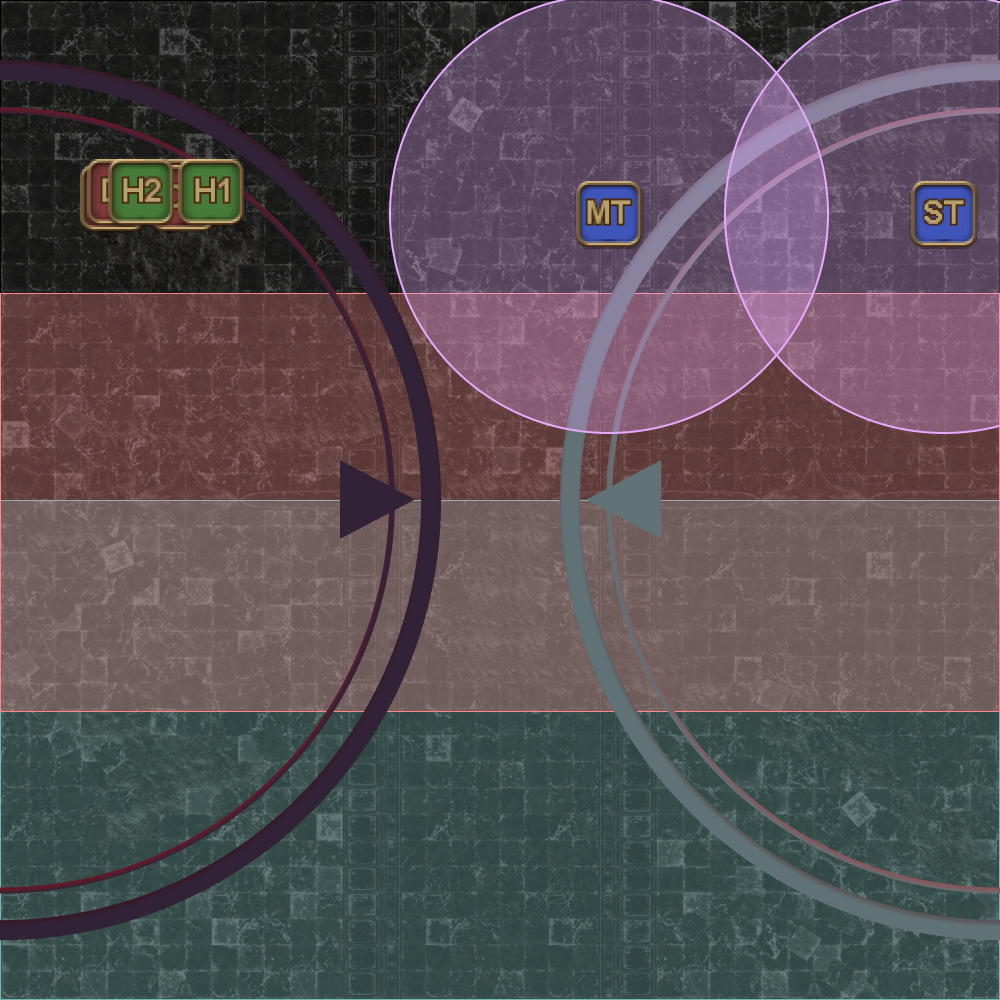 |
Wyrmsbreath 2 (5-1)
This iteration of Wyrmsbreath is different because we do not want to stack opposite tethers.
One player goes south (D3) to give additional space for the other five non-tanks to spread out along the North edge. Note that all melees can still maintain uptime on a dragon during the mechanic.
In the first example, Hraesvelgr's mouth is glowing, while Nidhogg's is not, so the MT has a single-target tankbuster. In the second example, both mouths are glowing, so the tanks stack together for a shared tankbuster. | 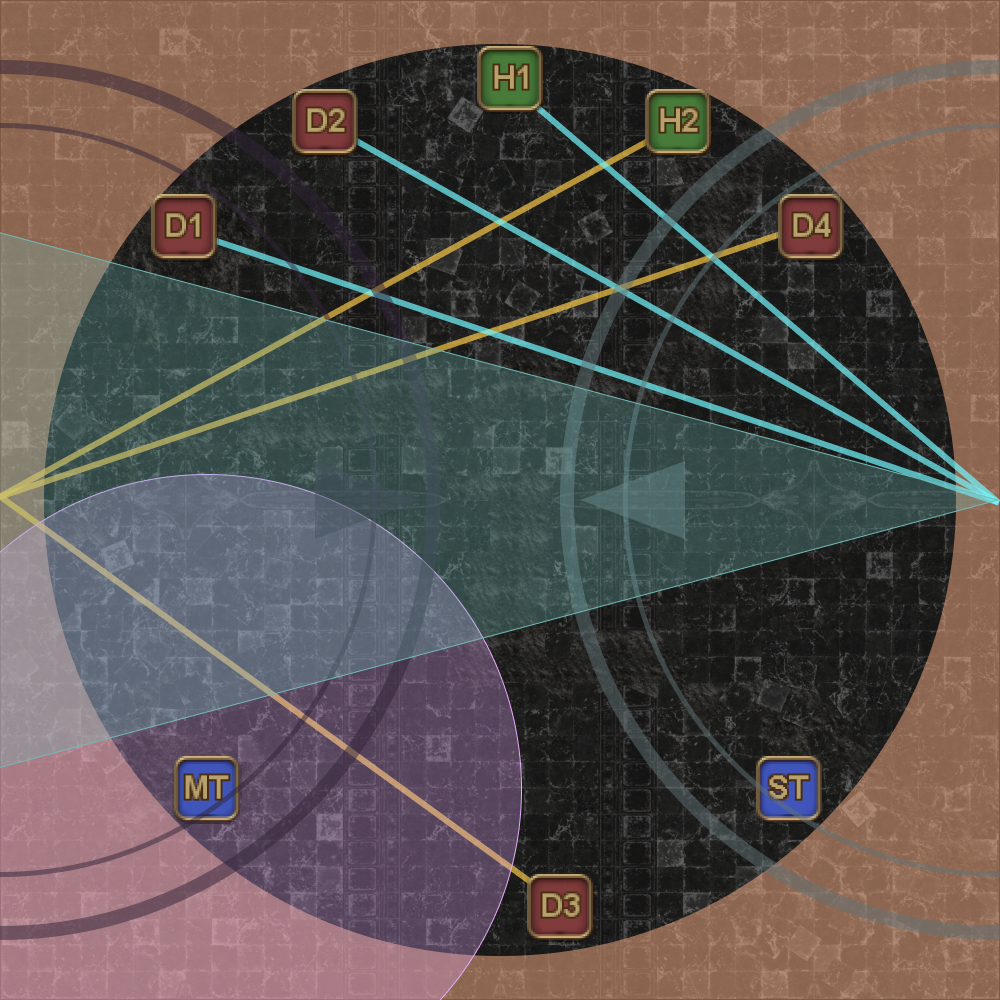 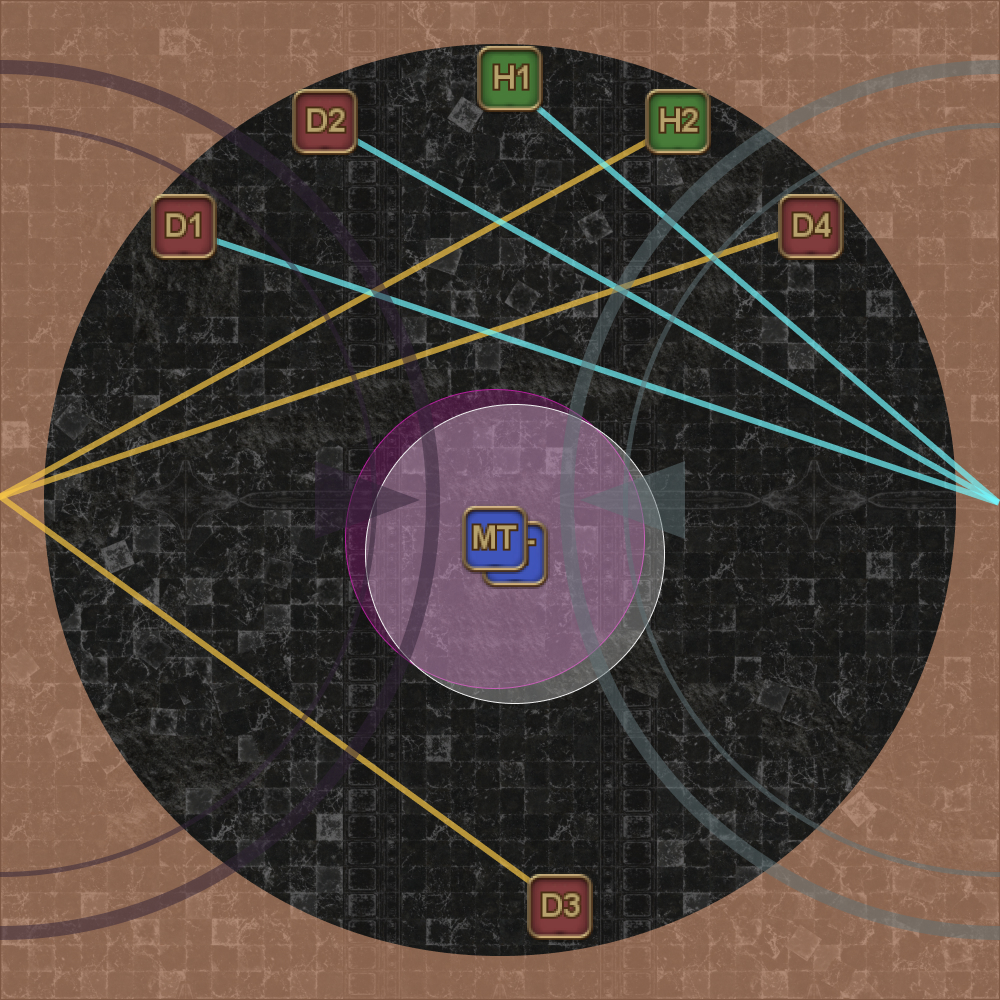 |
The left-most and right-most players at the North can use the inner markers as a guide. As long as their tethers do not cross the center of the markers, they will be safe from the cone AoEs.
Cauterize
The reason why we did not stack opposite tethers in Wyrmsbreath #2 was because we needed the fire/ice debuffs in order to survive this mechanic.
| 1. Nidhogg and Hraesvelgr will spawn along the north edge in a random configuration, and dive down each half. The first player hit by each dive takes additional damage, and are taken by the tanks with their invulns.
Do not move as Nidhogg's debuff will turn into Pyretic. The resulting damage will result in Hraesvelgr's Cauterize killing you and cause Hraesvelgr to enrage. Note: If you have a DRK and are using Living Dead here, neither dragon will be targetable for the DRK to recover HP for Walking Dead. | 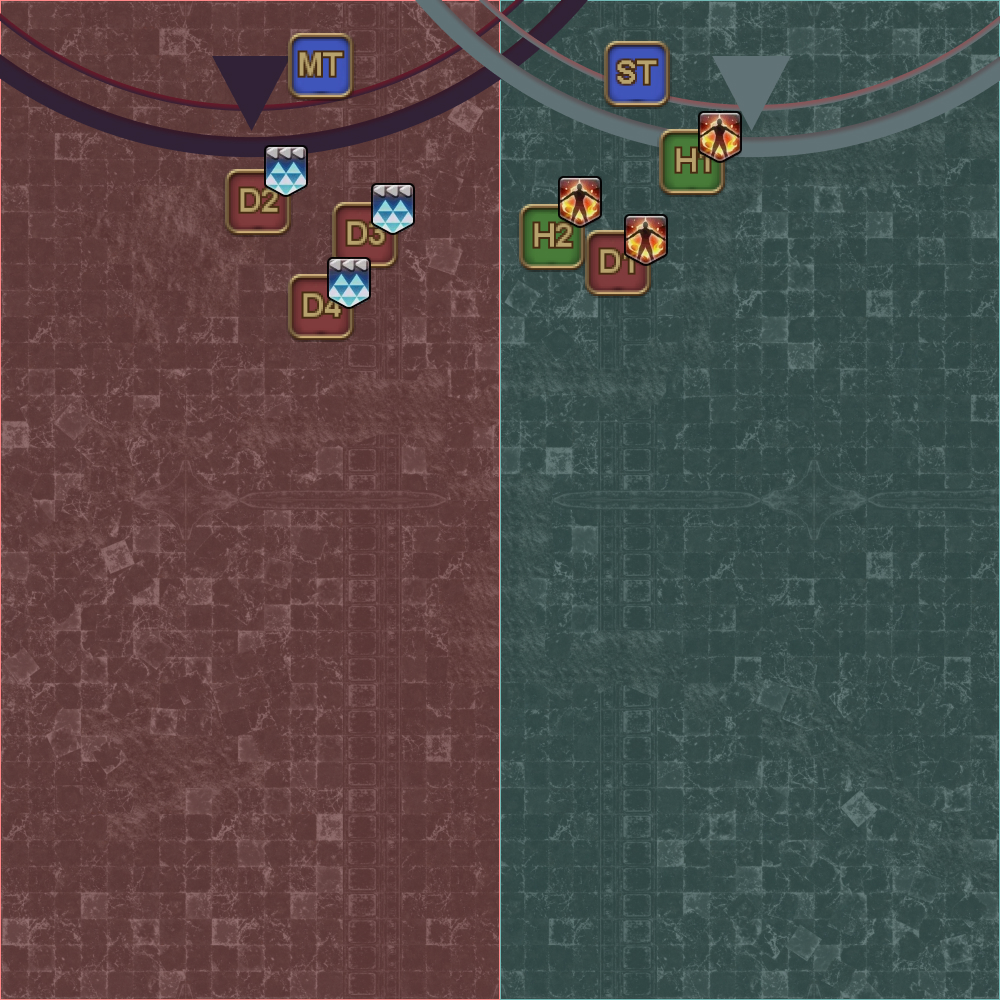 |
| 2. Mortal Vow pass #4 After Cauterize, everybody gathers north to avoid Nidhogg's and Hraesvelgr's Touchdown damage. After Touchdown, all players move away from the stack point except the DPS with Mortal Vow and D3. | 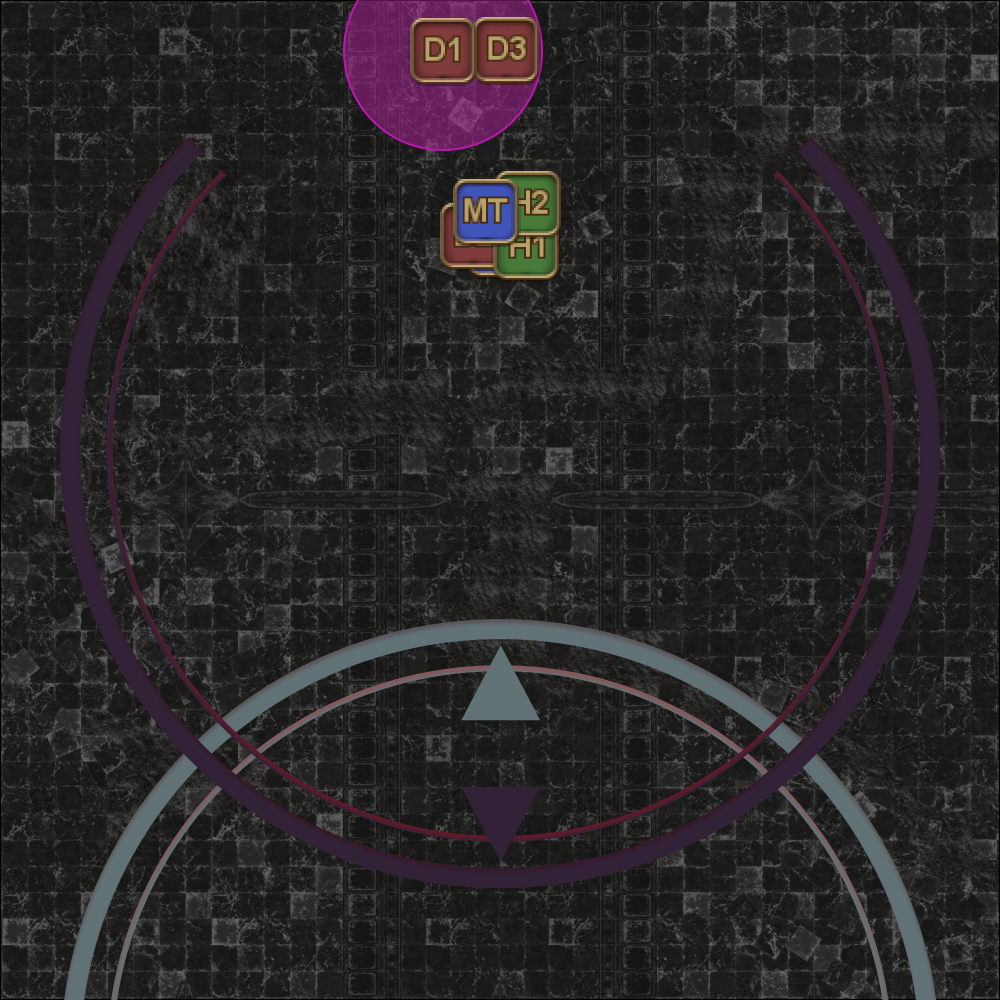 |
After both dragons Touchdown, they will each start casting their enrage, Revenge of the Horde.
Alternative End
After the two dragons are defeated, the two dragon eyes will be left behind. Just like before, they will do raid-wide damage with a bleed (Resentment).
This time around, if Thordan was spared in the previous phase, he will jump down and do another raid-wide with a bleed on the party (Shockwave) before taking the eyes for his own, starting his transformation to Dragonking Thordan.
When the bleed from Shockwave disappears, heavily shield and mitigate in order to survive Alternative End, the final raid-wide damage that marks the transition to the final phase (Dragonking Thordan will not be targetable during this).
You will need about six pieces of party mitigation to survive Alternative End.
| Alterative End | MT 90s, ST 90s, H2 30s, H2 90s, D3 (Add H2 120s, other party mitigations as needed.) |
Note: Each Bleed tick deals about ~14k damage. Make sure you do not apply shields until after the Bleed has worn off completely!
Tip: Thordan will announce "Hahahaha! By the power of mine enemy's eyes..." just before the second round of bleeds are applied.
A DNC should start Improvisation when the dialogue box disappears to get the maximum value out of Improvisation's shields.
Frequently Asked Questions
[Hallowed Wings 1] Why should the party continue to attack Hraesvelgr after the first Hallowed Wings, even after Nidhogg returns?
| This is done to prepare for the second Akh Afah HP check that happens after Wroth Flames. Part of what makes the second Akh Afah dynamic is that depending on whether the party (randomly) got uptime on Nidhogg or Hraesvelgr, the HP may be skewed in one direction. That being said, it is more likely that Hraesvelgr will have more HP than Nidhogg after Wroth Flames because:
|
[Wroth Flames] Is there a pattern to how the debuffs are assigned?
| Unfortunately not- the debuff distribution is random. Here's an example where two of the no-debuff players are both DPS. |  |
[Wroth Flames] Why are there two marking schemes?
| The short answer is "that's just the automarker configuration that got passed around early." One that argue that if you mark all eight players, the visual clutter makes it hard(er) for each player to discern their number over their colour, hence the "same marker-type" stack configuration. I am personally not a fan because it is harder to replicate manually (effectively mandating automarkers). The problem with manually marking each pair using the same marker type is that this task cannot be split between two players, because there's now a possibility that the two players pick the same person twice. For example, in the configuration on the right, one person can pick the WAR + SMN as a pair, then the other pick RDM + SMN, doubling up on the SMN and leaving the SAM unmarked (it also doesn't help that Mortal Atonement looks like a purple spread debuff). | |
[Wyrmsbreath 2] What is the fixed Wyrmsbreath 2 strat?
| As the name implies, this is a strat that fixes all player positions (except for the tanks, who may have to stack in the middle). The fixed Wyrmsbreath 2 strat is popular in other regions, but has fallen out of favour in Elemental.
Tanks should use where the outer AoE intersects the boss's targeting circle as a reference point.
Be careful if a tank gets a single-target tankbuster, as you may be in range if poorly positioned.
Depending on which dragon you are tethered to, your tether may not stretch fully. Use personal mitigations to help survive. This method fixes all player positions (except for the tanks), which simplifies positioning. However, player positioning is precise, and when things go wrong, it's often difficult to diagnose what went wrong. | 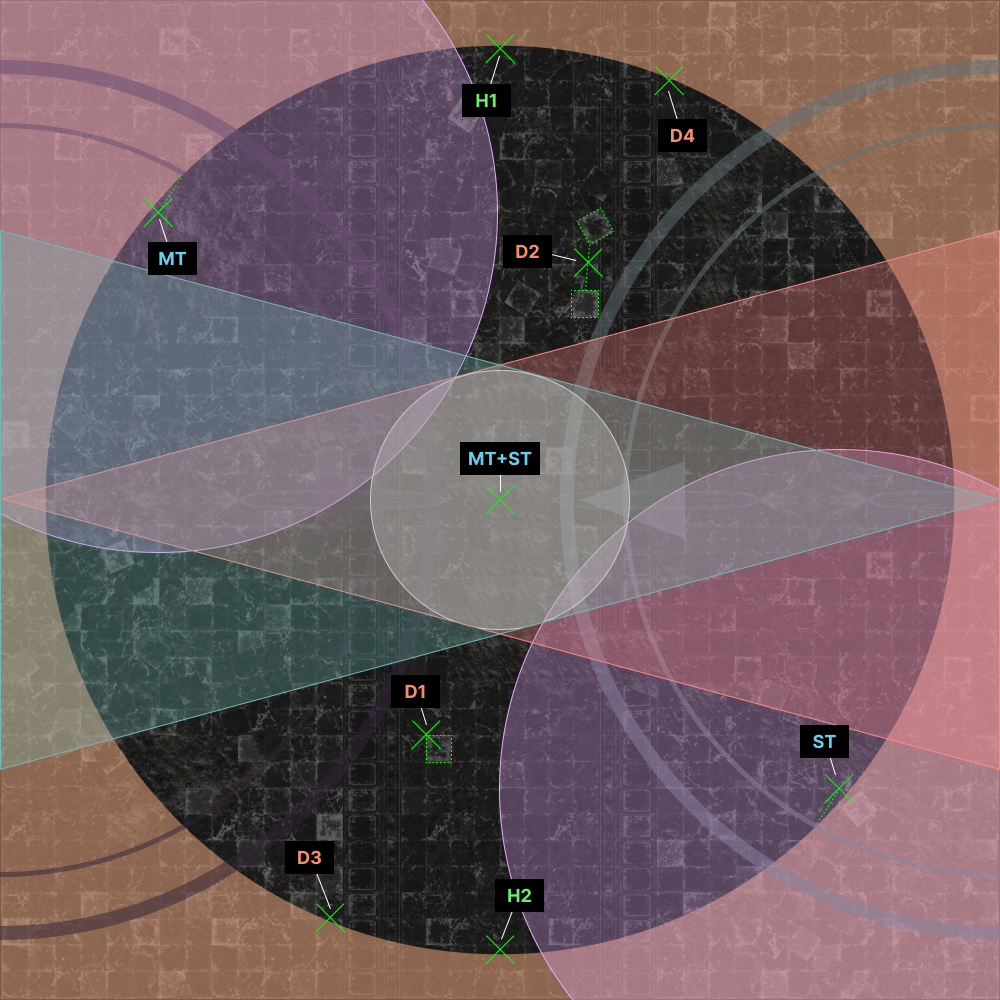 (Full-sized image) (Full-sized image) |
[Pyretic] Do channeled abilities/emotes trigger Pyretic?
| No. Channeled abilities like Improvisation, Meditate, Collective Unconsciousness, Flamethrower, Anatman, or emotes do not count as movement, and will not trigger Pyretic provided they're already in the middle of being channeled. However, starting to channel an ability counts. (You really shouldn't channel during Cauterize anyway, as the buildup to Alternative End is a better place to do so.) |
[Cauterize] Just how large are the Cauterize AoEs? Do they extend past half the arena?
| Each Cauterize is exactly half the arena, even though the visual effects make it look like the AoE is slightly larger. | 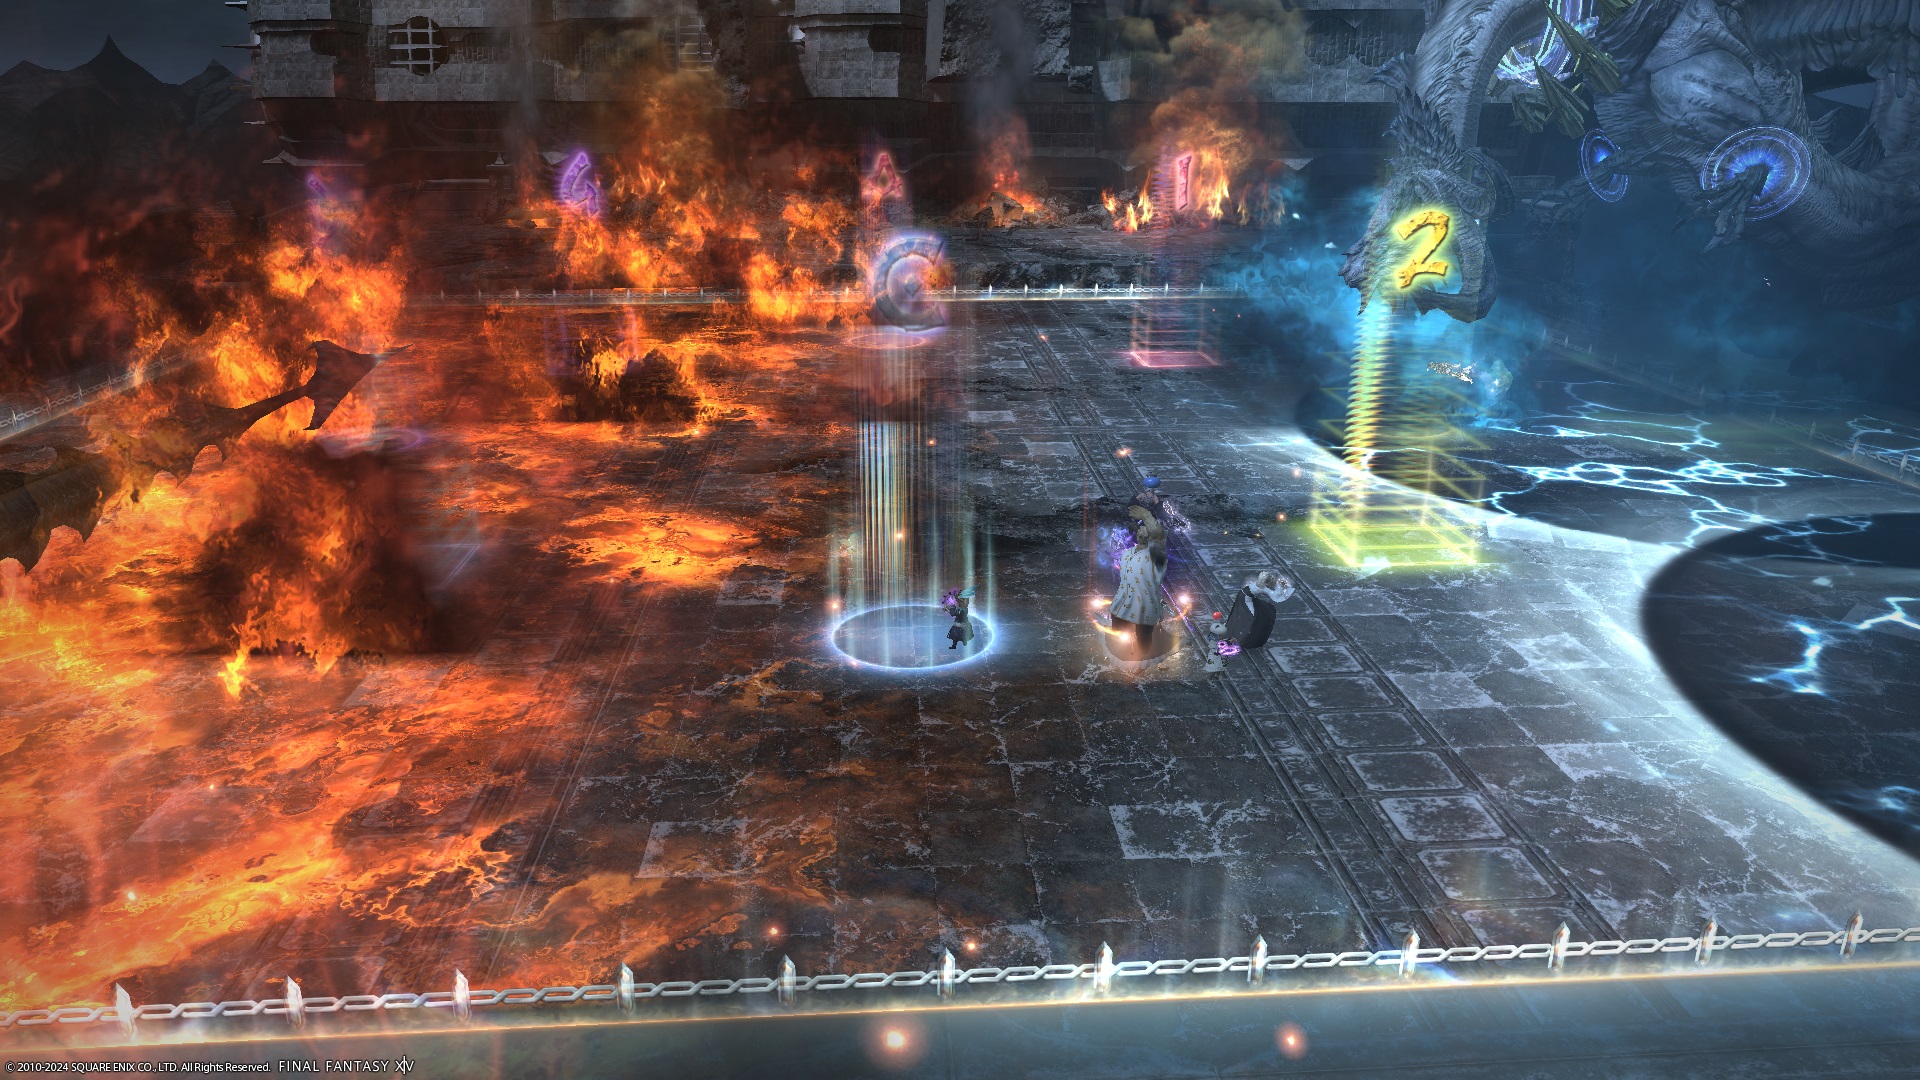 |
[Cauterize] Do the tanks have to invuln Cauterize?
| Technically speaking, no- Cauterize deals about 240k damage, which can be mitigated with Rampart, a tank's 30% mitigation, and the short mitigation. The problem is that Wyrmsbreath 2 happens right before. There is 14 seconds between Wyrmsbreath 2 and Cauterize which means that it is possible to catch both with a tank's 30% mitigation, allowing the tank to mitigate Cauterize instead. The end result is that the tank has their invuln available for P7- this is key to the "1-1-6" style of resolving Akh Morn's Edge that you might see other groups do. However, it is tighter in execution than simply using a tank invuln, and provides an additional point of failure in P6 (which is already unforgiving enough). Prog groups especially should aim to get more P7 practice, and it is difficult to justify potentially spending more time in P6 for both tanks to consistently (and independently!) get the timing down. At this stage, most players in PF aren't used to resolving Akh Morn's Edge in a 1-1-6 fashion, so trying to push 1-1-6 now may lead to wipes in P7 due to players being unfamiliar with the strat. |
[Cauterize] Can the Cauterize DoT be mitigated?
| No. Regardless of whether Cauterize was taken with invuln or with mitigations, the DoT ticks for about 18k damage/tick. |
[General] Can you defeat one dragon early?
| No. Each dragon will have a floor of 1HP until they start casting their enrage. |
[Alternative End] What do you mean by "Add H2 120s as needed?"
| As a single, hard-hitting raid-wide with time to setup, SCH is uniquely positioned to be very effective against Alternative End. Fey Illumination, combined with Protraction, Recitation, and Deployment Tactics, allows the SCH to mitigate Alternative End without using having to add Expedient to the mix. SGE, on the other hand, doesn't have the raw shielding power that a SCH has, and they will likely need to add Holos for the party to survive Alternative End. |
Troubleshooting
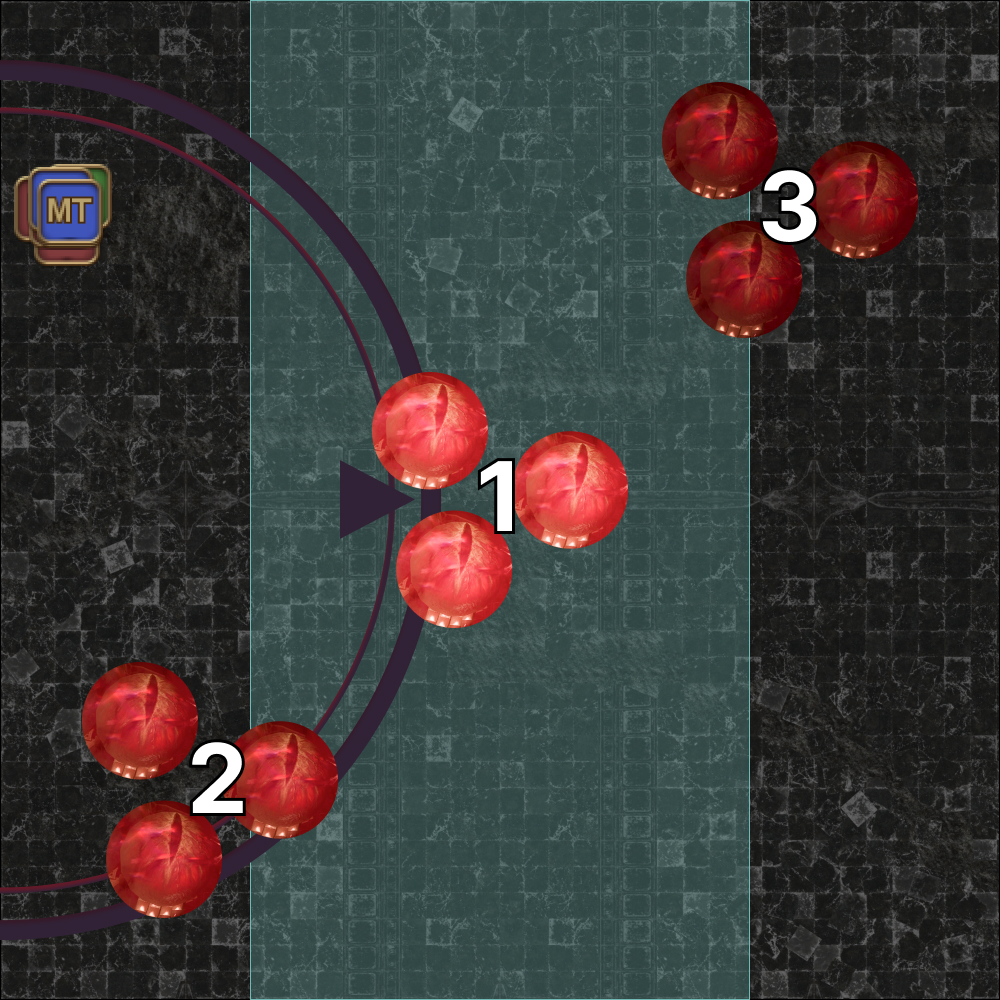
[Wyrmsbreath #1] I took extra damage even though I wasn't tethered- why is that?
| Both dragon's damage are based on proximity, even if you are not actually tethered to them. You can think of the tethers as just directing where the breaths will go; the colour change is a proximity indicator of that particular player-dragon pair, but you still have to worry about proximity to the other dragon. Here is a graph plotting damage vs distance (in centiyalms). | 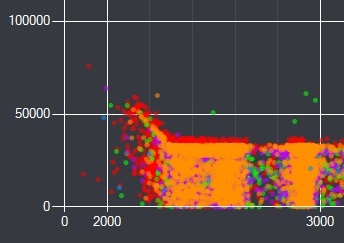 (Credit: radrauser) (Credit: radrauser) |