Abyssos: The Fifth Circle (Savage)
This is Game8’s macro
English
【Spread】 【Puddles】ST free
D3 MT D4 MT(invuln)
H1 H2 H1D3 H2D4
D1 ST D2 D1D2
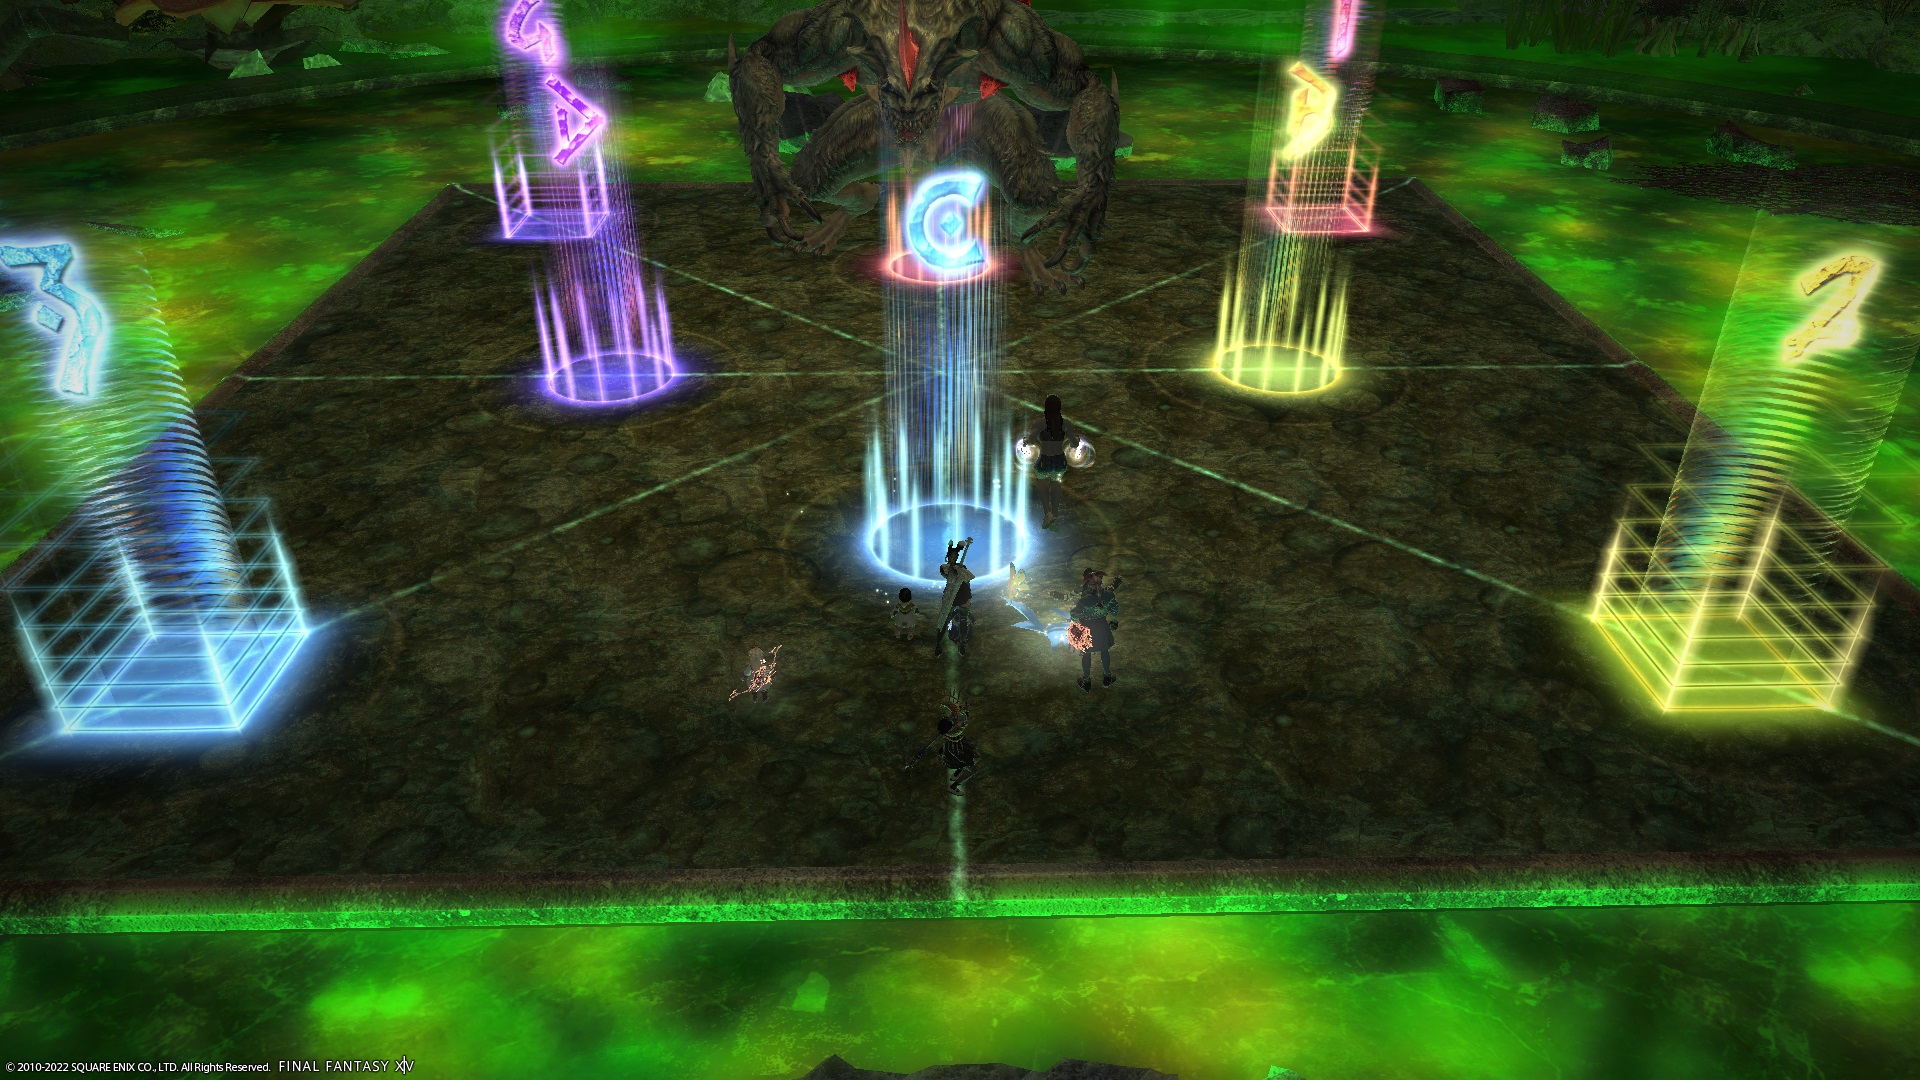
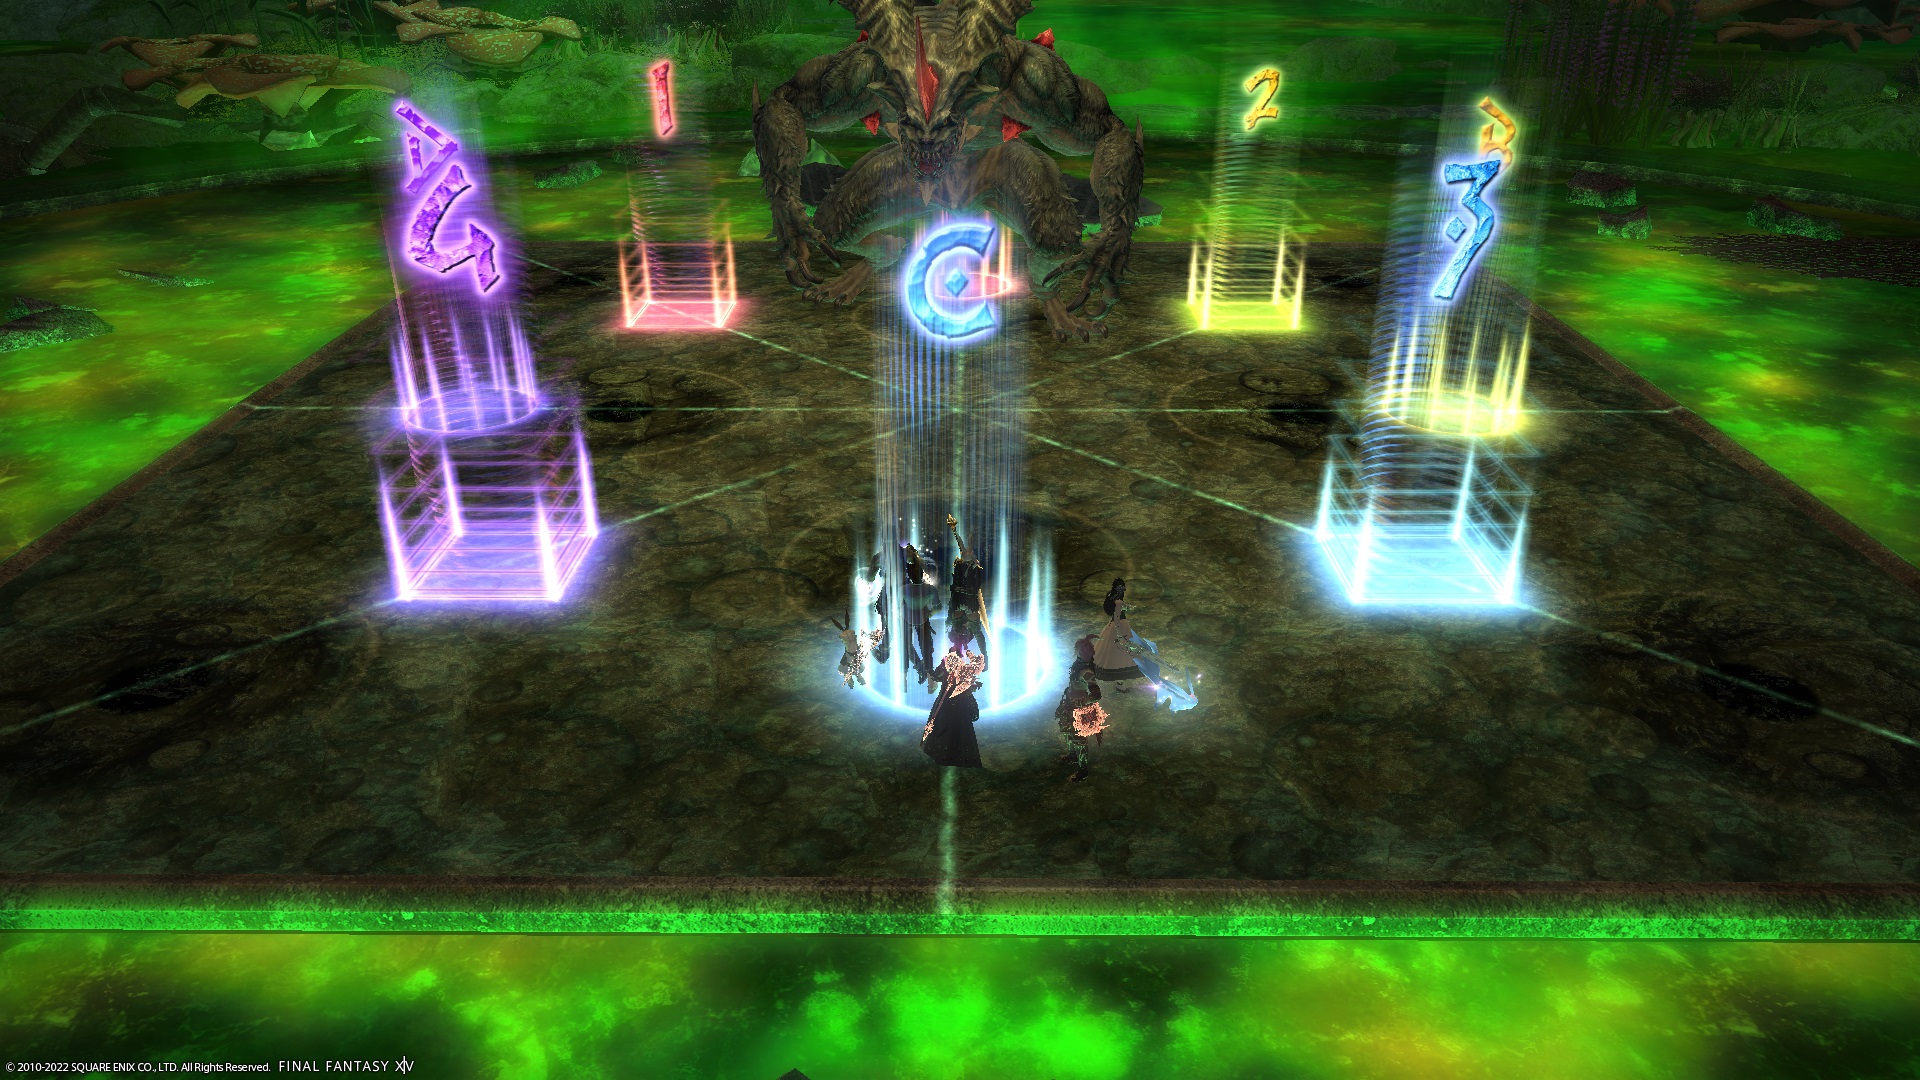
【Poison towers (melee in / ranged out)】
MTST / H1D3:CCW from 12 o'clock
D1D2 / H2D4:CW from 1 o'clock
【Venom Surge/Splash】
West/In:MTH1D1D3 East/Out:STH2D2D4
【Ruby Glow 5】
D1 H1 D3
MT
☆
ST
D4 H2 D2
MT group:Start from North poison quadrant
ST group:Start from South poison quadrant
Bait AoE outside, stack on MT/ST
【Ruby Glow 6:Diagonally opp 3-crystal room】
Inside:MTH1D1D2 Outside:STH2D3D4
Japanese
【基本散開】   【十字毒塔】STフリー
D3 MT D4      MT(無敵)
H1  H2   H1D3   H2D4
D1 ST D2       D1D2
【毒塔(近接内側 / 遠隔外側)】
MTST / H1D3:12時から反時計回り
D1D2 / H2D4:1時から時計回り
【ベノムサージ(東西受け)/スプラッシュ】
西/内壁:MTH1D1D3 東/外壁:STH2D2D4
【毒沼 + ベノムスコール】
   D1 H1 D3
    MT
    ☆
    ST
 D4 H2 D2
MT組:マーカー1or4に出た毒を起点に移動
ST組:マーカー2or3に出た毒を起点に移動
AOEは外周に捨ててMT/STの位置で頭割り
【4部屋ベノムスプラッシュ:3個部屋の対角】
内壁側:MTH1D1D2 外壁側:STH2D3D4
Markers
There aren’t any real fixed set of markers used for this fight- this set places markers on the potential poison puddle positions:
ABCDare used for orientation.1234are useful when calling out where to move during Ruby Glow 3.
XIVLauncher WaymarkPresetPlugin positions
{
  "Name":"P5S (Towers)",
  "MapID":873,
  "A":{"X":100.0,"Y":-300.0,"Z":92.9,"ID":0,"Active":true},
  "B":{"X":107.1,"Y":-300.0,"Z":100.0,"ID":1,"Active":true},
  "C":{"X":100.0,"Y":-300.0,"Z":107.1,"ID":2,"Active":true},
  "D":{"X":92.9,"Y":-300.0,"Z":100.0,"ID":3,"Active":true},
  "One":{"X":110.7,"Y":-300.0,"Z":89.3,"ID":4,"Active":true},
  "Two":{"X":110.7,"Y":-300.0,"Z":110.7,"ID":5,"Active":true},
  "Three":{"X":89.3,"Y":-300.0,"Z":110.7,"ID":6,"Active":true},
  "Four":{"X":89.3,"Y":-300.0,"Z":89.3,"ID":7,"Active":true}
}
This set of markers simply puts everything in a circle.
ABCDare used for orientation.1234are useful when calling out where to move during Ruby Glow 3.
XIVLauncher WaymarkPresetPlugin positions
{
  "Name":"P5S (Circle)",
  "MapID":873,
  "A":{"X":100.0,"Y":-300.0,"Z":90.0,"ID":0,"Active":true},
  "B":{"X":110.0,"Y":-300.0,"Z":100.0,"ID":1,"Active":true},
  "C":{"X":100.0,"Y":-300.0,"Z":110.0,"ID":2,"Active":true},
  "D":{"X":90.0,"Y":-300.0,"Z":100.0,"ID":3,"Active":true},
  "One":{"X":92.929,"Y":-300.0,"Z":92.929,"ID":4,"Active":true},
  "Two":{"X":107.07,"Y":-300.0,"Z":92.929,"ID":5,"Active":true},
  "Three":{"X":107.07,"Y":-300.0,"Z":107.07,"ID":6,"Active":true},
  "Four":{"X":92.929,"Y":-300.0,"Z":107.07,"ID":7,"Active":true}
}
Timeline
 (Credit: u/ExiaKuromonji)
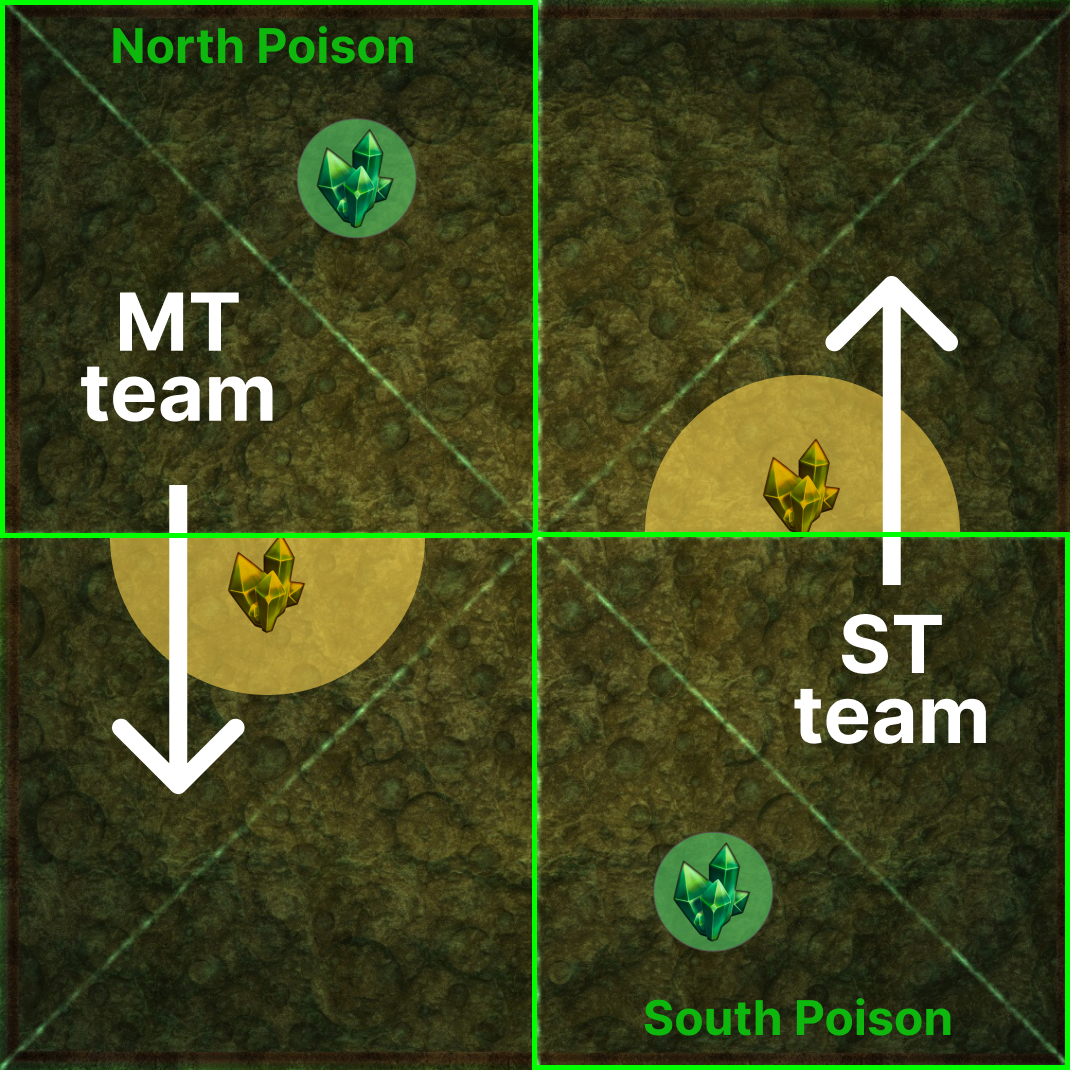
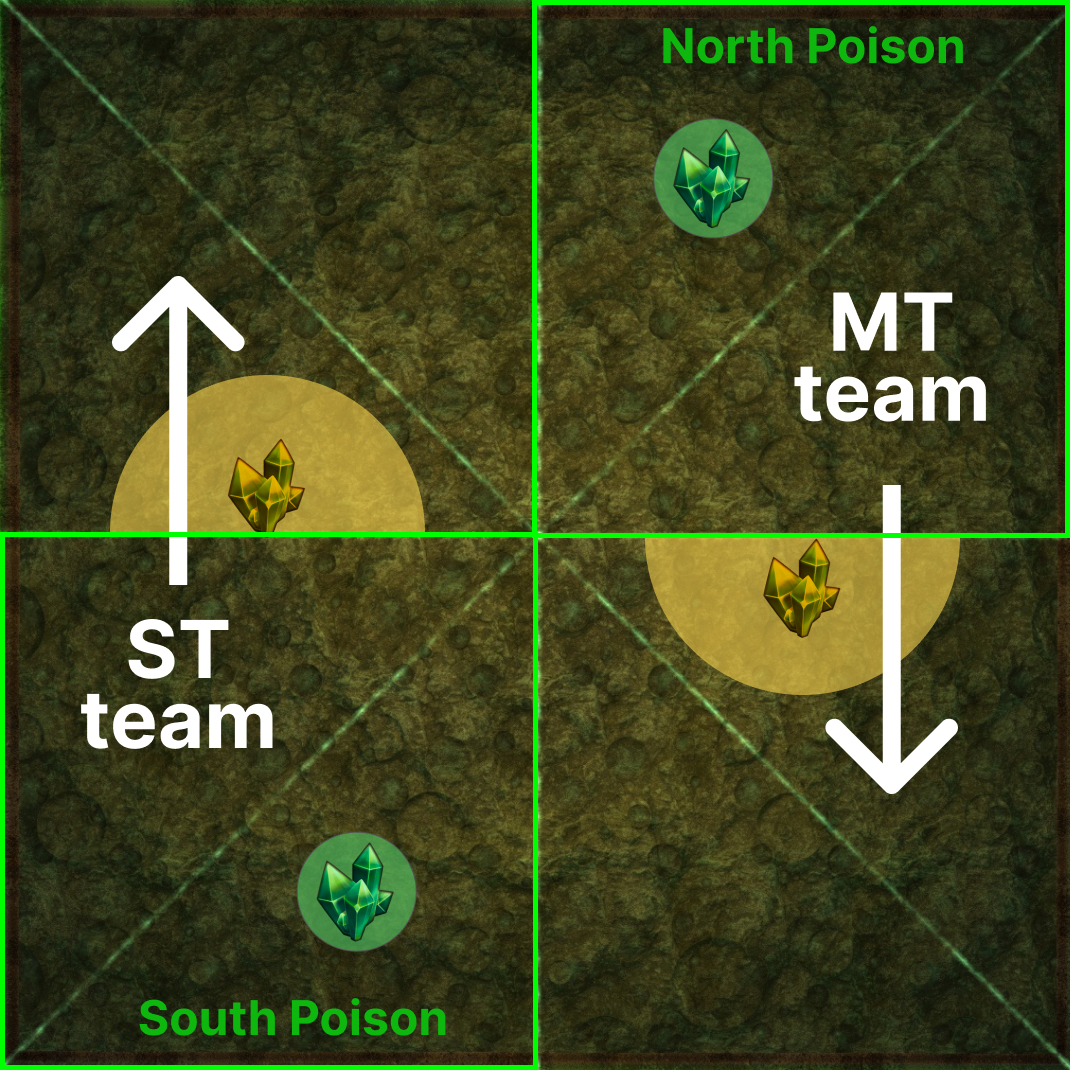
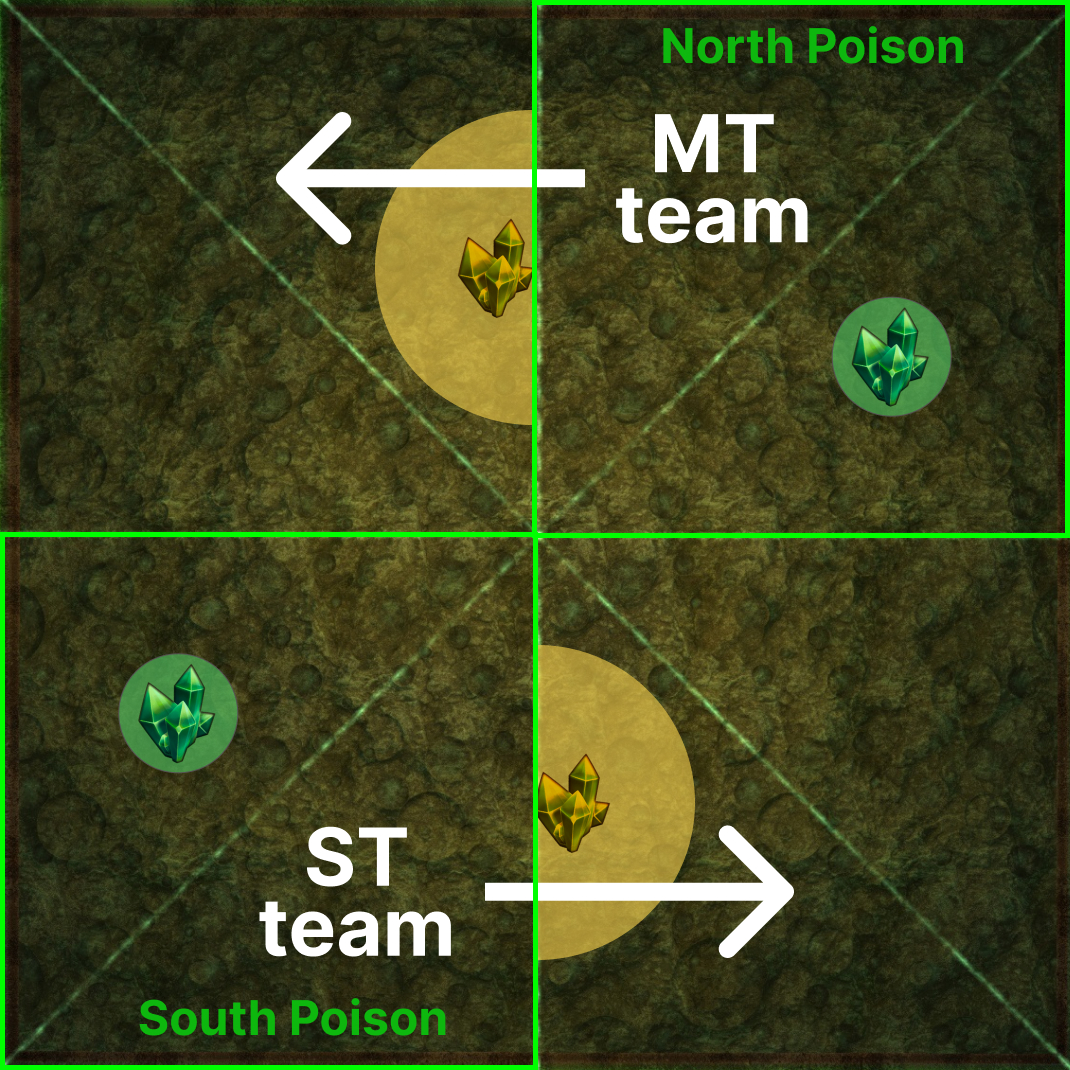
Ruby Glow 5
The way Game 8 chose to resolve Ruby Glow 5 is to assign the MT group to the north-side poison quadrant, and the ST group to the south side poison quadrant.
Once you’ve identified your quadrant, move to the side without the poison crystal (this will always be next to the yellow crystal that will explode).
The four possible outcomes are as follows:
 |  |
 |  |
Frequently Asked Questions
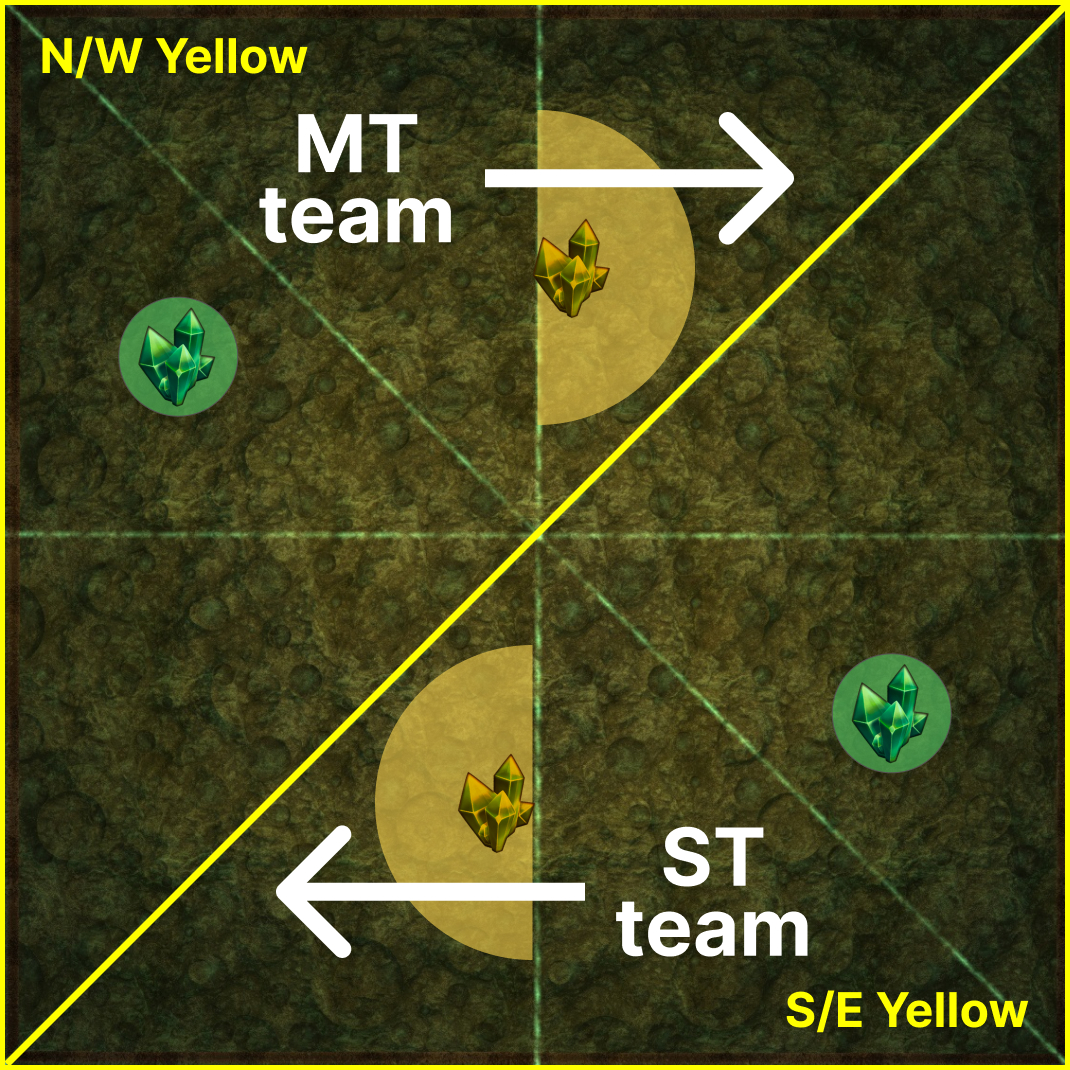
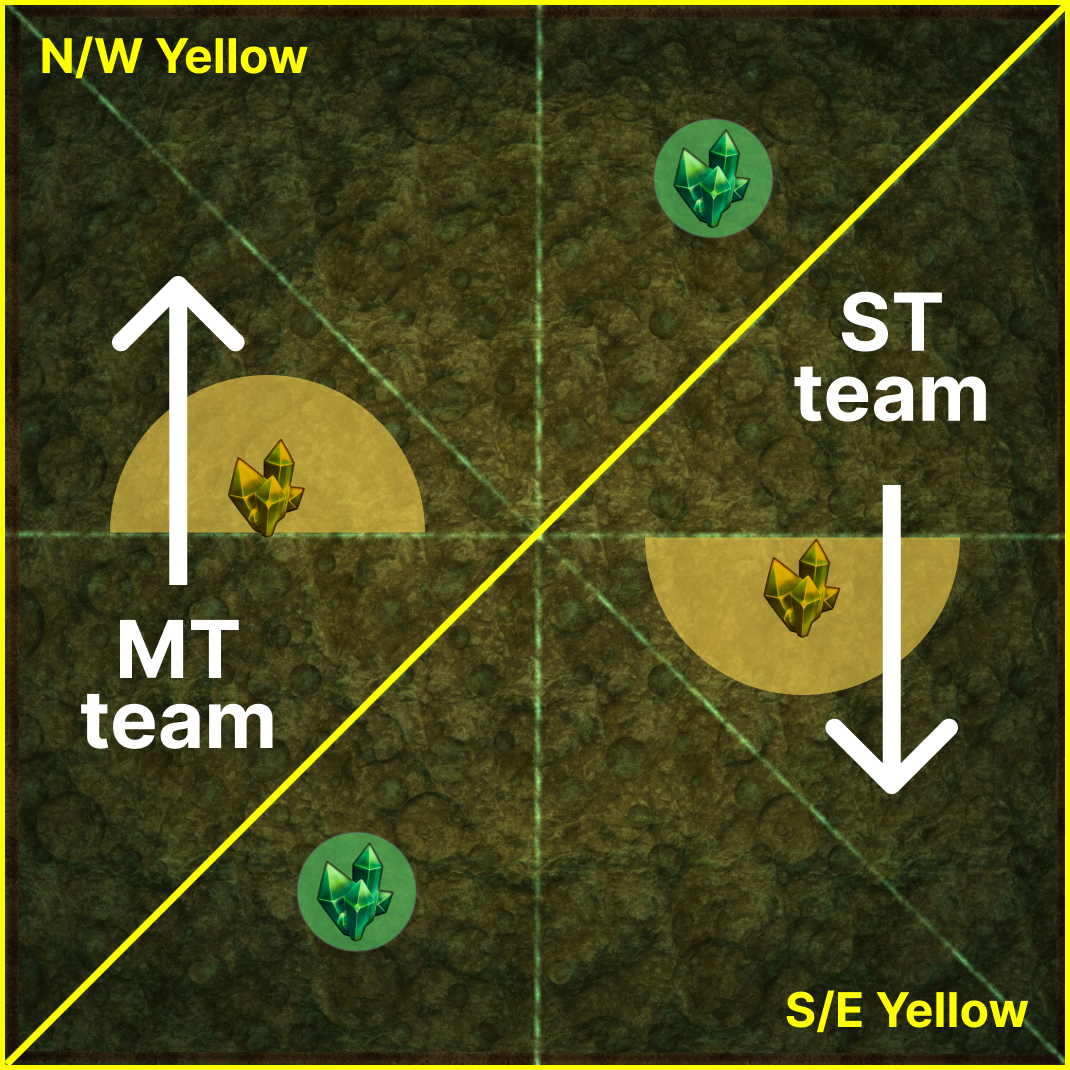
[Ruby Glow 5] Some groups refer to a N/W and S/E strat- how is that different?
This refers to a different method of assigning quadrants that some EN groups do. The main difference is what the party pays attention to. Game8 unfortunately chose the strat that focuses on the poison crystals, which leads to a somewhat counterintuitive case 1/4 of the time. This strat assigns the light parties based on the yellow crystals instead, which keeps to the "MT group N/W", "ST group S/E" convention. The problem, of course, is that both methods work out to the same outcome in 3/4 of the cases, but not the last 1/4. |
 |  |
 |  |