Limit Cut
While not technically a phase, the transition to Brute Justice + Cruise Chaser is not trivial, and is probably the only transition in all the Ultimate fights that takes up actual prog time.
In the transition leading up to Brute Justice and Cruise Chaser, players will have to resolve Limit Cut in combination with a pair of Hawk Blaster AoEs that go clockwise around the arena.
There are two main strats for Limit Cut- 1211, and 1256.
[Click to Expand] Limit Cut breakdown
Limit Cut is a mechanic from A11S where all players get numbered from 1 to 8. The following then happens:
This process repeats (cleave odd, dash even) until all eight numbers have been resolved. If a number is missing, Cruise Chaser picks a random target instead. Getting hit by Cruise Chaser will give you a Magic Vulnerability debuff, so you cannot get hit a second time. In addition, you will be knocked in the direction of Cruise Chaser's attack if you are not facing Cruise Chaser when it hits you. Because Cruise Chaser always spawns behind the odd-numbered players, the odd-numbered players will always be knocked forward, unless nullified with Arm's Length or Surecast. | 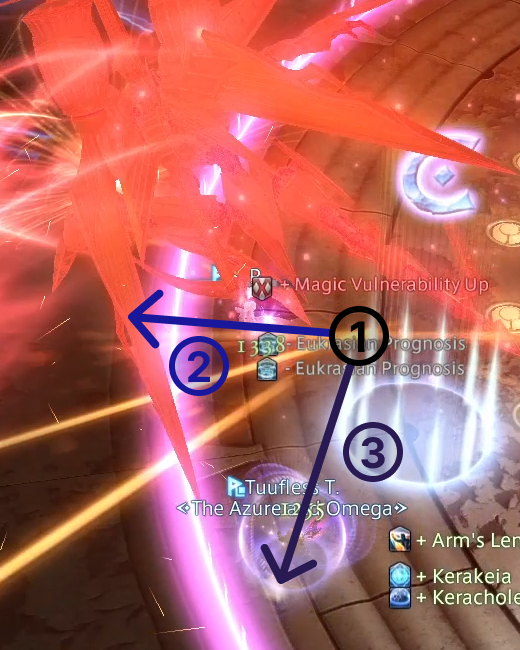 |
1211
1211 is the strat highlighted by the Korean simulator.
Unlike the Korean simulator, we recommend that both the odd and even players point Cruise Chaser outside, and forward/backward at diagonals.
(The simulator points Cruise Chaser directly outwards, and directly inwards through the center of the arena).
| The name "1211" comes from the explosion intervals before each pair of players resolve Cruise Chaser's Alpha Sword + Super Blassty Charge combo. | 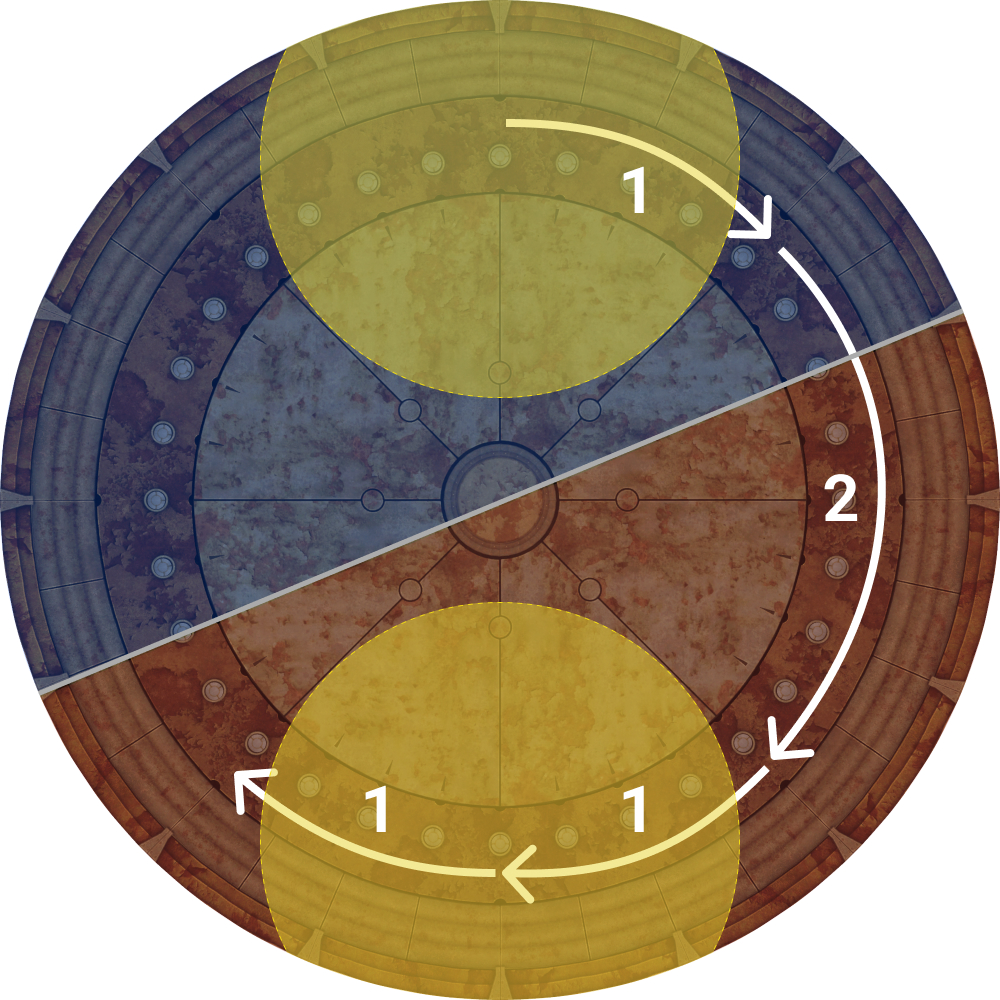 |
The movement for 1211 is as follows:
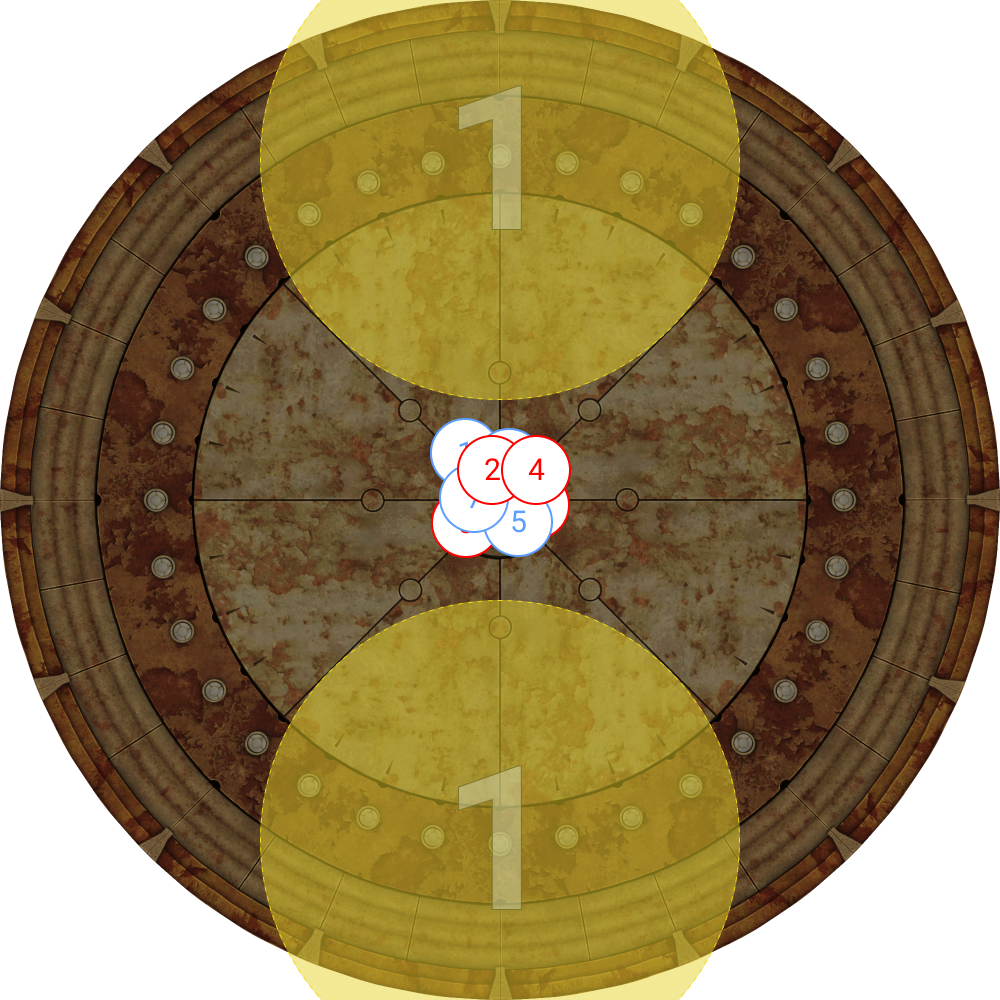
| 1. First pair of explosions. All players move towards the explosion in the northern (west) half. |  |
2. Second pair of explosions.
| 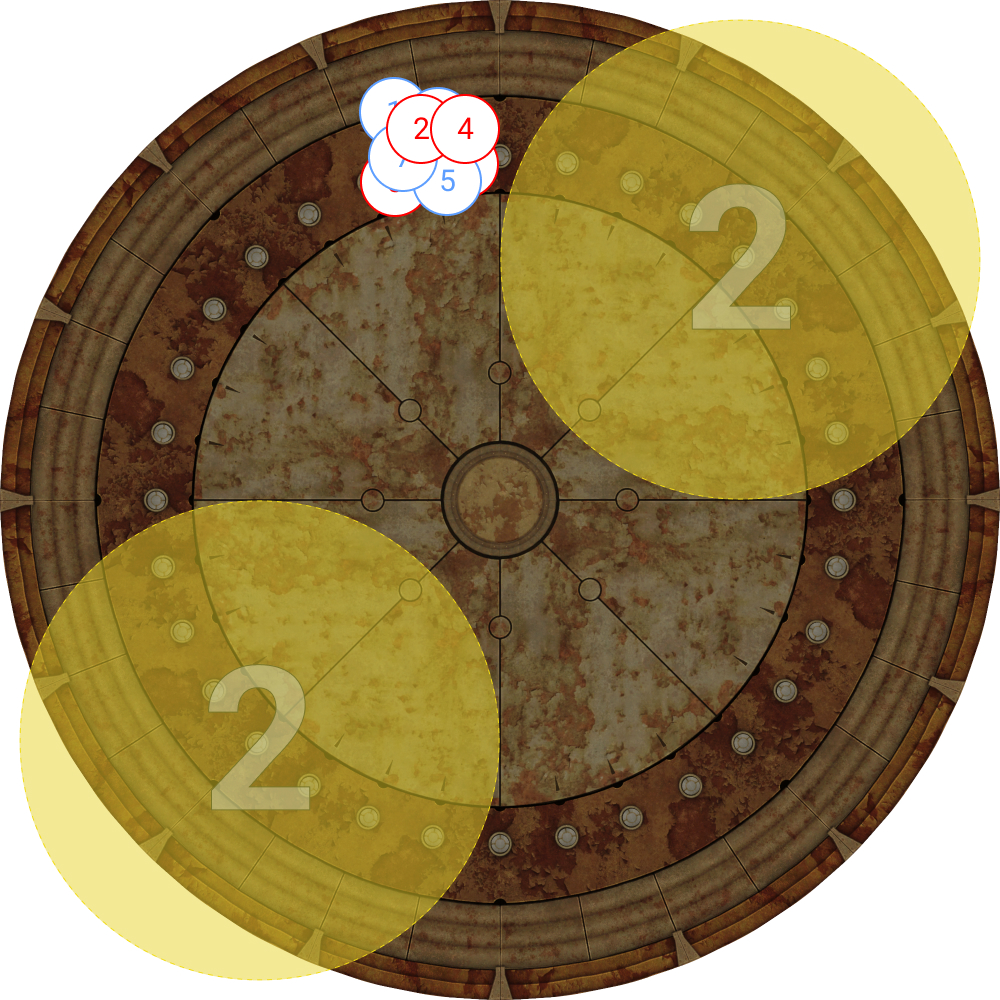 |
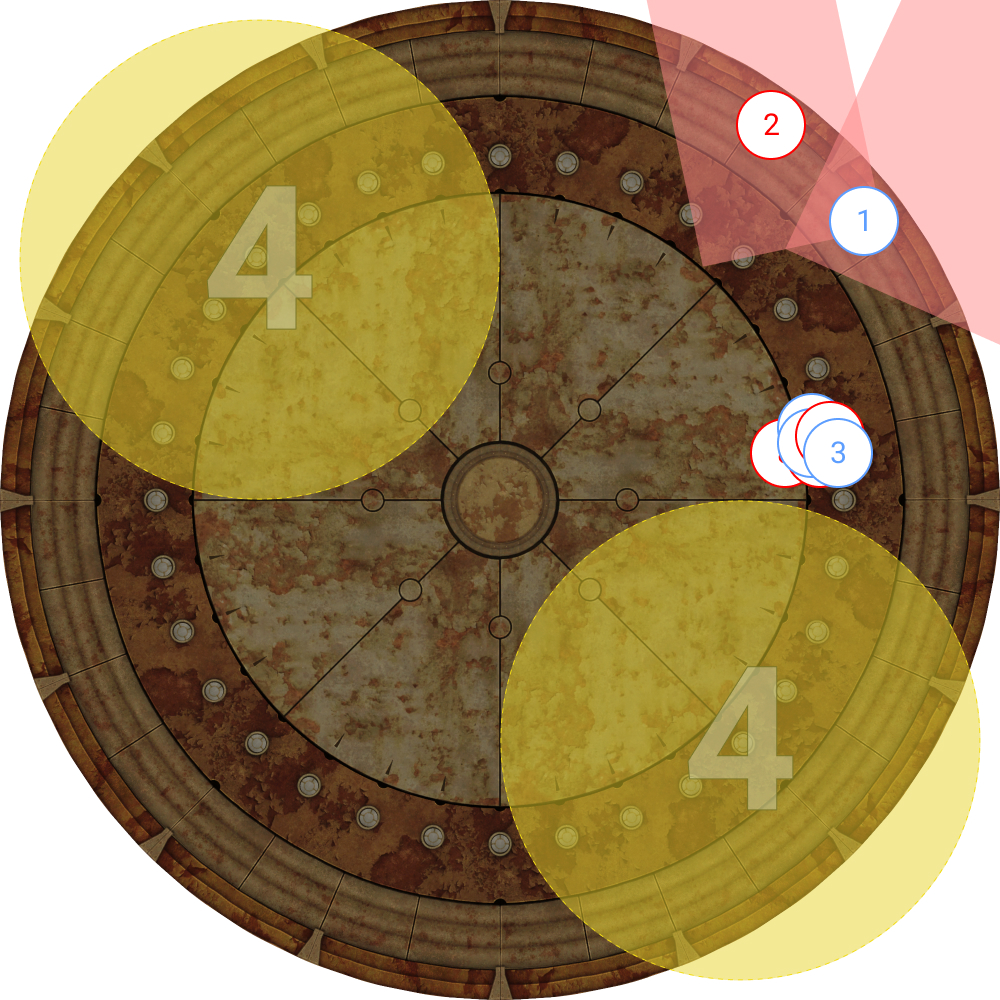
| 3. Third pair of explosions. | 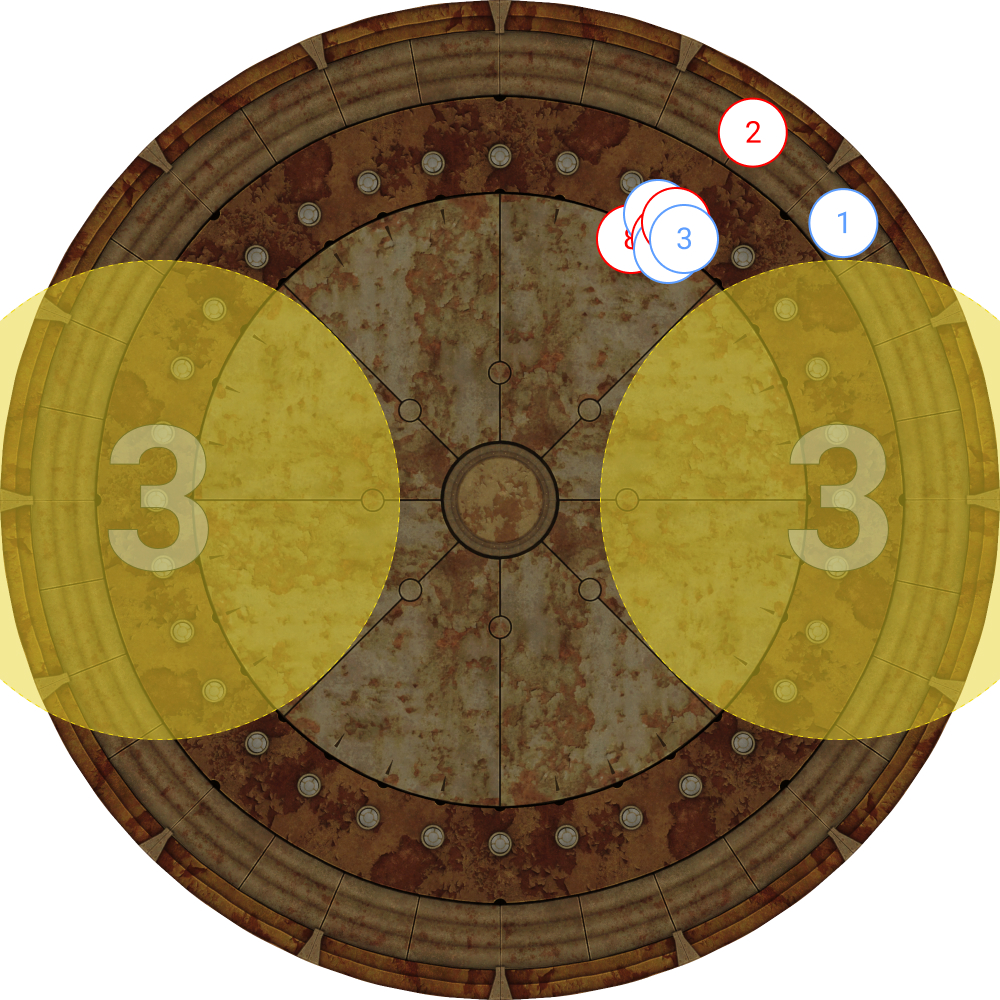 |
4. Fourth pair of explosions. All players wait behind the line where the explosion was.
|  |
| 5. Fifth explosion. | 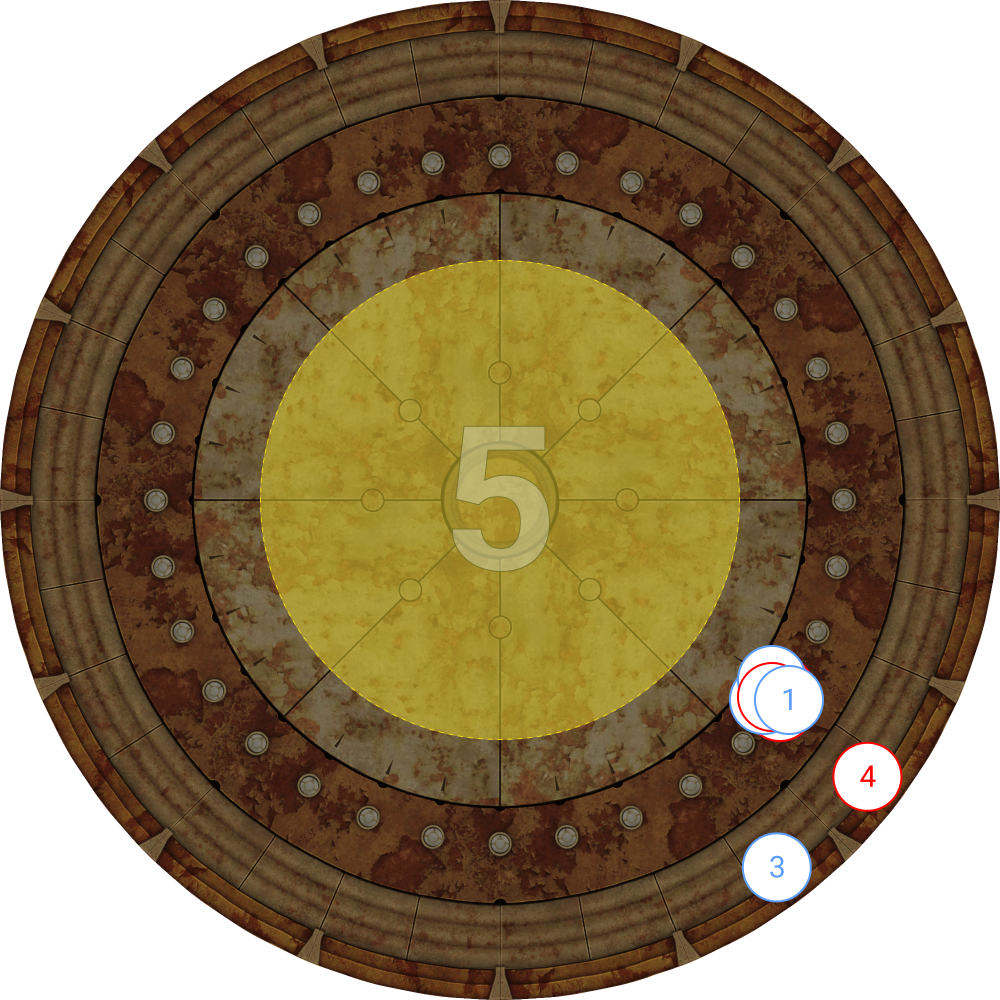 |
| 6. Sixth pair of explosions. | 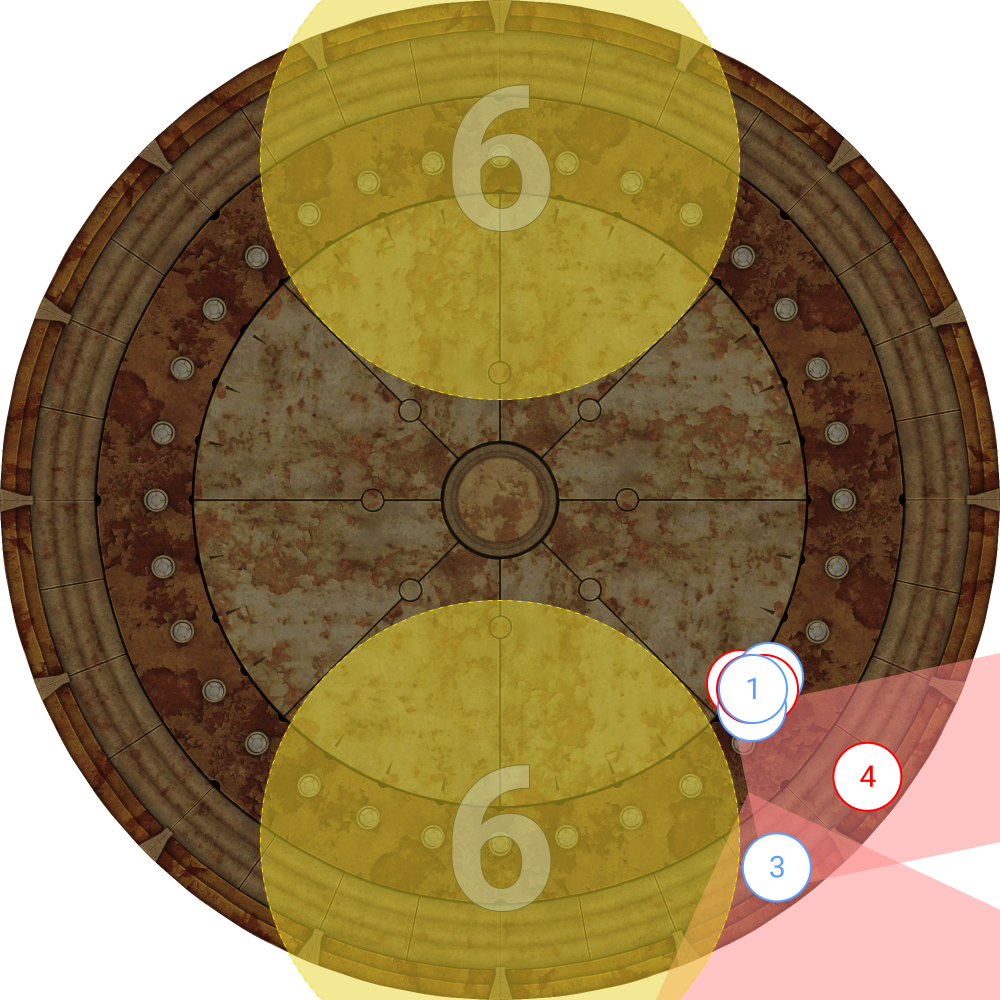 |
7. Seventh pair of explosions.
| 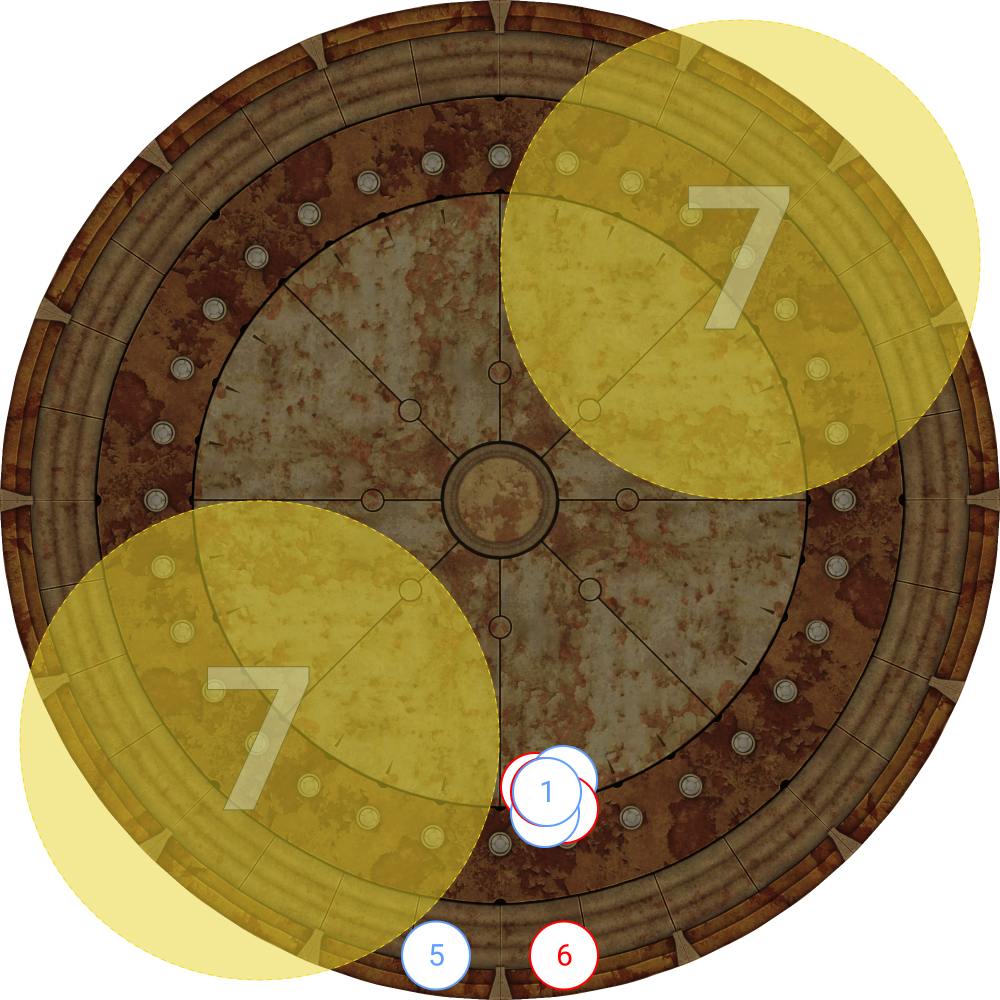 |
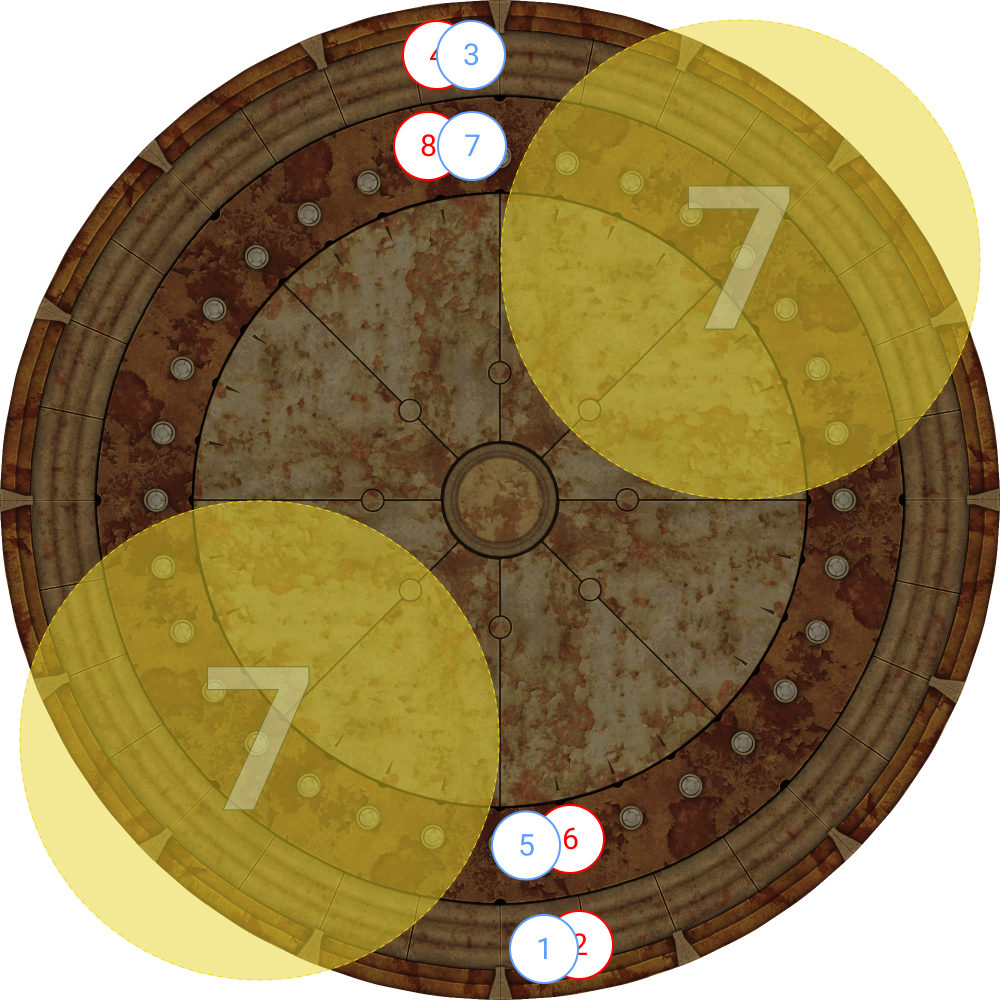
8. Eighth pair of explosions.
| 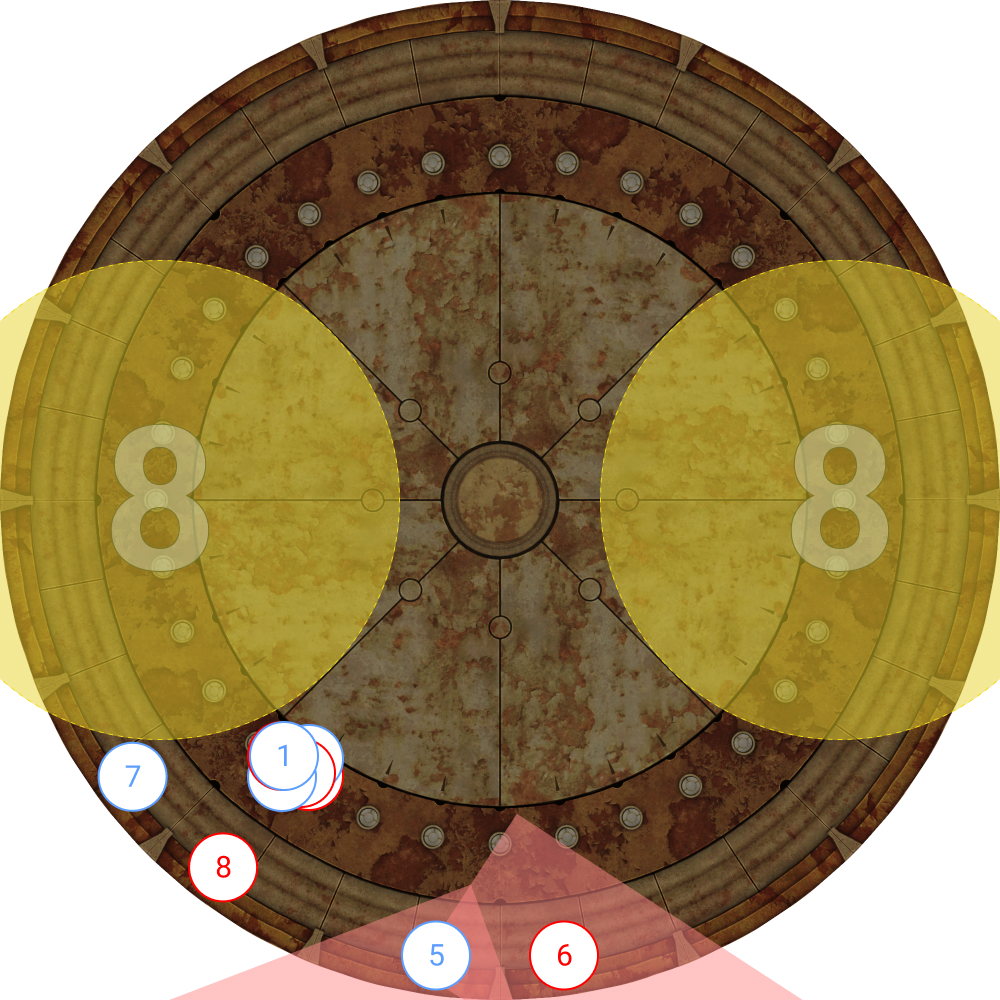 |
| 9. Ninth pair of explosions. Do not enter the middle yet. | 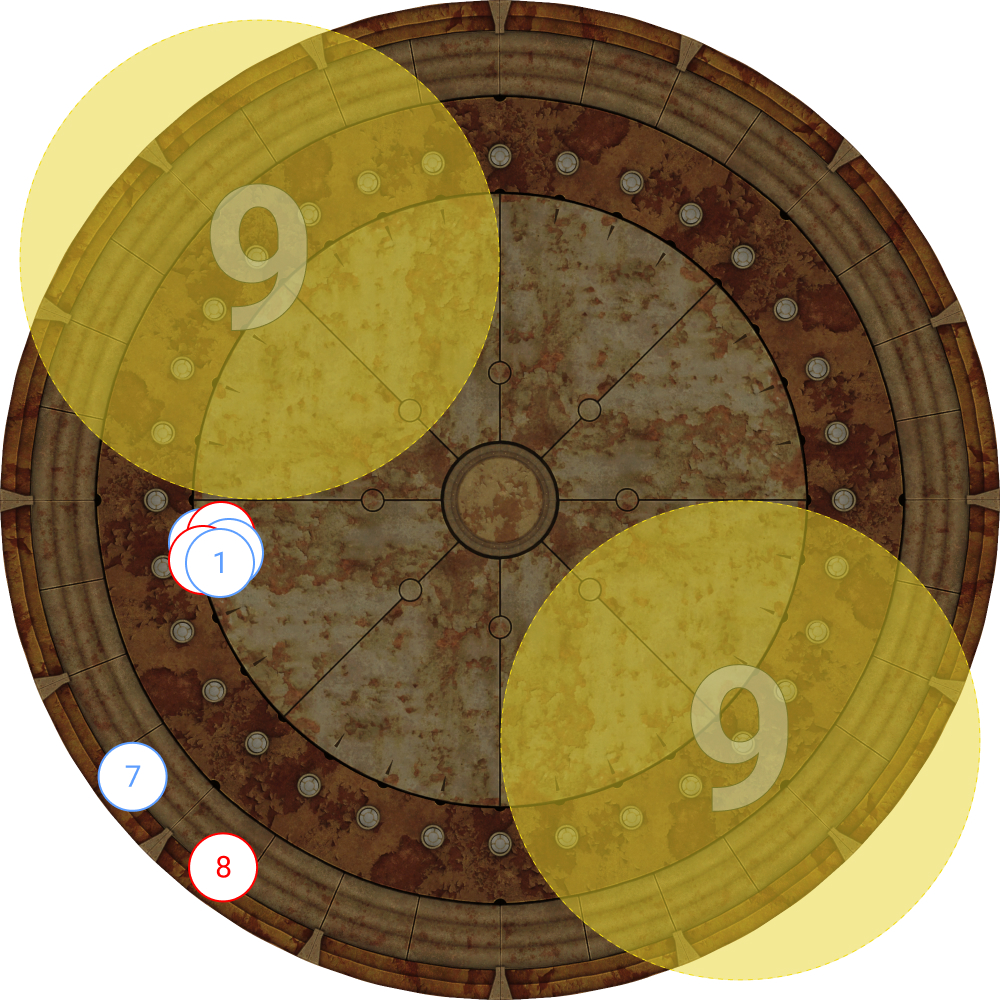 |
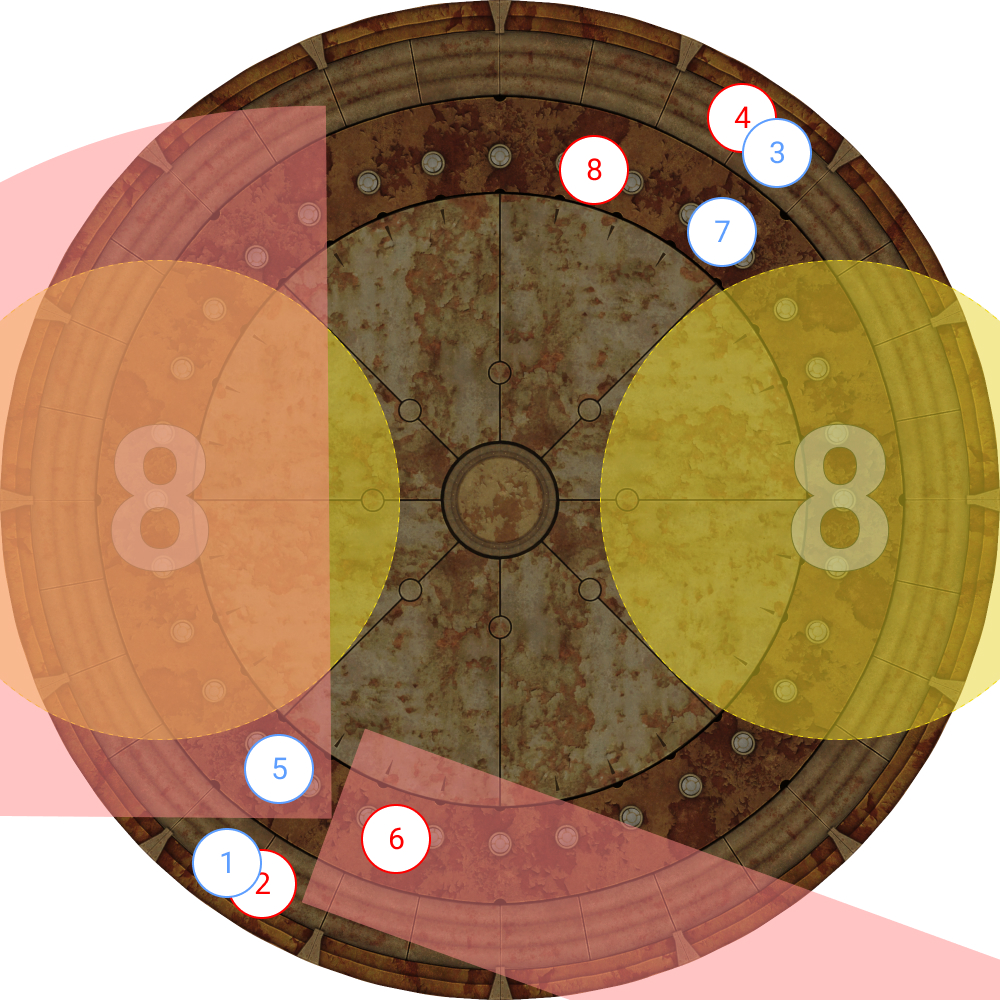
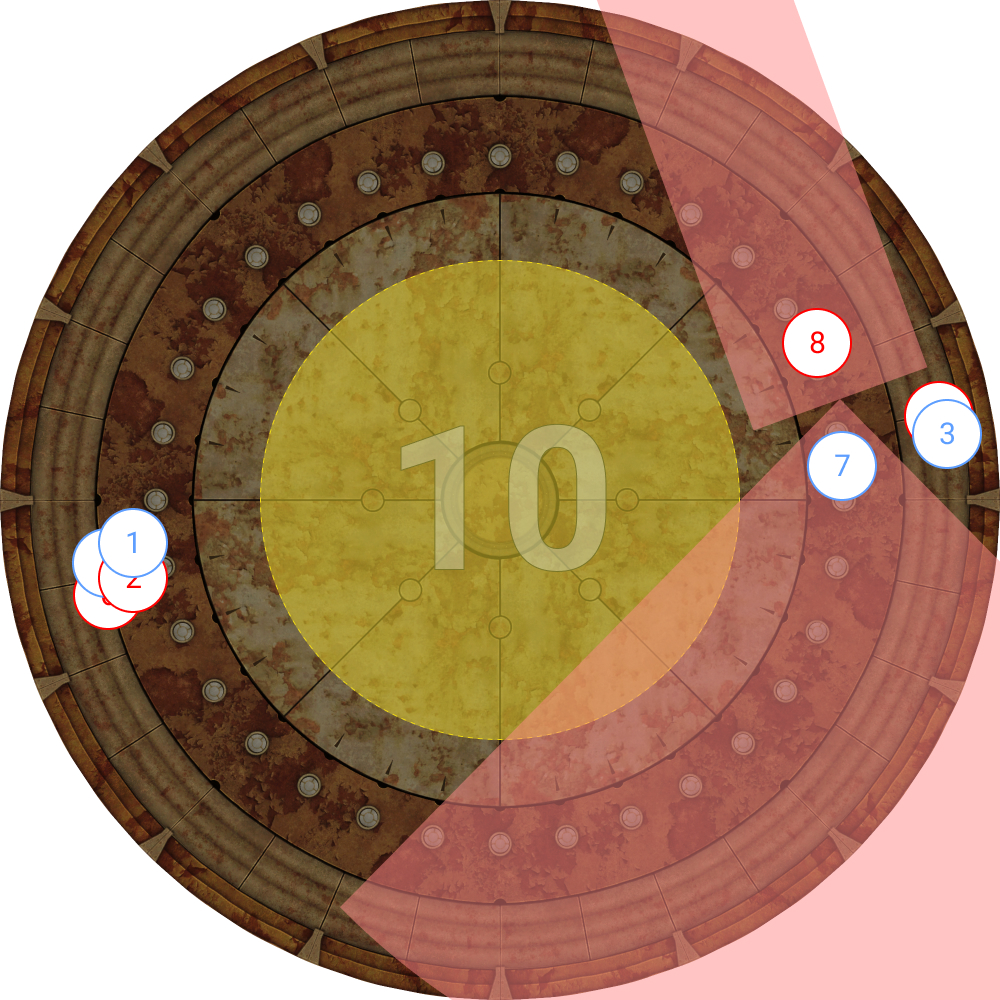
10. Tenth (final) explosion.
| 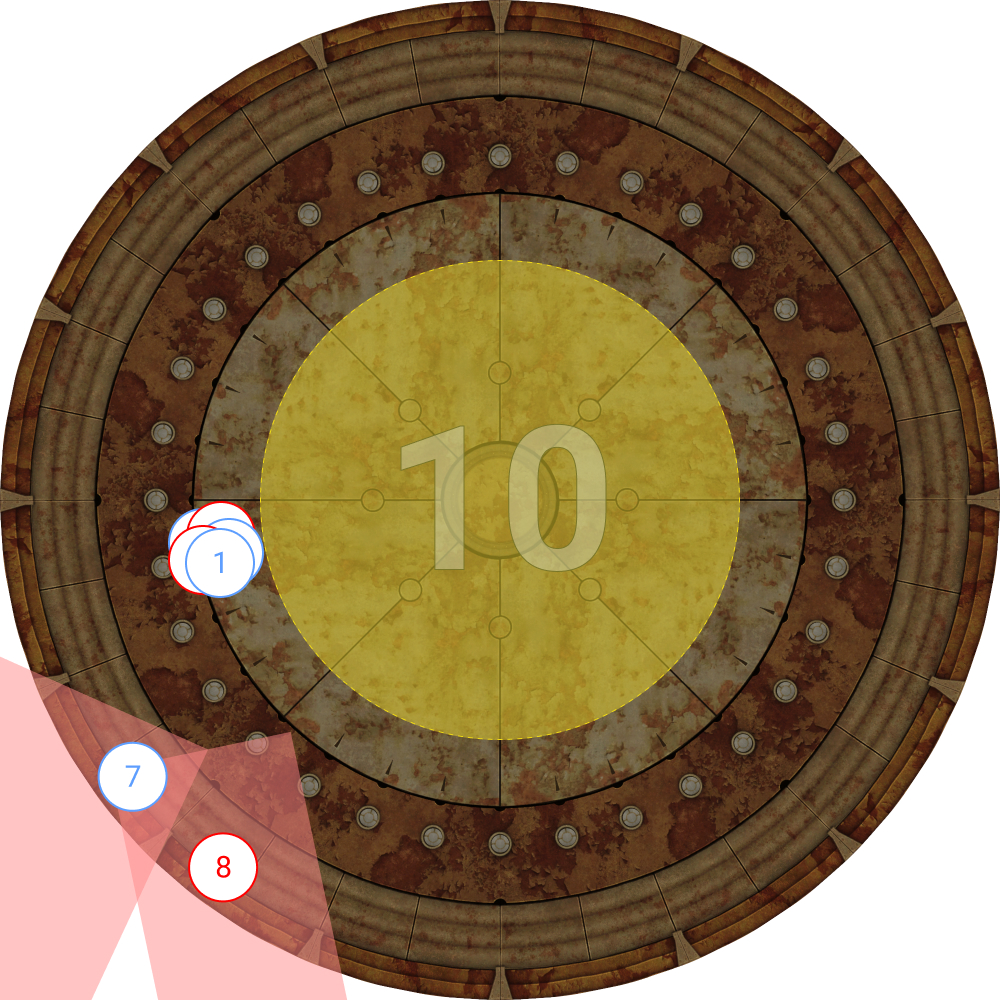 |
1256
1256 is personally my preferred method of resolving Limit Cut as it is more fluid and doesn’t require players to face outside, or use anti-knockback abilities. The 1256 vs. 3478 split also mirrors how Limit Cut will be resolved later in Wormhole Formation.
However, it is the harder of the two to learn, especially for players new to TEA.
| The name "1256" comes from the player numbers in each group. Players 1, 2, 5, and 6 start from the northern (west) explosion, while players 3, 4, 7, and 8 start from the southern (east) explosion. | 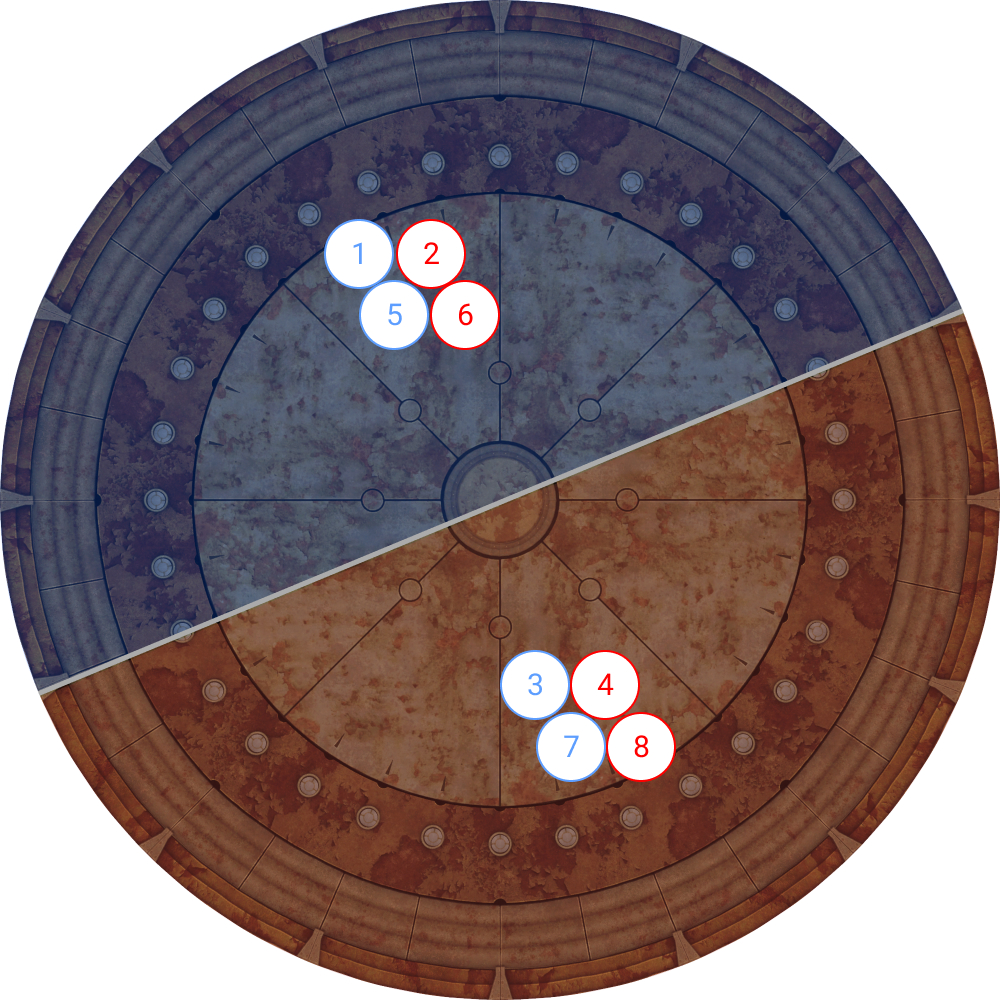 |
To summarize the movement:
- The first set of Limit Cuts will be resolved at the 3rd and 4th explosion.
- The second set of Limit Cuts will be resolved at the 7th and 8th explosion.
After each group resolves their first Limit Cut, the pair on the outside (that will resolve their Limit Cut next) and the pair on the inside (that just finished resolving their Limit Cut) swaps places.
1. First pair of explosions.
|  |
2. Second pair of explosions.
| 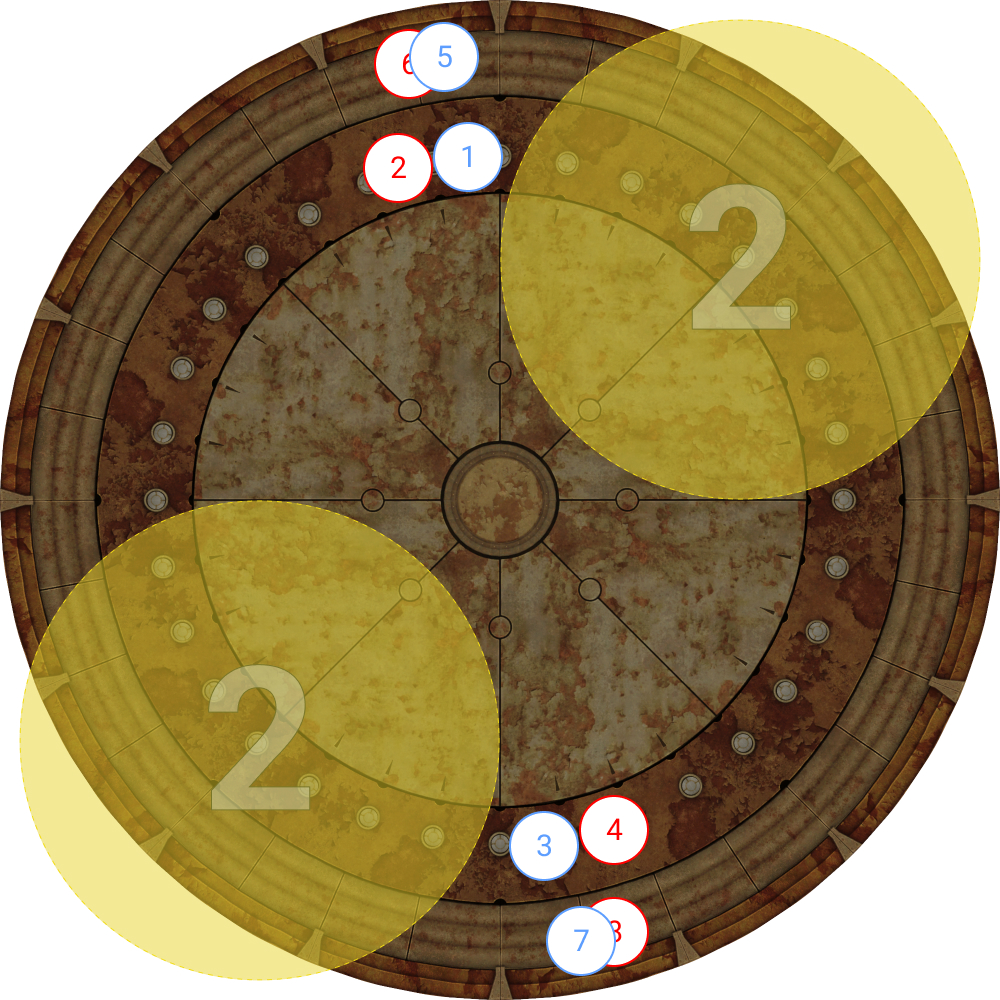 |
3. Third pair of explosions.
| 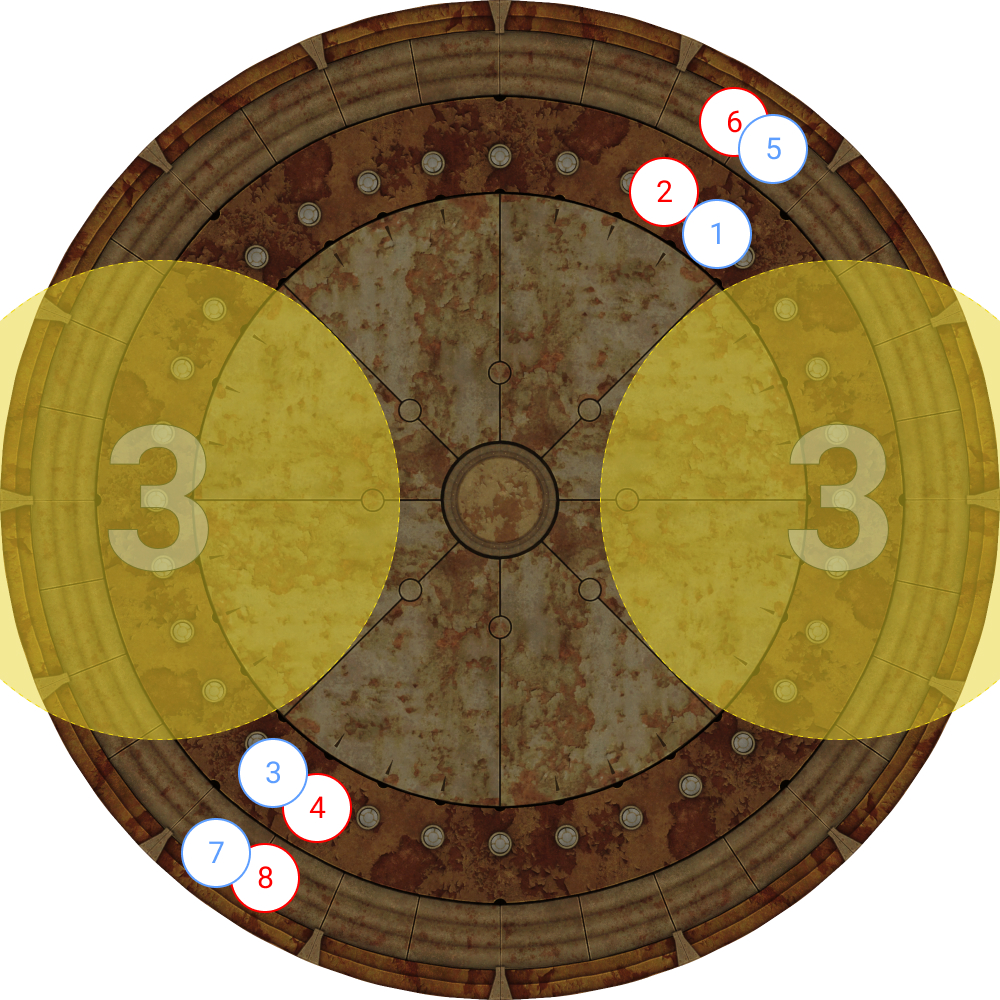 |
4. Fourth pair of explosions.
| 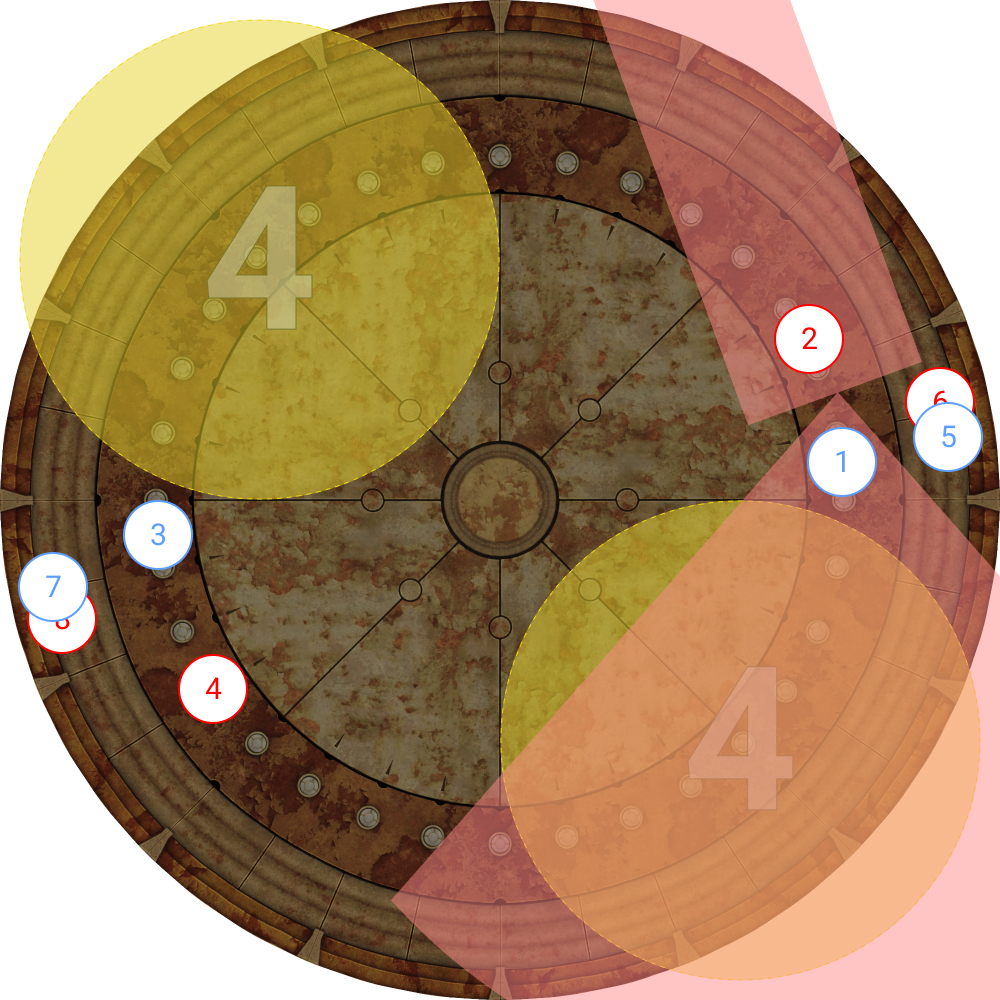 |
| 5. Fifth explosion. | 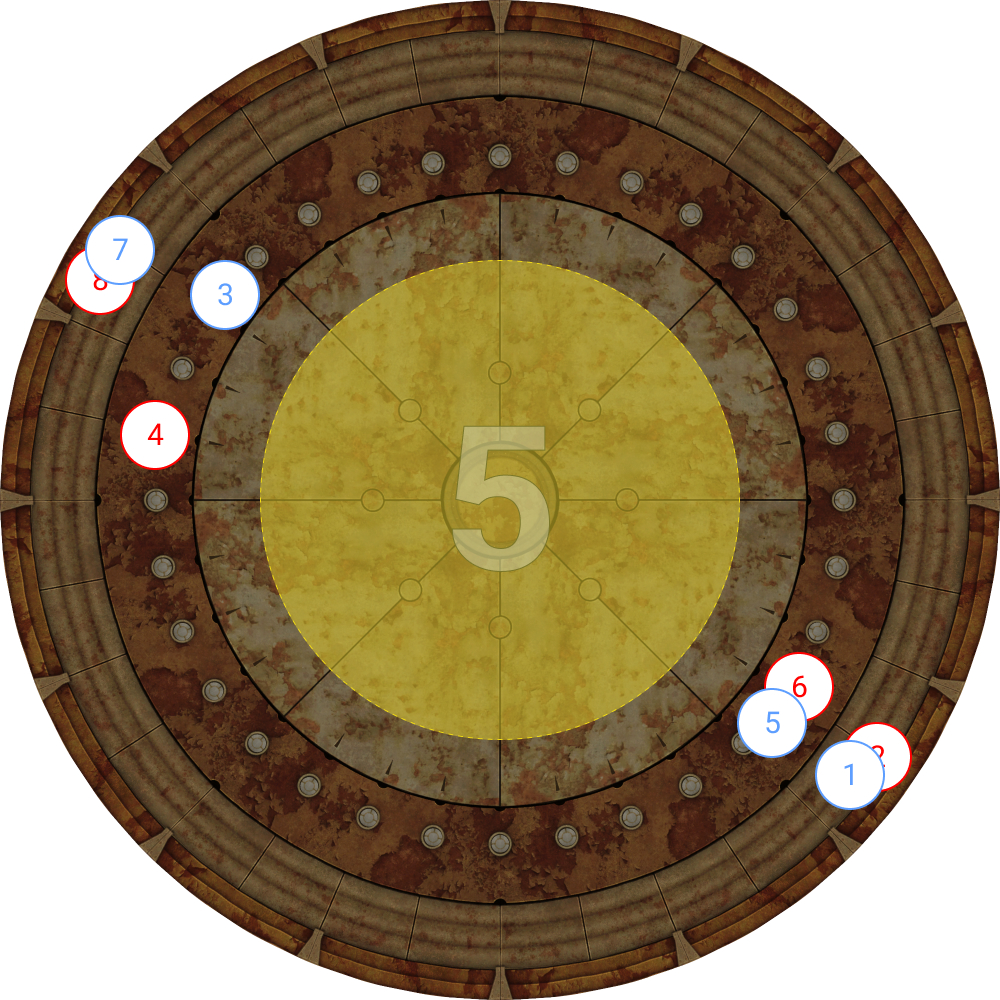 |
| 6. Sixth pair of explosions. | 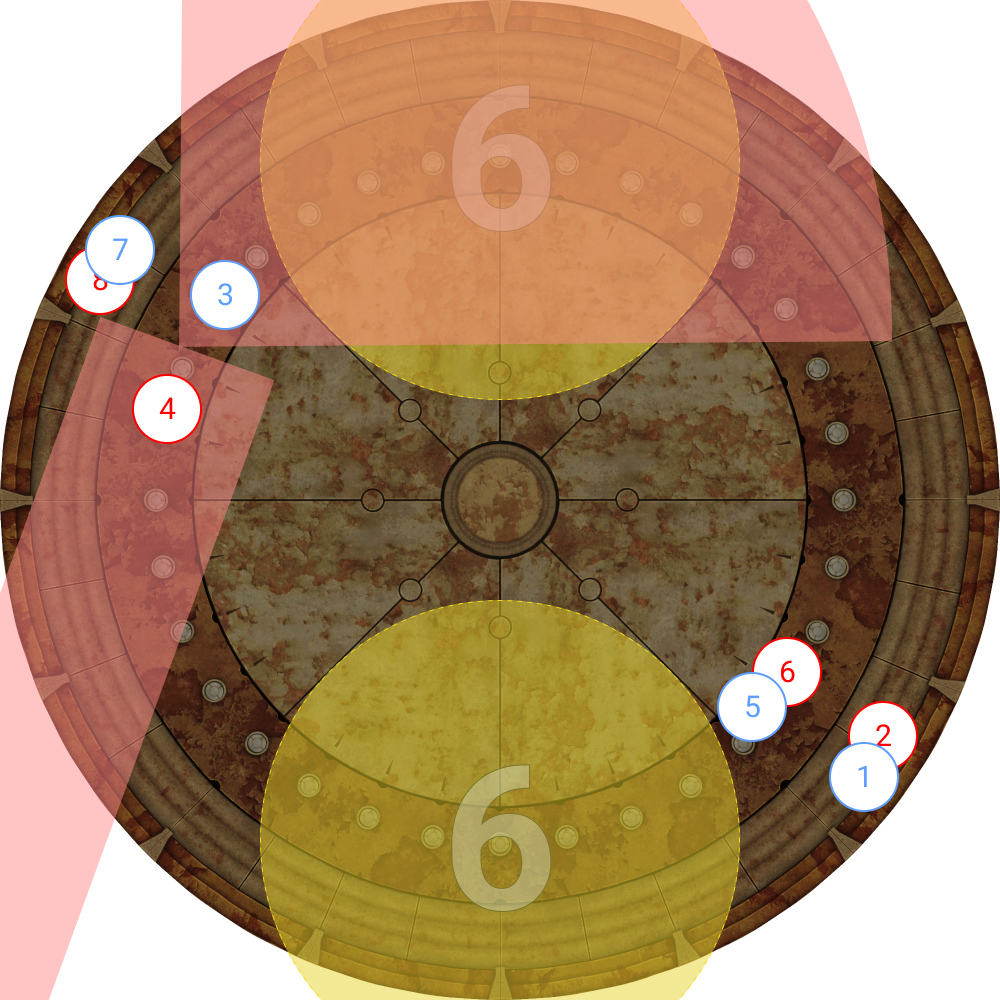 |
7. Seventh pair of explosions.
|  |
8. Eighth pair of explosions.
|  |
| 9. Ninth pair of explosions. | 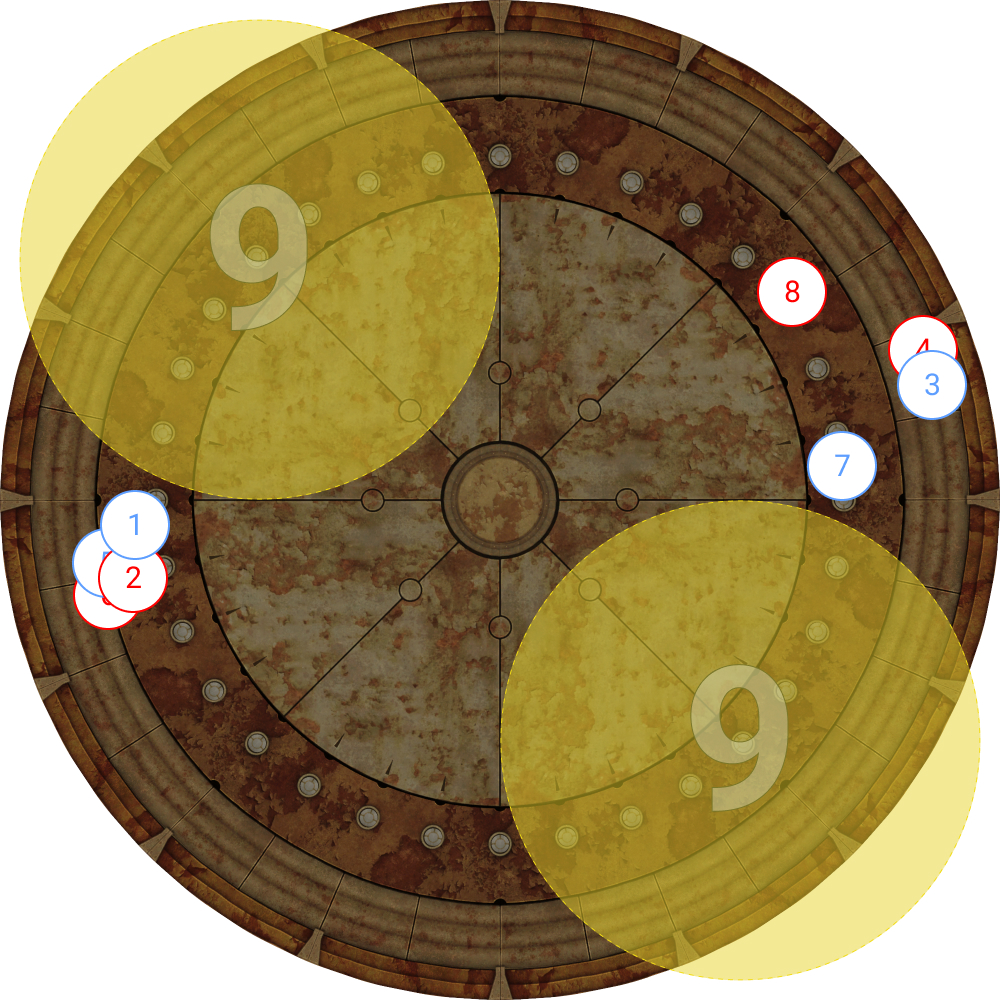 |
10. Tenth (final) explosion. All players come center for healing to prepare for J Kick.
|  |