Alternate Thordan
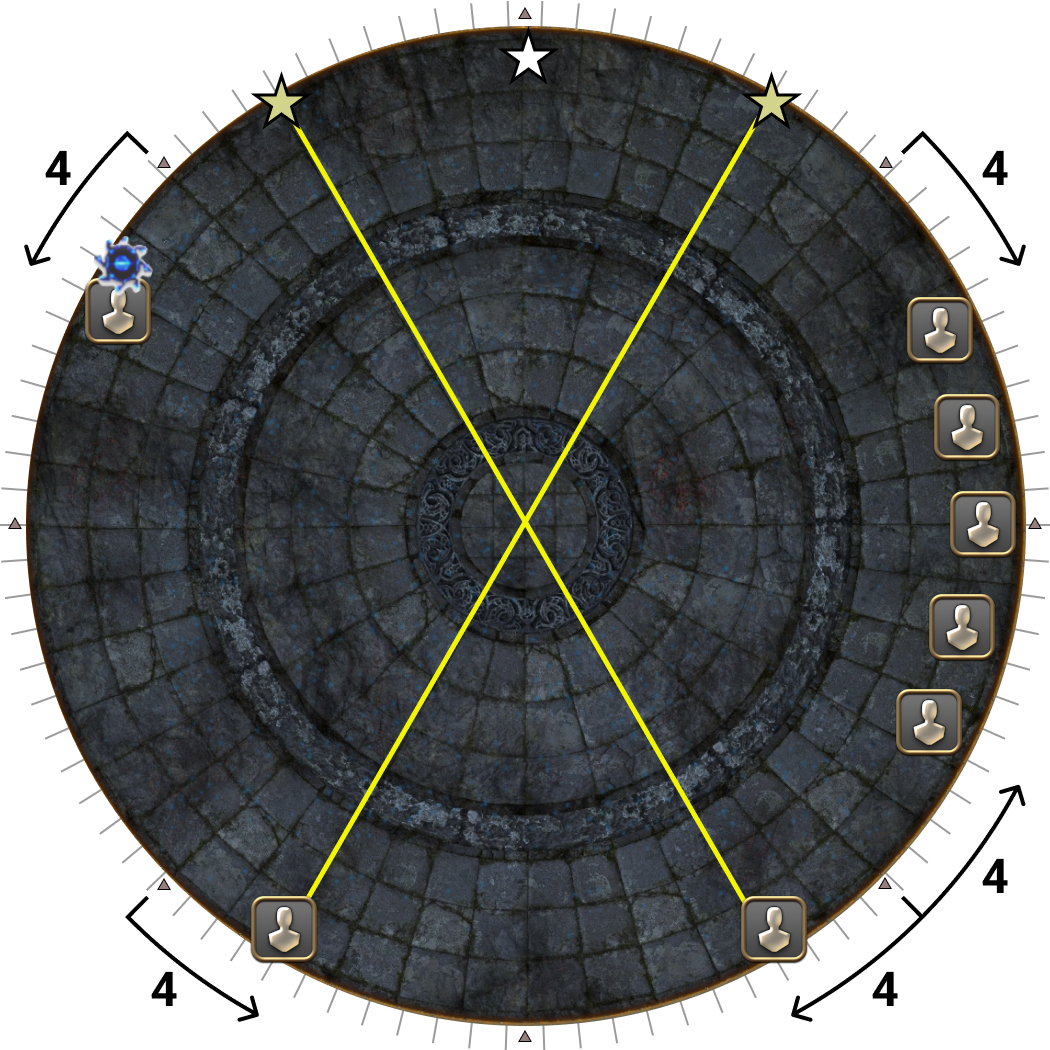
Thordan appears in the center of the arena, facing South. Thordan starts the phase by casting Incarnation, which simply revives the dragons lying around the arena, and casting The Dragon’s Eye, which is simply a damage up buff.
Because Thordan will not move or rotate while casting these abilities, have the MT start South, and the party North.
Thordan will auto-attack the MT twice (remember, these are cone AoEs!), before jumping to the center of the arena and casting the first Trio combo of the phase, Wrath of the Heavens.
Wrath of the Heavens
| 1. A white dragon with two knights will spawn at a random cardinal edge. Using the white dragon as north:
|  |
| 2. Ser Grinnaux (WAR) and Ser Charibert (BLM) will then spawn in the arena, one north, one south in a random configuration. Identify which is Ser Grinnaux (WAR), and which is Ser Charibert (BLM). Two players will also get a Thunderstruck debuff, which will resolve later. | 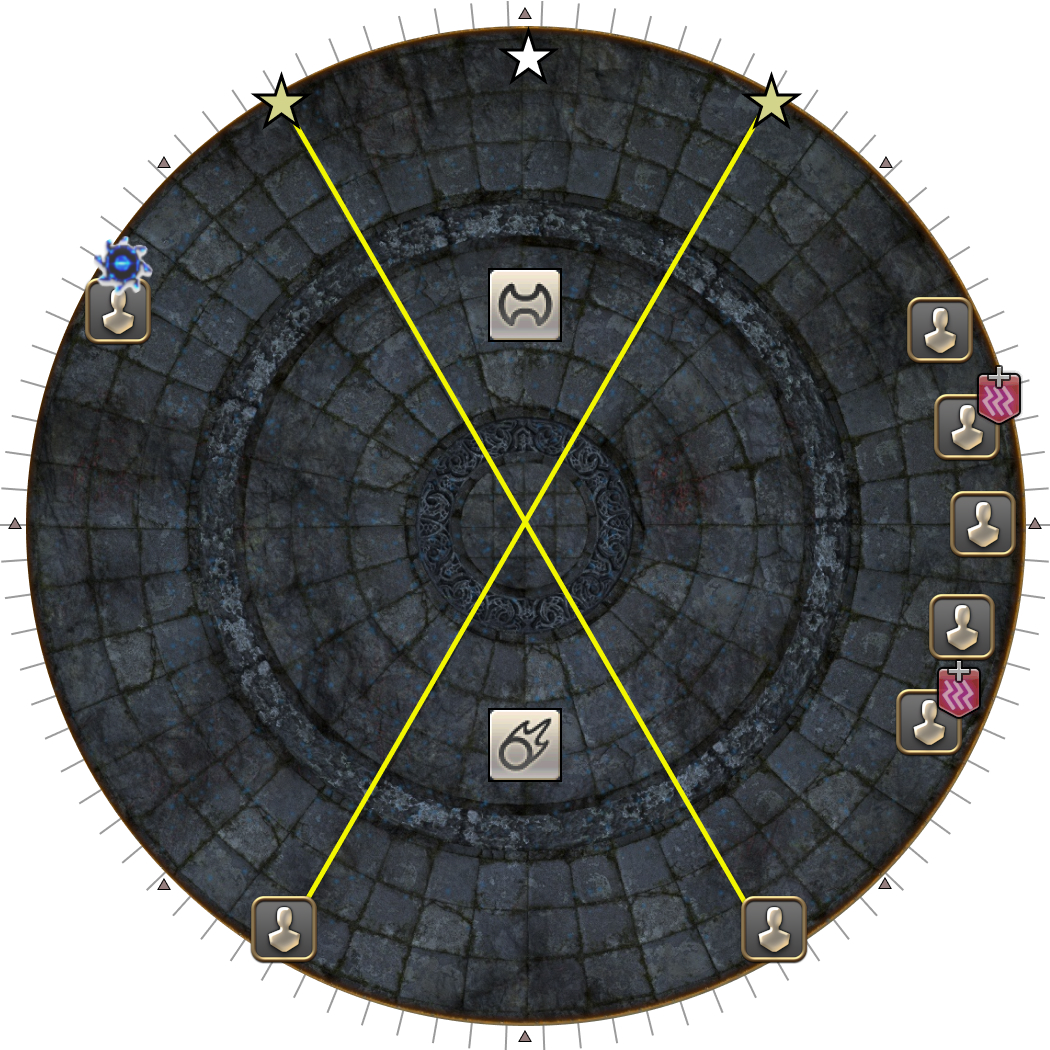 |
| 3. The Skyward Leap and Spiral Thrust AoEs resolve (applying Magic Vulnerability Up on their targets), and one of the five players along the east will get a green divebomb mark. All players move to dodge Twisters. | 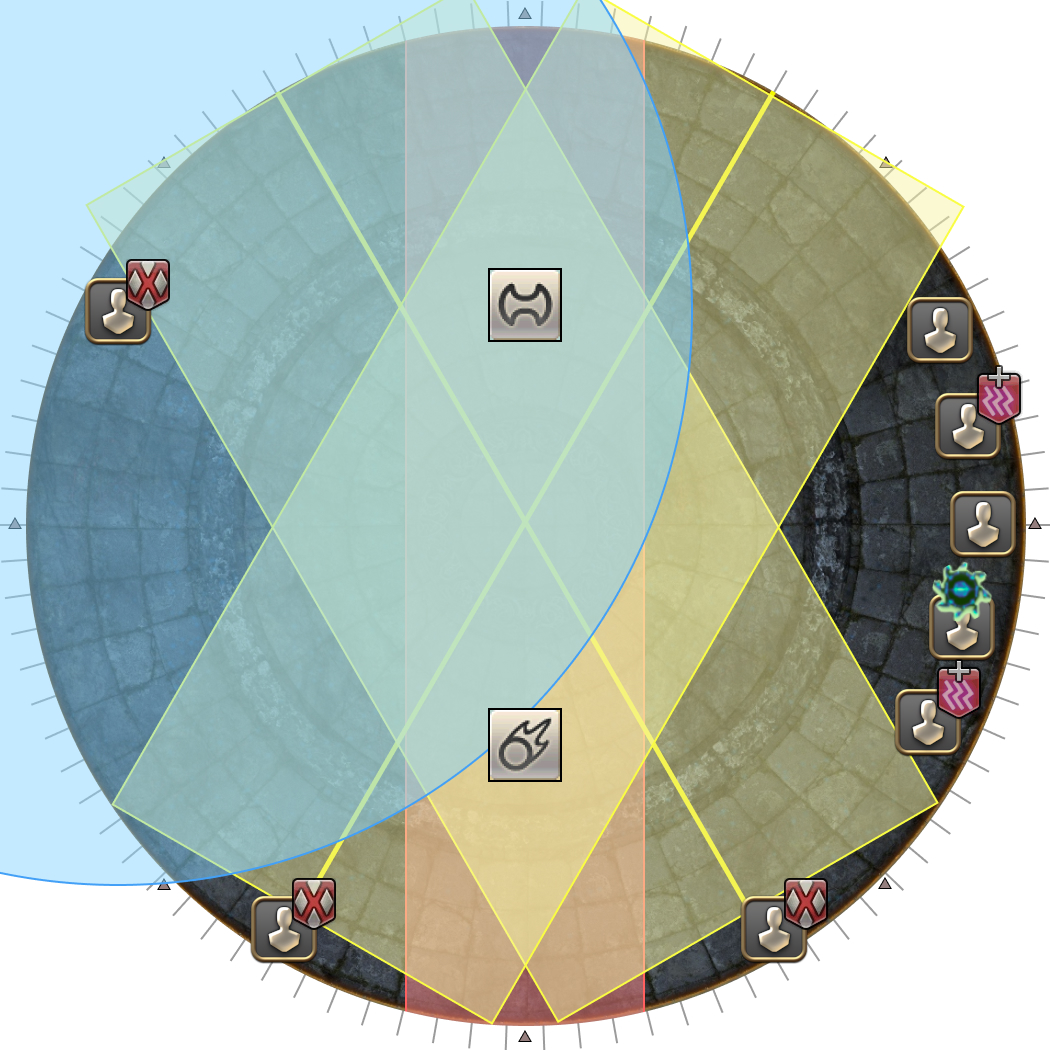 |
| 4. While dodging Twisters, all players must now spread out around the arena:
Take note that:
|  |
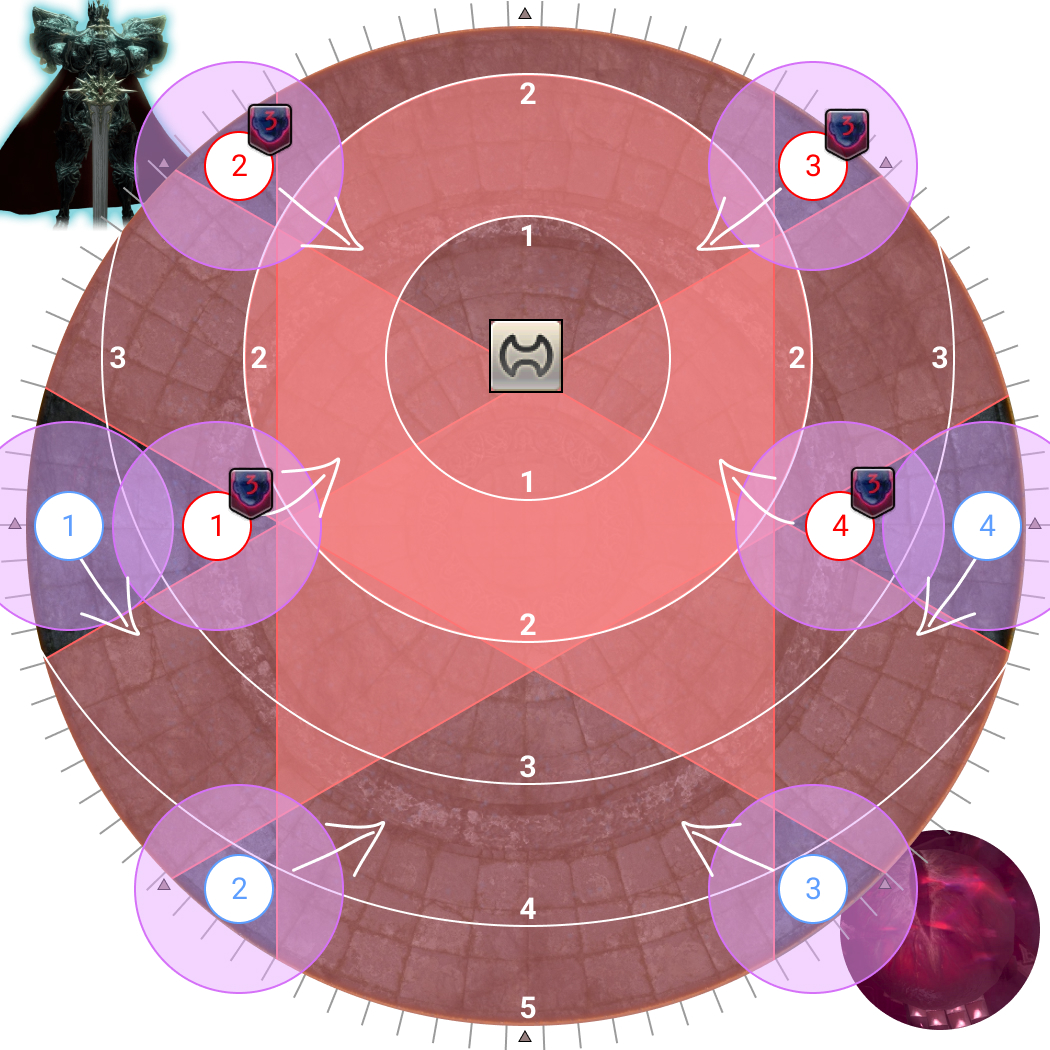
| 5. Thordan resolves Ascalon's Mercy Revealed, which cleaves all players. Baited AoEs then appear on two players:
A player with Thunderstruck will not be targeted by either Altar Pyre, or Liquid Heaven. | 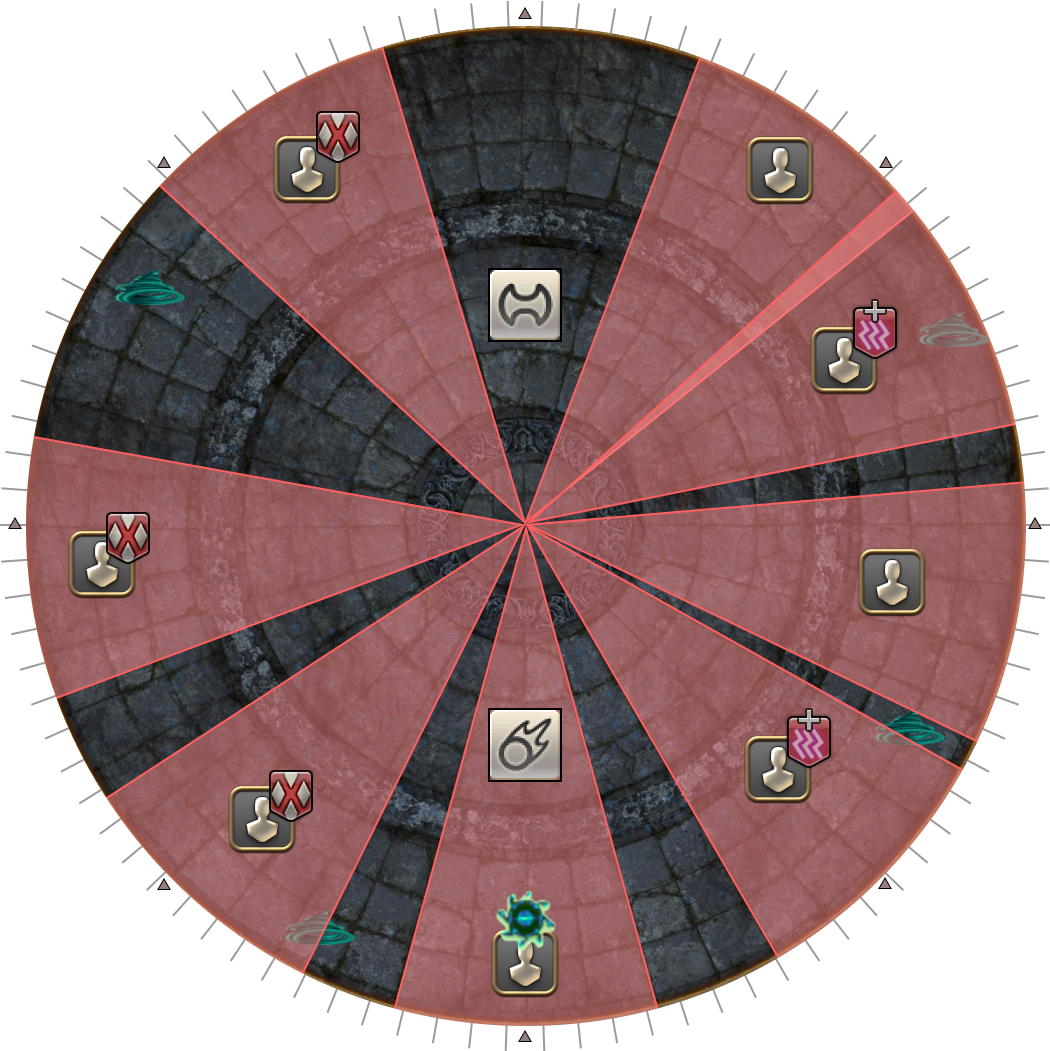 |
| 6. Bait Altar Pyre and Liquid Heaven AoEs, and move towards Ser Grinnaux (WAR).
The player on the east with Liquid Heaven should try to enter the safe spot from the side, as a player on the west side will be one-shot if they get hit by the Liquid Heaven AoE (as they each have Magic Vulnerability Up). | 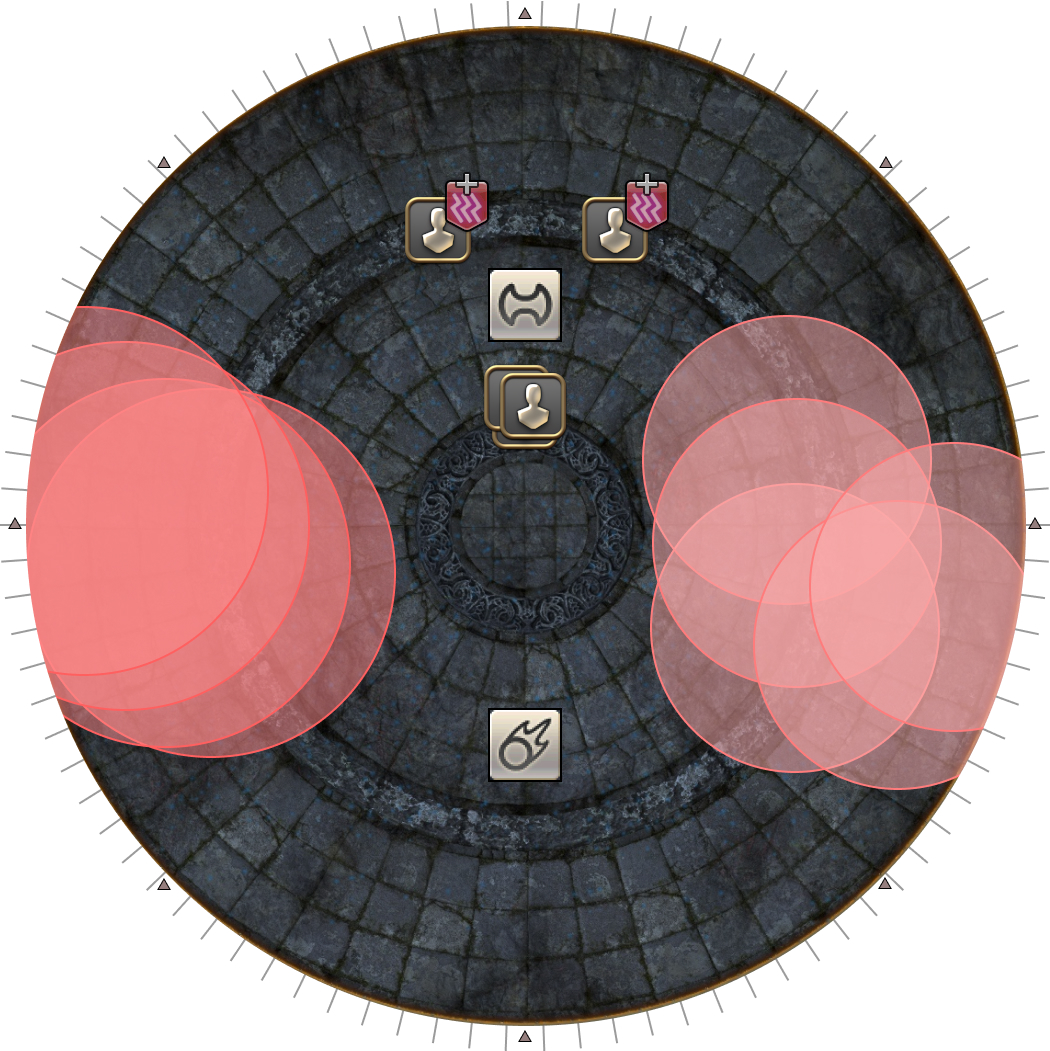 |
| 7. Ser Grinnaux's Empty Dimension resolves together with the two Thunderstruck debuffs, and the two divebombs. Heal and prepare for Ancient Quaga. | 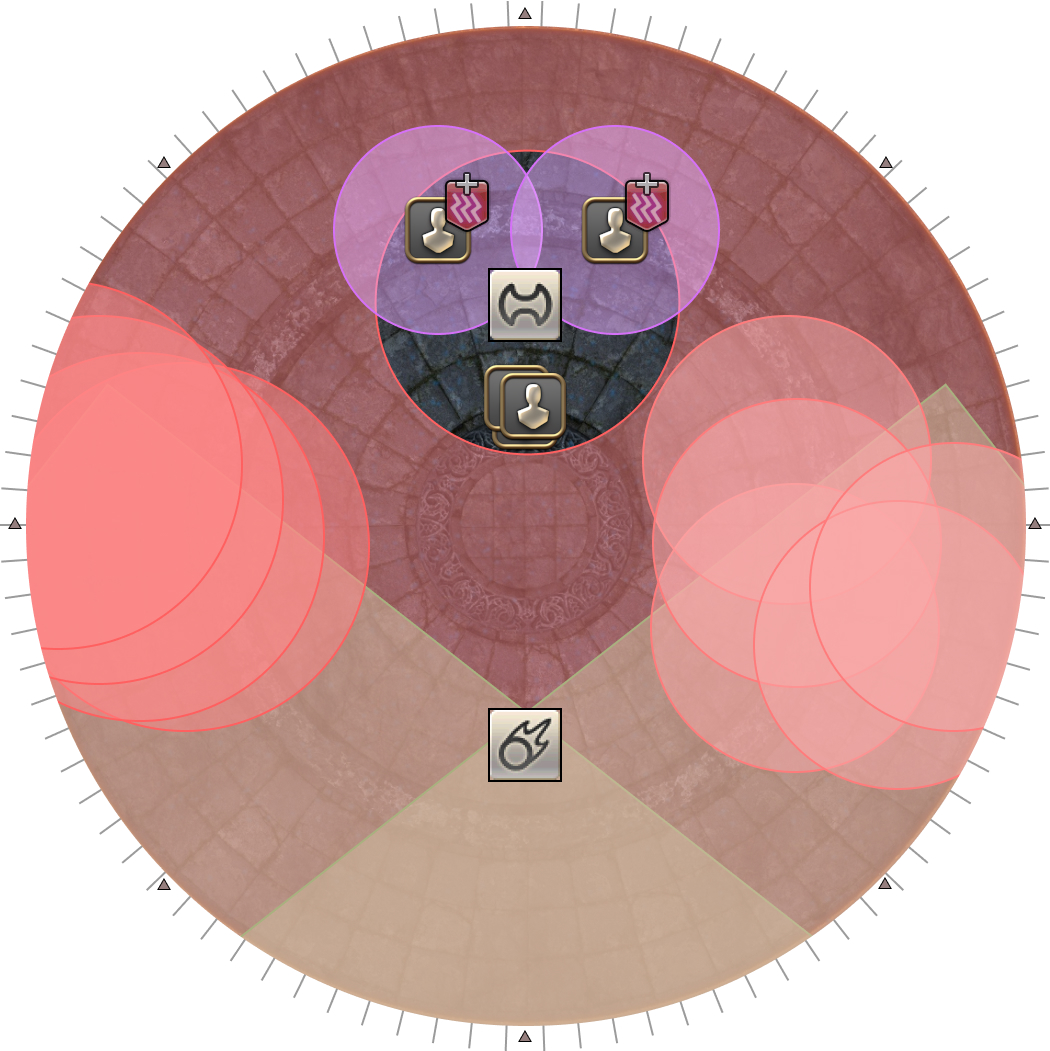 |
Thordan will auto-attack the MT once, before doing a Heavenly Heel → 3x Ascalon’s Might combo.
After this, Thordan will begin the second major mechanic, Death of the Heavens.
Death of the Heavens
My preferred strat is an upside-down version of the “Komazou” strat, which splits the Dooms 2-2.
One important detail to note here is that the Playstation symbols are not completely random- the circles are baited by the two Doomed players that are the furthest apart from each other.
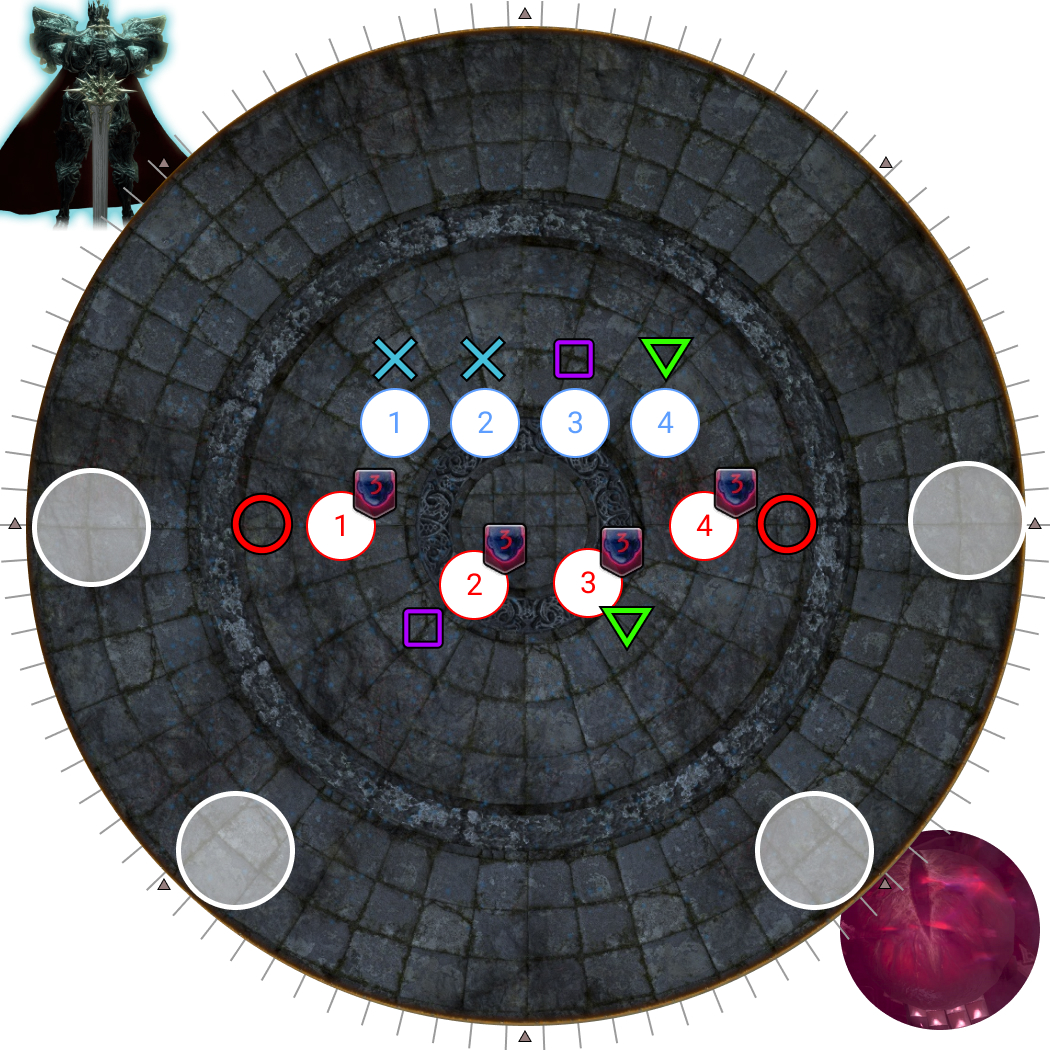
| 1. Ser Guerrique (WAR) will spawn on one of the four cardinal locations.
Thordan and the Dragon Eye will also spawn at two cardinal positions, either 135 degrees or 180 degrees apart. | 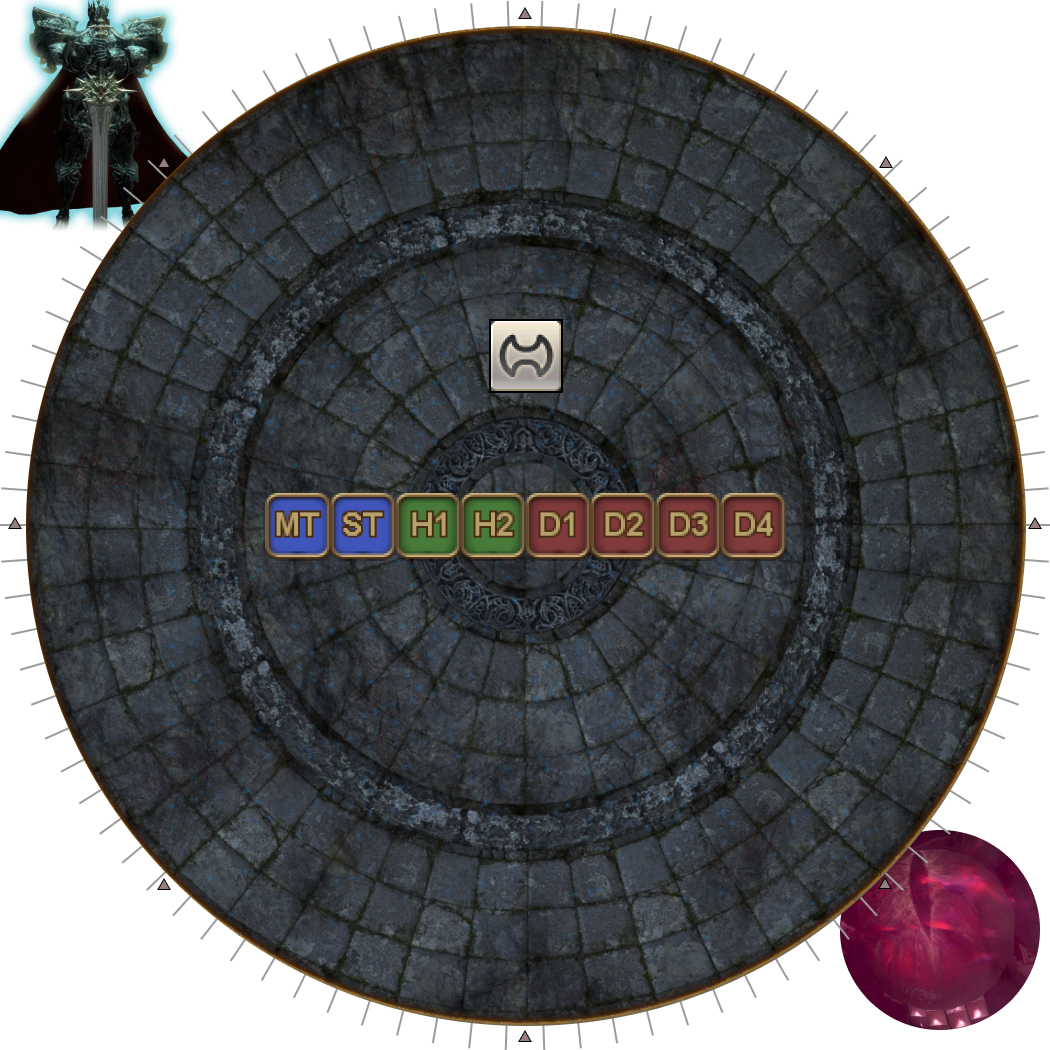 |
| 2. Four random players will be targeted with Doom.
This step forward/back is to help the players in the center identify their order within each Doom vs. non-Doom group. | 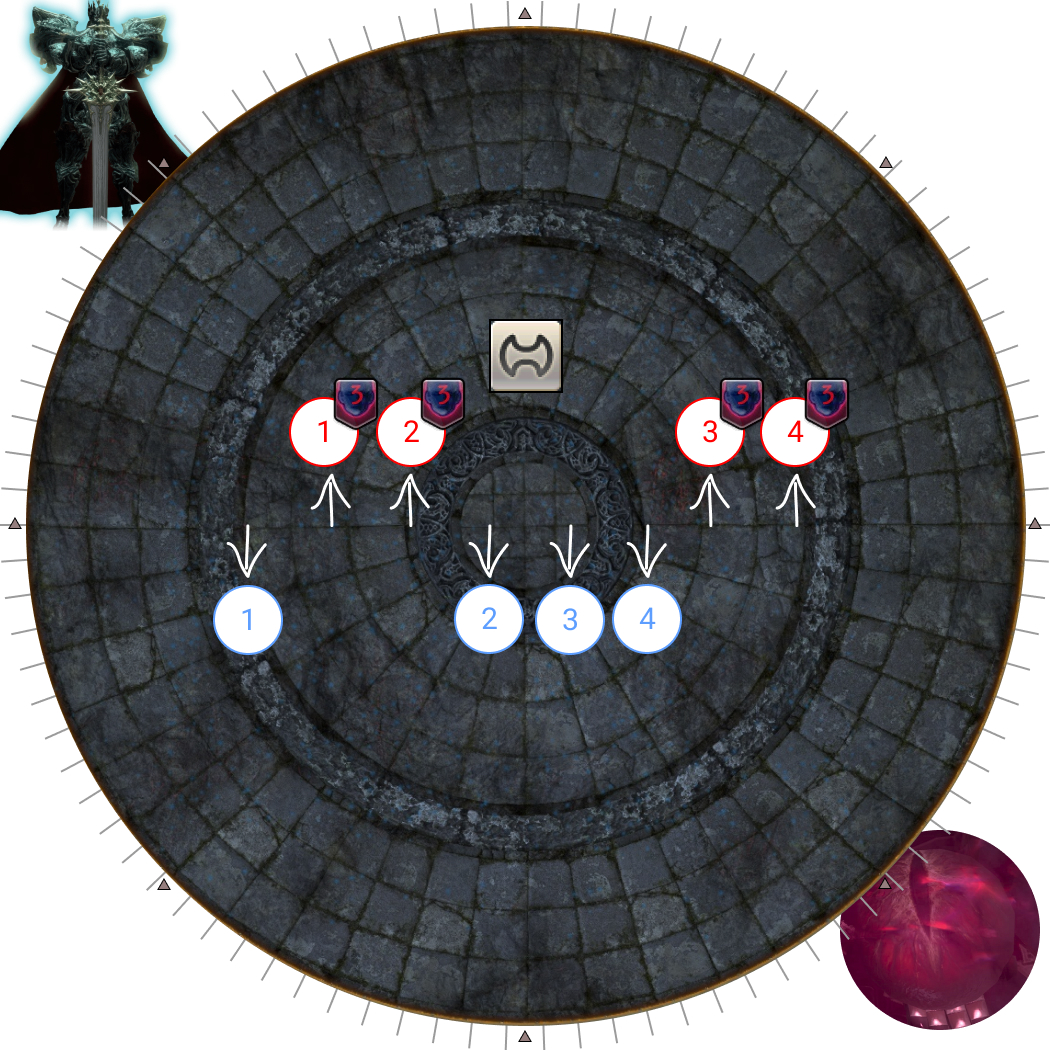 |
| 3. Spread out to your positions.
This is a good time to look for Thordan and the Dragon Eye. | 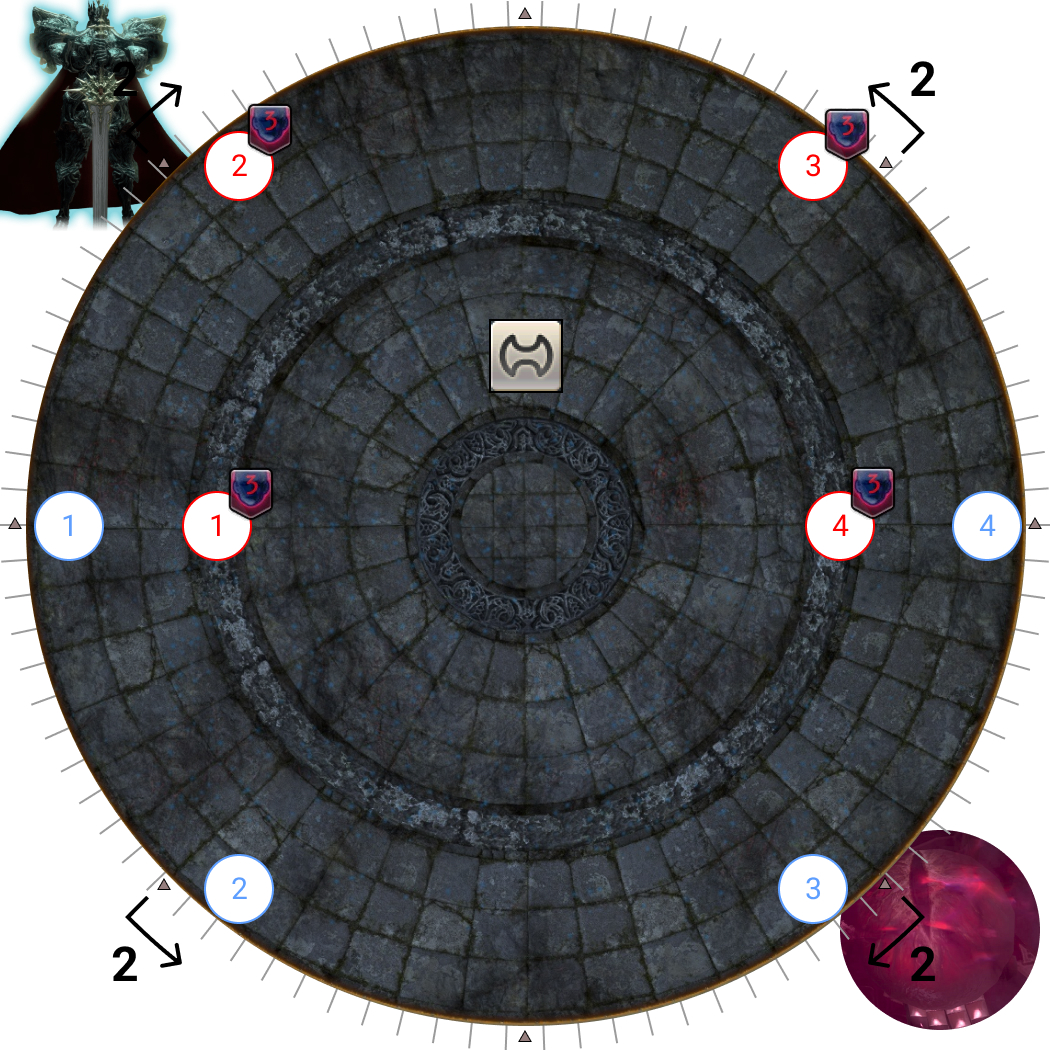 |
| 4. The second Heavy Impact resolves together with all the AoEs. Twisters will appear under random players. Doomed players:
Non-Doomed players:
|  |
| 5. Take up positions to prepare for the Playstation markers. Doomed players:
Non-Doomed players:
|  |
| 6. Playstation markers appear. Doomed players:
Non-Doomed players:
|  |
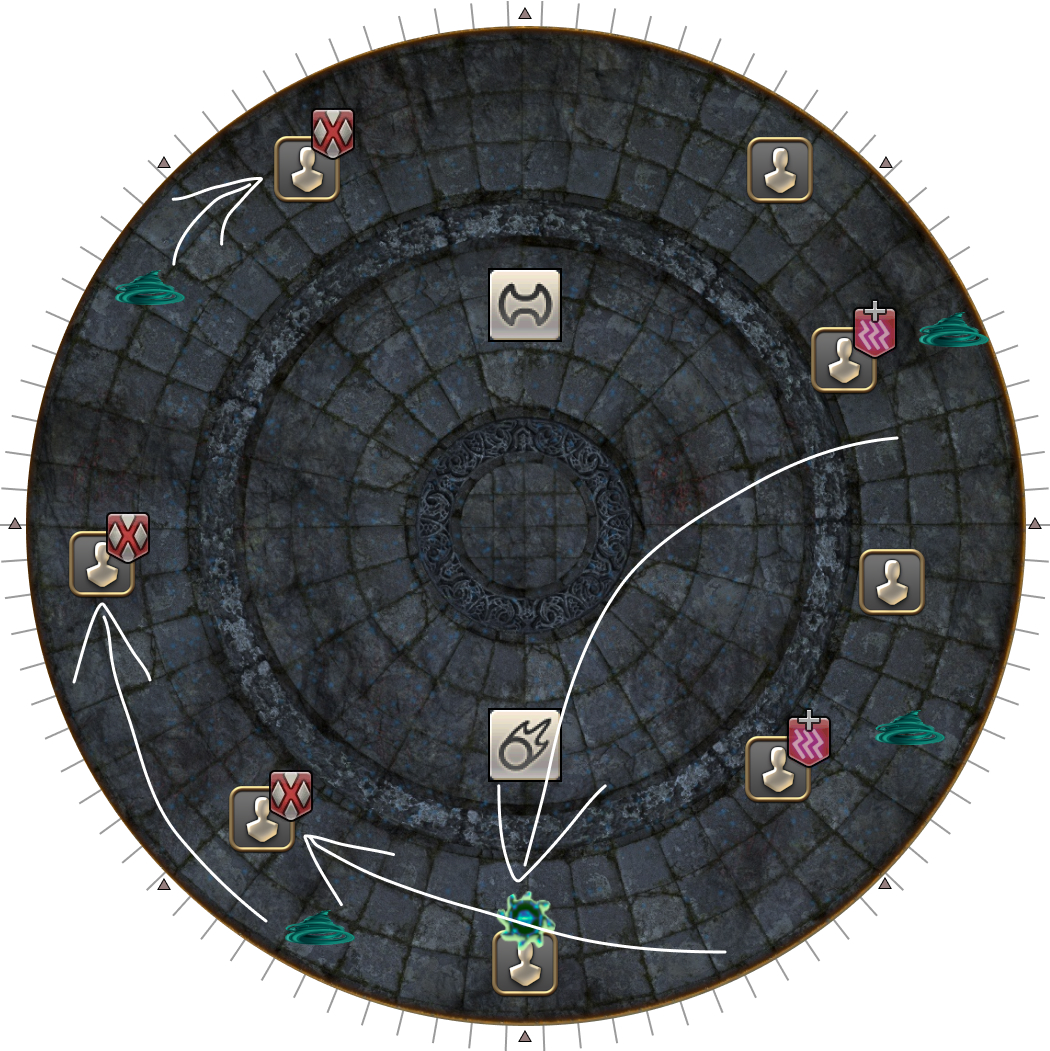
| 7. Players adjust as needed, use markers/outside "shurikens" to properly align yourself, and look away from both Thordan and the Dragon's Eye. Just as in Phase 1, the Playstation pairs will be chained together- stay close to the center to minimise the chain length, making it easier to break. | 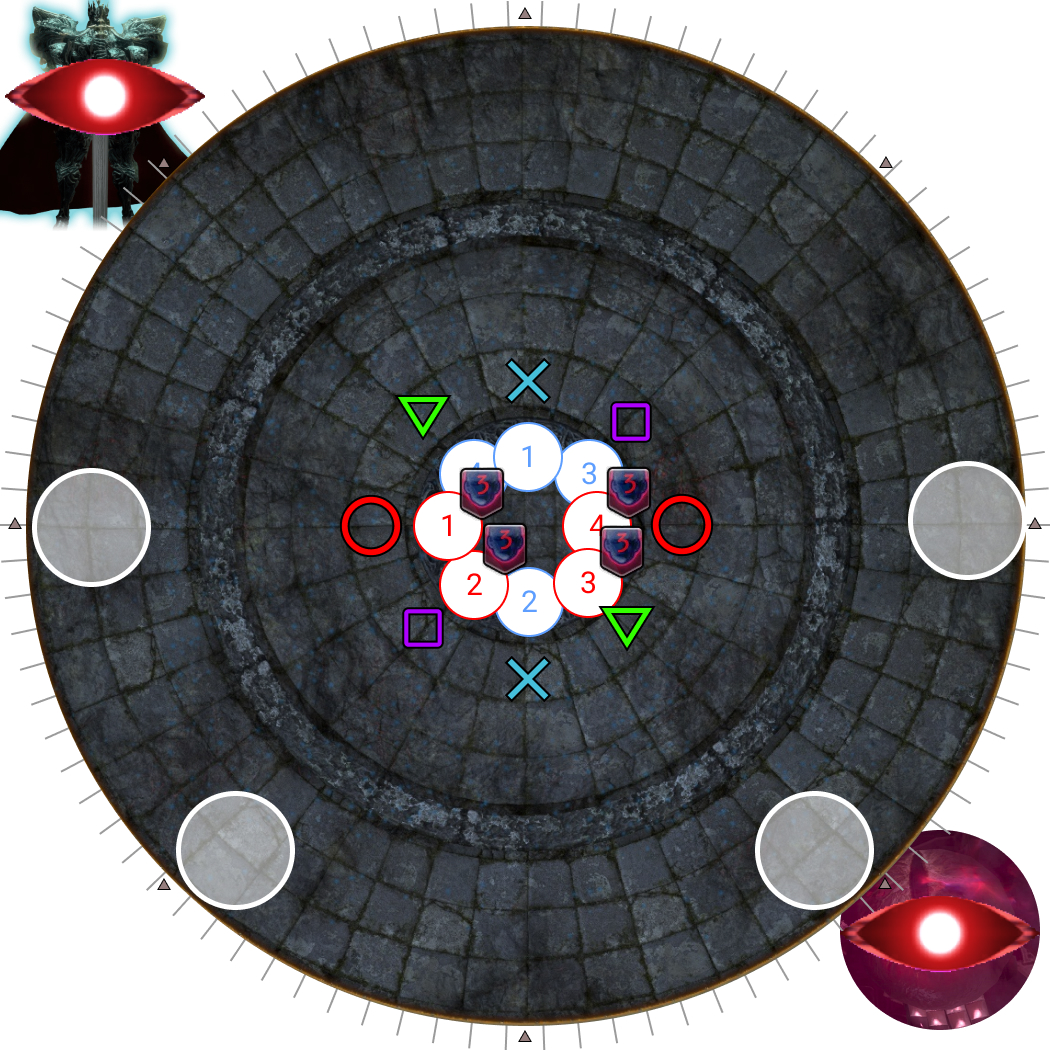 |
| 8. The gazes resolve, immediately followed by Faith Unmoving (knockback) and Heavensflame AoEs on each player. Doomed players:
All players should move further to the edge to ensure the chains break. | 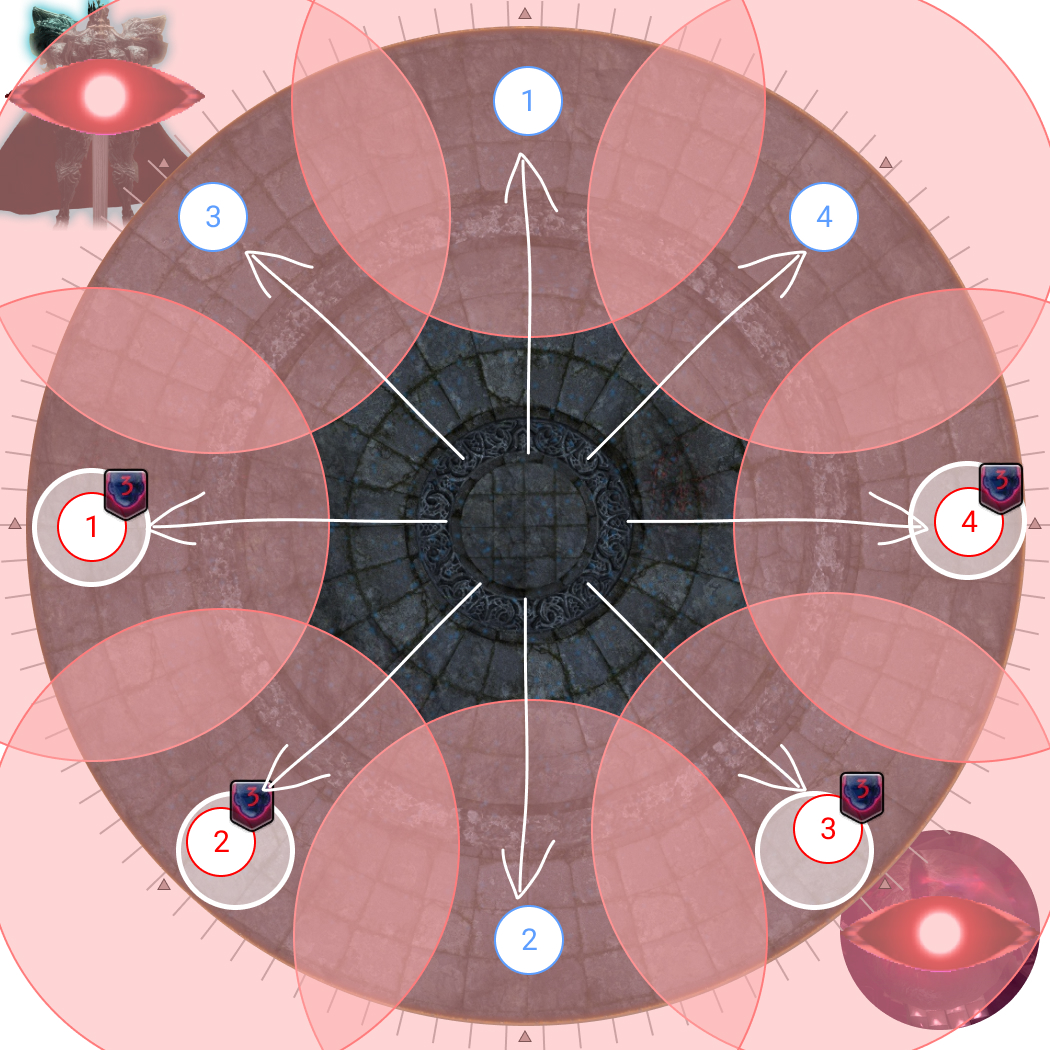 |
After Death of the Heavens, eight Meteor Circles will spawn that must be quickly destroyed.
A caster LB2 will destroy three Meteor Circles; if there are no casters alive, a ranged LB2 will also suffice.
- After all Meteors have been destroyed, Thordan will reappear in the middle and start casting Ancient Quaga.
- This is then followed by a Heavenly Heel → 3x Ascalon’s Mercy combo.
- Thordan then auto-attacks one more time before casting Aetheric Burst as the enrage.
Once Thordan’s HP drops below 3.0%, he will stumble, yield, and beg for mercy. Do not kill Thordan.
Thordan will then become untargetable and jump away, moving the party onto the next phase.
Frequently Asked Questions
[Death of the Heavens] Is there a pattern to how the Dooms are assigned?
| Unfortunately not- who gets the Dooms are completely random. Here's an example where all four tank/healers get Doom. |  |
[Death of the Heavens] Is there a particular reason why Dooms go North instead of South?
| This is just for simplification- having the Dooms "North" (towards Ser Guerrique) couples the Dooms to North/South positions. That, in turn means that players can dodge based on whether they have Doom or not (Dooms dodge immediately, non-Dooms next), instead of adding a second layer of whether they're North or South. |
[Meteors] Why caster LB2 instead of ranged LB2?
| A caster LB2 can target a Meteor and hit the two adjacent Meteors. A ranged LB2 will need to be properly aimed to hit three Meteors. |
[Thordan] What happens if you kill Thordan in this phase?
| At the end of the next phase with Nidhogg and Hraesvelgr, Nidhogg's eyes threaten to take over Estinien again. If Thordan was spared at the end of this phase, this is where Thordan jumps in to take the eyes and become Dragonking Thordan. However, if you kill Thordan in this alternate timeline, Thordan isn't around to take the eyes and the party returns to a repeat of the Eyes phase except this time, Haurchefant isn't dead and the party is now missing Huarchefant's buff needed to damage the blue eye.
|